

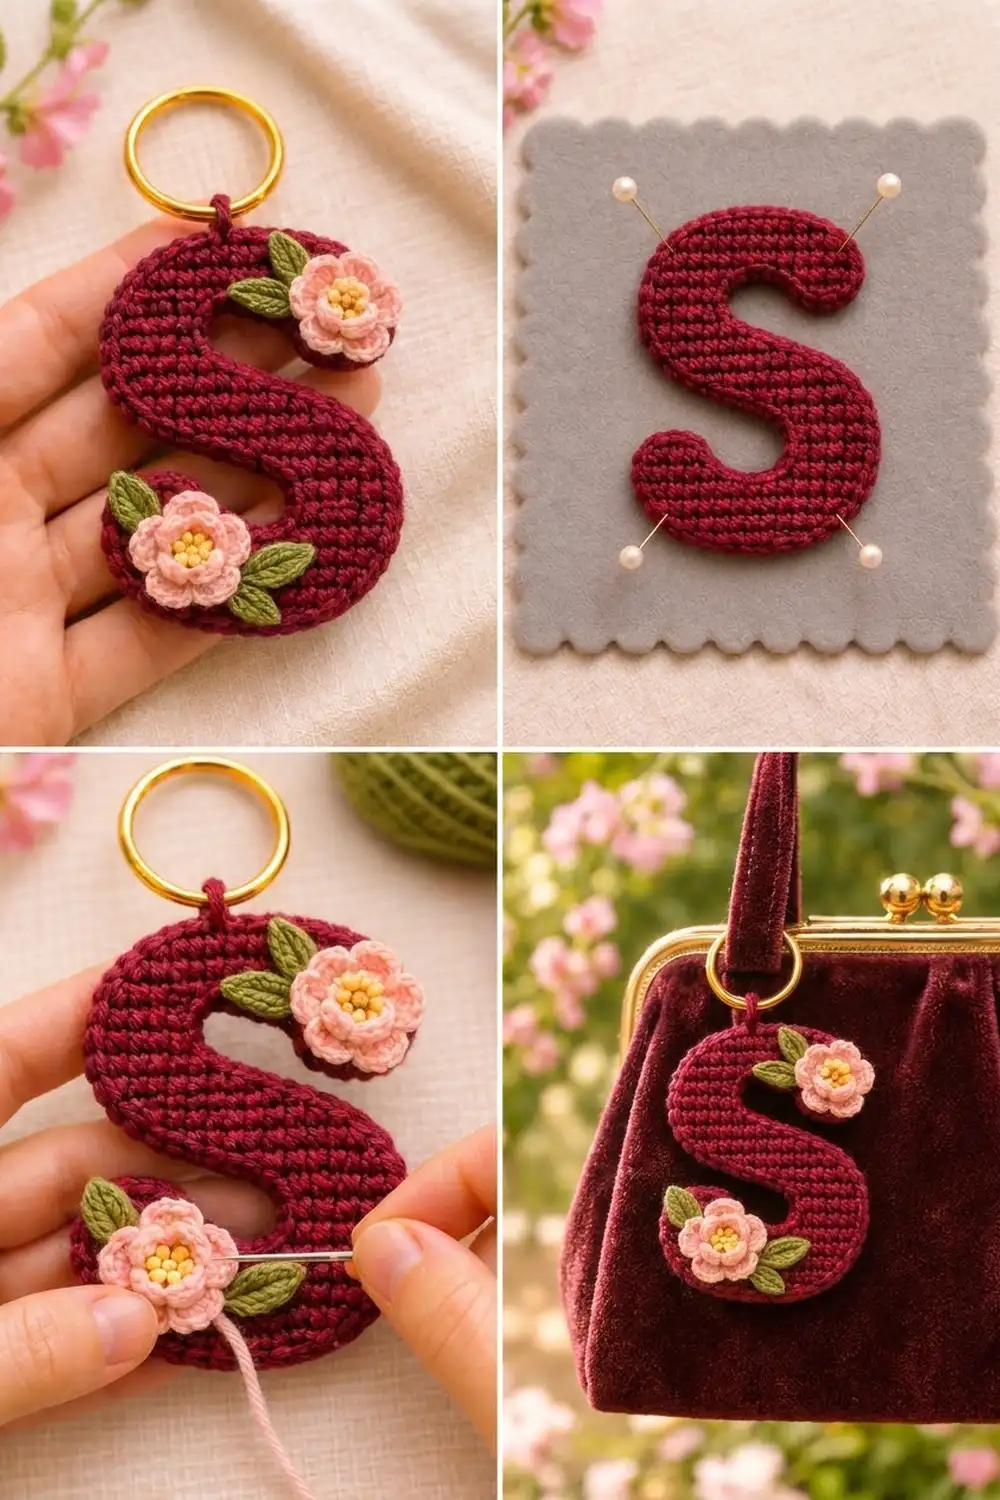
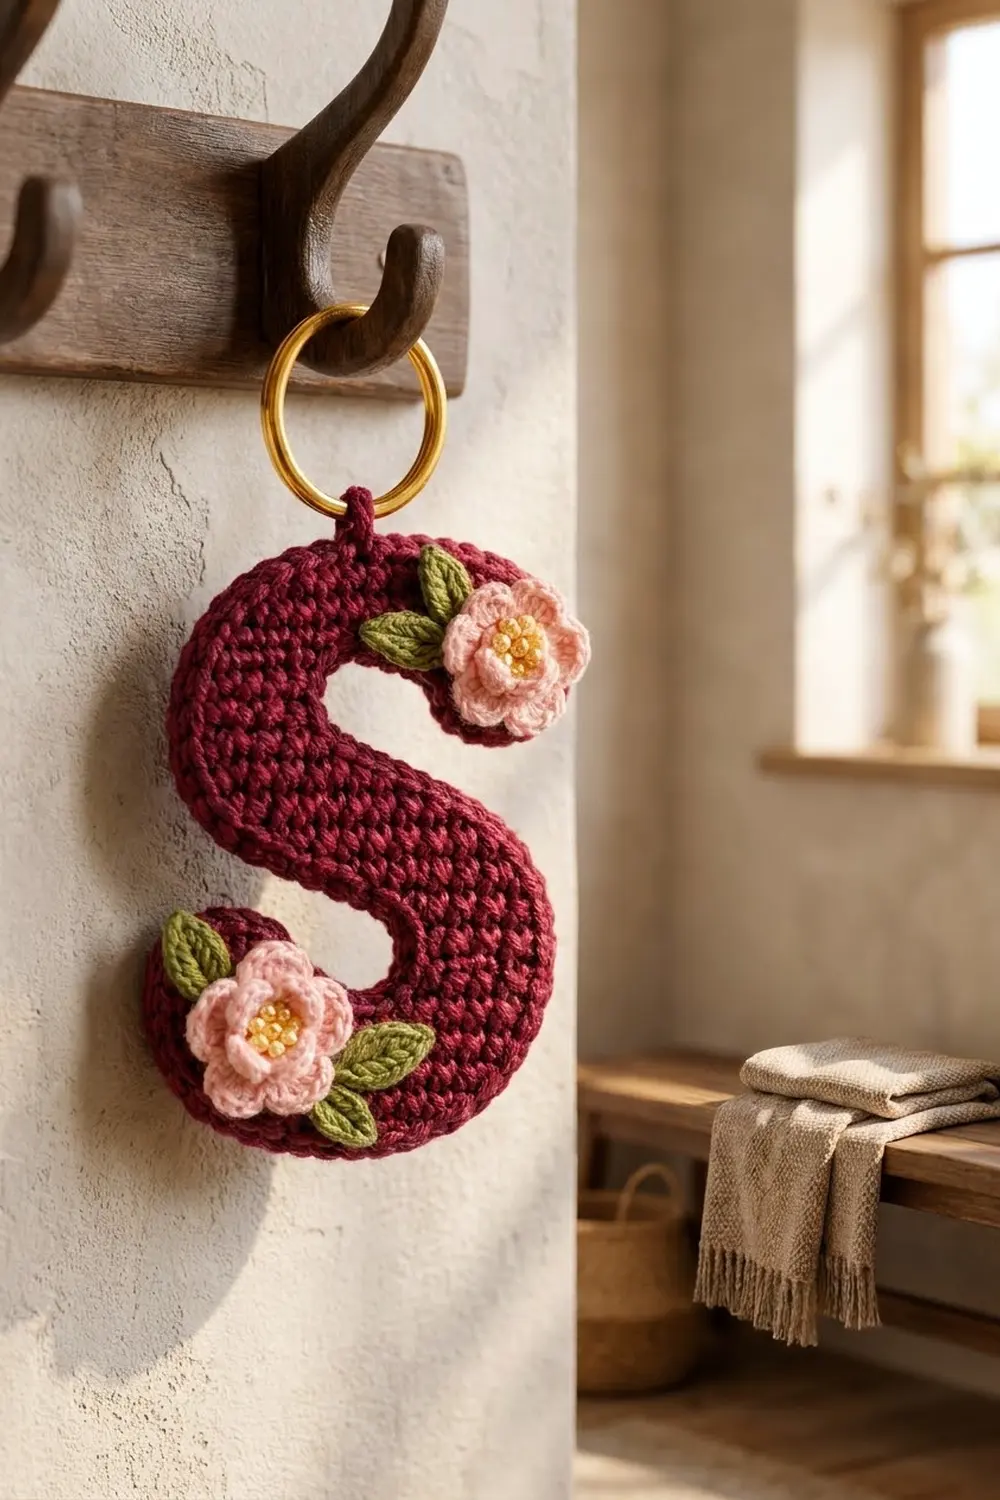
The Rosy Bloom Letter S Keychain is a small, firm monogram charm. It is worked in deep burgundy single crochet and finished with two layered pink flowers with yellow centers and three olive-green leaves. A gold split ring at the top lets you clip it onto a purse, backpack or set of keys.
The look is cozy and vintage. A dense, even grid of single crochet is outlined by a smooth raised rim, and the flowers sit on the two curled ends of the S. The colors are burgundy for the letter, light pink for the petals, golden yellow for the flower centers and olive green for the leaves.
The pattern uses US crochet terms. The finished letter measures 2.75 in (7.0 cm) wide and 4.25 in (10.8 cm) tall, not counting the hanging loop and ring.
An S looks the same when you turn it upside down, and this pattern uses that. You start with a chain across the middle bar and work the top half upward. Then you turn the piece upside down and work the bottom half into the other side of the chain, using exactly the same instructions. You add a small curled end (terminal) to each half and work one edging round around the letter. The flowers and leaves are sewn on after blocking.
Finished Size and Construction
- Finished size: 2.75 in (7.0 cm) wide x 4.25 in (10.8 cm) tall
- Skill level: Easy-intermediate
- Terminology: US crochet terms
- Yarn weight: DK (#3) cotton
- Hook: 2.75 mm (US C/2)
- Number of pieces: 1 letter, plus 2 flowers and 3 leaves sewn on as appliqués
- Layout: single letter S, no joining
- Letter size before edging: 2.5 in (6.4 cm) wide x 4 in (10.2 cm) tall
- Edging depth: 1/8 in (0.3 cm) on every side
- Stroke width: 5 sts, about 0.83 in (2.1 cm)
- Flower size: about 1.25 in (3.2 cm) across
- Leaf size: about 1 in (2.5 cm) long
Materials
Choose a smooth mercerized or matte DK cotton. Cotton gives crisp stitch definition and keeps the letter flat and firm, which matters for something that gets handled every day.
- Burgundy (letter, edging, loop): 18 g / 40 m
- Light pink (petals): 5 g / 11 m
- Golden yellow (flower centers): 2 g / 4 m
- Olive green (leaves): 3 g / 7 m
Tools:
- 2.75 mm (US C/2) crochet hook
- Gold split ring, 1 in (2.5 cm) diameter
- Tapestry needle
- Stitch markers (2)
- Scissors
- Blocking mat, rustproof pins and a spray bottle
The quantities include a margin of about 15 percent for your gauge swatch and for weaving in ends.
Abbreviations (US Terms)
- ch – chain
- sl st – slip stitch
- sc – single crochet
- hdc – half double crochet
- dc – double crochet
- sc2tog – single crochet 2 together
- st(s) – stitch(es)
- MR – magic ring
- FLO / BLO – front loop only / back loop only
- RS – right side
Special technique – working into free loops: when you work a row of sc into a chain, the bottom loop of each chain is left unused. To work new stitches on the other side of the chain, insert the hook under that single loop.
In the letter, the ch 1 at the start of a row is a turning chain and does not count as a stitch.
Gauge and Checkpoints
Gauge: 6 sc and 6 rows = 1 in (2.5 cm) in sc worked in rows.
Make a test swatch before you start the letter. Ch 13, sc in 2nd ch from hook and across (12 sts), then work 11 more rows of sc. The swatch should measure 2 in (5.1 cm) square. The fabric should feel dense, almost stiff, with no visible gaps between stitches.
Measurement checkpoints:
- After Row 2 of the top half: 15 sts = 2.5 in (6.4 cm) wide.
- After Row 12 of the top half: foundation to top edge = 2 in (5.1 cm).
- After the bottom half: total height = 4 in (10.2 cm).
- After the edging: 2.75 in (7.0 cm) x 4.25 in (10.8 cm).
If your swatch is too big, go down a hook size or tighten your tension. If it is too small, go up a hook size. A loose letter looks holey and floppy, so use the smaller hook if you are between sizes.
The Letter: Top Half
The top half includes the upper part of the middle bar, the upper-left column, the top bar and the hanging upper terminal.
Foundation: With burgundy, ch 16. Keep the chain relaxed so it measures about 2.5 in (6.4 cm).
Row 1: Sc in 2nd ch from hook and in each ch across. (15 sts) Place a marker at the end where this row finished. You will start the bottom half from that same end.
Row 2: Ch 1, turn, sc in each st across. (15 sts)
Rows 1–2 form the upper half of the middle bar.
Row 3: Ch 1, turn, sc in first 5 sts, leave remaining 10 sts unworked. (5 sts)
Rows 4–7: Ch 1, turn, sc in each st across. (5 sts per row)
Rows 3–7 form the column. Row 7 ends on the inner side of the column, facing the open space.
Row 8: Ch 11. Sc in 2nd ch from hook and in next 9 ch, then sc in each of the 5 sts of Row 7. (15 sts: 10 on chain + 5 on column)
Rows 9–10: Ch 1, turn, sc in each st across. (15 sts per row)
Row 11: Ch 1, turn, sc2tog, sc in next 11 sts, sc2tog. (13 sts)
Row 12: Ch 1, turn, sc2tog, sc in next 9 sts, sc2tog. (11 sts) Fasten off.
Rows 8–12 form the top bar, and the decreases round both of its outer corners. The open space under the chain part of Row 8 is the upper counter of the S. It is 5 sts wide and 5 rows tall, about 0.83 in (2.1 cm) each way.
Checkpoint: the top half is 2.5 in (6.4 cm) wide and 2 in (5.1 cm) tall.
Upper Terminal
The terminal hangs from the outer end of the top bar. You work it into the free loops of the Row 8 chain.
Turn the piece so the top bar is below and the chain edge faces up. Along the chain edge, count the 5 free loops nearest the outer end. Ignore the turning ch at the very tip.
Row T1: Join burgundy in the innermost of those 5 loops. Ch 1, sc in same loop and in next 4 loops toward the outer end. (5 sts)
Row T2: Ch 1, turn, sc2tog, sc in next 3 sts. (4 sts) Fasten off.
The decrease rounds the outer corner of the curl. A 3-row gap is left between the terminal and the middle bar, so the counter stays open on its outer side.
The Letter: Bottom Half
Turn the piece 180 degrees so the top half points down and the free loops of the foundation chain face up.
Row 1: Join burgundy in the free loop at the marked end. Ch 1, sc in same loop and in each free loop across. (15 sts)
Rows 2–12: Work exactly as Rows 2–12 of the top half. (Row 2: 15 sts; Rows 3–7: 5 sts; Row 8: 15 sts; Rows 9–10: 15 sts; Row 11: 13 sts; Row 12: 11 sts) Fasten off.
Bottom Terminal: Work Rows T1–T2 exactly as for the upper terminal. (5 sts, then 4 sts) Fasten off.
Because Row 1 starts from the opposite end, the column lands on the right automatically. The terminal ends up on the lower left and rises toward the middle.
The middle bar is now 4 rows tall, about 0.67 in (1.7 cm).
Checkpoint: the letter is 2.5 in (6.4 cm) wide and 4 in (10.2 cm) tall. Single crochet looks almost the same on both sides. Choose the side where the letter reads as a correct S as your front. Weave in all ends on the back.
Edging
Edging gauge: 1 sc in each stitch along the top or bottom of a row, and 1 sc in each row end along the sides. The gauge is square (6 sts and 6 rows per inch), so this keeps every straight edge flat.
Corner rules:
- Outer (convex) corners: work 3 sc in the corner stitch. The corner stitch already counts as 1 unit, so each outer corner adds 2 sts.
- Inner (concave) corners: sc2tog over the last unit of one edge and the first unit of the next. Each inner corner removes 1 st.
Edging Round: With the front facing, join burgundy in the last st of top-half Row 12, at the corner on the column side. Ch 1, then sc around the whole letter. The table lists the stitches that belong to one half:
| Edge segment | Units | Adjust | Sts |
|---|---|---|---|
| Top edge (Row 12), both corners | 11 | +4 | 15 |
| Outer side of top bar | 5 | 0 | 5 |
| Outer side of terminal | 2 | 0 | 2 |
| End of terminal (Row T2), both corners | 4 | +4 | 8 |
| Inner side of terminal | 2 | 0 | 2 |
| Free loops under counter | 5 | 0 | 5 |
| Inner side of column | 5 | 0 | 5 |
| Top of Row 2 (counter floor), outer corner | 10 | +2 | 12 |
| Middle bar end (Rows 2 and 1) | 2 | 0 | 2 |
| Middle bar end on column side (Rows 1–2) | 2 | 0 | 2 |
| Outer side of column | 5 | 0 | 5 |
| Column-side edge of top bar | 5 | 0 | 5 |
| Three inner corners | — | −3 | −3 |
| Half total | 58 | +7 | 65 |
The bottom half is the same edging turned upside down, so the full round has 65 x 2 = 130 sts. Sl st to first sc to join.
Why the math works: each half has 58 edge units, 5 outer corners (+10) and 3 inner corners (−3), which gives 65 sts. The three inner corners are where the terminal meets the underside of the counter, where that underside meets the column, and where the column meets the counter floor. The edging adds one stitch, 1/8 in (0.3 cm), on every side. That makes 2.5 in + 0.25 in = 2.75 in (7.0 cm) wide and 4 in + 0.25 in = 4.25 in (10.8 cm) tall.
Hanging Loop
Find the 8th of the 15 edging sts along the top edge, which is the center. Sl st into it, ch 6, sl st into the same st. Ch 1, work 10 sc over the chain loop, then sl st into the base. Fasten off and weave in. The loop stands about 1/2 in (1.3 cm) tall.
Flowers (Make 2)
Rnd 1: With yellow, MR, 5 sc in ring, sl st to first sc. (5 sts) Pull the ring closed. Fasten off.
Rnd 2 (inner petals): Join pink in FLO of any st. Working in FLO only, (sl st, ch 2, 2 dc, ch 2, sl st) in each st around. (5 small petals)
Rnd 3: Fold the inner petals forward. Working in BLO of Rnd 1, 2 sc in each st around, sl st to first sc. (10 sts)
Rnd 4 (outer petals): *(sc, hdc, 2 dc) in next st, (2 dc, hdc, sc) in next st; repeat from * 4 more times. Sl st to first sc. (5 large petals, 40 sts) Fasten off, leaving a 10 in (25.4 cm) tail.
The yellow center stays visible inside two stacked rings of pink petals. Each flower measures about 1.25 in (3.2 cm) across.
Leaves (Make 3)
With olive green, ch 6.
Leaf round: Sc in 2nd ch from hook, hdc in next ch, dc in next ch, hdc in next ch, 3 sc in last ch. Working in the free loops on the other side: hdc in next ch, dc in next ch, hdc in next ch, sc in last ch. For the pointed tip, ch 2 and sl st in 2nd ch from hook. Sl st to first sc. (11 sts plus tip) Fasten off, leaving an 8 in (20.3 cm) tail.
Each leaf is about 1 in (2.5 cm) long.
Final Blocking
- Weave in all ends except the tails you will use to sew on the flowers and leaves.
- Pin the letter face up on the blocking mat at 2.75 in (7.0 cm) x 4.25 in (10.8 cm), with one pin in each outer curve.
- Use the pins to gently round the top bar, the bottom bar and the two terminals.
- Mist the letter, flowers and leaves with water until damp, not soaked.
- Pat the flowers flat, cupping the outer petals slightly with your fingertips.
- Let everything dry completely, for at least 6 hours.
- Sew the upper flower onto the upper terminal so it slightly overlaps the outer edge. Tuck one leaf under its upper-left side.
- Sew the lower flower onto the lower terminal, with one leaf at its upper left and one at its lower right.
- Stitch through the back loops only so the stitching doesn’t show on the back. Weave in the tails.
- Open the split ring and slide it onto the hanging loop.
Final Quality-Control Checklist
- The letter measures 2.75 in (7.0 cm) x 4.25 in (10.8 cm).
- Both counters are open on the outer side, with a clear 3-row gap.
- Both terminals have rounded outer corners.
- The edging has 130 sts and doesn’t ruffle or cup.
- The letter reads as a correct S on the front.
- The flower centers are visible and each flower has two distinct petal layers.
- There are three leaves: one on the upper flower and two on the lower flower.
- The hanging loop is centered and firmly anchored.
- All ends are woven in on the back.
Troubleshooting
Letter reads backwards: flip it over and use the other side as the front.
Top half too wide: your foundation chain is loose or your sc is relaxed. Remake it with a smaller hook.
Counter closes up: check that Row 3 has exactly 5 sts and Row 8 has exactly 15 sts.
Edging ruffles: you are adding extra stitches along straight edges. Stick to 1 sc per row end.
Edging cups or pulls: make sure you are using 3 sc at every outer corner, or loosen your tension.
Petals flop: tighten the Rnd 1 magic ring and keep the dc short.
Leaves curl: pin them flat during blocking.
Care
Hand wash in cool water with mild soap, press out the water with a towel and dry flat. Take off the split ring before washing to protect the metal finish.
Final Notes
At a gauge of 6 sts and 6 rows per inch, 15 sts give 2.5 in (6.4 cm) of width and 24 rows give 4 in (10.2 cm) of height. One edging round of 130 sts adds 1/8 in (0.3 cm) on each side, for a finished letter of 2.75 in (7.0 cm) x 4.25 in (10.8 cm). If you check each stage against these numbers, your Rosy Bloom S will come out crisp, flat and ready to hang on your favorite bag.
Happy crocheting!