

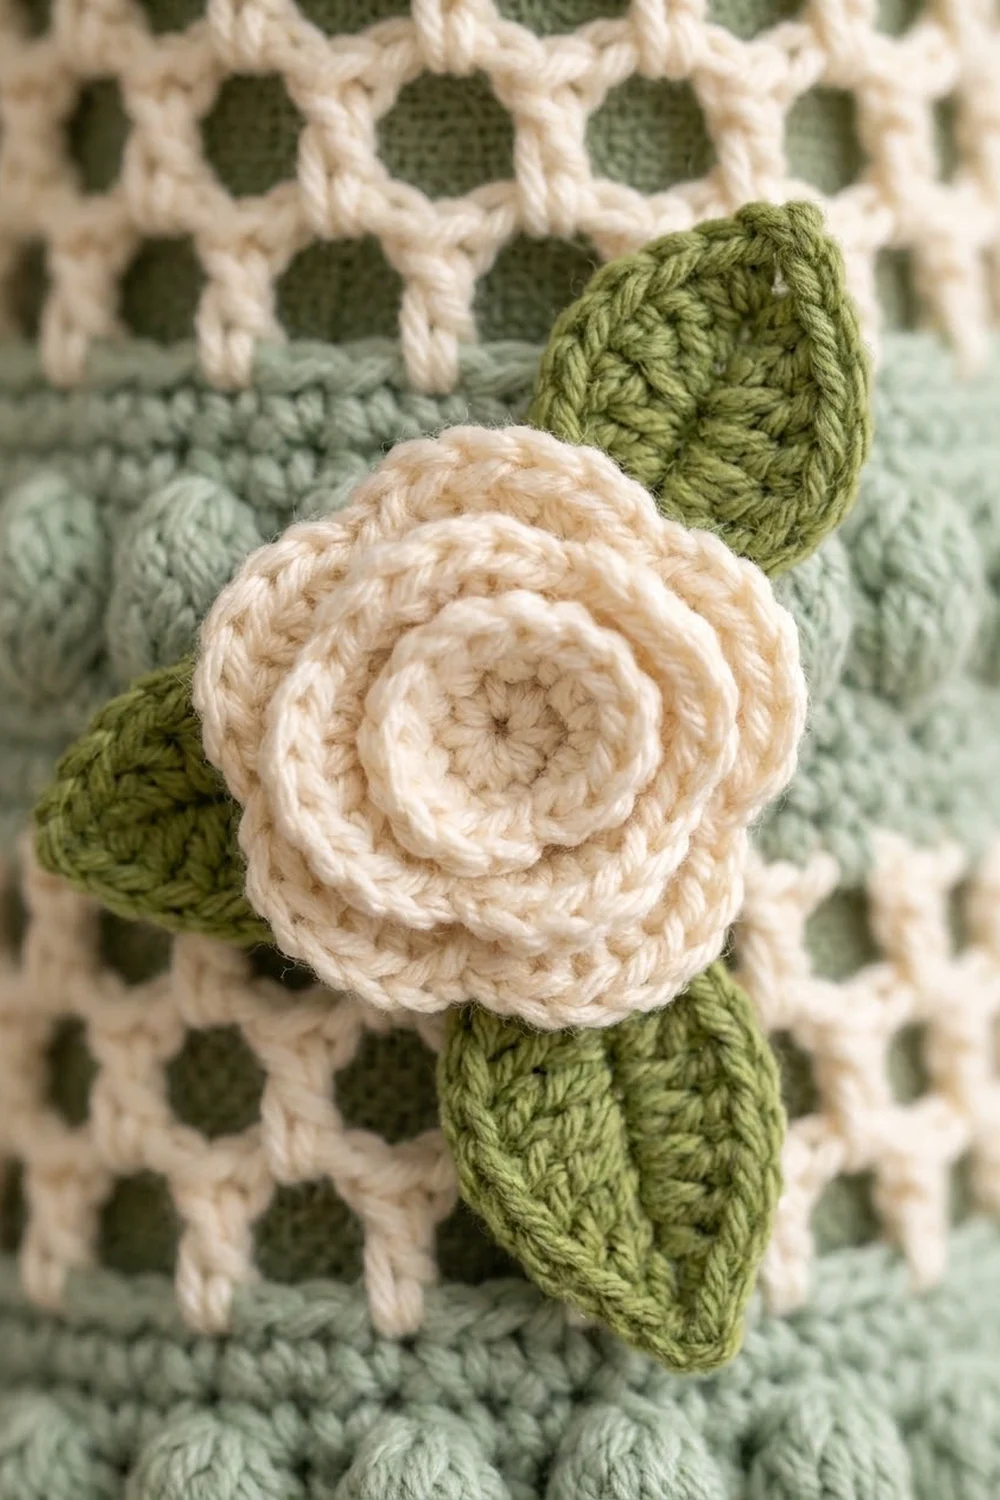
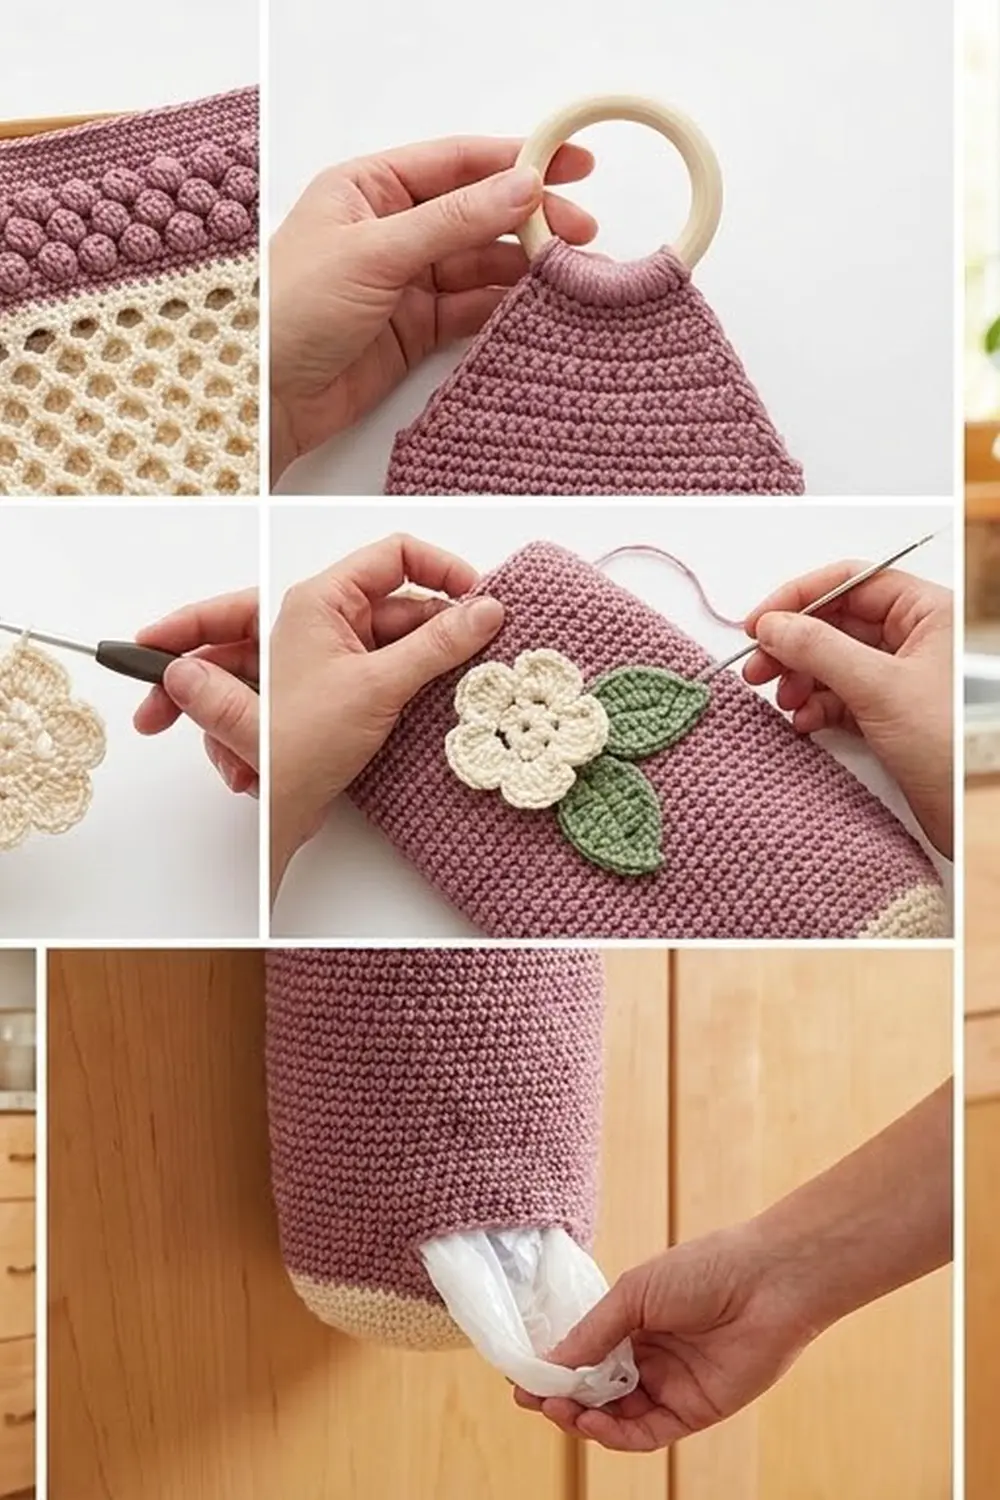
The Rosy Lattice Bag Holder is a tall crochet tube that hangs from a wooden ring on a cabinet door. It keeps plastic grocery bags tidy and makes them easy to grab. Cream honeycomb mesh bands alternate with soft mauve bands of raised popcorns. A layered mauve rose, a small cream flower and three green leaves are sewn on as a finishing touch.
The style is cottage kitchen: textured, practical and a little romantic. You stuff bags in through the open top and pull them out one at a time through an oval slot near the base.
This pattern uses US crochet terms. The holder measures about 14 in (35.6 cm) around and lies about 7 in (17.8 cm) wide when flattened. The body is 14.4 in (36.6 cm) tall, and the hanging length is about 18.8 in (47.8 cm) including the tab and ring.
The holder is worked in one piece from the bottom up. You start with an oval base, work joined rounds up the tube, then work a short back tab in rows and wrap it around the ring. A trim finishes the top opening and the dispensing slot. The flowers and leaves are made separately and sewn on.
Finished Size and Construction
- Finished size: 14 in (35.6 cm) circumference; 7 in (17.8 cm) flat width; 14.4 in (36.6 cm) body height; about 18.8 in (47.8 cm) hanging length
- Skill level: Intermediate
- Terminology: US
- Yarn weight: Worsted (#4) cotton
- Hook: 4.5 mm (US 7)
- Number of pieces: 1 tube, plus 5 appliqués (1 rose, 1 small flower, 3 leaves)
- Layout: Single vertical tube; no joining of motifs
- Base size: about 5.5 in × 2.5 in (14.0 × 6.4 cm) oval
- Size before trim: 14.4 in (36.6 cm) body plus a 2.4 in (6.1 cm) tab
- Trim depth: 2 rows, about 0.5 in (1.3 cm)
Materials
Use a smooth worsted-weight cotton or cotton blend at about 190 m per 100 g. Cotton holds its shape, resists stretching under the weight of the bags, and shows the popcorns and mesh clearly.
- Cream (A): 70 g / 133 m (base, mesh, top band, small flower, trim)
- Mauve (B): 65 g / 124 m (slot band, popcorn bands, tab, rose)
- Green (C): 10 g / 19 m (leaves)
- Yellow (D), optional: 2 g / 4 m (flower center)
Quantities include a margin of about 20 percent for swatching and weaving in ends.
Tools:
– 4.5 mm (US 7) hook
– 2 in (5.1 cm) wooden ring
– 4 stitch markers
– Tapestry needle
– Scissors
– Measuring tape
– Rust-proof pins
– Spray bottle and a rolled towel for blocking
Abbreviations (US Terms)
- ch – chain
- sl st – slip stitch
- sc – single crochet
- hdc – half double crochet
- dc – double crochet
- sc2tog – single crochet 2 together
- BLO – back loop only
- MR – magic ring
- st(s) – stitch(es)
- sp – space
- rnd – round
- RS – right side
Special stitches:
- Popcorn (pc): Work 5 dc in the same st. Drop the loop from your hook, insert the hook from front to back into the top of the first dc, pick up the dropped loop and pull it through. Ch 1 to close. The ch-1 does not count. One pc counts as 1 st.
- Back-post single crochet (bpsc): Insert the hook from back to front to back around the post of the stitch. Yarn over, pull up a loop, then yarn over and pull through both loops on the hook.
- Reverse single crochet (rev sc): Work sc from left to right, inserting the hook into the next stitch to the right.
Gauge and Checkpoints
Single crochet gauge: 16 sc × 18 rnds = 4 in (10.2 cm)
Mesh gauge: 2 mesh rnds = 1 in (2.5 cm); 2 dc-and-ch-1 pairs = 1 in (2.5 cm)
The base is your test piece. Work Rnds 1–4 and measure before going further.
Checkpoints:
– After Rnd 4: 56 sts; the oval is 5.5 in × 2.5 in (14.0 × 6.4 cm).
– After Rnd 12: the cream wall is 1.8 in (4.6 cm) tall, and the tube lies 7 in (17.8 cm) wide when flattened.
– After Rnd 19: the height is 3.3 in (8.4 cm).
– After Rnd 24: the height is 5.8 in (14.7 cm).
– After Rnd 28: the height is 6.7 in (17.0 cm).
– After Rnd 46: the height is 13.5 in (34.3 cm).
– After Rnd 50: the height is 14.4 in (36.6 cm).
If your piece is too big, go down a hook size (4.0 mm). If it is too small, go up a size (5.0 mm). The flat width matters more than the height. Height can be adjusted later by adding or removing one mesh round per section.
Base (Cream)
Each round is joined with a sl st to the first st. Ch 1 at the start of each sc round; the ch-1 does not count as a st.
Ch 15.
Rnd 1: Work 2 sc in the 2nd ch from the hook, sc in the next 12 ch, and 4 sc in the last ch. Working along the opposite side of the foundation chain, sc in the next 12 ch, then 2 sc in the last ch (the same ch as the first sts). Join. (32 sts)
Rnd 2: 2 sc in each of the next 2 sts, sc in the next 12, 2 sc in each of the next 4, sc in the next 12, 2 sc in each of the next 2. (40 sts)
Rnd 3: (sc in the next st, 2 sc in the next) 2 times, sc in the next 12, (sc in the next st, 2 sc in the next) 4 times, sc in the next 12, (sc in the next st, 2 sc in the next) 2 times. (48 sts)
Rnd 4: (sc in the next 2 sts, 2 sc in the next) 2 times, sc in the next 12, (sc in the next 2, 2 sc in the next) 4 times, sc in the next 12, (sc in the next 2, 2 sc in the next) 2 times. (56 sts)
In Rnd 4, sts 9–20 and 37–48 form the two straight long sides. Mark st 9 and st 48. Sts 37–48 become the front.
Rnd 5: Working in BLO, sc in each st around. (56) This turns the wall up.
Rnds 6–12: Sc in each st around. (56) Fasten off A.
Move your markers up every few rounds so they stay above sts 9 and 48.
Slot Band (Mauve)
Rnds 13–14: Join B. Sc in each st around. (56)
Rnd 15: Sc in the next 36 sts, ch 12, skip the next 12 sts (sts 37–48), sc in the last 8. (56: 44 sc + 12 ch)
Rnd 16: Sc in the next 36 sts, sc in each of the 12 ch, sc in the last 8. (56)
Rnds 17–19: Sc in each st around. (56) Fasten off B.
The slot opens to about 3 in (7.6 cm) wide and is centered on the front.
Mesh and Popcorn Bands
Mesh A (Cream), Rnds 20–24
Rnd 20: Join A. Ch 4 (counts as dc + ch 1), skip the next st. Dc in the next st, ch 1, skip the next st. Repeat from * 27 times. Join to the 3rd ch of the beginning ch-4. (28 dc + 28 ch-1 sps = 56)
Rnds 21–24: Sl st into the first ch-1 sp, ch 4. Dc in the next ch-1 sp, ch 1. Repeat from * 27 times. Join. (28 dc + 28 sps = 56)
Because each dc lands over a space, the holes stagger into the honeycomb look. Fasten off A.
Popcorn Band 1 (Mauve), Rnds 25–28
Rnd 25: Join B. Sc in each dc and in each ch-1 sp around. (28 + 28 = 56)
Rnd 26: Sc in each st around. (56)
Rnd 27: (Sc in the next 3 sts, pc in the next st) 14 times. (56 sts, including 14 pc)
Rnd 28: Sc in each st around, working into the top of each pc. (56) Fasten off B.
Repeat the sequence:
– Mesh B: Rnds 29–33, worked like Rnds 20–24 with A.
– Popcorn Band 2: Rnds 34–37, worked like Rnds 25–28 with B.
– Mesh C: Rnds 38–42, worked like Rnds 20–24 with A.
– Popcorn Band 3: Rnds 43–46, worked like Rnds 25–28 with B.
Every round is 56 sts.
Top Band (Cream), Rnds 47–50
Rnds 47–48: Join A. Sc in each st around. (56)
Rnd 49: (Sc in the next 3 sts, pc in the next st) 14 times. (56, including 14 pc)
Rnd 50: Sc in each st around. (56) Fasten off.
Hanging Tab (Mauve)
The tab is centered on the back long side, over sts 5–24.
Row 1 (RS): Join B in st 5 of Rnd 50. Ch 1, sc in the same st and in the next 19 sts. Turn. (20) The remaining 36 sts stay open as the front of the mouth.
Row 2: Ch 1, sc2tog, sc in the next 16, sc2tog. Turn. (18)
Rows 3–7: Ch 1, sc2tog, sc across to the last 2 sts, sc2tog. Turn. Each row has 2 fewer sts than the row before:
– Row 3: 16
– Row 4: 14
– Row 5: 12
– Row 6: 10
– Row 7: 8
Rows 8–15: Ch 1, sc in each st across. Turn. (8)
Fold Rows 12–15 over the ring toward the inside. Whipstitch the top of Row 15 to the back of Row 11.
The visible tab, Rows 1–11, is 2.4 in (6.1 cm) tall and narrows to 2 in (5.1 cm), matching the ring.
Appliqués
Rose (Mauve)
Rnd 1: MR, ch 1, 10 sc in the ring. Join. (10)
Rnd 2: Ch 1, sc in the first st, ch 2, skip the next st. Sc in the next st, ch 2, skip the next st. Repeat from * 4 times. Join. (5 sc, 5 ch-2 sps)
Rnd 3: In each ch-2 sp work (sc, hdc, 3 dc, hdc, sc). Join. (5 petals, 35 sts)
Rnd 4: Working behind the petals, ch 1, bpsc around the first Rnd 2 sc. Ch 4, bpsc around the next Rnd 2 sc. Repeat from * 3 times, ch 4, join. (5 ch-4 loops)
Rnd 5: In each ch-4 loop work (sc, hdc, 5 dc, hdc, sc). Join. (5 petals, 45 sts)
Rnd 6: Working behind the petals, bpsc around each Rnd 4 bpsc with ch 5 between them. Join. (5 ch-5 loops)
Rnd 7: In each ch-5 loop work (sc, hdc, 7 dc, hdc, sc). Join. (5 petals, 55 sts)
Fasten off. The rose measures 2.75 in (7.0 cm). Each petal layer sits behind and between the petals of the layer before, so the three tiers stack like a real rose.
Small Flower (Cream)
Rnd 1: MR, ch 1, 10 sc in the ring. Join. (10)
Rnd 2: Ch 1, sc in the first st, ch 2, skip the next st. Sc in the next st, ch 2, skip the next st. Repeat from * 4 times. Join. (5 ch-2 sps)
Rnd 3: In each ch-2 sp work (sc, hdc, 3 dc, hdc, sc). Join. (35 sts)
Fasten off. The flower measures 1.5 in (3.8 cm). With D, embroider 3 French knots in the center.
Leaf (Green), make 3
Ch 9. Sl st in the 2nd ch from the hook, sc in the next ch, hdc in the next ch, dc in the next 2 ch, hdc in the next ch, sc in the next ch, and 3 sc in the last ch.
Working along the opposite side of the chain: sc in the next ch, hdc in the next ch, dc in the next 2 ch, hdc in the next ch, sc in the next ch, sl st in the last ch. (17 sts)
Fasten off. Each leaf is 1.75 in (4.4 cm) long and pointed at both ends.
Placement: Center the rose over the line between Popcorn Band 2 and Mesh C, 1.5 in (3.8 cm) left of front center. Tuck the small flower at the rose’s lower left. Fan the leaves around the rose: one at the upper left, one at the upper right and one below. Sew each piece around its outer edge so the mesh holes stay open.
Sage colorway: Use sage in place of mauve for the whole tube and tab. Make 2 roses in cream and 4 leaves. Sew one rose on Mesh C left of center and one on Mesh B right of center, with 2 leaves beside each rose.
Border: Top Opening and Slot Trim
Trim gauge: 1 sc per st and 1 sc per row end.
Top Trim, Row 1: With A, join at the Row 11 end on one edge of the tab. Work as follows:
– Sc 11 down the tab edge (one per row end of Rows 11–1)
– Sc 36 across the front sts of Rnd 50
– Sc 11 up the other tab edge
Do not turn. (11 + 36 + 11 = 58)
Top Trim, Row 2: Ch 1, rev sc in each st across. (58) Fasten off.
Slot Trim: With B, join at the right corner of the slot. Work as follows:
– Sc 12 into the 12 skipped sts of Rnd 14
– Sc 1 in the end of the slot
– Sc 12 into the underside of the ch-12
– Sc 1 in the other end of the slot
Join. (24 sts worked one per existing st + 2 corner sts added = 26)
Why the math works: The front rim keeps exactly one sc per existing st (36 sts = 9 in / 22.9 cm), so the mouth neither ruffles nor pulls in. An sc row is slightly shorter than an sc stitch is wide, so one sc per row end keeps the tab edges firm and flat. Around the slot, the 2 extra sts turn the corners without bunching.
Final Blocking
- Weave in all ends inside the solid bands, never through the mesh.
- Mist the appliqués, pin them flat with the petals spread, and let them dry before sewing.
- Roll a towel to about 4.5 in (11.4 cm) across and slide it into the tube.
- Mist the tube evenly. Gently straighten the mesh columns and push each popcorn outward.
- Check that the height is 14.4 in (36.6 cm) and the flat width is 7 in (17.8 cm).
- Let it dry fully, remove the towel, and sew on the appliqués.
Final Quality-Control Checklist
- Every round is 56 sts; there are 14 popcorns in each popcorn round.
- The slot is centered on the front, directly below the open mouth.
- The tab is centered on the back, and the ring hangs straight.
- The mesh holes line up in neat staggered columns.
- All popcorns face outward.
- The top trim has 58 sts, and the slot trim has 26.
- The appliqués are secure and lie flat.
Troubleshooting
- Popcorns push inward: Check that the RS is facing you, and close each pc from the front.
- The tube twists: Joined rounds drift a little. Keep your markers aligned and check them against the slot.
- The mesh sags: Your dc tension is loose. Go down half a hook size for the mesh rounds only.
- The mouth ruffles: You worked more than 36 sc across the front. Undo the trim and recount.
- The tab tilts: It was started off-center. Recount 10 sts on each side of back center.
- The slot gapes too wide: Work the slot trim slightly tighter, or ch 10 and skip 10 instead (adjust the Rnd 15 counts to sc 37, ch 10, sk 10, sc 9).
Care
Hand wash in cool water, press out the water in a towel, and dry flat over a rolled towel. Don’t tumble dry, as the cotton may shrink and the popcorns may flatten.
Final Notes
The measurement chain is simple:
– Gauge of 16 sc = 4 in (10.2 cm)
– 56 sts give a 14 in (35.6 cm) circumference and a 7 in (17.8 cm) flat width
– 31 sc rounds plus 15 mesh rounds give 14.4 in (36.6 cm) of height
– An 11-row visible tab adds 2.4 in (6.1 cm)
– With the 2 in (5.1 cm) ring, the hanging length is about 18.8 in (47.8 cm)
If every checkpoint matches, the finished holder will match. Happy crocheting!