

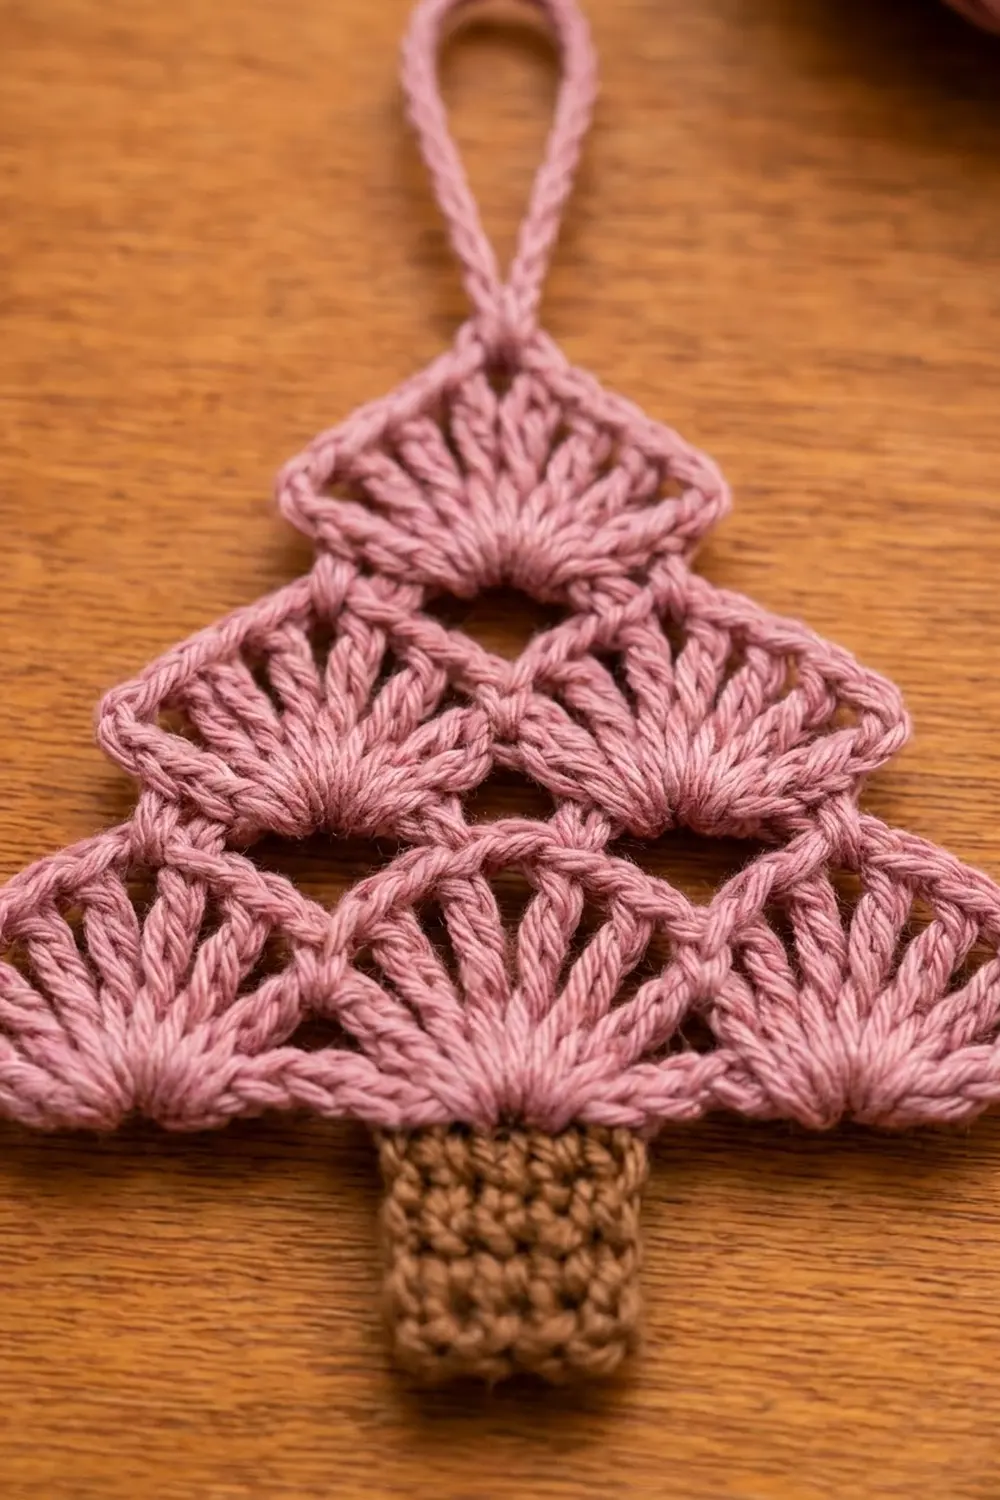
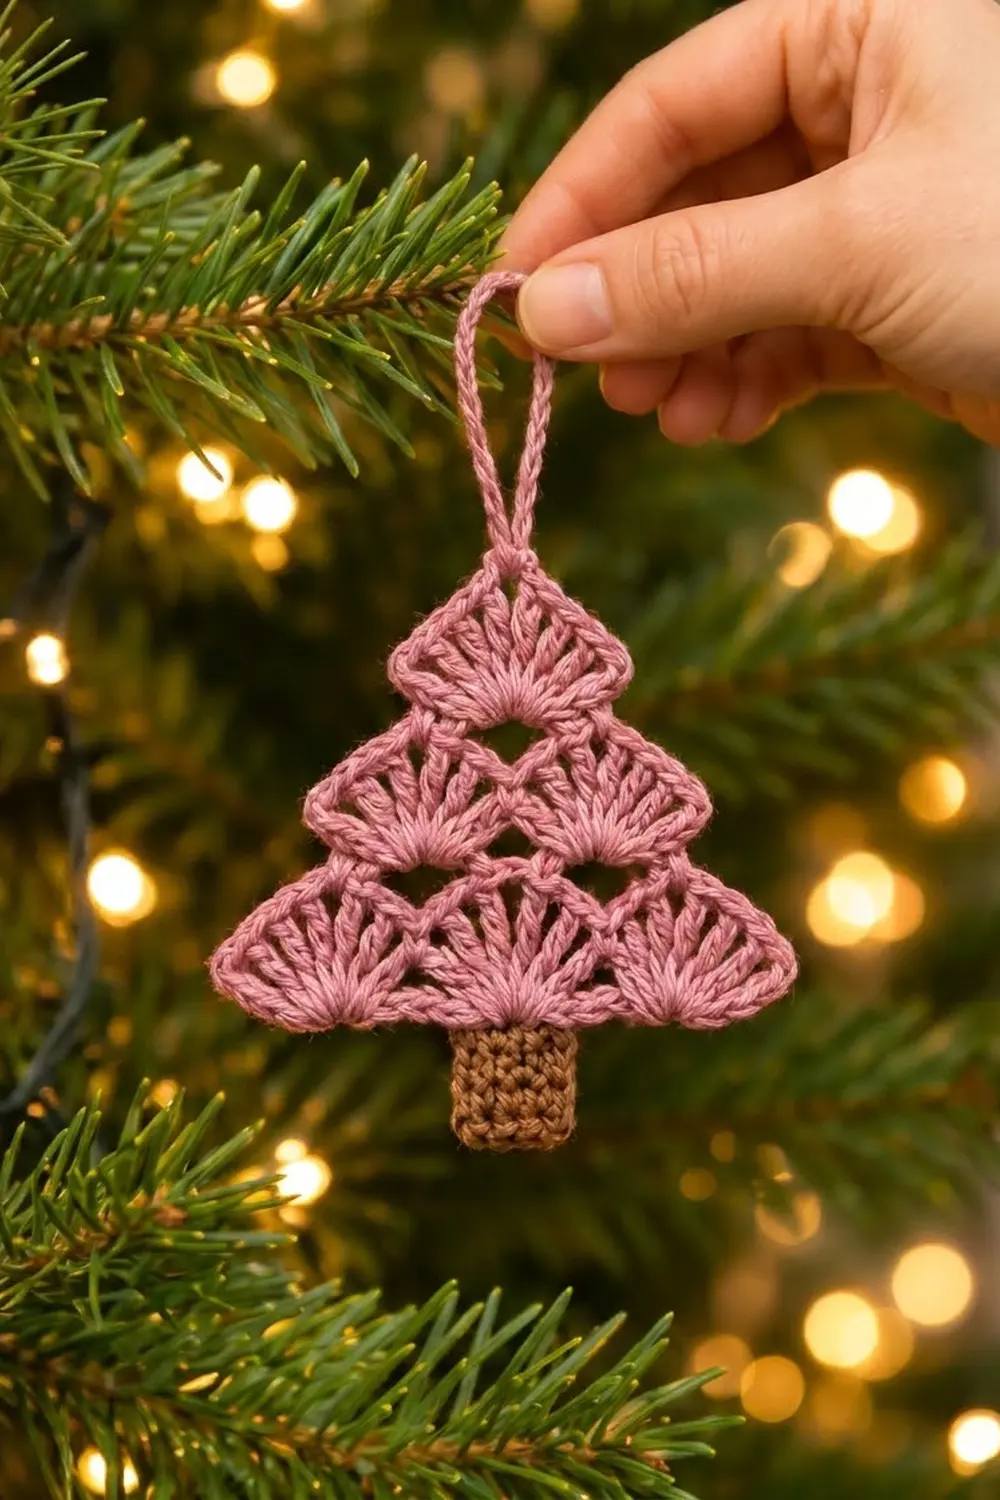
This little tree is built from stacked shell fans in a soft dusty rose, sitting on a solid brown trunk. Three fans form the bottom tier, two fans the middle, and one fan the pointed top. Small open diamonds appear between the tiers, giving the ornament a light, lacy look that catches the glow of tree lights.
The style is simple and slightly vintage. It uses only two colors: dusty rose pink for the canopy, edging and hanging loop, and warm brown for the trunk. Once you know the shell rhythm, it takes well under an hour.
This pattern uses US crochet terms. The finished ornament measures 3.75 in (9.5 cm) wide and 4 in (10.2 cm) tall, plus a 1.5 in (3.8 cm) hanging loop, for a total hanging length of 5.5 in (14.0 cm).
The whole ornament is one piece. You crochet the brown trunk in rows, attach a pink chain foundation to its top, then work three tiers of fans upward in turned rows. A one-row single crochet outline sharpens the edges, and a chain loop finishes the tip.
Finished Size and Construction
- Finished size: 3.75 in (9.5 cm) wide x 4 in (10.2 cm) tall, plus a 1.5 in (3.8 cm) loop
- Skill level: Easy to intermediate
- Terminology: US crochet terms
- Yarn weight: DK / light worsted (#3) cotton
- Hook: 3.5 mm (E-4)
- Number of pieces: 1 (trunk and canopy worked as one piece, no seams)
- Layout: Trunk at the bottom, then tiers of 3, 2 and 1 fans
- Trunk size: 1.2 in (3.0 cm) wide x 1.25 in (3.2 cm) tall
- Size before edging: 3.5 in (8.9 cm) wide x 3.75 in (9.5 cm) tall
- Edging depth: 0.125 in (0.3 cm) on each side edge, 0.25 in (0.6 cm) at the top point
Materials
Choose a smooth mercerized or matte cotton in DK weight. Cotton gives crisp fan stitches and holds its shape on the tree. Acrylic also works, but its fans are softer and rounder. Scraps are perfect for this project, so check your stash before buying anything new.
- Color A, dusty rose pink: 8 g, about 18 m (canopy, edging, loop)
- Color B, warm brown: 3 g, about 7 m (trunk)
These amounts include extra for weaving in ends and for one practice trunk if you need to change your hook size.
Tools:
- 3.5 mm (E-4) crochet hook
- Tapestry needle
- Scissors
- 2 stitch markers
- Rust-proof pins and a foam blocking mat
- Spray bottle with water
- Ruler or tape measure
Abbreviations (US Terms)
- ch = chain
- sl st = slip stitch
- sc = single crochet
- dc = double crochet
- sk = skip
- sp = space
- st(s) = stitch(es)
- RS = right side
Special stitch – Fan: 9 dc worked into the same ch-sp. The 5th dc of a fan is its center dc. The four dc on either side of the center are the fan’s “halves.”
Gauge and Checkpoints
Gauge: 20 sc and 22 rows = 4 in (10.2 cm) in Color B with a 3.5 mm hook. One fan (9 dc in a ch-4 sp) measures about 1.1 in (2.8 cm) wide and 0.6 in (1.5 cm) tall.
This is a single small piece, so the trunk is also your gauge test. Make it first and measure it before you pick up the pink. If the trunk is the right size, the fans will be too.
Checkpoints:
- Trunk: 1.2 in (3.0 cm) wide x 1.25 in (3.2 cm) tall.
- After Row 2 (bottom tier): 3.3 in (8.4 cm) wide.
- After Row 4 (middle tier): middle tier about 2.25 in (5.7 cm) wide.
- After Row 6 (top fan): 3.5 in (8.9 cm) wide x 3.75 in (9.5 cm) tall including the trunk.
- After edging: 3.75 in (9.5 cm) wide x 4 in (10.2 cm) tall.
If your trunk is too big, go down to a 3.25 mm hook and start again. If it is too small, go up to a 3.75 mm hook. Use the new hook for both colors, because the fans follow the same tension as the trunk.
Trunk (Color B)
Work in rows. The ch-1 at the start of each row does not count as a stitch.
Row 1: Ch 7. Sc in 2nd ch from hook and in each ch across. Turn. (6 sc)
Rows 2–7: Ch 1, sc in each st across. Turn. (6 sc)
At the end of Row 7, fasten off Color B and weave in the tail. The trunk should measure 1.2 in (3.0 cm) wide x 1.25 in (3.2 cm) tall. Hold it with Row 7 on top. Place a marker in the 1st stitch and another in the 6th stitch of Row 7.
Canopy (Color A)
Row 1 – Foundation Loops
With Color A, ch 17.
Sc in 2nd ch from hook, ch 4, sk 4 ch, sc in next ch; repeat from * 2 more times. Turn. (4 sc, 3 ch-4 sps)
To check the chain math: the first sc uses 1 ch, and each of the 3 repeats uses 4 skipped ch + 1 ch for the sc. That is 1 + (3 x 5) = 16 ch worked, plus the 1 ch skipped at the start = 17.
Joining to the trunk as you go: the 2nd and 3rd sc of this row anchor the middle loop to the trunk. Hold the trunk directly below the chain, with Row 7 on top.
- Work the 2nd sc through both the chain and the marked 1st stitch of the trunk.
- Work the 3rd sc through both the chain and the marked 6th stitch.
The 4 skipped chains of the middle loop now span trunk stitches 2–5 exactly. The two outer loops extend freely past each side of the trunk.
Check: the middle loop sits centered on the trunk, with one loop reaching out on each side.
Row 2 – Bottom Tier (3 Fans)
Ch 1, sc in first sc, 9 dc in next ch-4 sp, sc in next sc; repeat from * 2 more times. Turn. (3 fans, 4 sc; 31 sts)
Count: 27 dc + 4 sc = 31 sts. The row should be 3.3 in (8.4 cm) wide. The middle fan sits right on top of the trunk.
Row 3 – Middle Tier Loops
Sl st in first sc and in each of next 4 dc. Ch 1, sc in next dc (center dc of first fan), ch 5, sc in center dc of next fan, ch 5, sc in center dc of last fan. Turn. Leave the remaining stitches unworked. (3 sc, 2 ch-5 sps)
Each ch-5 sp bridges from one fan center to the next, so it sits directly over a valley of the bottom tier. The 4 unworked dc on the outer half of each end fan become the outer edge of the bottom tier.
Row 4 – Middle Tier (2 Fans)
Ch 1, sc in first sc, 9 dc in next ch-5 sp, sc in next sc, 9 dc in next ch-5 sp, sc in last sc. Turn. (2 fans, 3 sc; 21 sts)
Count: 18 dc + 3 sc = 21 sts. The small open diamonds between the tiers form here, below each ch-5 bridge.
Row 5 – Top Tier Loop
Sl st in first sc and in each of next 4 dc. Ch 1, sc in next dc (center dc of first fan), ch 5, sc in center dc of next fan. Turn. (2 sc, 1 ch-5 sp)
Row 6 – Top Fan
Ch 1, sc in first sc, 9 dc in ch-5 sp, sc in last sc. (1 fan, 2 sc; 11 sts)
Fasten off. Check: 3.5 in (8.9 cm) wide x 3.75 in (9.5 cm) tall including the trunk.
Border – Outline Edging
The edging is one row of sc around the outer edge only. It goes up one side, over the top fan, and down the other side. Do not edge the bottom of the canopy or the trunk.
Border gauge: work one sc in each free outer stitch, under both loops. The edging adds about 0.125 in (0.3 cm) to each side edge and about 0.25 in (0.6 cm) at the top point.
Edging row: With RS facing, join Color A in the end sc of Row 2 at the lower right point. Ch 1, then work:
- Right side (going up): 3 sc in the Row 2 end sc (bottom point), 1 sc in each of the 4 unworked dc of the outer bottom fan, 1 sc in the Row 4 end sc (tier notch), 1 sc in each of the 4 unworked dc of the outer middle fan, 1 sc in the Row 6 end sc. (3 + 4 + 1 + 4 + 1 = 13 sc)
- Top fan: 1 sc in each of the first 4 dc, 3 sc in the center dc, 1 sc in each of the last 4 dc. (4 + 3 + 4 = 11 sc)
- Left side (going down): 1 sc in the Row 6 end sc, 1 sc in each of the 4 unworked dc of the outer middle fan, 1 sc in the Row 4 end sc, 1 sc in each of the 4 unworked dc of the outer bottom fan, 3 sc in the Row 2 end sc (bottom point). (1 + 4 + 1 + 4 + 3 = 13 sc)
Fasten off. Total edging: 13 + 11 + 13 = 37 sc.
Why the math works:
- Every outer fan leaves exactly 4 dc free. Rows 3 and 5 slip stitch across 1 sc + 4 dc, and the next tier then covers the center dc.
- Each Row 4 and Row 6 end sc sits directly on a covered center dc, so it makes a natural 1-stitch notch between tiers.
- The top fan’s 11 sc are its 9 dc worked 1-per-stitch + 2 extra sc in the center dc.
- The 3-sc groups at the two bottom points add the fullness needed to turn a sharp corner without cupping.
- The two sides mirror each other at 13 sc each.
Hanging Loop
Join Color A in the center sc of the 3-sc group at the top point. Ch 25, sl st in the same st. Fasten off. The loop stands about 1.5 in (3.8 cm) tall.
Weave in all ends along the back of the fans and the trunk. Use the Color A starting tail to tack the middle foundation loop to trunk stitches 2–5 with 3 or 4 small whipstitches, so the trunk sits flat and centered.
Final Blocking
- Lightly spray the ornament with water until it is evenly damp, not soaked.
- Lay it RS up on the blocking mat.
- Pin the top point first, then the two bottom points, forming a triangle 3.75 in (9.5 cm) wide and 4 in (10.2 cm) tall including the trunk.
- Pin the two tier notches on each side so they sit slightly inward.
- Gently open each fan with your fingertips so the 9 dc spread evenly.
- Square the trunk to 1.2 in (3.0 cm) x 1.25 in (3.2 cm) and pin its corners.
- Pin the hanging loop straight up.
- Let it dry completely, at least 4 hours, before unpinning.
For extra stiffness, mist with a light fabric starch before step 3.
Final Quality-Control Checklist
- Trunk has 7 rows of 6 sc.
- Row 1 has 4 sc and 3 ch-4 sps, with the middle loop anchored on trunk stitches 1 and 6.
- Bottom tier: 3 fans of 9 dc each, 31 sts total.
- Middle tier: 2 fans, 21 sts total, centered over the valleys.
- Top tier: 1 fan, 11 sts total.
- Small open diamonds show between the tiers.
- Edging totals 37 sc, with 3 sc at each of the three points.
- Finished size is 3.75 in (9.5 cm) x 4 in (10.2 cm), with a 1.5 in (3.8 cm) loop.
- All ends are woven in on the back.
Troubleshooting
Fans ruffle or wave: your dc are loose compared with the chain space. Go down a hook size for the canopy rows.
Fans look cramped and cupped: your chain spaces are too tight. Chain more loosely, or work just the chains with a hook one size larger.
Middle tier is off-center: recount the slip stitches in Rows 3 and 5. You need 1 sl st in the sc and 4 sl sts in dc before the ch 1.
Trunk hangs crooked: the anchor sc in Row 1 went into the wrong trunk stitches. They must go into trunk stitches 1 and 6.
Points are rounded: work all 3 sc into one single stitch at each point, and pin the points sharply while blocking.
Edging count is off: you probably edged into a covered center dc. Only the 4 outer dc of each end fan are free.
Loop twists: block it straight, or work the ch 25 with slightly firmer tension.
Care
Hand wash in cool water with mild soap, roll in a towel to remove moisture, and dry flat, re-pinning the points if needed. Store it flat between tissue paper so the fans keep their shape.
Final Notes
The measurement chain is short and easy to follow. The trunk sets your gauge at 1.2 in (3.0 cm) x 1.25 in (3.2 cm). The bottom tier grows to 3.3 in (8.4 cm) wide, and the full canopy reaches 3.5 in (8.9 cm) x 3.75 in (9.5 cm). The 37-stitch edging brings the tree to 3.75 in (9.5 cm) x 4 in (10.2 cm), topped by a 1.5 in (3.8 cm) loop.
If each stage matches its checkpoint, your finished ornament will match this one. Make one in rose, then try a few in other colors for the tree or as gift toppers.
Happy crocheting!