

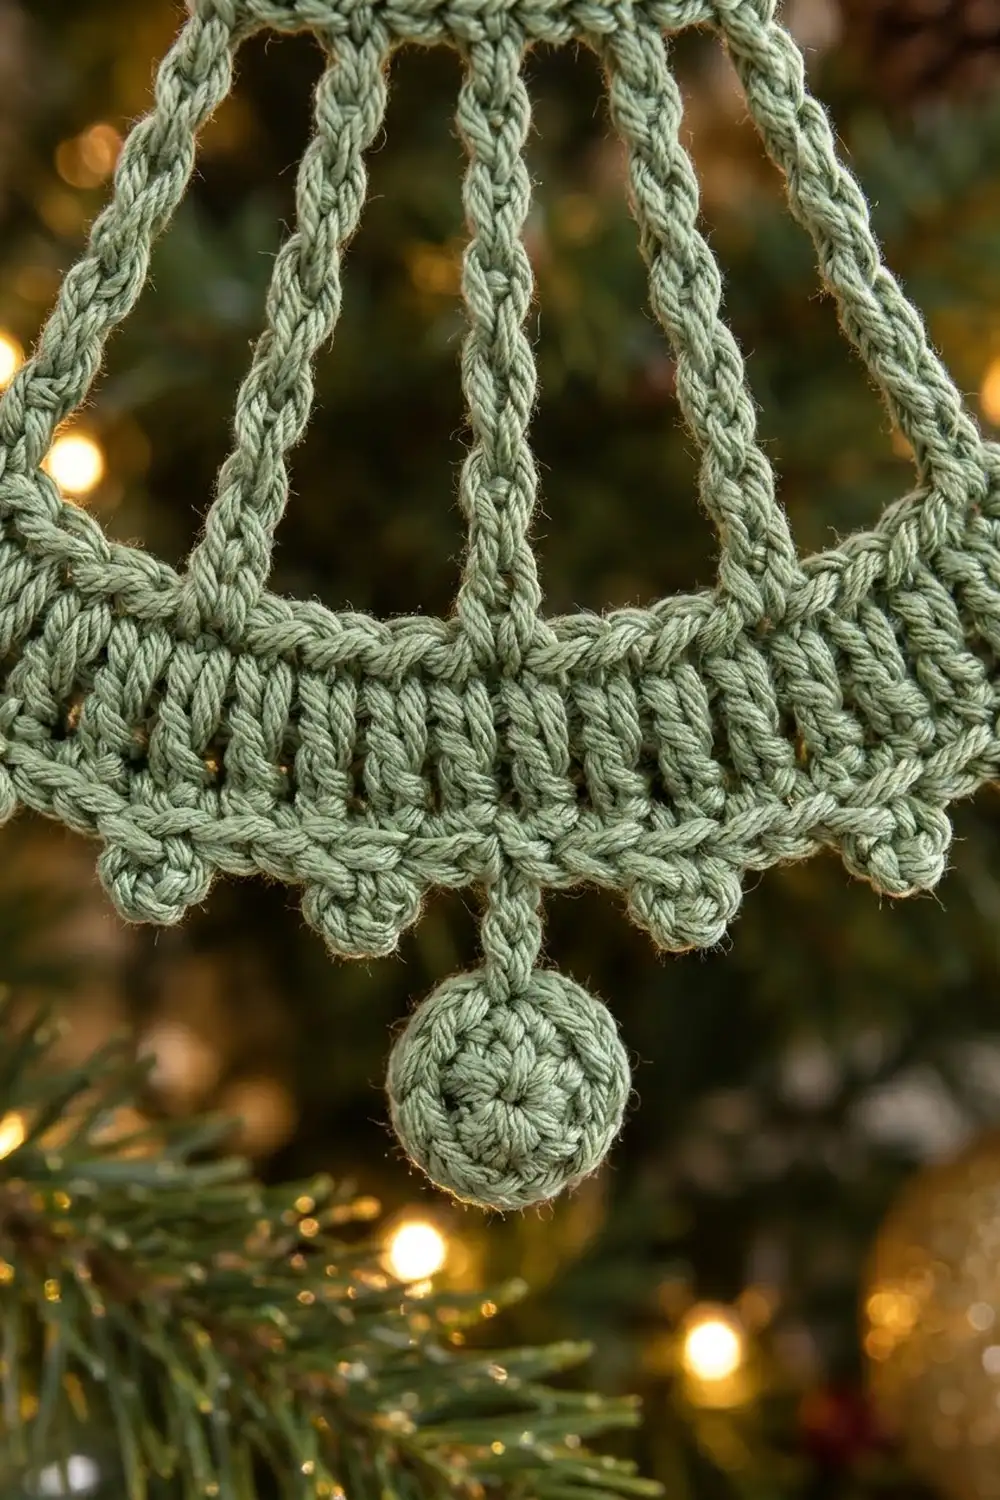
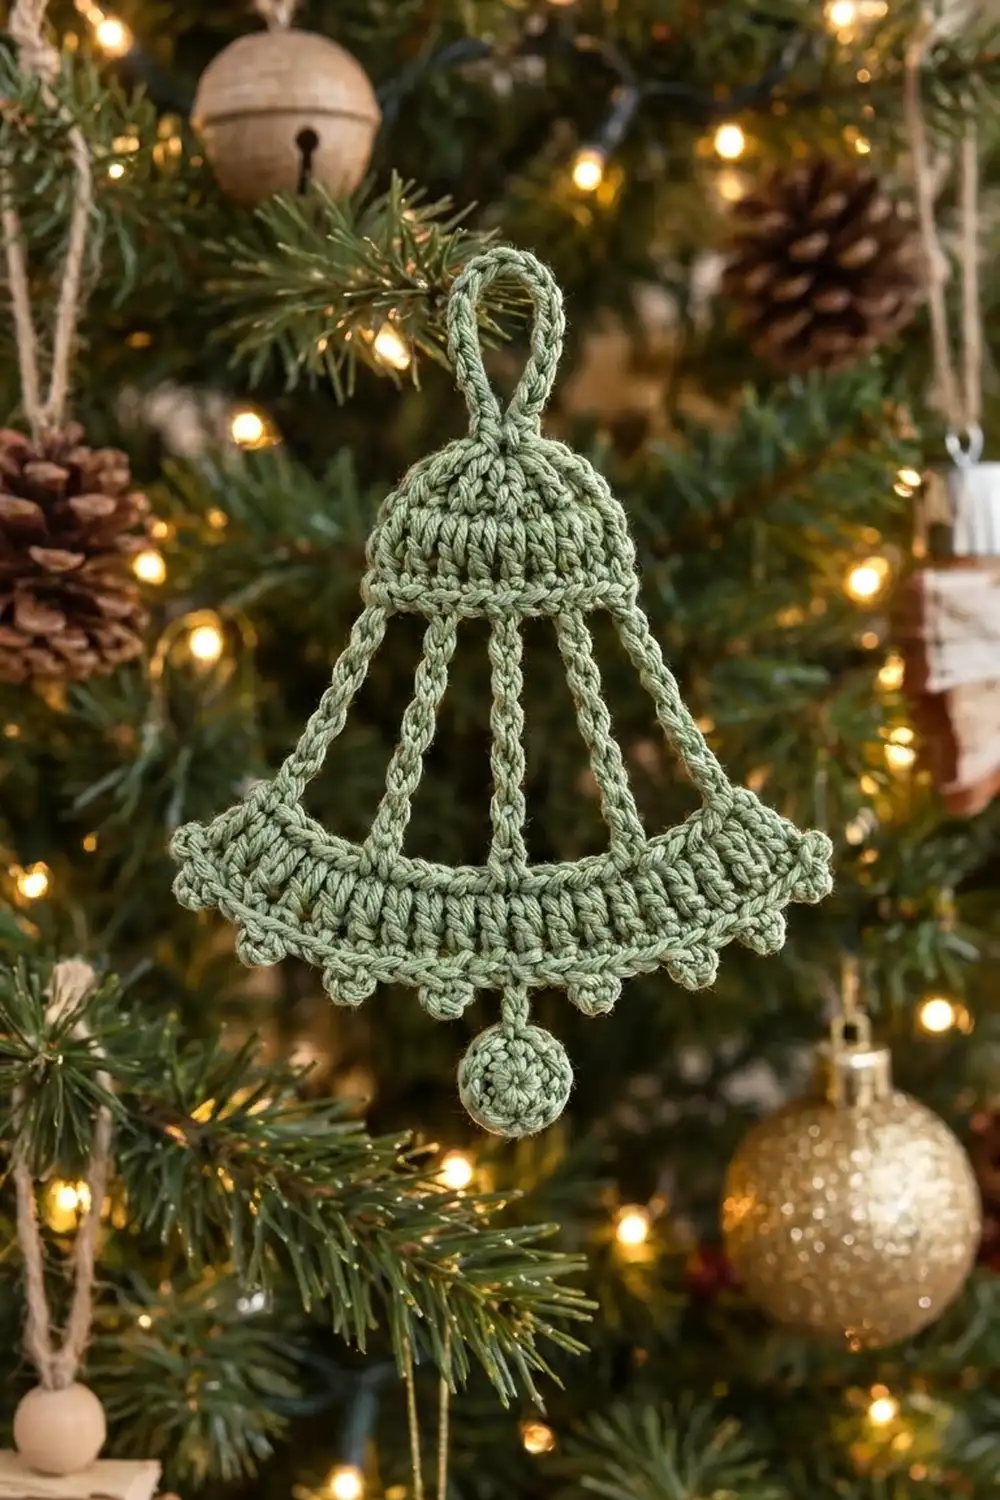
The Sage Chime Bell is a light, airy ornament that looks like a little line drawing of a bell. It has a solid rounded dome, five slender cords that open up the middle, a flared skirt and a row of tiny picots. A small round clapper hangs underneath.
It’s worked in one soft sage green cotton, which gives it a calm, vintage feel. It looks lovely against green branches, gold baubles and warm string lights. Mercerized cotton gives crisp stitch definition, and the bell holds its shape well after light starching.
This pattern uses US crochet terms. The finished bell body measures about 4 in (10.2 cm) wide and 4 in (10.2 cm) tall. With the hanging loop and clapper, it is about 6 in (15.2 cm) long in total.
The bell is one single piece. You crochet the dome in rows from the top down, then add five slip-stitch cords. Next, you link the cord tips and work a flared skirt, finish with a picot edge, and add the loop and clapper.
Finished Size and Construction
- Finished size: 4 in (10.2 cm) wide × 4 in (10.2 cm) tall (bell body)
- Total hanging length: about 6 in (15.2 cm) including loop and clapper
- Skill level: Easy-intermediate
- Terminology: US crochet terms
- Yarn weight: Sport (#2) mercerized cotton
- Hook: 2.75 mm (C-2)
- Number of pieces: 1 (loop and clapper are worked on, no sewing)
- Layout: Single ornament, no assembly
- Dome size: 2.2 in (5.6 cm) wide × 1.4 in (3.6 cm) tall
- Size before border: 3.6 in (9.1 cm) tall
- Border depth: 0.4 in (1.0 cm), picot edge included
Materials
Yarn: Use a smooth, tightly plied sport-weight mercerized cotton. Mercerized cotton shows each stitch clearly and starches well. Fuzzy or split-prone yarns will blur the cords.
- Sage green: 8 g, about 25 m (27 yd)
Quantities include a margin of about 25% for your test dome and the weaving-in tails.
Tools:
- 2.75 mm (C-2) crochet hook
- Tapestry needle
- Small scissors
- Stitch marker
- Fabric stiffener or spray starch
- Foam blocking board and rustproof pins
- Ruler or tape measure
Abbreviations (US Terms)
- ch – chain
- sl st – slip stitch
- sc – single crochet
- hdc – half double crochet
- dc – double crochet
- MR – magic ring
- st(s) – stitch(es)
- RS / WS – right side / wrong side
- [ ] × n – repeat bracketed steps n times
Special stitches:
- Picot: Ch 3, then sl st in the 3rd ch from the hook (the first of the 3 chains).
- Leg: Ch 11, then sl st in the 2nd ch from the hook and in each of the next 9 ch (10 sl sts). Finish with a sl st in the same dome stitch at the base of the leg. The skipped chain at the bottom is the leg tip.
Turning chains: In this pattern, ch 1 and ch 2 at the start of a row never count as stitches.
Gauge and Checkpoints
Base gauge: 6 sts = 1 in (2.5 cm) in hdc or sc, and 4 hdc rows = 1 in (2.5 cm).
Gauge matters less here than for a garment, but it controls whether the cords meet the skirt cleanly. Make the dome first and use it as your test piece. If it measures correctly, keep going on that same piece.
Checkpoints:
- After Dome Row 6: 2.2 in (5.6 cm) wide × 1.4 in (3.6 cm) tall.
- Each leg: 1.5 in (3.8 cm) long, measured from the dome edge to the tip.
- After Skirt Row 1: the linking row spans about 2.8 in (7.1 cm).
- After Skirt Row 3: the bell measures 3.6 in (9.1 cm) tall from the top of the dome.
- After the border: the bell body measures 4 in (10.2 cm) × 4 in (10.2 cm).
- Clapper disc: 0.8 in (2.0 cm) across.
If the dome is too big, go down to a 2.5 mm hook. If it’s too small, go up to a 3.0 mm hook. Change the hook rather than the stitch counts, because every later count depends on the dome’s 13 stitches.
Part 1: Dome
The dome is worked flat in rows from the top down. Increasing at both ends of each row makes the rounded shape.
Row 1 (RS): Ch 7, hdc in 3rd ch from hook and in each ch across. (5 hdc)
Row 2: Ch 2, turn. 2 hdc in first st, hdc in next 3 sts, 2 hdc in last st. (7 hdc)
Row 3: Ch 2, turn. 2 hdc in first st, hdc in next 5 sts, 2 hdc in last st. (9 hdc)
Row 4: Ch 2, turn. 2 hdc in first st, hdc in next 7 sts, 2 hdc in last st. (11 hdc)
Row 5: Ch 2, turn. 2 hdc in first st, hdc in next 9 sts, 2 hdc in last st. (13 hdc)
Row 6: Ch 1, turn. Sc in each st across. (13 sc)
This sc row gives the firm rim along the bottom of the dome. Check the measurement now: 2.2 in (5.6 cm) wide × 1.4 in (3.6 cm) tall.
Part 2: Cords (Legs)
Five cords hang from the dome rim, on stitches 1, 4, 7, 10 and 13. That spaces them exactly 3 stitches apart and puts the middle cord at the center stitch.
Row 7: Ch 1, turn. Sl st in first st, make a Leg. [Sl st in next 3 sts, make a Leg] × 4. (13 sl sts, 5 legs)
Fasten off and leave a 4 in (10.2 cm) tail.
Each leg should measure 1.5 in (3.8 cm). Lay the piece flat with the legs pointing down, and make sure none of the cords are twisted. A twisted leg will pull the skirt sideways.
Part 3: Skirt
The skirt joins the leg tips and flares outward. Because all five legs are the same length, the outer legs naturally angle out. This gives the skirt its gentle, smile-shaped curve.
Row 1 (RS): With RS facing and legs pointing down, join yarn with a sl st in the tip of the rightmost leg. Ch 1, sc in the same tip. [Ch 3, sc in tip of next leg] × 4.
Count: 5 sc + 12 ch = 17 sts. The row should span about 2.8 in (7.1 cm).
Row 2: Ch 2, turn. Work into each sc and each chain (not around the chains), as follows:
Dc in first 2 sts, 2 dc in next st, dc in next 3 sts, 2 dc in next st, dc in next 3 sts, 2 dc in next st, dc in next 3 sts, 2 dc in next st, dc in last 2 sts. (21 dc)
This places the increases on stitches 3, 7, 11 and 15, mirrored around the center stitch 9, so the flare stays even.
Row 3: Ch 2, turn. Dc in first 2 sts, 2 dc in next st, dc in next 4 sts, 2 dc in next st, dc in next 5 sts, 2 dc in next st, dc in next 4 sts, 2 dc in next st, dc in last 2 sts. (25 dc)
The increases fall on stitches 3, 8, 14 and 19 of 21. That pattern is also mirrored around the center stitch 11.
Checkpoint: The bell now measures 3.6 in (9.1 cm) tall from the top of the dome. The skirt section (Rows 1–3) is about 0.7 in (1.8 cm) deep.
Border: Picot Edge
Border gauge: 6 sc = 1 in (2.5 cm). Each picot sticks out about 0.25 in (0.6 cm) below the edge. The two border rows add 0.4 in (1.0 cm) in total.
Border Row 1 (Row 4 of skirt): Ch 1, turn. Sc in each st across. (25 sc)
This row is worked exactly 1 sc into each dc, so it adds no stitches. It forms the ridge along the bottom of the skirt band.
Border Row 2 (Row 5 of skirt): Ch 1, turn. Sc in first 2 sts. [Picot, sc in next 3 sts] × 7. Picot, sc in last 2 sts. (25 sc + 8 picots)
Why the math works: 2 + (7 × 3) + 2 = 25, which matches the 25 stitches from the previous row exactly. There are 2 sc before the first picot and 2 sc after the last, so the edge is symmetrical. The middle stitch, stitch 13, is a plain sc between two picots, which is where the clapper hangs.
Fasten off and leave a 4 in (10.2 cm) tail.
Part 4: Hanging Loop
Step 1: With RS facing, join yarn with a sl st in the free loop of the foundation chain at the base of the 3rd (center) hdc of Dome Row 1.
Step 2: Ch 10, then sl st in the same place to make a loop.
Step 3: Work 14 sc over the chain loop. Sl st in the base.
Fasten off. The finished loop stands about 0.75 in (1.9 cm) tall. Covering it with sc gives the thick, cord-like look and keeps it from stretching.
Part 5: Clapper
Rnd 1: Make a MR, then work 6 sc in the ring. Pull the ring closed. (6 sc)
Rnd 2: 2 sc in each st. (12 sc)
Rnd 3: [Sc in next st, 2 sc in next st] × 6. Sl st in first sc. (18 sc)
The disc should measure 0.8 in (2.0 cm) across.
Attach: Ch 4, then sl st in the center sc (stitch 13) of the picot row. Fasten off.
The clapper hangs about 1.25 in (3.2 cm) below the picot edge. That brings the total length to 6 in (15.2 cm): 0.75 in loop + 4 in body + 1.25 in clapper.
Final Blocking
- Weave in all ends along stitches of the same color, keeping them out of the open spaces.
- Mix fabric stiffener according to the label, or prepare spray starch.
- Dip or spray the bell until it is evenly damp but not dripping. Blot it with a towel.
- Pin it flat on the blocking board, starting at the top of the dome.
- Pin the dome rim straight at 2.2 in (5.6 cm) wide.
- Pin the three center legs straight down and parallel. Angle the two outer legs outward evenly.
- Pin the skirt into a smooth arc 4 in (10.2 cm) across, with one pin at each end.
- Pin each of the 8 picots open so they look like small round beads.
- Pin the loop upright and the clapper straight below the center.
- Let it dry completely, at least 12 hours, before unpinning.
Final Quality-Control Checklist
- Dome has 13 sts at the rim and measures 2.2 in (5.6 cm) wide.
- There are 5 legs, each 1.5 in (3.8 cm) long, with none twisted.
- Skirt counts are 17, then 21, then 25.
- Border has 25 sc and 8 picots, with 2 sc at each end.
- Clapper hangs from stitch 13, centered under the middle leg.
- Bell body measures 4 in (10.2 cm) × 4 in (10.2 cm).
- Total length is 6 in (15.2 cm).
- All ends are hidden and trimmed.
- Bell lies flat and hangs straight from its loop.
Troubleshooting
Dome looks pointed instead of rounded: Your edge increases may be too tight. Work the 2-hdc increases a little looser, or block the dome sides into a curve.
Skirt tilts to one side: One leg is probably twisted, or the skirt started on the wrong leg. Check that all legs lie flat before Skirt Row 1.
Cords are wavy: Slip stitches worked too loosely will ripple. Work them snugly, and pin the legs straight while blocking.
Skirt ruffles: Your dc rows are looser than the dome. Go down 0.25 mm for the skirt only.
Skirt cups or pulls the legs inward: The dc stitches are too tight. Go up 0.25 mm for Rows 2–3.
Clapper is off-center: Count the picot-row stitches again and reattach at stitch 13.
Picots look flat: Make sure you sl st into the 3rd ch from the hook, not the 2nd. Then pin each picot open while blocking.
Care
Hand wash in cool water with a mild soap, press out the water gently, and lay flat. Starch and pin it again if it softens.
Final Notes
The measurements build on each other. The 13-stitch dome is 2.2 in (5.6 cm) wide and 1.4 in (3.6 cm) tall. The five legs add 1.5 in (3.8 cm), the skirt rows add 0.7 in (1.8 cm), and the picot border adds 0.4 in (1.0 cm). Together they make a 4 in (10.2 cm) bell body. The 0.75 in (1.9 cm) loop and the 1.25 in (3.2 cm) clapper bring the total to 6 in (15.2 cm).
If the dome checkpoint is right, the rest will follow. Make one, then make a whole set for the tree.
Happy crocheting!