

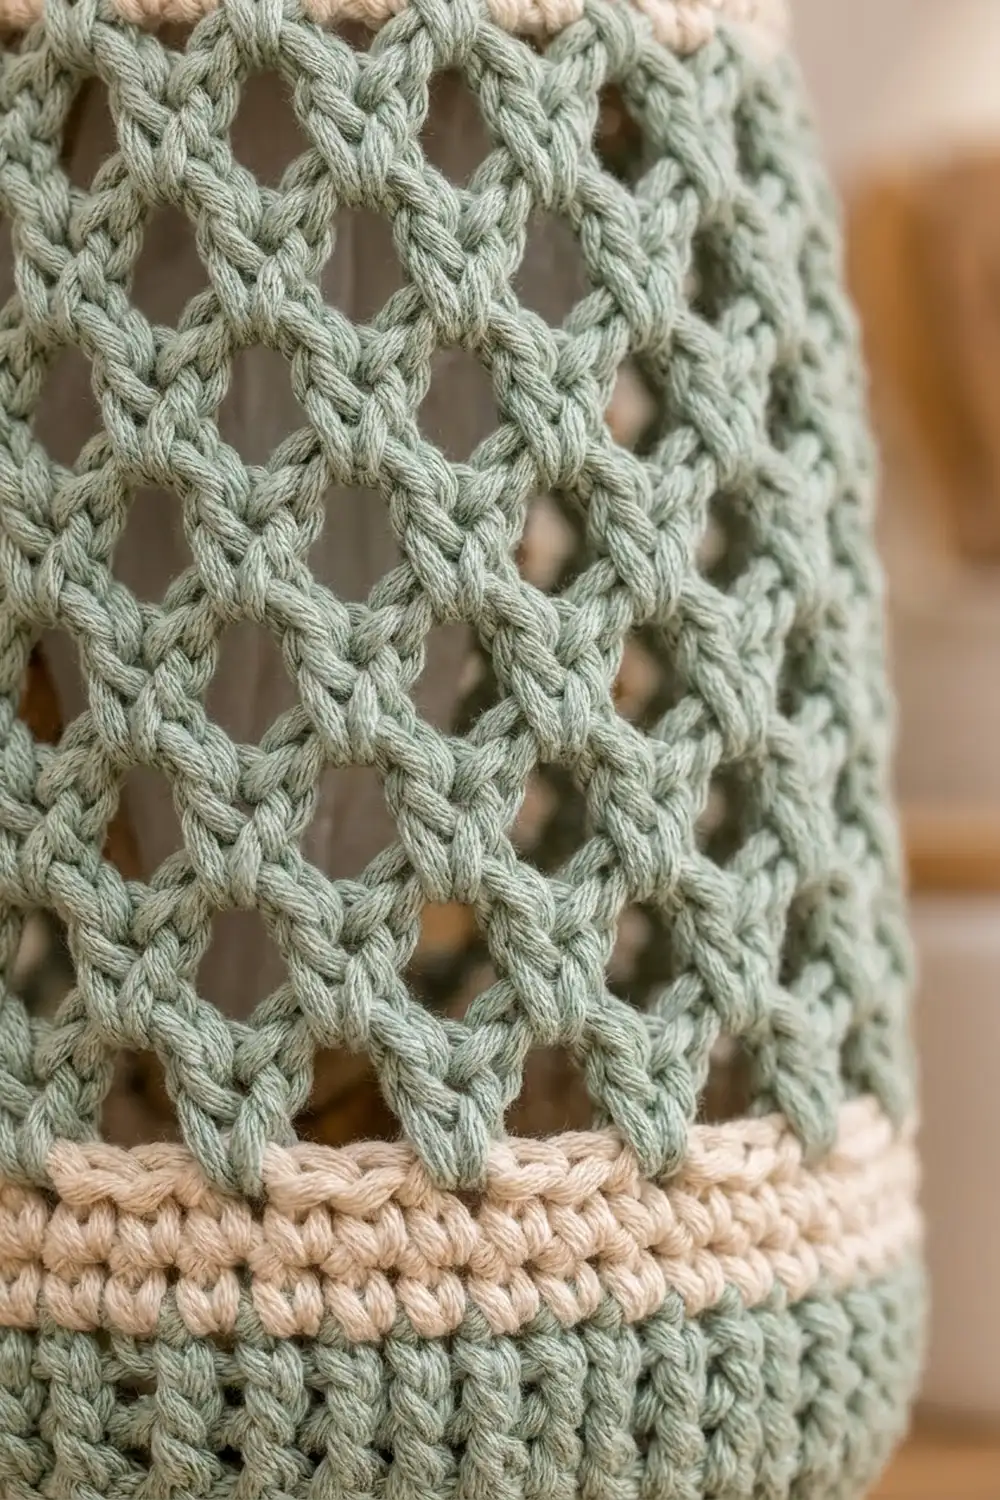
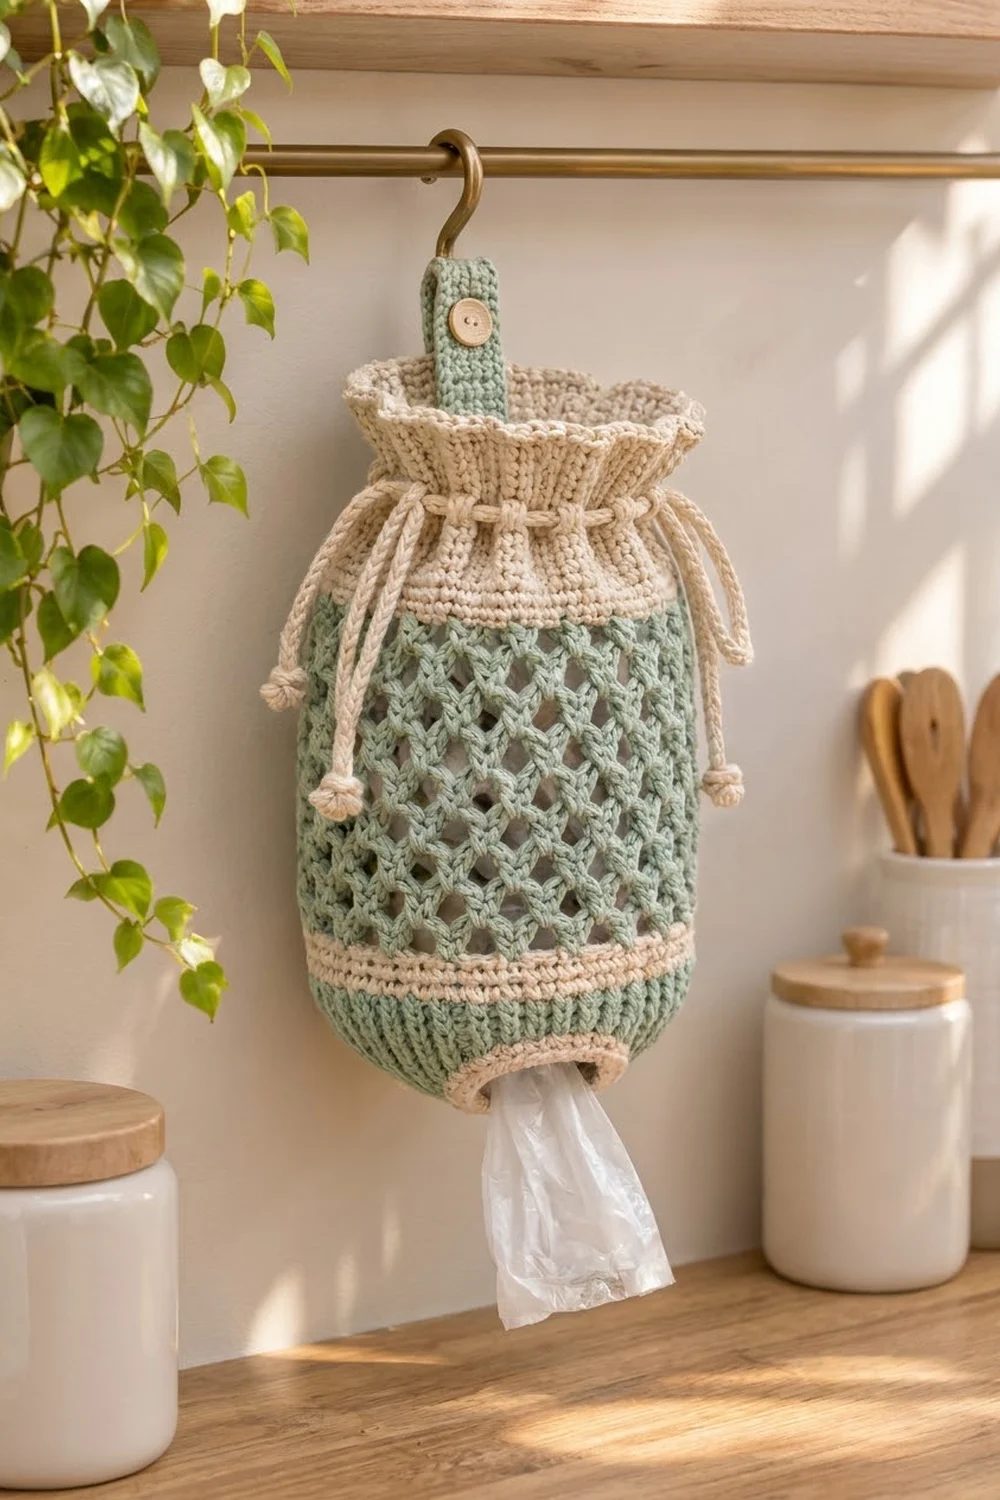
This Sage Lattice Bag Dispenser is a hanging tube that holds plastic grocery bags. You stuff bags in through the gathered top and pull them out, one at a time, through a small round opening at the bottom. The body is an open diamond mesh in soft sage green. Cream bands frame it, a cream ruffle finishes the top, and a ribbed green band shapes the bottom.
The palette is just two colors: sage green and natural cream. The style is calm and farmhouse-friendly. Knit-look stitches on the bottom band and the top section give a woven texture. Two cream drawstrings with small bobble ends close the top. A green strap with a wooden button hangs it from a rail hook.
This pattern uses US crochet terms. The finished dispenser measures 7.5 in (19.1 cm) wide when flat. It is about 13.5 in (34.3 cm) tall from the bottom opening to the top of the ruffle. When it hangs, the strap loop sits about 2.5 in (6.4 cm) above the ruffle.
The body is one piece worked in joined rounds from the bottom up. It starts at the bottom opening and increases to form a rounded base. It then works straight up through the rib, mesh and top sections. The strap and the two drawstrings are small add-on parts that you attach at the end.
Finished Size and Construction
- Finished size: 7.5 in (19.1 cm) wide flat x 13.5 in (34.3 cm) tall, plus a strap loop about 2.5 in (6.4 cm) above the ruffle
- Skill level: Easy intermediate
- Terminology: US crochet terms
- Yarn weight: Worsted (#4) cotton
- Hook: 5.0 mm (H-8)
- Number of pieces: 1 body, plus 1 strap and 2 drawstrings attached to it
- Layout: Single vertical tube, with the strap at center back
- Body circumference: 60 stitches = 15 in (38.1 cm)
- Size before border: 7.5 in (19.1 cm) wide x 12.75 in (32.4 cm) tall
- Border depth: Top ruffle 0.75 in (1.9 cm); the bottom opening edge adds no height
Materials
Choose a smooth worsted-weight cotton or cotton blend. Cotton keeps its shape when a full load of bags stretches the mesh, and it washes well. Avoid very fuzzy yarn, because it hides the lattice.
- Sage green: 90 g / 180 m (197 yd)
- Cream: 75 g / 150 m (164 yd)
Both amounts include a margin of about 15 percent for your gauge test and for weaving in ends.
Tools:
- 5.0 mm (H-8) crochet hook
- 1 wooden button, 1 in (2.5 cm) across
- Stitch markers (at least 2)
- Tapestry needle
- Sewing needle and cream thread for the button
- Scissors
- Tape measure
Abbreviations (US Terms)
- ch: chain
- sl st: slip stitch
- sc: single crochet
- hdc: half double crochet
- dc: double crochet
- BLO: back loop only
- sp: space
- st(s): stitch(es)
- rnd: round
- inc: 2 sc in the same st
- ksc: knit stitch (see below)
- cl: cluster (see below)
Knit stitch (ksc): The front of each stitch shows a V. Insert the hook from front to back through the center of that V, between the two vertical legs and below the top loops. Yarn over and pull up a loop. Yarn over again and pull through both loops. Stacked rounds of ksc form vertical columns that look like knitting.
4-dc cluster (cl): Yarn over, insert the hook in the given st and pull up a loop. Yarn over and pull through 2 loops. Repeat from * 3 more times, leaving 5 loops on the hook. Yarn over and pull through all 5 loops.
Gauge and Checkpoints
Gauge: 16 sc and 18 rnds = 4 in (10.2 cm) in sc worked in joined rounds. In the mesh, 4 ch-5 loops = 4 in (10.2 cm) wide, and 2 mesh rnds = about 1 in (2.5 cm) tall.
Test the start of the body before you commit. Work Rnds 1–6 and measure them. If the base matches the checkpoints, keep going. If it does not, rip back and change hooks now.
Checkpoints:
- After Rnd 1: The bottom opening is about 2.5 in (6.4 cm) across.
- After Rnd 4: The outer edge measures 15 in (38.1 cm) around.
- After Rnd 13: The tube is 7.5 in (19.1 cm) wide flat and about 2.75 in (7.0 cm) tall.
- After Rnd 27: The piece is about 9.75 in (24.8 cm) tall, measured with the mesh relaxed, not stretched.
- After Rnd 39: The piece is about 12.75 in (32.4 cm) tall and still 7.5 in (19.1 cm) wide.
If your piece is too big: Go down one hook size, to 4.5 mm.
If your piece is too small: Go up one hook size, to 5.5 mm.
Knit stitch tends to pull in. If your ksc rounds measure less than 7.5 in (19.1 cm) wide flat, work just those rounds with a 5.5 mm hook.
Body
Join every round with a sl st to the first st. Start each round at the center back so that all joins and color changes line up under the strap. The ch 1 at the start of a round does not count as a stitch.
Bottom Opening and Base (Sage Green)
Foundation: With green, ch 30. Without twisting the chain, sl st to the first ch to form a ring.
Rnd 1: Ch 1, sc in each ch around, join. (30 sts)
Rnd 2: Ch 1, sc in next 2 sts, inc in next st; repeat from * around, join. (40 sts)
Rnd 3: Ch 1, sc in next 3 sts, inc in next st; repeat from * around, join. (50 sts)
Rnd 4: Ch 1, sc in next 4 sts, inc in next st; repeat from * around, join. (60 sts)
These four rounds form the rounded base. They cup around the opening instead of lying flat, which gives the bottom its soft dome.
Ribbed Bottom Band (Sage Green)
Rnds 5–10: Ch 1, ksc in each st around, join. (60 sts)
This makes a knit-look band about 1.25 in (3.2 cm) tall. From here the tube grows straight up with no more increases.
Lower Cream Stripe
Rnd 11: Change to cream. Ch 1, sc in BLO of each st around, join. (60 sts)
Rnds 12–13: Ch 1, sc in BLO of each st around, join. (60 sts)
Fasten off cream. Check the After Rnd 13 checkpoint now.
Lattice Mesh Body (Sage Green)
Rnd 14: Join green with a sl st in the center-back st. Ch 1, sc in the same st. Ch 5, skip next 3 sts, sc in next st; repeat from * 13 more times. Ch 2, skip the last 3 sts, dc in first sc. (15 sc, 15 ch-5 loops)
The ch 2 plus dc stands in for the last ch-5 loop. It also leaves your hook in the middle of that loop, ready for the next round.
Rnds 15–26: Ch 1, sc around the post of the dc just made. Ch 5, sc in next ch-5 sp; repeat from * 13 more times. Ch 2, dc in first sc. (15 loops)
Rnd 27: Ch 1, sc around the post of the dc just made. Ch 5, sc in next ch-5 sp; repeat from * 13 more times. Ch 5, sl st in first sc. (15 full ch-5 loops)
Each sc lands in the center of a loop from the round below, which builds the diamond lattice. The mesh is 14 rounds tall, about 7 in (17.8 cm). Fasten off green.
Upper Cream Stripe
Rnd 28 (conversion round): Join cream in the center-back ch-5 sp. Ch 1, work 4 sc in each ch-5 sp around, join. (15 sc, one per loop, + 45 extra sc, three more per loop = 60 sts)
Rnds 29–30: Ch 1, sc in BLO of each st around, join. (60 sts)
Keep cream attached. The rest of the body is cream.
Top Section and Drawstring Eyelets (Cream)
Rnds 31–34: Ch 1, ksc in each st around, join. (60 sts)
Rnd 35 (eyelet round): Ch 4 (counts as dc and ch 1), skip next st. Dc in next st, ch 1, skip next st; repeat from * 28 more times. Join with a sl st to the 3rd ch of the beginning ch-4. (30 dc + 30 ch-1 sps = 60 sts)
Rnd 36: Ch 1, sc in each dc and in each ch-1 sp around, join. (60 sts)
Rnds 37–39: Ch 1, ksc in each st around, join. (60 sts)
Do not fasten off. Check the After Rnd 39 checkpoint: 12.75 in (32.4 cm) tall and 7.5 in (19.1 cm) wide.
Border
The dispenser has two edges to finish: the ruffled top and the bottom opening. Because the body is a tube, each border round is counted around the full circumference rather than side by side.
Border gauge: The ruffle has 120 sts over the same 15 in (38.1 cm) as the body. That is 8 sts per inch (about 3.1 sts per cm), twice the body gauge, so the extra fabric has nowhere to go but into waves.
Top Ruffle (Cream)
Rnd 40 (increase round): Ch 1, 2 sc in each st around, join. (60 sts worked 1-per-existing-stitch + 60 extra = 120 sts)
Rnd 41: Ch 2 (does not count), hdc in each st around, join. (120 sts)
Rnd 42: Ch 1, sc in BLO of each st around, join. (120 sts)
Fasten off and weave in the end. The ruffle is about 0.75 in (1.9 cm) deep, which brings the total height to 13.5 in (34.3 cm).
Why the math works: Doubling the count in one round, from 60 to 120, makes a gentle, even ruffle. Every original stitch gets exactly 2 new ones, so the waves spread evenly around the top. The hdc round adds height so the frill shows above the drawstrings, and the BLO sc round gives the edge a neat ridge.
Bottom Opening Edge (Sage Green)
Hold the body upside down. Join green in any unused loop of the foundation chain. Sl st loosely in each of the 30 foundation ch loops around, join. (30 sl sts)
Fasten off. This firm edge keeps the opening from stretching as bags are pulled through, so it stays about 2.5 in (6.4 cm) across.
Strap (Sage Green)
Ch 7.
Row 1: Sc in 2nd ch from hook and in each ch across, turn. (6 sts)
Rows 2–26: Ch 1, sc in BLO of each st across, turn. (6 sts)
Row 27 (buttonhole): Ch 1, sc in BLO of next 2 sts, ch 2, skip next 2 sts, sc in BLO of last 2 sts, turn. (4 sc + 1 ch-2 sp)
Row 28: Ch 1, sc in BLO of next 2 sts, 2 sc in ch-2 sp, sc in BLO of last 2 sts, turn. (6 sts)
Rows 29–30: Ch 1, sc in BLO of each st across, turn. (6 sts)
Fasten off and leave a 12 in (30.5 cm) tail. The strap is 1.5 in (3.8 cm) wide and about 6.75 in (17.1 cm) long.
Sew the button to the front of the strap, centered on Row 14. Place Rows 1–7 against the outside of the center back, over Rnds 31–38. Use the tail to whipstitch all four edges of this section to the body.
To hang the dispenser, pass the free end over a hook or rail, fold it down in front, and fasten the buttonhole over the button. This makes a closed loop about 1.75 in (4.4 cm) tall, and its top sits about 2.5 in (6.4 cm) above the ruffle.
Drawstrings (Cream, Make 2)
Ch 130.
Row 1: Sl st in the back bump of the 2nd ch from hook and in each ch across. (129 sl sts)
Fasten off. Each cord is about 29 in (73.7 cm) long.
Bobble ends: Join cream at one end of the cord. Ch 3, cl in 3rd ch from hook, sl st to the cord end and fasten off. Repeat at the other end, so each cord has 2 bobbles.
Threading: Weave the first cord over and under through all 30 ch-1 sps of Rnd 35. Start and finish at the left side so both ends come out of the same space. Weave the second cord the same way, but start and finish at the right side. Each cord leaves two tails of about 7 in (17.8 cm). Pull both pairs at once to close the top, and loosen them to load bags.
Final Blocking
- Weave in all remaining ends along the center back.
- Soak the body in cool water, then gently squeeze it out. Do not wring it.
- Roll it in a towel to remove extra water.
- Stuff the tube lightly with a rolled towel or a few plastic bags so it is 7.5 in (19.1 cm) wide flat.
- Shape the mesh so the diamonds are even, aiming for a total height of 13.5 in (34.3 cm).
- Fluff the ruffle with your fingers so the waves spread evenly.
- Lay the strap flat beside the body and straighten it.
- Let everything dry completely before you hang it.
Final Quality-Control Checklist
- The bottom opening is about 2.5 in (6.4 cm) across, with a firm sl st edge.
- The body is 7.5 in (19.1 cm) wide flat from base to top.
- The mesh has 15 diamonds around and is 14 rounds tall.
- Each cream stripe has 3 rounds with clear ridges.
- The eyelet round has 30 open spaces.
- The ruffle has 120 sts and waves evenly.
- The total height is about 13.5 in (34.3 cm) before stuffing.
- The strap is sewn down on all four edges of its attached section and buttons securely.
- Each drawstring has 2 bobble ends and slides freely.
- All ends are woven in and can’t be seen from the front.
Troubleshooting
The base lies flat instead of cupping. Your increases are too loose. Work Rnds 2–4 with a 4.5 mm hook.
The ksc bands pull in. This is common. Work those rounds with a 5.5 mm hook and keep each loop relaxed.
The mesh slants to one side. Make sure each sc goes into the center of a loop, not into a chain. A slight slant is normal in rounds, and blocking straightens it.
The diamonds are uneven. Count your chains. Each loop needs exactly 5.
Rnd 28 is wavy or tight. Check that you have 4 sc in every loop, for 60 sts in total.
The ruffle flips outward too much. Work Rnd 41 in sc instead of hdc.
Bags fall out of the bottom. Work a second sl st round around the opening to make it smaller.
The strap stretches. Rework it with a 4.5 mm hook.
Care
Hand wash in cool water with mild soap, then reshape and dry flat. Do not tumble dry, because cotton mesh can shrink and lose its shape.
Final Notes
Everything in this dispenser grows from one number: 60 stitches around. The 30-chain opening increases to 60 sts, which gives 15 in (38.1 cm) around and 7.5 in (19.1 cm) wide flat. The mesh turns those 60 sts into 15 loops of 4 sts each, and Rnd 28 converts them back with 4 sc per loop. The ruffle then doubles 60 to 120.
Check your gauge at the base. As you work up, confirm heights of 2.75 in (7.0 cm), 9.75 in (24.8 cm) and 12.75 in (32.4 cm). The ruffle brings the total to 13.5 in (34.3 cm).
Happy crocheting!