

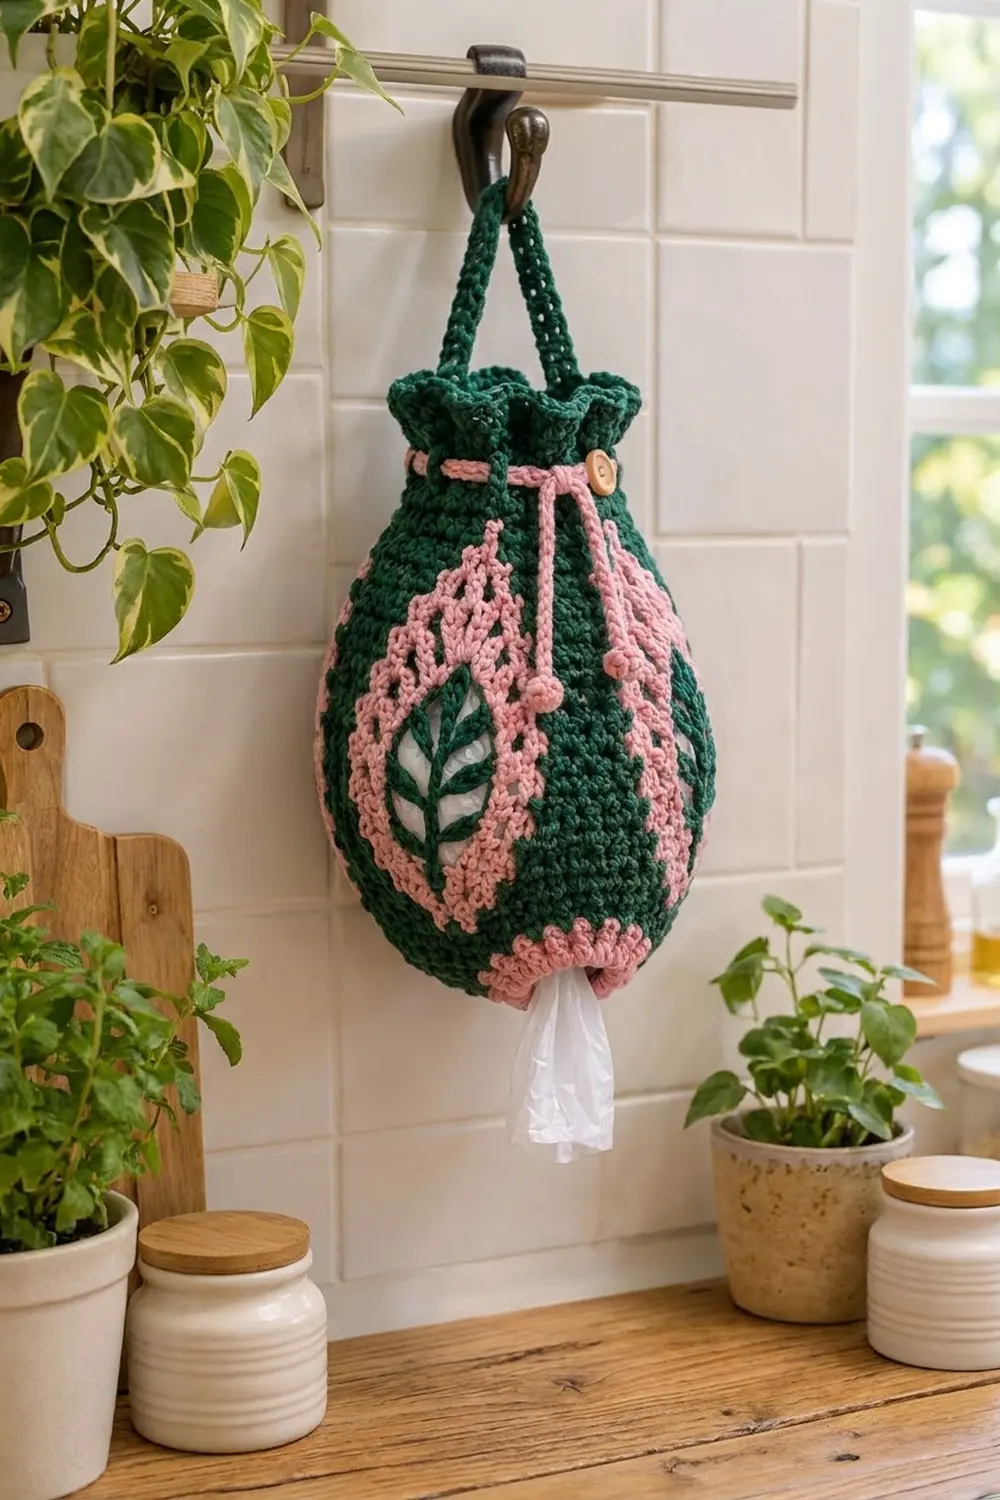
This pear-shaped bag dispenser keeps plastic grocery bags tidy and makes the kitchen wall look a little nicer. It is worked in dark forest green and dusty pink, with green wedges, pink lacy columns, and open windows that each hold a small green leaf sprig.
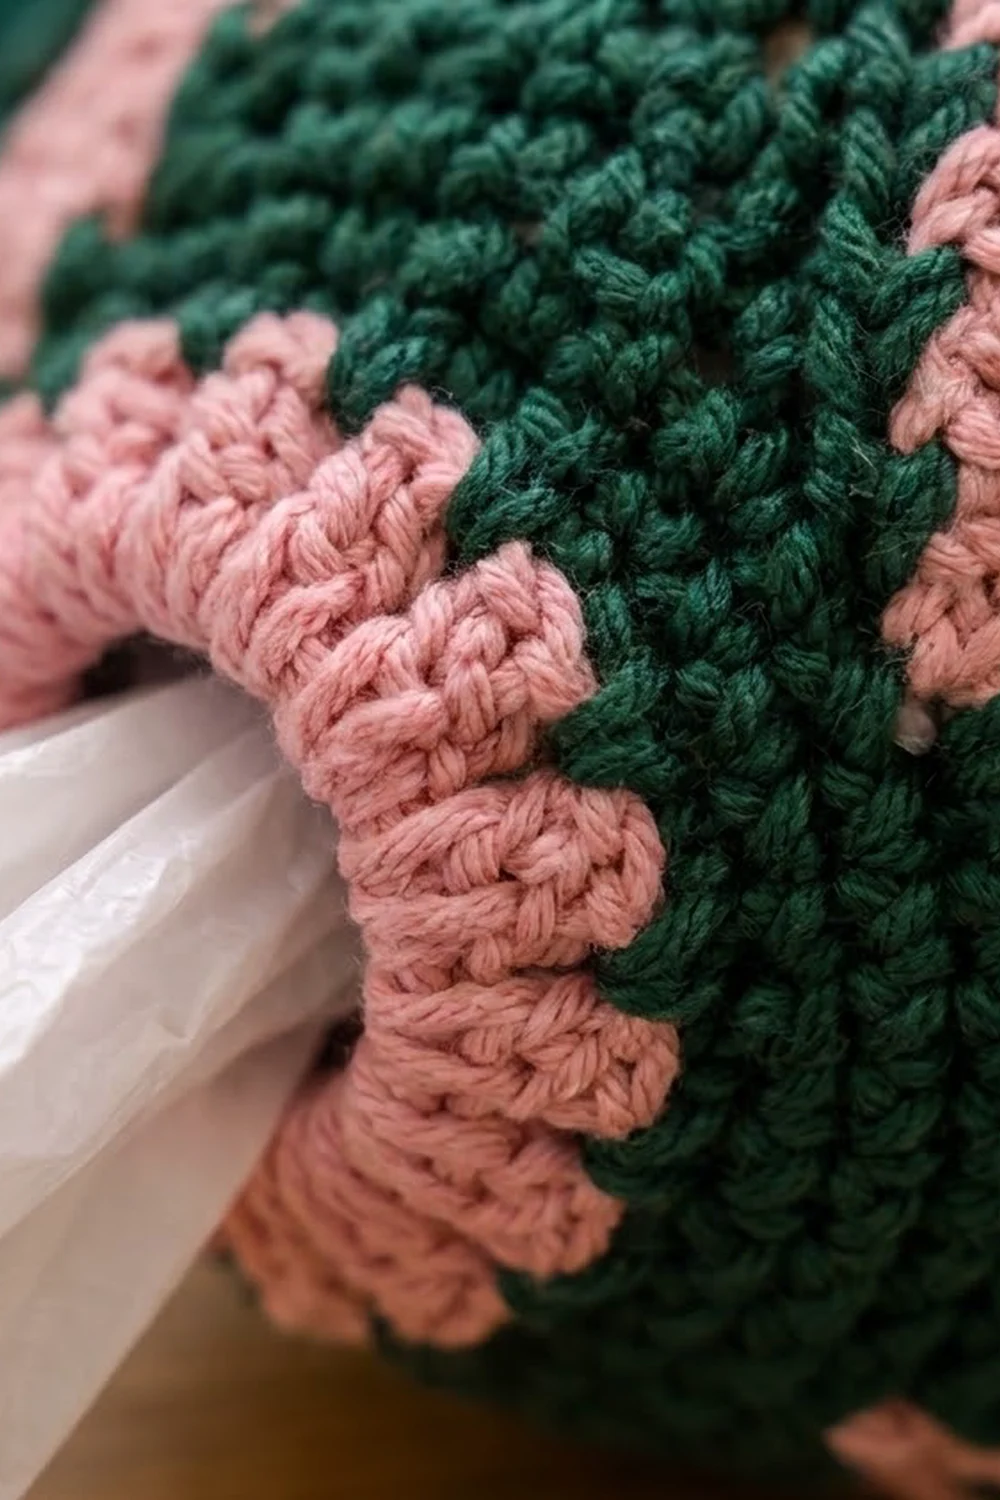
The style is cottage kitchen: a ruffled collar at the top, a pink drawstring with ball-tipped ends, two wooden buttons, and a pink scalloped ruffle around the bottom opening where you pull the bags out.
This pattern uses US crochet terms. The finished dispenser is about 11.75 in (29.8 cm) tall without the handle and about 7.5 in (19.1 cm) across at its fullest when filled. The fullest round measures 24 in (61.0 cm) around.
You work the whole pouch as one piece, bottom-up, in joined rounds. You start at the dispensing hole, increase a solid green cone, and then work four panel repeats using tapestry crochet. After that you decrease to the neck, work an eyelet round, and finish with the collar and the bottom ruffle. The handle, drawstring, ball ends, and leaf sprigs are small extras that you sew on.
Finished Size and Construction
- Finished size: about 11.75 in (29.8 cm) tall, plus a handle loop of about 3.5 in (8.9 cm)
- Width: 24 in (61.0 cm) around at the fullest point, about 7.5 in (19.1 cm) across when filled
- Skill level: Intermediate (tapestry color changes, simple mesh)
- Terminology: US
- Yarn weight: Worsted (#4), cotton or cotton blend
- Hook: 4.5 mm (US 7)
- Number of pieces: 1 main body, plus a sewn-on handle, drawstring, 2 ball ends, and 4 leaf sprigs
- Layout: worked in the round from the bottom up; 4 panel repeats around the body
- Piece size before edgings: about 10 in (25.4 cm) tall, 24 in (61.0 cm) around at the fullest
- Edging depth: top collar about 1.25 in (3.2 cm), bottom ruffle about 0.5 in (1.3 cm)
Materials
Use a smooth, firm worsted cotton. Cotton holds the pear shape well and won’t stretch out under the weight of the bags. Avoid fuzzy yarns, because they hide the mesh windows. These amounts assume about 85 m (93 yd) per 50 g:
- Color A, dark forest green: 120 g, about 204 m (223 yd)
- Color B, dusty pink: 80 g, about 136 m (149 yd)
Both amounts include a margin of about 20% for gauge differences and for the strand you carry during tapestry crochet.
Tools:
– 4.5 mm (US 7) crochet hook
– 2 wooden buttons, 1 in (2.5 cm)
– Stitch markers (at least 5)
– Tapestry needle
– Scissors
– A few plastic bags or a small towel for blocking and testing
Abbreviations (US Terms)
- ch – chain
- sl st – slip stitch
- sc – single crochet
- hdc – half double crochet
- dc – double crochet
- sc2tog – single crochet 2 together
- sc3tog – single crochet 3 together
- sk – skip
- sp – space
- st(s) – stitch(es)
- inc – 2 sc in the same stitch
Pink block (17 sts): [sc, ch 1, sk 1, sc, ch 1, sk 1, sc] (5-st lacy column), [ch 3, sk 3, sc, ch 3, sk 3] (7-st window), [sc, ch 1, sk 1, sc, ch 1, sk 1, sc] (5-st lacy column). The block has 7 sc and 10 chains. Every chain counts as 1 stitch.
Tapestry color change: Work the last yarn over of the stitch before the new color with the new color. Lay the unused strand along the top of the round and work your sc over it.
Gauge and Checkpoints
Gauge: 16 sc and 18 rounds = 4 in (10.2 cm) in sc worked in the round.
Use the base cone (Rounds 1–14) as your gauge test. It is plain green sc, so it’s quick to measure, and you keep working from it if it’s right.
Checkpoints:
– After Round 1: 6 in (15.2 cm) around
– After Round 14: 24 in (61.0 cm) around, about 3.1 in (7.9 cm) tall
– After Round 38: about 8.4 in (21.3 cm) tall
– After Round 43: 12 in (30.5 cm) around, about 9.5 in (24.1 cm) tall
– After Round 45: about 10 in (25.4 cm) tall
If Round 14 measures more than 24.5 in (62.2 cm) around, go down to a 4 mm (US G-6) hook. If it measures less than 23.5 in (59.7 cm), go up to a 5 mm (US H-8) hook. A firm fabric matters here, so lean toward the smaller hook if you’re unsure.
Main Pattern: Pouch Body
Join every round with a sl st to the first st. Ch 1 at the start of each sc round; it does not count as a stitch. Place a marker in the first st of each round.
Base Cone (Color A)
Round 1: Ch 24 and join with a sl st to the first ch, taking care not to twist. Ch 1, then sc in each ch. (24)
Round 2: (Sc 2, inc) 8 times. (32)
Round 3: Sc in each st around. (32)
Round 4: (Sc 3, inc) 8 times. (40)
Round 5: (Sc 4, inc) 8 times. (48)
Round 6: Sc around. (48)
Round 7: (Sc 5, inc) 8 times. (56)
Round 8: (Sc 6, inc) 8 times. (64)
Round 9: Sc around. (64)
Round 10: (Sc 7, inc) 8 times. (72)
Round 11: (Sc 8, inc) 8 times. (80)
Round 12: (Sc 9, inc) 8 times. (88)
Round 13: (Sc 10, inc) 8 times. (96)
Round 14: Sc around. For the last 10 sts, lay Color B along the top and work over it to anchor it. (96)
Checkpoint: 24 in (61.0 cm) around.
Panel Section (Colors A and B)
Carry the unused color through every sc. When you work a chain space, let the carried strand float loosely on the inside. A float never crosses more than 3 sts. Keep the floats snug against the inside wall so they don’t catch the bags.
Round 15 (setup): With A, sc in next 7 sts; with B, work the pink block over the next 17 sts. Repeat from * 3 more times. (4 green panels of 7 + 4 pink blocks of 17 = 96)
Rounds 16–26: With A, sc in each green sc; with B, sc in each sc, ch 1 over each ch-1 sp, and ch 3 over each ch-3 sp. Repeat from * around. (96)
The stacked chains make lacy ladders in the pink columns and two open 3-st holes in each window, one on each side of a pink center spine.
Round 27 (decrease): With A, sc2tog, sc 3, sc2tog; work the pink block as set. Repeat around. (4 × [5 + 17] = 88)
Rounds 28–30: Work even as set. (88)
Round 31 (decrease): With A, sc2tog, sc 1, sc2tog; work the pink block as set. Repeat around. (4 × [3 + 17] = 80)
Rounds 32–34: Work even. (80)
Round 35 (decrease): With A, sc3tog; work the pink block as set. Repeat around. (4 × [1 + 17] = 72)
Rounds 36–38: Work even. (72) Fasten off B.
The green panels now taper from 7 sts to a single st, which gives the wedge shape. Checkpoint: about 8.4 in (21.3 cm) tall.
Neck (Color A)
Round 39 (conversion): Sc in each sc, 1 sc in each ch-1 sp, and 3 sc in each ch-3 sp. Per repeat: 1 + 7 + 4 + 6 = 18. That is 72 sts worked one per existing stitch (counting chains) + 0 added = 72.
Round 40: (Sc 4, sc2tog) 12 times. (60)
Round 41: Sc around. (60)
Round 42: (Sc 3, sc2tog) 12 times. (48)
Round 43: Sc around. (48)
Checkpoint: 12 in (30.5 cm) around, about 9.5 in (24.1 cm) tall.
Round 44 (eyelets): Ch 3 (counts as dc), ch 1, sk 1, dc in next st, ch 1, sk 1. Repeat from * 22 more times. Join to the top of the ch-3. (24 dc + 24 ch-1 sps = 48)
Round 45: Ch 1, then sc in each dc and in each ch-1 sp. (48)
Leaf Sprigs (make 4, Color A)
Ch 19. Sl st in the 2nd ch from the hook.
Leaf: Ch 4, sc in 2nd ch from hook, hdc in next ch, sc in next ch, sl st in the same stem ch.
Work 1 leaf at the tip. Sl st in next 3 stem ch, then work 2 leaves in the same stem ch (a pair). Repeat from * 3 more times. Sl st in the last 5 ch. (9 leaves; sprig about 4.5 in / 11.4 cm long)
Center each sprig vertically over a window’s pink center spine, with the tip pointing up. Sew it down along the stem and at each leaf tip.
Handle (Color A)
Ch 41. Sc in the 2nd ch from the hook and in each ch across. (40) Ch 1, turn, and sc across. (40) The strap is about 10 in (25.4 cm) long and 0.5 in (1.3 cm) wide.
Sew the ends to the inside of Round 45, 24 sts apart, at the sides of the pouch.
Drawstring and Ball Ends (Color B)
Cord: Ch 121. Sl st in the back bump of the 2nd ch and of each ch across. (120 sl sts, about 30 in / 76.2 cm)
Balls (make 2): Make a magic ring and work 6 sc into it. (6) Next round: 2 sc in each st. (12) Next round: sc around. (12) Next round: sc2tog 6 times. (6) Stuff with pink scraps, close, and sew one ball to each cord end.
Starting at center front, weave the cord in and out through all 24 eyelets so both ends come out at center front. Tie a loose knot. Each tail hangs about 7 in (17.8 cm).
Sew one button to each side of center front on Round 44, 6 sts from center, so the buttons sit 12 sts (3 in / 7.6 cm) apart.
Edgings: Top Collar and Bottom Ruffle
Edging gauge: 1 dc round = about 0.4 in (1.0 cm). 1 scallop round = about 0.45 in (1.1 cm).
Top Collar (Color A, worked into Round 45)
Round C1: Ch 3 (counts as dc), 2 dc in next st, dc in next st, 2 dc in next st. Repeat from * 22 more times. That is 48 sts worked one per stitch + 24 added = 72.
Round C2: Ch 3 (counts as dc), then dc in each st. (72)
Round C3: Sl st in next st, sk 1, 5 dc in next st, sk 1. Repeat from * around. (18 scallops)
Why the math works: Each scallop uses 4 sts, and 72 ÷ 4 = 18 with nothing left over, so the scallops meet evenly at the join. The 1.5× increase in C1 makes the collar flare.
Bottom Ruffle (Color B, worked into the foundation chain)
Round R1: Join B in the free loop of any ch from Round 1. Ch 1, 2 sc in each ch. That is 24 sts worked one per chain + 24 added = 48.
Round R2: Sc in next st, sk 1, 5 dc in next st, sk 1. Repeat from * around. (12 scallops)
Here 48 ÷ 4 = 12, so the ruffle closes evenly. Because the stitch count doubles, the ruffle stands out around the hole without making it any smaller.
Final Blocking
- Weave in all the ends on the inside. Run them along the floats so they can’t catch the bags.
- Lightly mist the whole pouch with water.
- Fill it firmly with plastic bags or a rolled towel to bring out the full pear shape.
- Line up the green wedges so they run straight from bottom to top.
- Fan out the collar scallops and the bottom ruffle with your fingers.
- Press each leaf sprig flat over its window.
- Hang the pouch by the handle and let it dry completely.
Final Quality-Control Checklist
- [ ] Round 14 measures 24 in (61.0 cm) around
- [ ] All four green wedges taper 7 → 5 → 3 → 1
- [ ] Each pink block has 17 sts, including 2 open 3-st holes per round
- [ ] Round 43 measures 12 in (30.5 cm) around
- [ ] 24 eyelets, with the cord passing through every one
- [ ] 18 collar scallops and 12 ruffle scallops
- [ ] All 4 sprigs are centered, with the tips up
- [ ] Handle ends are 24 sts apart and securely sewn
- [ ] Buttons are 3 in (7.6 cm) apart at center front
- [ ] No loose floats on the inside
Troubleshooting
Green wedges drift sideways: Your rounds are spiraling. Join each round with a sl st, and start each round in the first green st.
Pink shows through the green panels: Hold the carried strand flat along the top of the round and keep it snug.
Windows pucker: The ch-3 bars are too tight. Chain a little more loosely, or use a hook 0.5 mm larger for the chains only.
Bags fall out on their own: Pull the bottom ruffle firmer during blocking, or work Round R1 as 1 sc per ch (24 sts) and R2 as 6 scallops.
Collar flops over: Work Round C2 with a hook 0.5 mm smaller.
Ball ends unravel: Close the ring tightly and knot the tail inside before sewing.
Care
Hand wash in cool water, roll in a towel to remove water, and dry flat or hanging while stuffed so it keeps its shape. Avoid the dryer, because cotton may shrink.
Final Notes
Measure in this order: the base cone sets the 24 in (61.0 cm) fullest round, the four panel repeats keep that width for 12 rounds, the tapering wedges take it down to 72 sts, and the neck decreases it to 48 sts, which is 12 in (30.5 cm) around. From there, the 72-st collar and the 48-st ruffle divide evenly into scallops of 4 sts. If your checkpoints match at Rounds 14, 38, and 43, the finished dispenser will be about 11.75 in (29.8 cm) tall and ready for the hook.
Happy crocheting!