
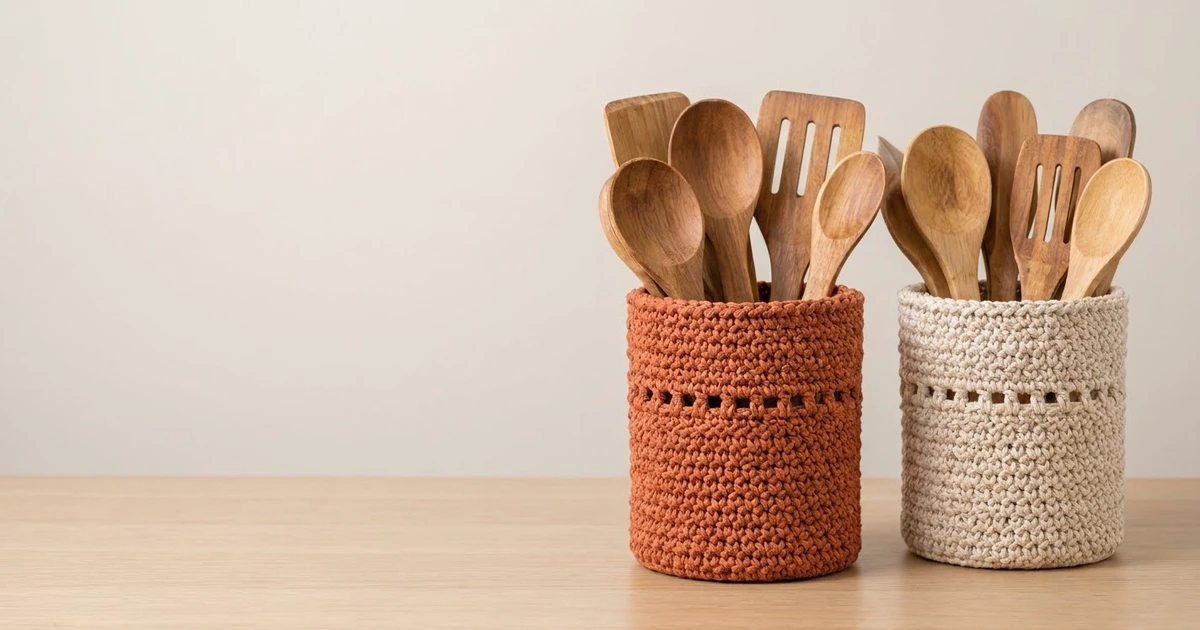
This utensil holder is a simple, sturdy cylinder made in one piece. It has a flat round base, straight walls in dense single crochet, and one round of small square eyelets just below the middle. The eyelets break up the solid texture without making the walls weak.
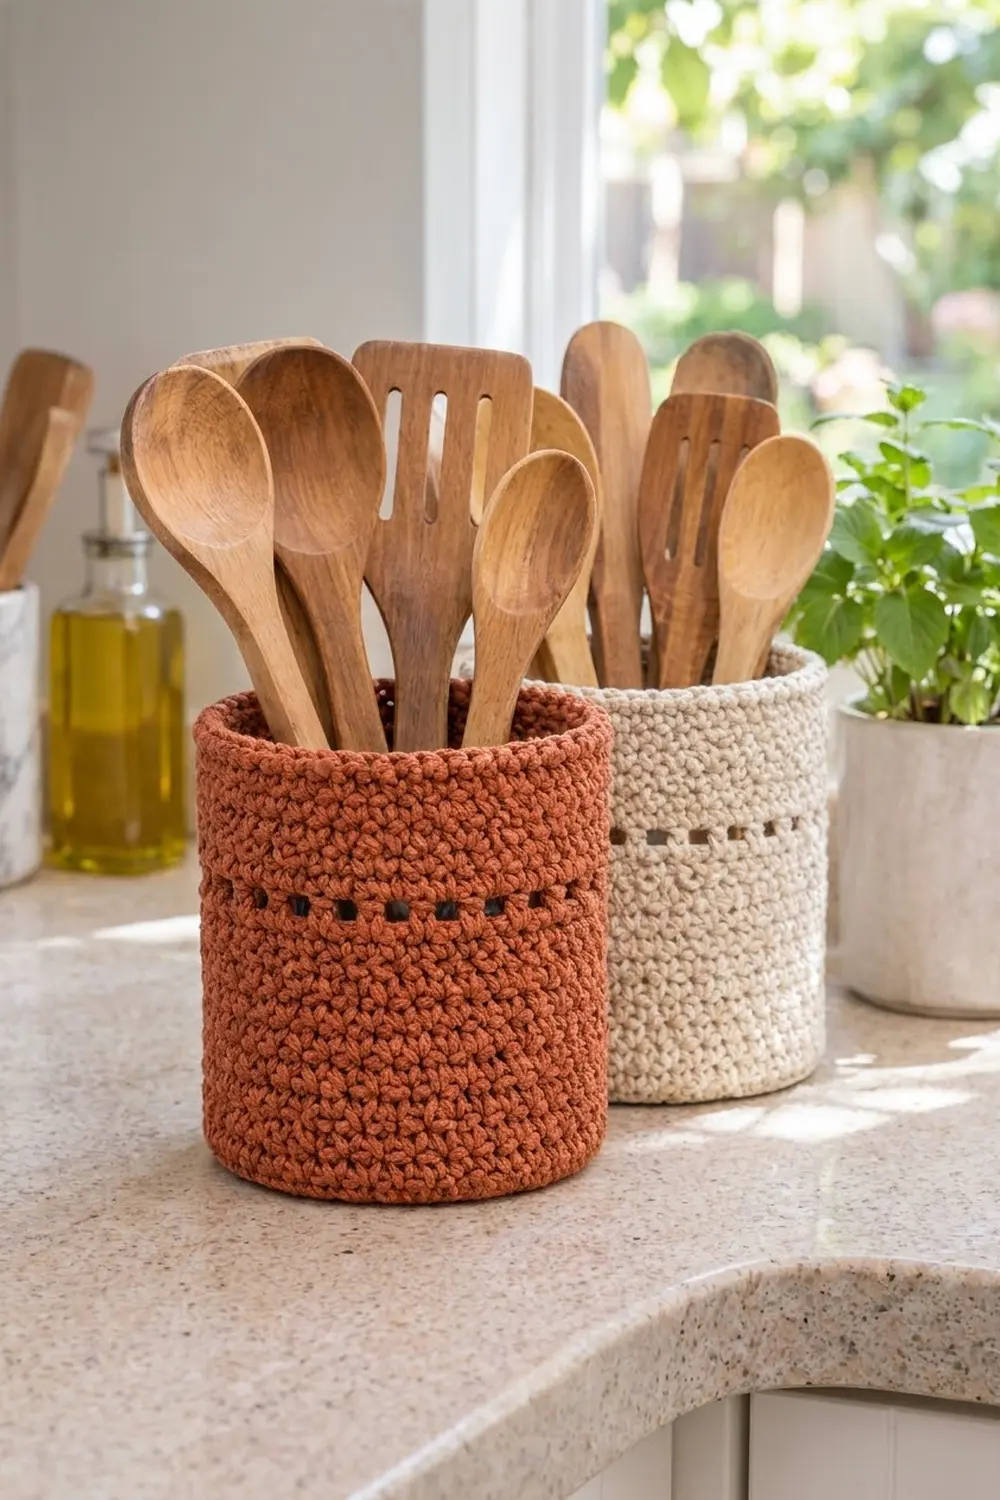
The sample is worked in a warm terracotta, a rusty orange-brown that looks good with wooden spoons, natural wood countertops, and green plants. The same pattern works well in cream or oatmeal, and two holders in different colors look good side by side on a counter.
All instructions use US crochet terms. The finished holder is about 5.75 in (14.6 cm) across and 6.5 in (16.5 cm) tall. That size holds a full set of wooden spoons, spatulas, and turners.
You start with a flat circle worked in joined rounds. One back-loop-only round turns the edge up into the wall, and the wall is worked straight up with no increases. Halfway up, one eyelet round adds the lace band. Two finishing rounds make a neat, firm rim. There is no sewing, no assembly, and only two ends to weave in.
Finished Size and Construction
- Finished size: about 5.75 in (14.6 cm) diameter x 6.5 in (16.5 cm) tall
- Skill level: Easy
- Terminology: US crochet terms
- Yarn weight: Bulky (#5) cotton or cotton blend
- Hook: 6.0 mm (US J-10)
- Number of pieces: 1 (no joining)
- Layout: Single seamless cylinder with a closed, flat base
- Piece size: base 5.75 in (14.6 cm) across, wall circumference 18 in (45.7 cm)
- Size before rim: about 6 in (15.2 cm) tall after Round 28
- Rim depth: 2 rounds, about 0.5 in (1.3 cm)
Materials
Choose a firm, smooth bulky cotton or cotton-blend yarn. Cotton holds its shape, can be washed, and shows the stitches clearly. Soft acrylic will work, but the walls will be less stiff. If you only have worsted cotton, hold two strands together and check gauge. Avoid fuzzy or brushed yarns, because they hide the eyelets and make the stitches hard to count.
- Terracotta (main color): about 120 g, about 120 m (131 yd)
- Optional second holder in cream: another 120 g, about 120 m (131 yd)
Quantities include a margin of about 20% for gauge differences and swatching. The holder alone uses close to 100 g.
Tools:
- 6.0 mm (US J-10) crochet hook
- 2 stitch markers
- Tapestry needle
- Scissors
- Measuring tape
- Spray bottle for blocking
- Optional: a straight-sided jar or can about 5.5 in (14.0 cm) across to use as a blocking form
Abbreviations (US Terms)
- ch – chain
- sc – single crochet
- sl st – slip stitch
- inc – 2 sc in the same stitch
- sk – skip
- sp – space
- st(s) – stitch(es)
- BLO – back loop only
- rep – repeat
- rnd(s) – round(s)
Special technique: Magic ring. Wrap the yarn around two fingers to make a loop. Insert the hook, pull up a loop, and ch 1. Work the stitches of Round 1 over the ring and the tail, then pull the tail tight to close the center.
Joined rounds: Every round begins with ch 1, which does not count as a stitch. Work the first sc into the same stitch as the join. End every round with a sl st into the first sc. Put a marker in the first sc of each round so the join is easy to find.
Gauge and Checkpoints
Gauge: 12 sc and 13 rnds = 4 in (10.2 cm) in sc worked in joined rounds.
Gauge matters here. If your stitches are loose, the holder will be floppy. If your gauge is off, the holder will not be the size listed. The base is a quick test piece. Work Rounds 1–9, measure, and change your hook before you start the walls.
To measure, lay the base on a hard, flat surface without stretching it. Measure straight across through the center, from edge to edge, in two directions, and average the two numbers.
Checkpoints:
- After Round 3 (18 sts): about 2 in (5.1 cm) across
- After Round 6 (36 sts): about 3.75 in (9.5 cm) across
- After Round 9 (54 sts): about 5.75 in (14.6 cm) across, lying flat
- After Round 17: walls about 2.5 in (6.4 cm) tall, measured from the base edge
- After Round 28: about 6 in (15.2 cm) tall
- After Round 30: about 6.5 in (16.5 cm) tall
If the base is too big: go down to a 5.5 mm (US I-9) hook. If the base is too small: go up to a 6.5 mm (US K-10.5) hook. Keep the stitch counts exactly as written. The wall size depends on the base having 54 sts.
Pattern
Base
Make a magic ring.
Rnd 1: Ch 1, 6 sc in ring, sl st to first sc to join. (6 sts)
Rnd 2: Ch 1, inc in each st around, join. (12 sts)
Rnd 3: Ch 1, sc in next st, inc in next st rep 6 times, join. (18 sts)
Rnd 4: Ch 1, sc in next 2 sts, inc in next st rep 6 times, join. (24 sts)
Rnd 5: Ch 1, sc in next 3 sts, inc in next st rep 6 times, join. (30 sts)
Rnd 6: Ch 1, sc in next 4 sts, inc in next st rep 6 times, join. (36 sts)
Rnd 7: Ch 1, sc in next 5 sts, inc in next st rep 6 times, join. (42 sts)
Rnd 8: Ch 1, sc in next 6 sts, inc in next st rep 6 times, join. (48 sts)
Rnd 9: Ch 1, sc in next 7 sts, inc in next st rep 6 times, join. (54 sts)
Lay the base flat and measure it. It should be about 5.75 in (14.6 cm) across, with no cupping or ruffling. If it looks a little like a hexagon, that is normal. It will look rounder after the walls are added and the piece is blocked. If you want, you can stagger the increases. On even rounds, work half of the plain stitches before the first increase.
Turning Ridge
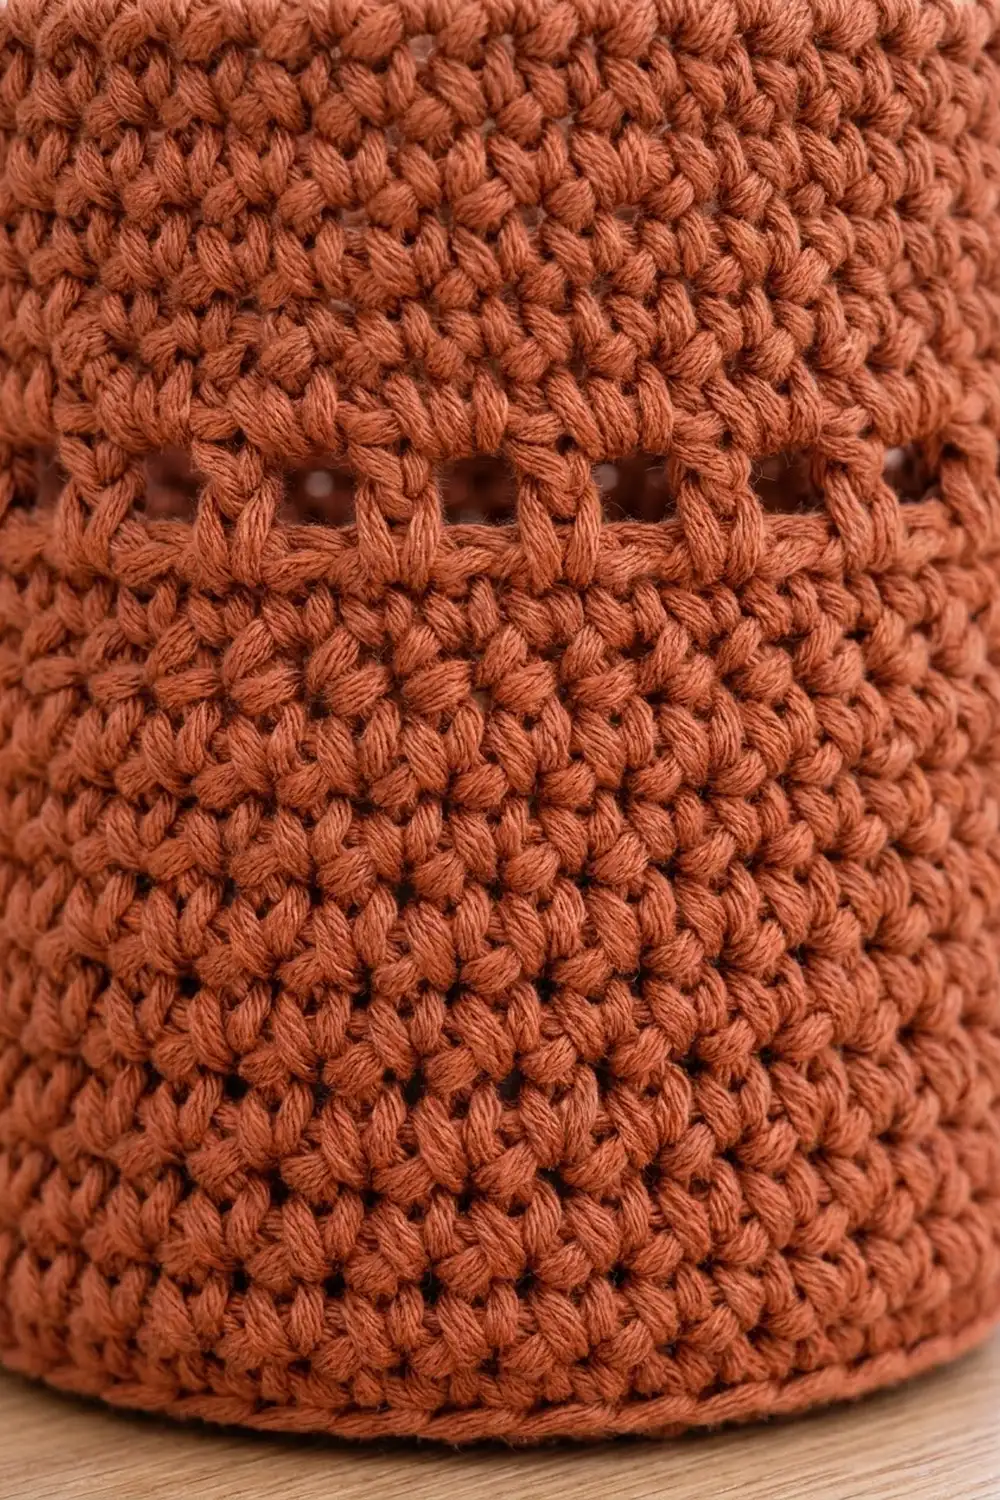
Rnd 10: Ch 1, sc in BLO of each st around, join. (54 sts)
The front loops you leave behind form a ridge around the outer edge of the base. This ridge folds the fabric up at a sharp angle, which gives the holder a crisp bottom edge and a flat base. From here, work through both loops again.
Lower Wall
Rnds 11–17: Ch 1, sc in each st around, join. (54 sts each round)
Check after Round 17. The wall should rise straight up from the base, and it should be about 2.5 in (6.4 cm) tall measured from the ridge. If the wall flares out, your wall stitches are looser than your base stitches. Tighten up a little, or go down half a hook size for the walls only.
Eyelet Round
Rnd 18: Ch 1, sc in first st, ch 1, sk next st, sc in next st, ch 1, sk next st rep 26 more times, join to first sc. (27 sc + 27 ch-1 sps = 54 sts in total)
This makes 27 small square holes evenly spaced around the holder. Their centers sit about 2.75 in (7.0 cm) above the base. Keep each ch 1 the same size as a normal sc. If the chains are tight, the eyelets close up. If they are loose, the band will flare.
Rnd 19 (conversion round): Ch 1, sc in first sc, sc in next ch-1 sp, sc in next sc, sc in next ch-1 sp rep around, join. (27 sc worked into sc + 27 sc worked into ch-1 sps = 54 sts)
Work into the ch-1 space, not into the chain itself. This keeps the eyelets open and square.
Upper Wall
Rnds 20–28: Ch 1, sc in each st around, join. (54 sts each round)
Checkpoint: The holder should be about 6 in (15.2 cm) tall and 18 in (45.7 cm) around. Count the last round. It must have exactly 54 sts before you start the rim.
Top Rim
The rim works like a border on this piece. It does not get any wider. Its job is to firm up and finish the top edge so it stays round when you take tools in and out.
Rim gauge: same as the body, 12 sts = 4 in (10.2 cm). The slip stitch round should be firm but not tight.
Rnd 29: Ch 1, sc in each st around, join. (54 sts)
Rnd 30: Ch 1, sl st in each st around, keeping the same tension as your sc. Do not join with an extra sl st. Fasten off and leave a 6 in (15.2 cm) tail. (54 sl sts)
To hide the join, use the tapestry needle to bring the tail under both loops of the first sl st, then back down through the last sl st. This makes an invisible join.
Why the math works: The base ends with 54 sts. Every wall round, the eyelet round, and both rim rounds also have exactly 54 sts. Because the count never changes after Round 9, the wall stays the same width as the base. It will not flare or pull in. The eyelet round uses 27 pairs of (sc, ch 1), which fits 54 evenly with no leftover stitches, so the holes stay evenly spaced all the way around and match up at the seam.
Final Blocking
- Weave in all ends on the inside of the holder. Weave each end in at least 2 in (5.1 cm), then go back the other way for a short distance.
- Spray the holder with water until it is damp all over. Do not soak it.
- Slide it over a straight-sided jar or can about 5.5 in (14.0 cm) across. If you do not have one, stuff it firmly with a rolled towel.
- Press the base flat on the table and pinch the BLO ridge into a clean edge.
- Line up the eyelet band so it is level all the way around. Gently open each hole with a fingertip.
- Measure the holder: 6.5 in (16.5 cm) tall and 5.75 in (14.6 cm) across.
- Let it dry completely on the form, usually for 24 hours.
Final Quality-Control Checklist
- Base is flat and about 5.75 in (14.6 cm) across
- Base edge has a clear ridge from Round 10
- Walls are straight, with no flare or taper
- Every round has 54 sts
- 27 eyelets, evenly spaced and the same size
- Eyelet band is level, about 2.75 in (7.0 cm) up
- Height is about 6.5 in (16.5 cm)
- Rim is smooth, with an invisible join
- All ends are hidden inside
Troubleshooting
Base cups like a bowl: Your increase stitches are too tight, or you skipped an increase. Count each round. A slightly larger hook for the base will help.
Base ruffles: You have too many stitches or your tension is loose. Check the counts and go down half a hook size.
Walls flare out: Your wall stitches are looser than your base stitches. Tighten your tension or use a 5.5 mm hook for Rounds 11–30.
Walls pull in: Your tension tightened as you went. Loosen up, or check that you did not miss a stitch at the join.
Seam slants: This is normal in joined rounds. Always work the first sc into the same stitch as the join, and turn the seam to the back.
Eyelets look uneven: Make every ch 1 the same size, and in Round 19 work into the space, not the chain.
Holder is floppy: Your gauge is too loose. Remake it with a smaller hook, or hold a thinner yarn double.
Care
Hand wash in cool water with mild soap, press out the water in a towel, and reshape it over a jar to dry. Do not tumble dry, because the walls may lose their shape.
Final Notes
The measurement chain is simple: gauge of 12 sts = 4 in (10.2 cm), a 54-stitch base 5.75 in (14.6 cm) across, a turning ridge, straight walls of 54 sts, an eyelet round at about 2.75 in (7.0 cm), and a 2-round rim that brings the height to 6.5 in (16.5 cm). Check your base before you start the walls, keep the count at 54 in every round, and the holder will turn out right. Make a second one in cream to go with it.
Happy crocheting!