

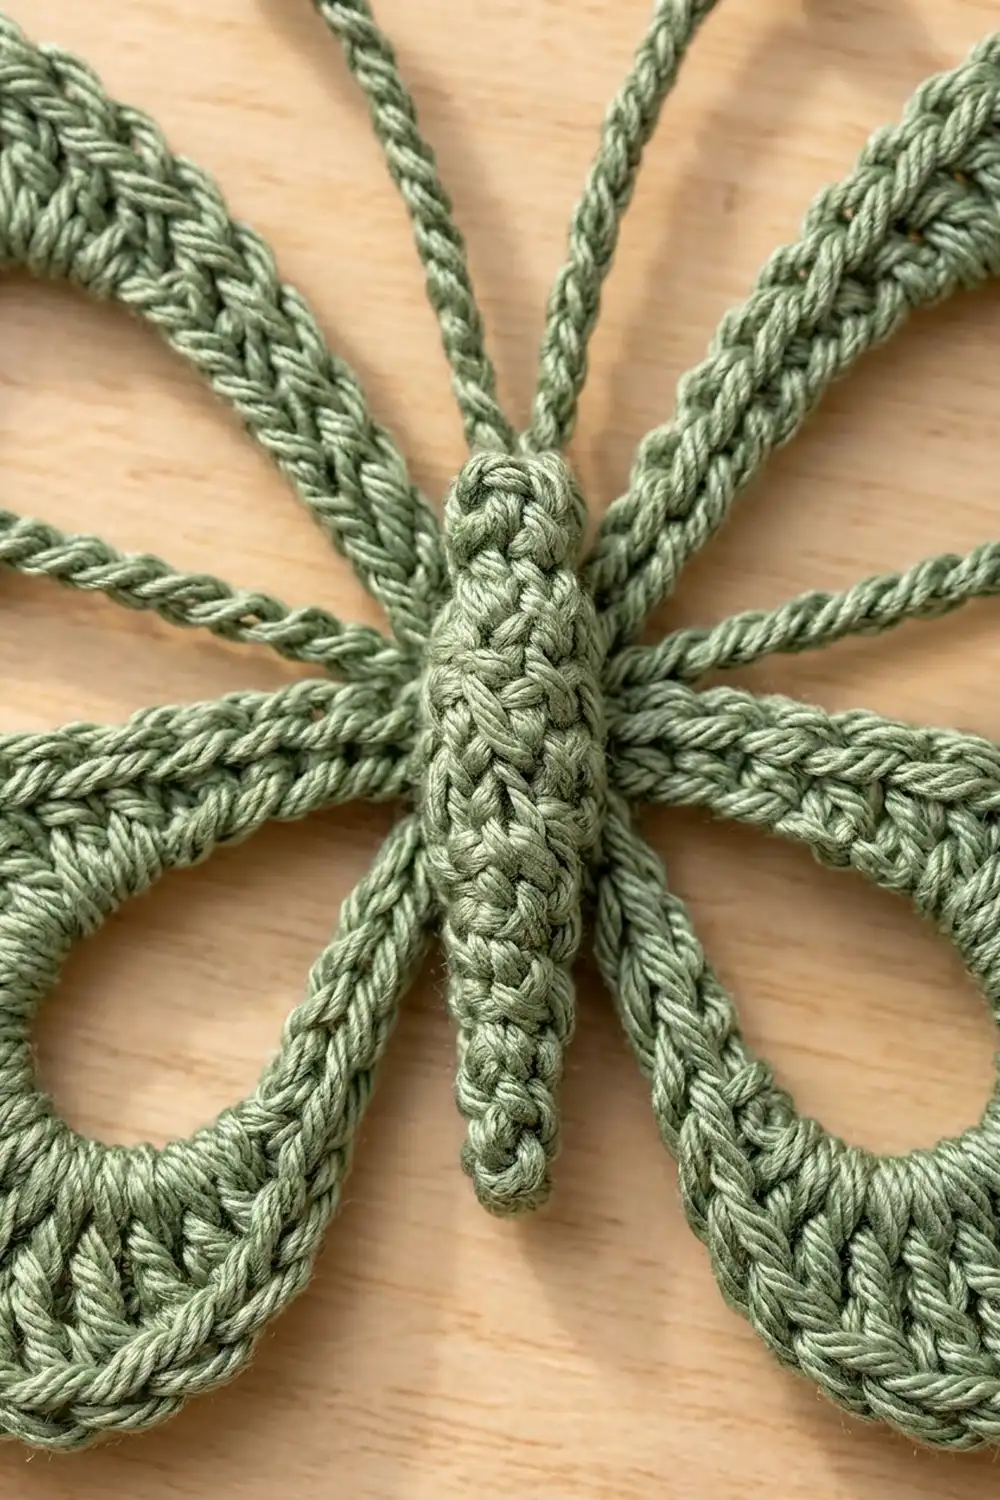
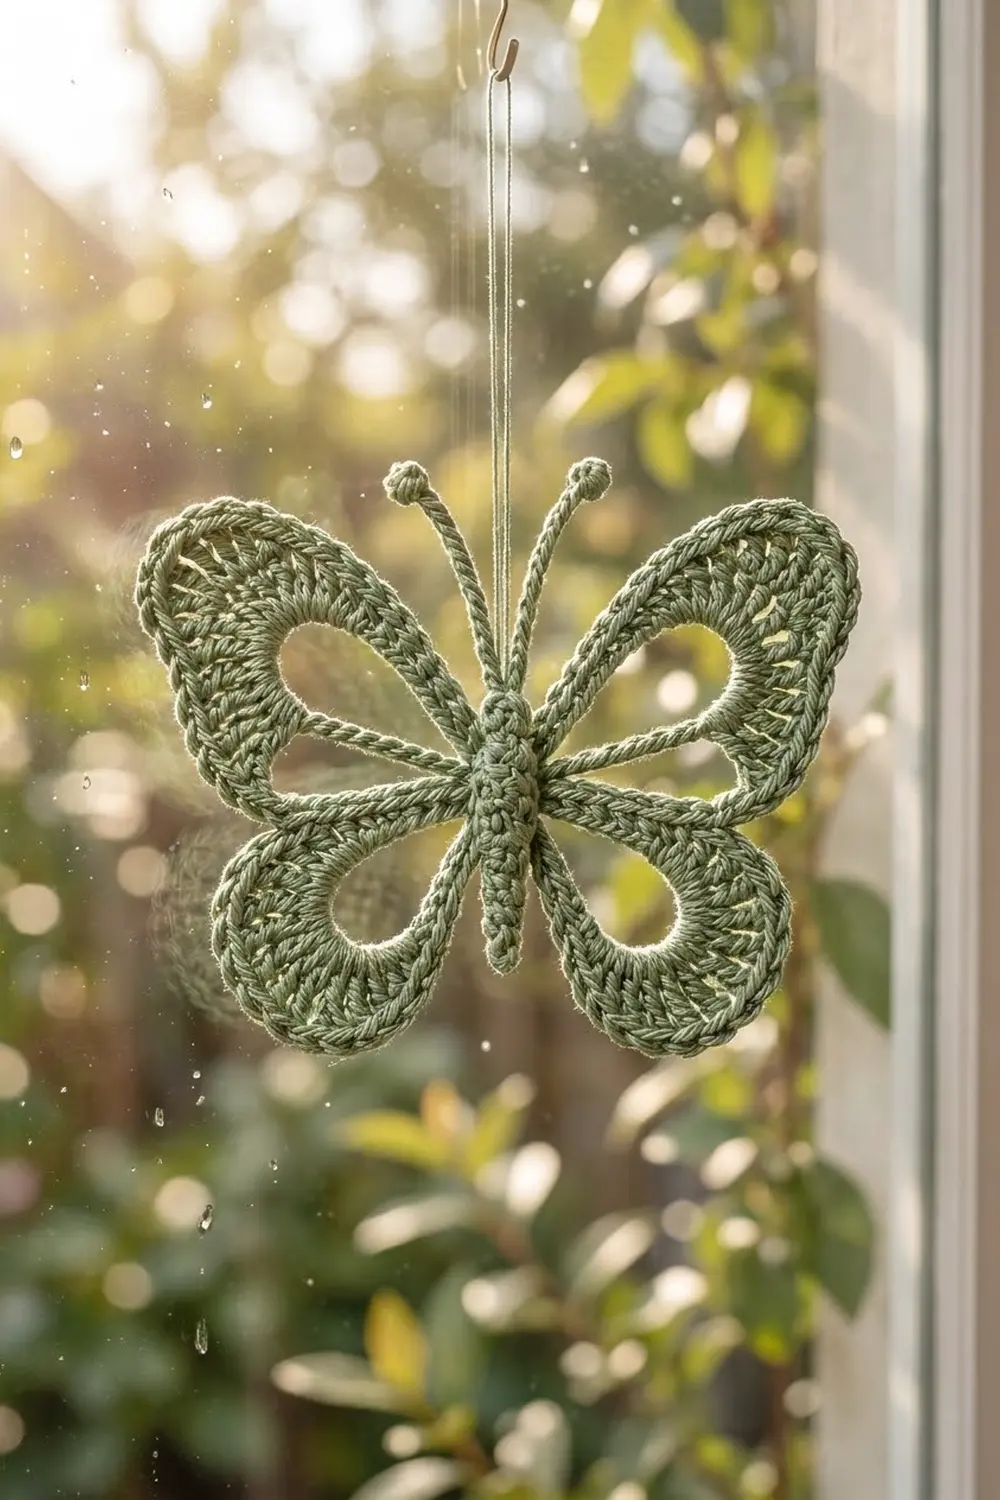
The Sage Meadow Butterfly is a single, flat crochet appliqué with four open “window” wings, a raised ridged body, and two fine antennae with tiny knobbed tips. Each wing is a teardrop-shaped open loop, outlined with a thick corded edge of single crochet. A fan of taller stitches fills the outer curve of each wing.
The sample is worked in one soft sage green cotton, which makes the lacy shape look calm and botanical. Use it as a stand-alone appliqué, a bag or jacket embellishment, a card topper, or a hanging ornament.
This pattern uses US crochet terms. The finished butterfly measures approximately 5.5 in (14.0 cm) across the wings and 4.25 in (10.8 cm) tall through the wings. With the antennae, it stands about 5 in (12.7 cm) tall.
Construction is simple. You chain four loops from a small center ring, then cover every loop with single crochet to make the corded wing frame. Next you fill the outer curve of each wing with two short-row fans and finish each wing with a single crochet edge. Last, you make a small ridged body with antennae and sew it over the center.
Finished Size and Construction
- Finished size: 5.5 in (14.0 cm) wingspan x 4.25 in (10.8 cm) wing height; about 5 in (12.7 cm) tall including antennae
- Skill level: Intermediate (short rows anchored to a frame)
- Terminology: US crochet terms
- Yarn weight: Sport weight (#2) cotton
- Hook: 2.75 mm (US C/2)
- Number of pieces: 1 finished motif, made from 2 components (wing frame and body)
- Layout: 2 upper wings and 2 lower wings radiating from one center ring; body sewn vertically over the ring
- Piece size: upper wing about 3 in (7.6 cm) from center to tip; lower wing about 2.5 in (6.4 cm); body 2.7 in (6.9 cm) long
- Size before border: about 5.1 in (13.0 cm) wingspan
- Border depth: 1 row of single crochet, about 0.2 in (0.5 cm)
Materials
Choose a smooth sport weight cotton, either mercerized or combed. Cotton holds the open loops crisply and gives the corded, rope-like stitch definition seen in the sample. Avoid fuzzy or very stretchy fibers, because they let the open windows sag.
- Sage green, sport weight cotton: 12 g, about 37 m (40 yd)
One 50 g ball of sport cotton is enough for about four butterflies. The quantity above includes a margin of roughly 30 percent for your gauge test, the yarn tails, and sewing on the body.
Tools:
- 2.75 mm (US C/2) crochet hook
- Tapestry needle
- 4 locking stitch markers
- Scissors
- Rust-proof pins and a foam blocking mat
- Spray bottle with water
- Optional: a small pinch of fiberfill for the head, and light fabric starch if the butterfly will hang
Abbreviations (US Terms)
- ch – chain
- sl st – slip stitch
- sc – single crochet
- sc2tog – single crochet 2 together
- dc – double crochet
- tr – treble crochet (yarn over twice, insert hook, pull up a loop, [yarn over, pull through 2 loops] 3 times)
- BLO – back loop only
- sp – space
- st(s) – stitch(es)
- rnd – round
- RS – right side
Special stitch – dc3tog knob: [yarn over, insert hook in the indicated ch, pull up a loop, yarn over, pull through 2 loops] 3 times in the same ch, then yarn over and pull through all 4 loops on the hook. This makes the tiny ball at each antenna tip.
Gauge and Checkpoints
Gauge: 22 sc and 24 rows = 4 in (10.2 cm) in sc worked flat. Chain gauge is about 7 ch = 1 in (2.5 cm).
Gauge matters here because the loop lengths control the wing shape. Before you start, test one wing loop: ch 5, join into a ring, ch 28, sl st in ring, then work 32 sc into the ch-28 sp. Lay it flat. The covered loop should measure about 2 in (5.1 cm) from the ring to the tip.
Checkpoints:
- After Rnd 2 (frame): upper loop about 2 in (5.1 cm) long; lower loop about 1.5 in (3.8 cm) long; frame span about 3.5 in (8.9 cm)
- After Row 4 (upper wing): fill band about 1 in (2.5 cm) deep
- After Row 4 (lower wing): fill band about 0.75 in (1.9 cm) deep
- After Border: 5.5 in (14.0 cm) wingspan
- Body: 2.7 in (6.9 cm) long
If your test loop is too big: go down to a 2.5 mm hook, or tighten your chains. If it is too small: go up to a 3 mm hook. Do not change the chain counts, because the fan counts are matched to them.
Wing Frame
Center Ring
Ch 5, sl st in first ch to form a ring.
Rnd 1 (Wing Loops)
Ch 28, sl st in ring (upper right loop made). Ch 22, sl st in ring (lower right loop made). Ch 22, sl st in ring (lower left loop made). Ch 28, sl st in ring (upper left loop made).
Count: 4 loops: 2 ch-28 loops and 2 ch-22 loops (100 ch and 4 sl sts total).
Check that no loop is twisted before moving on.
Rnd 2 (Corded Frame)
Work 32 sc in the upper left ch-28 sp, sl st in ring. Work 26 sc in the lower left ch-22 sp, sl st in ring. Work 26 sc in the lower right ch-22 sp, sl st in ring. Work 32 sc in the upper right ch-28 sp, sl st in ring. Fasten off and weave in the ends.
Count: 116 sc (32 + 26 + 26 + 32) and 4 sl sts.
Push the sc snugly together so they cover the chain completely. This dense coverage creates the thick, corded outline and lets each loop open into a teardrop. With the RS facing, place a marker in the first sc of each loop. Number the sc in each loop starting from 1 at that marked sc.
Checkpoint: upper loops about 2 in (5.1 cm) long, lower loops about 1.5 in (3.8 cm) long.
Upper Wing Fill (Make 2)
Each upper loop has 32 sc. The fill uses sc 5 to sc 28. Sc 1–4 and sc 29–32 stay unworked, so they form the bare corded edge next to the body.
Row 3: With RS facing, join yarn with a sl st in sc 6. Ch 2 (does not count as a st). [Dc in next sc, 2 dc in next sc] 9 times across sc 7–24. Sl st in sc 25, sl st in sc 26. Turn. (27 dc)
Row 4: Skip the 2 sl sts. Ch 3 (does not count as a st). [Tr in next 2 dc, 2 tr in next dc] 9 times. Sl st in sc 6 (the joining st), sl st in sc 5. Turn. (36 tr)
Do not fasten off. Go straight on to Border Row 5 for this wing (see Border below).
Checkpoint: the upper fill band is about 1 in (2.5 cm) deep. It should curve smoothly around the tip of the loop without cupping.
Lower Wing Fill (Make 2)
Each lower loop has 26 sc. The fill uses sc 4 to sc 23. Sc 1–3 and sc 24–26 stay unworked.
Row 3: With RS facing, join yarn with a sl st in sc 5. Ch 2 (does not count as a st). [Dc in next sc, 2 dc in next sc] 7 times across sc 6–19. Sl st in sc 20, sl st in sc 21. Turn. (21 dc)
Row 4: Skip the 2 sl sts. Ch 2 (does not count as a st). [Dc in next 2 dc, 2 dc in next dc] 7 times. Sl st in sc 5 (the joining st), sl st in sc 4. Turn. (28 dc)
Do not fasten off. Go straight on to Border Row 5 for this wing.
Checkpoint: the lower fill band is about 0.75 in (1.9 cm) deep.
Body
The body is worked in a spiral. Do not join rounds. Mark the first st of each round.
Rnd 1: 6 sc in a magic ring. (6)
Rnd 2: [Sc in next st, 2 sc in next st] 3 times. (9)
Rnd 3: Sc in each st around. (9)
Rnd 4: [Sc in next st, sc2tog] 3 times. (6)
If you like, push a tiny pinch of fiberfill into the head.
Rnds 5–16: Sc BLO in each st around. (6 per round)
Working in the back loops creates the ridged, segmented look along the body. Fasten off and leave a 12 in (30.5 cm) tail. Thread the tail through the front loops of the last round and pull it closed.
Checkpoint: 2.7 in (6.9 cm) long, about 0.5 in (1.3 cm) wide at the head.
Antennae
Join yarn with a sl st at the top of the head, at Rnd 1. Ch 15. Work a dc3tog knob in the 4th ch from the hook. Sl st in each of the next 11 ch back to the head. Sl st into the head 2 sts over from the first antenna. Repeat for the second antenna: ch 15, dc3tog knob in 4th ch from hook, sl st in each of next 11 ch, sl st into the head. Fasten off.
Each antenna is about 1.25 in (3.2 cm) long, plus the knob.
Border
The border is Row 5 of each wing. Work it right after Row 4, while the wing yarn is still attached.
Border gauge: 22 sc = 4 in (10.2 cm), or 5.5 sc per inch (2.5 cm).
Upper wing, Row 5: Ch 1. Skip the 2 sl sts. Sc in each of the 36 tr. Sl st in sc 27, sl st in sc 28. Fasten off. (36 sc, plus 2 anchoring sl sts)
Lower wing, Row 5: Ch 1. Skip the 2 sl sts. Sc in each of the 28 dc. Sl st in sc 22, sl st in sc 23. Fasten off. (28 sc, plus 2 anchoring sl sts)
Counts per wing (“side”): upper right 36 sc, lower right 28 sc, lower left 28 sc, upper left 36 sc. Border total: 128 sc.
Why the math works: Row 4 is the last increase row, so Row 5 is worked 1 sc per stitch, with no extra stitches. The edge stays exactly as long as Row 4. At 5.5 sc per inch, the upper border measures about 6.5 in (16.5 cm) around its curve, and the lower border measures about 5.1 in (13.0 cm). Both match the natural arc of the fan, so the edge lies flat.
Check the anchors on each wing. Rows 3, 4, and 5 are each tied into the frame at both ends. On an upper wing you have used sc 5–28: 18 for the fan base and 6 for the sl st anchors. Sc 1–4 and sc 29–32 stay bare. On a lower wing you have used sc 4–23: 14 for the fan base and 6 for the anchors. Sc 1–3 and sc 24–26 stay bare. These bare corded sections make the clean dividing lines between the wings and the body.
Assembly
Lay the wing frame RS up. Position the body vertically over the center ring with the head at the top. The center ring should sit behind Rnds 7–8 of the body. Using the long tail, whipstitch the underside of the body to the ring and to the base of each wing loop. Keep the stitches hidden underneath. Weave in all ends on the wrong side.
Final Blocking
- Lightly mist the butterfly until it is damp, not soaked.
- Lay it RS up on the blocking mat.
- Pin the center and body first, so the body runs straight.
- Pin each upper wing tip about 2.75 in (7.0 cm) from the body’s center line, for a 5.5 in (14.0 cm) wingspan.
- Shape each open window into a smooth teardrop. Put a pin inside each window to hold the curve.
- Pin the outer border about every 0.5 in (1.3 cm) so the fans lie flat.
- Arrange the antennae into a gentle V.
- If the butterfly will hang, brush on a light starch now.
- Let it dry completely before unpinning.
Final Quality-Control Checklist
- Rnd 2 frame has 116 sc: 32 in each upper loop and 26 in each lower loop
- Upper wings: 27 dc in Row 3, 36 tr in Row 4, 36 sc in Row 5
- Lower wings: 21 dc in Row 3, 28 dc in Row 4, 28 sc in Row 5
- The bare cord sections match on the left and right wings
- Wingspan is 5.5 in (14.0 cm) and wing height is 4.25 in (10.8 cm)
- Body is 2.7 in (6.9 cm) long with even ridges
- Both antennae are the same length, with tight knobs
- No yarn ends show on the RS
Troubleshooting
Frame loops curl or twist. The sc are too loose, or a chain is twisted. Pack the sc more snugly, and check the chains before Rnd 2.
Fan ruffles. Your tr may be too short and tight, or you added extra increases. Recount Row 4 (36 or 28 sts) and relax your tension on tall stitches.
Fan cups or pulls the window closed. Your increases are too tight. Go up 0.25 mm in hook size for Rows 3–5 only.
Left and right wings look different. You may have joined at the wrong sc. Recount from the marked sc 1 in each loop.
Body leans. Sew it down along its full length, not only at the center.
Antenna knobs are loose. Pull the dc3tog closure snug, and work the sl sts firmly.
Care
Hand wash in cool water with mild soap, press out the water in a towel, and dry flat, pinned to shape. If the butterfly hangs, starch it again after washing.
Final Notes
The measurement chain is short. Your gauge of 22 sc = 4 in (10.2 cm) makes the covered loops about 2 in (5.1 cm) and 1.5 in (3.8 cm) long. The fills add about 1 in (2.5 cm) and 0.75 in (1.9 cm). The border adds 0.2 in (0.5 cm), which brings the wingspan from 5.1 in (13.0 cm) to 5.5 in (14.0 cm). If each checkpoint matches, your butterfly will match too. Once you have made one, the same steps will give you more matching butterflies, for example to hang in a hoop.
Happy crocheting!