

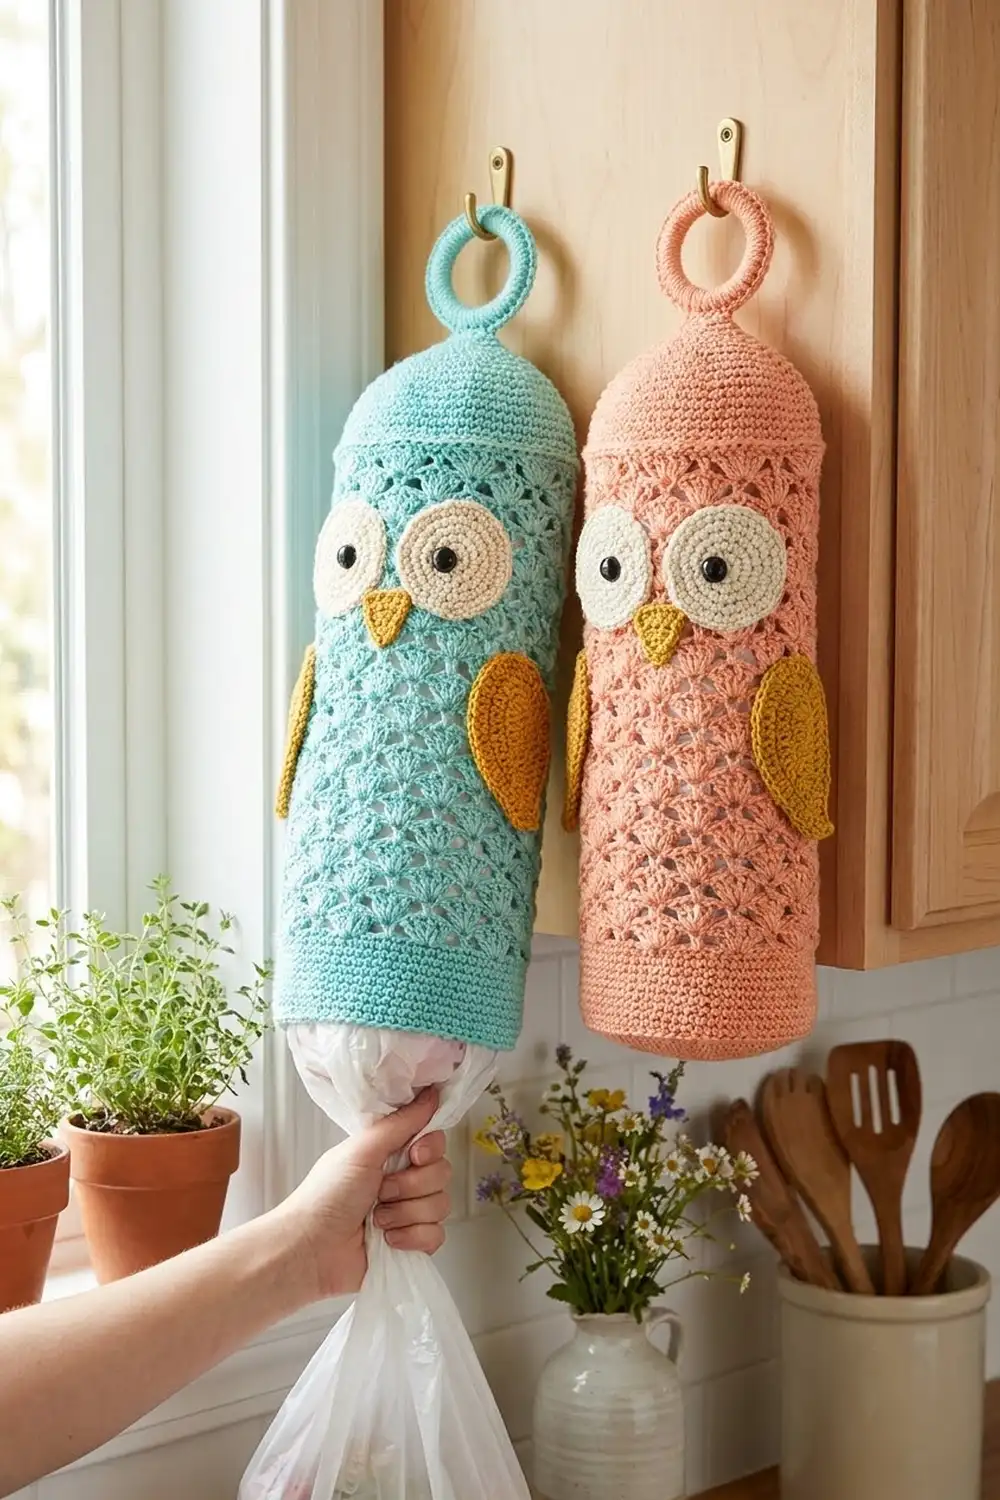
This cheerful owl turns a pile of plastic grocery bags into tidy kitchen decor. The body is an airy lace of fan stitches, so you can see the bags inside. A firm single-crochet band frames the bottom opening, where you pull the bags out one at a time.
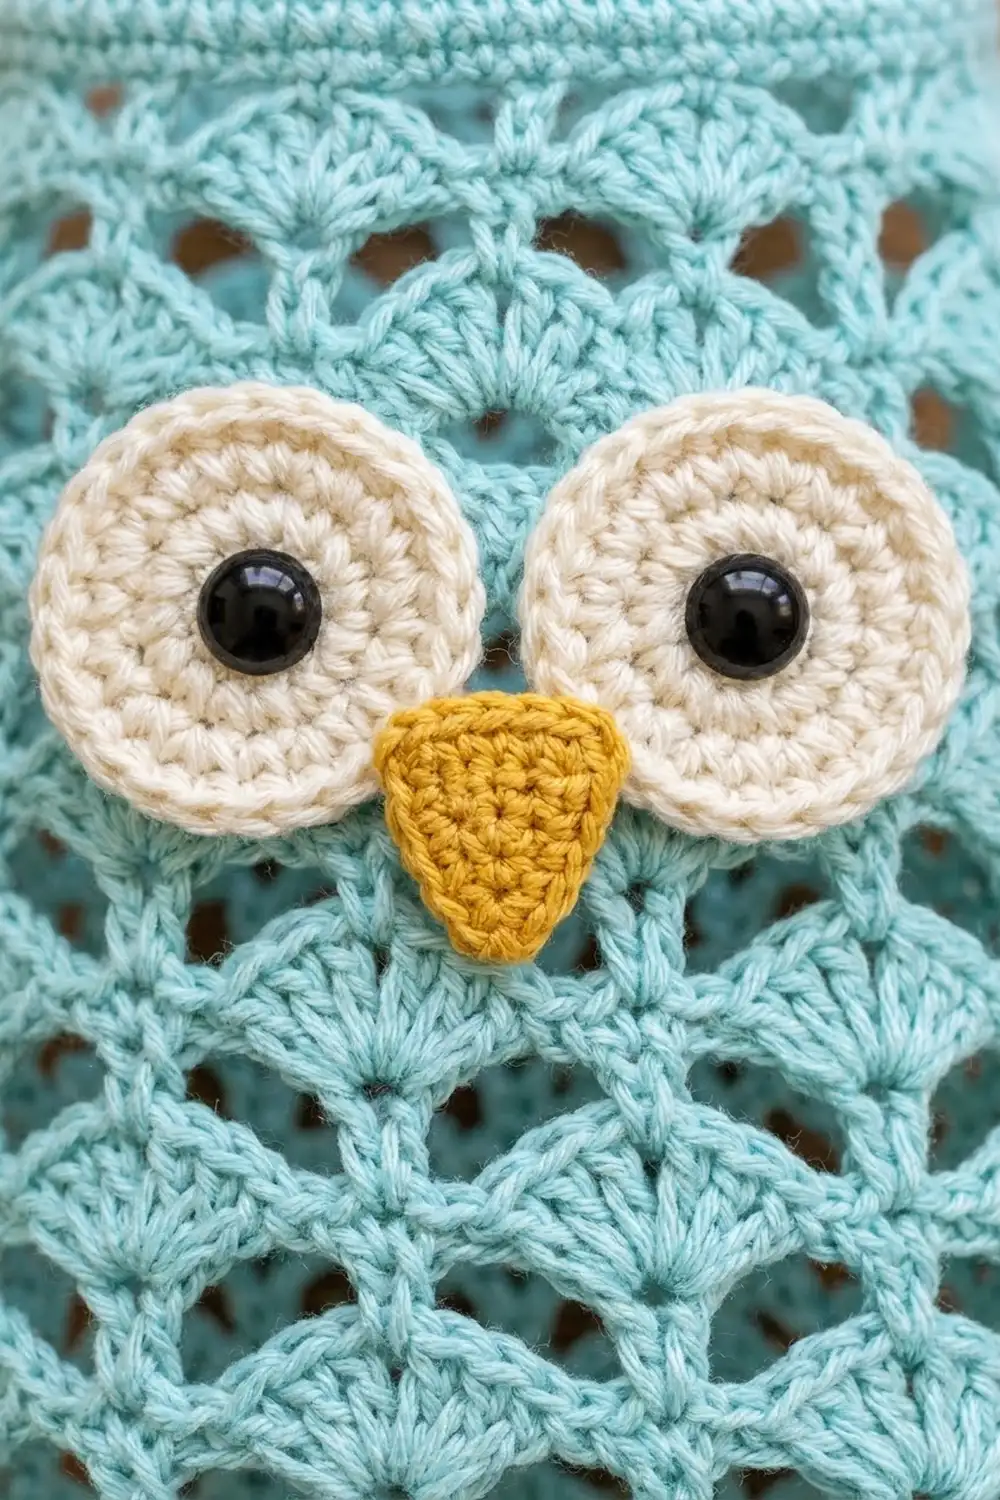
The sample is soft aqua, with cream eyes, black safety eyes, and a golden-yellow beak and wings. It also looks lovely in peach, mint or lilac. Keep the eyes cream and the beak and wings gold so the owl face stays easy to read.
The pattern uses US crochet terms. The finished body is about 7½ in (19.1 cm) wide when flat and 12 in (30.5 cm) tall. With the tab and ring, it hangs about 16¼ in (41.3 cm) long.
Construction is simple. You chain a ring for the bottom opening, increase in single crochet, then work 16 rounds of fans upward. Next you decrease the top closed and finish the bottom opening with a neat edging. The ring hanger and the four appliqués are made separately and sewn on.
Finished Size and Construction
- Finished size: 7½ in (19.1 cm) wide flat × 12 in (30.5 cm) tall body; 16¼ in (41.3 cm) total hanging length
- Skill level: Easy–Intermediate
- Terminology: US
- Yarn weight: #4 worsted, cotton or cotton blend
- Hook: 5.0 mm (H-8)
- Number of pieces: 7 (body, ring hanger, 2 eyes, beak, 2 wings)
- Layout: One tubular body with appliqués on the front
- Body circumference: 60 sts = 15 in (38.1 cm)
- Size before border: 7½ in (19.1 cm) × 11½ in (29.2 cm)
- Border depth: ½ in (1.3 cm), worked downward around the bottom opening
Materials
Choose a smooth worsted cotton. It holds the fan shapes crisply, wipes clean and doesn’t stretch out under the weight of the bags. Acrylic works too, but the mesh will be a little looser.
- Color A (aqua): 110 g / 175 m (body, ring cover, tab)
- Color B (cream): 10 g / 16 m (eyes)
- Color C (golden yellow): 15 g / 24 m (beak, wings)
Tools and notions:
– 5.0 mm (H-8) crochet hook
– 3 in (7.6 cm) plastic or wooden ring
– 2 black safety eyes, 12 mm
– Tapestry needle
– Stitch marker
– Scissors
– Rust-proof pins
– Measuring tape
The yarn amounts include about a 15% margin for your gauge swatch and small tension differences.
Abbreviations (US Terms)
- ch – chain
- sl st – slip stitch
- sc – single crochet
- hdc – half double crochet
- dc – double crochet
- sc2tog – single crochet 2 together
- sc3tog – single crochet 3 together
- rev sc – reverse single crochet (crab stitch)
- BLO – back loop only
- MR – magic ring
- sk – skip
- sp(s) – space(s)
- st(s) – stitch(es)
Special stitch – Shell: 5 dc in the same stitch.
Reverse sc: Working from left to right (right-handed), insert the hook into the next stitch to the right, yarn over, pull up a loop, yarn over and pull through both loops.
Gauge and Checkpoints
- Single crochet gauge: 16 sc and 18 rounds = 4 in (10.2 cm)
- Shell gauge: 1 repeat (shell + sc with ch-2 sps) = 1½ in (3.8 cm) wide; 8 shell rounds = 5 in (12.7 cm) tall
Test one piece first. Make one eye before you start the body. It should measure about 1¾ in (4.4 cm) across. If it is bigger, go down half a hook size. If it is smaller, go up half a size.
Body checkpoints:
– After Rnd 1: The foundation ring lies flat without twisting. Its circumference is 10 in (25.4 cm).
– After Rnd 4: The circumference is 15 in (38.1 cm), or 7½ in (19.1 cm) when flattened.
– After Rnd 12: The 8 shell rounds measure 5 in (12.7 cm).
– After Rnd 20: The body measures 11 in (27.9 cm) from the foundation.
If the body is too wide, change to a 4.5 mm hook for the shell rounds. If it is too narrow, use a 5.5 mm hook. Do not change the stitch counts, because the fan repeat depends on 60 stitches.
Body
Use Color A. Join each round with a sl st to the first st. Do not turn.
Bottom Band
Ch 40 and join with a sl st to the first ch to form a ring. Don’t twist the chain.
- Rnd 1: Ch 1, sc in each ch around. (40 sc)
- Rnd 2: Ch 1, sc in next 3 sts, 2 sc in next st; repeat from * 10 times. (50 sc)
- Rnd 3: Ch 1, sc in next 4 sts, 2 sc in next st; repeat from * 10 times. (60 sc)
- Rnd 4: Ch 1, sc in each st around. (60 sc)
Checkpoint: The band is about 1 in (2.5 cm) deep and flares slightly outward from the opening.
Shell Mesh
Rnd 5:
1. Ch 1 and sc in the first st.
2. Ch 2, sk 2 sts, work a shell in the next st, ch 2, sk 2 sts, sc in the next st. Work from * 9 times in total.
3. Ch 2, sk 2 sts, work a shell in the next st, ch 2, sk the last 2 sts, and sl st to the first sc.
(10 shells, 10 sc, 20 ch-2 sps)
Rnd 6:
1. Sl st into the next ch-2 sp, then sl st into each of the next 3 dc. You are now at the center dc of the shell.
2. Ch 1 and sc in the same center dc.
3. Ch 2, work a shell in the next sc, ch 2, sc in the center dc of the next shell. Work from * 9 times in total.
4. Ch 2, work a shell in the last sc, ch 2, and sl st to the first sc.
(10 shells, 10 sc, 20 ch-2 sps)
Each round puts its shells above the single crochets of the round below. This makes the offset fan pattern with chain arches between the fans.
Rnds 7–20: Repeat Rnd 6. Each round has the same count: (10 shells, 10 sc, 20 ch-2 sps)
That makes 16 shell rounds in total (Rnds 5–20), about 10 in (25.4 cm) tall.
Top Closure
- Rnd 21 (conversion): Ch 1, sc in each dc and each sc around, skipping all ch-2 sps. (50 sc worked into the dc + 10 sc worked into the sc + 0 added = 60 sc)
- Rnd 22: Ch 1, sc in next st, sc2tog; repeat from * 20 times. (40 sts)
- Rnd 23: Ch 1, sc2tog around. (20 sts)
- Rnd 24: Ch 1, sc2tog around. (10 sts)
- Rnd 25: Flatten the top so that 5 sts sit in front and 5 behind. Ch 1, then sc through both layers 5 times to close the top. (5 sc)
Fasten off, leaving a 12 in (30.5 cm) tail for sewing on the tab.
Checkpoint: The top forms a rounded dome about ½ in (1.3 cm) tall. The body now measures 11½ in (29.2 cm) before the border.
Ring Hanger
Use Color A.
Ring cover:
1. Join the yarn around the 3 in (7.6 cm) ring with a sl st.
2. Work sc around the ring, packing the stitches closely, until no ring shows. This is about 54 sc.
3. Sl st to the first sc.
Tab:
– Row 1: Ch 1, sc in the next 5 sts. Turn. (5 sc)
– Rows 2–6: Ch 1, sc across. Turn. (5 sc)
Fasten off. The tab is about 1¼ in (3.2 cm) wide and 1¼ in (3.2 cm) long.
Eyes (Make 2)
Use Color B.
- Rnd 1: 8 sc in an MR. (8)
- Rnd 2: 2 sc in each st around. (16)
- Rnd 3: Sc in next st, 2 sc in next st; repeat from * 8 times. (24)
- Rnd 4: Sl st loosely in each st around. (24 sl st)
The slip stitches make a raised outline. Fasten off and leave a 12 in (30.5 cm) tail.
Push a safety eye through the center of the MR and lock the washer on the back. Each eye is about 1¾ in (4.4 cm) across.
Beak
Use Color C.
- Ch 6.
- Row 1: Sc in the 2nd ch from the hook and in each ch across. Turn. (5)
- Row 2: Ch 1, sc2tog, sc in next st, sc2tog. Turn. (3)
- Row 3: Ch 1, sc3tog. (1)
Fasten off and leave a tail. The beak is a triangle about 1¼ in (3.2 cm) wide and ¾ in (1.9 cm) tall.
Wings (Make 2)
Use Color C. Each wing is worked around both sides of a foundation chain.
Ch 11.
Rnd 1:
1. Starting in the 2nd ch from the hook, work sc in the next 2 ch, hdc in the next 2 ch, dc in the next 5 ch, and 6 dc in the last ch for the rounded end.
2. Rotate the piece and work along the other side of the foundation chain: dc in the next 5 ch, hdc in the next 2 ch, sc in the next 2 ch.
3. Ch 2 and sl st to the first sc to make the pointed tip.
(24 sts + ch-2 tip)
Rnd 2 (BLO):
1. Ch 1, and work in the BLO: sc in the next 9 sts, 2 sc in each of the next 6 sts, sc in the next 9 sts.
2. Work (sc, ch 2, sc) in the ch-2 tip sp.
3. Sl st to the first sc.
(32 sc + ch-2 tip)
The back-loop stitches leave the front loops as a ridge around the wing. That ridge, together with the center spine of the foundation chain, gives the wing its texture.
Each wing is about 3 in (7.6 cm) long and 1½ in (3.8 cm) wide. Fasten off and leave a tail.
Assembly
- Tab: Center the tab’s last row on the closed top of the body. Whipstitch the tab’s 5 sts to Rnd 25’s 5 sts, one to one.
- Eyes: Pin the eyes side by side over Rnds 17–19, centered on the front and just touching each other. Whipstitch around each outer edge, catching the dc posts of the mesh.
- Beak: Pin the beak point-down between the eyes and just below them. Sew it in place.
- Wings: Pin one wing on each side over Rnds 10–16, with the pointed tips up and angled slightly outward. Sew around the edges.
Weave in all ends on the wrong side.
Border (Bottom Opening Edging)
Border gauge: 16 sc = 4 in (10.2 cm), the same as the body. The opening has 40 foundation chains. Flattened, that is 20 sts on the front side and 20 on the back side. A tube has no corners, so there are no corner stitches to add.
With the bottom facing you, join Color A in any free loop of the foundation chain.
- Border Rnd 1: Ch 1, sc in each free loop around. (40 sc: 20 per side)
- Border Rnd 2: Ch 1, rev sc in each st around. (40 rev sc: 20 per side)
Fasten off and weave in the end.
Why the math works: There is exactly one stitch for every foundation chain (40 to 40). The edging therefore keeps the 10 in (25.4 cm) circumference, so it doesn’t ruffle or pucker. The reverse sc makes a firm, rope-like rim that springs back after you pull out a bag.
The border adds ½ in (1.3 cm), bringing the body to 12 in (30.5 cm) tall.
Final Blocking
- Lightly mist the body with water, or soak it for 10 minutes and gently squeeze out the water. Don’t wring it.
- Stuff the body loosely with a towel or plastic bags so it keeps its tube shape.
- Pat it to 7½ in (19.1 cm) wide and 12 in (30.5 cm) tall, and open each fan evenly.
- Pin the wings and eyes flat if they curl.
- Let it dry completely, ideally upright or hanging from the ring.
- Steam the ring cover lightly if any stitches lean.
Final Quality-Control Checklist
- 10 even fans in every shell round
- 16 shell rounds, with each shell sitting above the sc of the round below
- Body 7½ in (19.1 cm) wide flat and 12 in (30.5 cm) tall
- Bottom opening 5 in (12.7 cm) flat, with a smooth rev sc rim
- No part of the ring shows through the sc cover
- Tab sewn firmly and centered
- Safety eyes locked, with the eyes level and touching
- Beak centered under the eyes
- Wings placed symmetrically, tips up
- All ends woven in securely
Troubleshooting
- Fans lean in a spiral: Count the sl sts at the start of each round. You must land on the center (3rd) dc every time.
- Body flares at the top: Check that Rnd 21 skips the ch-2 sps.
- Bottom band cups too much: Work Rnd 2 with a hook one size larger.
- Ring cover twists: Push the stitches together with your fingers every 10 sts.
- Eyes ruffle: Your Rnd 3 is too loose. Go down a hook size for the eyes only.
- Wings curl: Pin them flat while blocking, or loosen your tension on Rnd 2.
- Bags fall out too easily: Work Border Rnd 2 tighter, or add one sc round before it.
Care
Hand wash in cool water and lay flat or hang to dry. Take out the bags before washing and don’t machine dry, because the safety eyes can loosen.
Final Notes
Everything comes back to one measurement chain. The 40 foundation chains give a 10 in (25.4 cm) opening, and the increases bring it to 60 sts and 15 in (38.1 cm) around. Those 60 sts hold exactly 10 fan repeats of 1½ in (3.8 cm) each.
Sixteen shell rounds add 10 in (25.4 cm). The top closure brings the body to 11½ in (29.2 cm), and the 40-stitch border finishes it at 12 in (30.5 cm). The tab and the 3 in (7.6 cm) ring bring the full hanging length to 16¼ in (41.3 cm).
Check your gauge, keep counting your fans, and your owl will be on kitchen duty in no time.
Happy crocheting!