

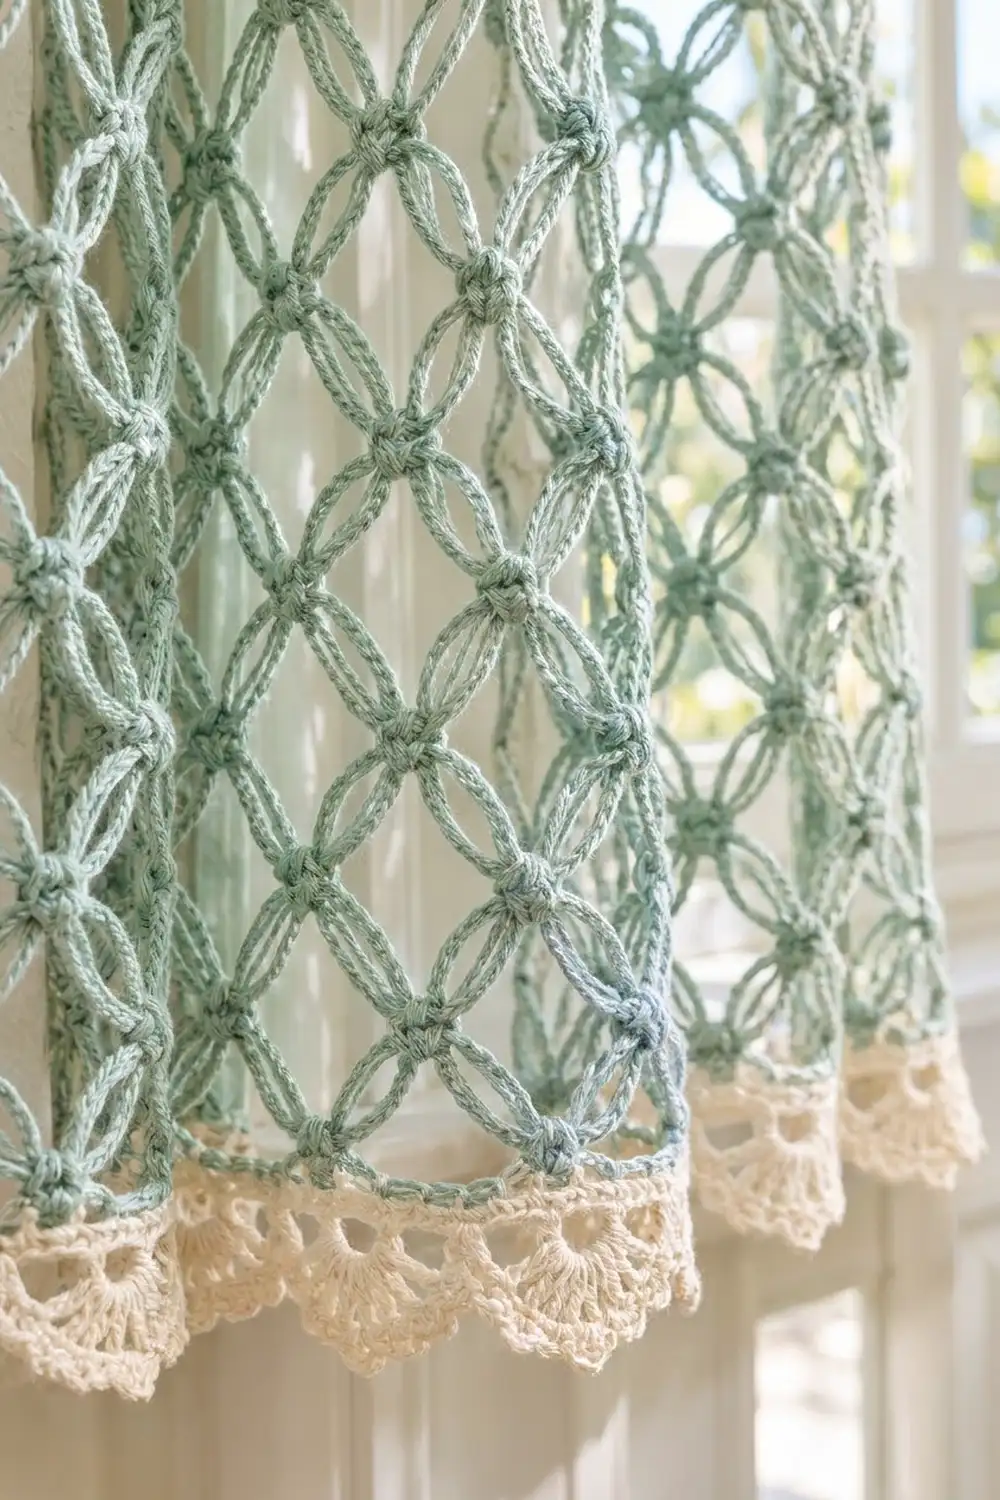
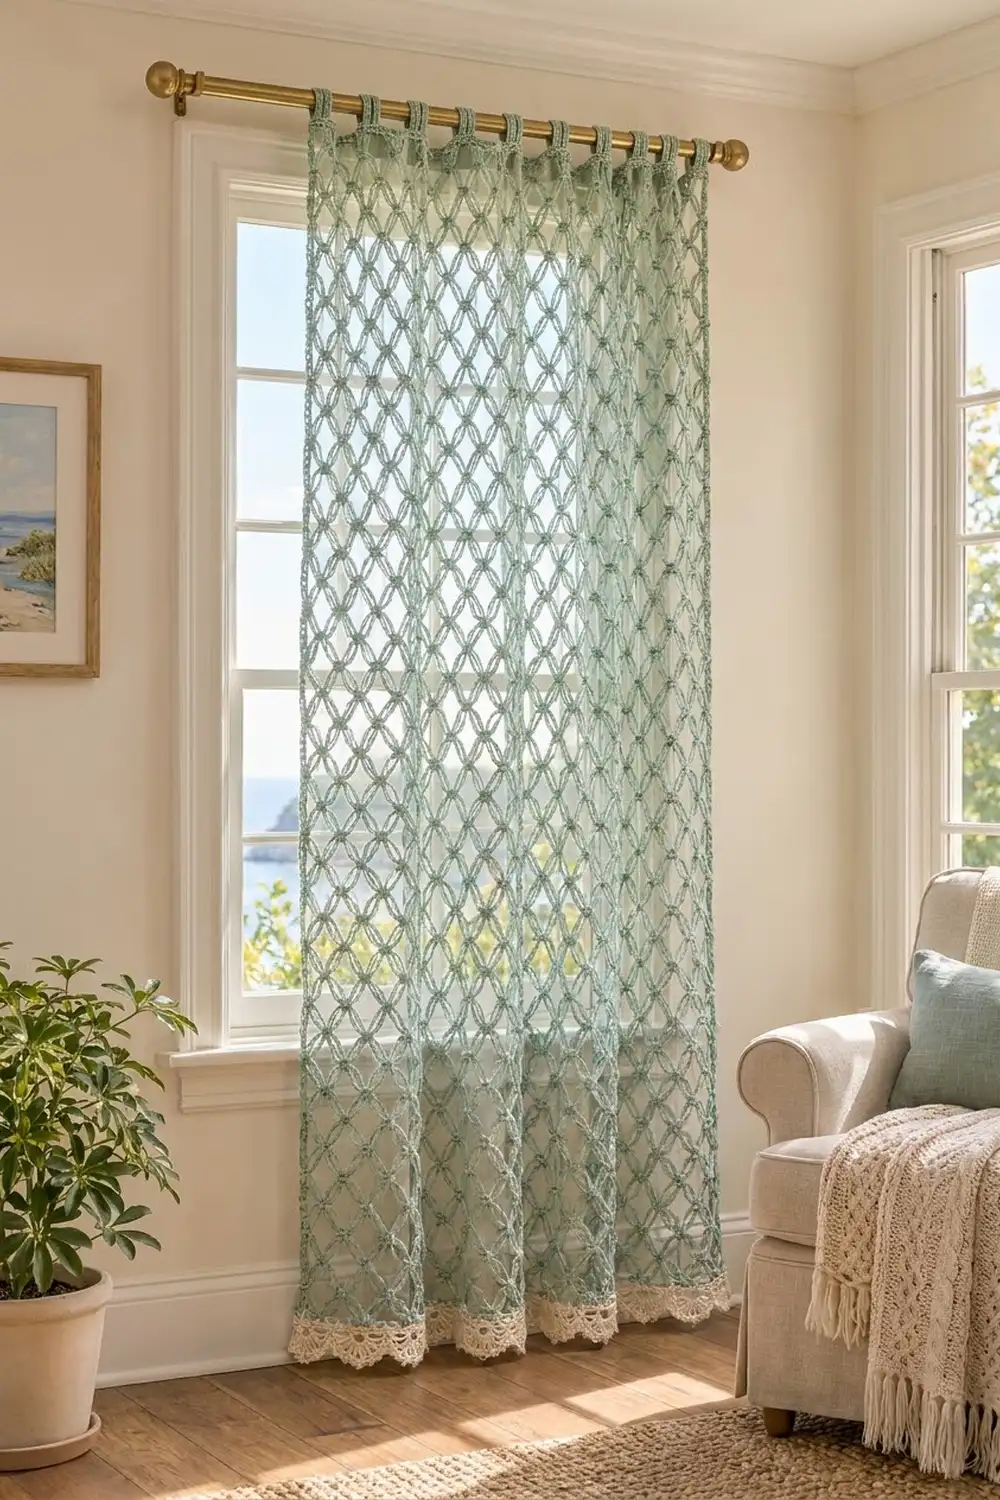
This curtain panel is a light, airy net of sage green chain arcs that cross at small round knots. When it hangs, the arcs stack into a soft diamond-and-oval lattice that lets daylight through while still framing the window.
The palette is simple: sage green for the lattice, header and tab loops, and creamy ivory for a scalloped fan hem. The style falls between coastal cottage and vintage filet lace, and the open mesh lets the panel drape and sway nicely.
The pattern uses US crochet terms. The finished panel measures 42.25 in (107.3 cm) wide and 81.5 in (207.0 cm) long, not counting the tab loops, which rise about 2.5 in (6.4 cm) above the top edge.
The panel is worked in one piece from the top down. You chain a foundation, work a solid single crochet header, then build the knotted lattice row by row. The ivory border is worked across the last lattice row, and the tab loops are worked into the foundation chain at the end. For a pair, make two panels.
Finished Size and Construction
- Finished size: 42.25 in x 81.5 in (107.3 cm x 207.0 cm), tabs not included
- Skill level: Intermediate
- Terminology: US crochet terms
- Yarn weight: DK (#3) cotton or cotton blend
- Hook: 4.5 mm (US 7)
- Number of pieces: 1 panel, with 17 tab loops worked directly onto it
- Layout: single vertical panel, header at the top, border at the bottom
- Piece size: 169 stitches wide; 8 header rows, 103 lattice rows, 4 border rows
- Size before border: 42.25 in x 79 in (107.3 cm x 200.7 cm)
- Border depth: 2.5 in (6.4 cm), bottom edge only
Materials
Choose a smooth, mercerized or combed cotton in DK weight. Cotton keeps the knots crisp, stretches less than acrylic in a long hanging piece, and washes well. Avoid fuzzy yarns, which blur the lattice.
- Color A, sage green: 500 g, about 1,100 m (10 balls of 50 g / 110 m)
- Color B, ivory: 50 g, about 110 m (1 ball of 50 g / 110 m)
Tools:
- 4.5 mm (US 7) crochet hook
- Tapestry needle
- Scissors
- Stitch markers (about 10)
- Measuring tape
- Rust-proof pins and a large blocking surface (a bed or a clean floor covered with towels works)
- Spray bottle
Quantities include a margin of about 20 percent. If you make a pair, double everything.
Abbreviations (US Terms)
- ch: chain
- sl st: slip stitch
- sc: single crochet
- dc: double crochet
- tr: treble crochet
- sp: space
- st(s): stitch(es)
- RS / WS: right side / wrong side
- rep: repeat
Special stitch: Knot (K). Work (sc, ch 1, sc) all into the same stitch or chain. The two sc pinch together around the ch 1 and make the small, round, bead-like node where the arcs meet.
Gauge and Checkpoints
Make a test swatch before you start. A long hanging panel exaggerates every small gauge difference, so this step matters.
Swatch: Ch 26. Work header Row 1 (25 sc), then 7 more rows of sc. Work lattice Row 1 with 4 arcs: sc in first sc, (ch 7, skip 5 sc, K in next sc) 3 times, ch 7, skip 5 sc, sc in last sc. Then work 8 more lattice rows. Fasten off, wet block and pin gently.
Gauge targets:
- Header: 16 sc and 18 rows = 4 in (10.2 cm)
- Lattice: 4 repeats (knot to knot) = 6 in (15.2 cm) wide
- Lattice: 8 rows = 6 in (15.2 cm) tall, blocked and hanging
Checkpoints on the real panel:
- After header Row 1: 169 sc, 42.25 in (107.3 cm) wide.
- After the header: 8 rows, about 1.75 in (4.4 cm) deep.
- After lattice Row 24: the lattice measures about 18 in (45.7 cm) when hung for a minute.
- After lattice Row 103: header plus lattice measures about 79 in (200.7 cm).
- After the border: 81.5 in (207.0 cm).
If your swatch is too big, go down half a hook size. If it is too small, go up half a size. If only the lattice height is off, add or remove lattice rows in pairs (one Row 2 plus one Row 3) so the last row is still a Row 1 type. Each pair changes the length by 1.5 in (3.8 cm).
Header
With Color A, ch 170.
Row 1 (RS): Sc in 2nd ch from hook and in each ch across, turn. (169 sc)
Rows 2 to 8: Ch 1, sc in each sc across, turn. (169 sc)
Do not fasten off. The header should measure 42.25 in x 1.75 in (107.3 cm x 4.4 cm). Place a marker on the RS so you can find it later.
Lattice
The lattice alternates two row types:
- Row 1 type: 28 full arcs and 27 knots, with a sc at each edge.
- Row 2 type: 27 full arcs, a half arc at each end, 28 knots, and a tr at each edge.
Each new row’s knots go into the 4th ch (the center) of the arcs below. This offsets the knots and creates the diamond lattice.
Row 1: Ch 1, sc in first sc, *ch 7, skip 5 sc, K in next sc; rep from * 26 more times, ch 7, skip 5 sc, sc in last sc, turn. (28 ch-7 arcs, 27 knots, 2 edge sc)
Check: 1 edge sc + 28 repeats of 6 sts = 169 sts used.
Row 2: Ch 4 (counts as tr), ch 3, K in 4th ch of first ch-7 arc, *ch 7, K in 4th ch of next ch-7 arc; rep from * 26 more times, ch 3, tr in last sc, turn. (27 ch-7 arcs, 2 ch-3 half arcs, 28 knots, 2 edge tr)
Row 3: Ch 1, sc in first tr, skip the ch-3 half arc, *ch 7, K in 4th ch of next ch-7 arc; rep from * 26 more times, ch 7, sc in 4th ch of turning ch-4, turn. (28 ch-7 arcs, 27 knots, 2 edge sc)
Row 3 has the same counts as Row 1, so the width never changes.
Rows 4 to 103: Rep Rows 2 and 3 fifty more times. (103 lattice rows total)
Row 103 is a Row 3 type: 28 ch-7 arcs, 27 knots, 2 edge sc. Fasten off Color A.
Hang the panel from your fingers or a hanger for a minute and measure it. Header plus lattice should be about 79 in (200.7 cm). The lattice stretches, so always measure it hanging, never pulled out flat on a table.
Tip: Place a marker every 10 rows. Counting 103 open rows by eye is easy to get wrong.
Border
The border is worked across the bottom edge only, with RS facing. The sides are left as the natural lattice edge.
Border gauge: Border Row 1 must match the header: 16 sc = 4 in (10.2 cm), so 169 sc = 42.25 in (107.3 cm). If your border row comes out wider than the header, the hem will ruffle. In that case, go down half a hook size for the border only.
Row 1 (conversion row): With RS facing, join Color B in the first sc of Row 103. Ch 1, sc in same sc, *5 sc in next ch-7 arc, sc in ch-1 sp of next knot; rep from * 26 more times, 5 sc in last ch-7 arc, sc in last sc, turn.
Count: 2 edge sc + (28 arcs x 5 sc = 140) + (27 knots x 1 sc = 27) = 169 sc.
Row 2: Ch 3 (counts as dc), dc in each sc across, turn. (169 dc)
This row makes the solid ivory band.
Row 3 (fans): Ch 1, sc in first dc, *skip 5 dc, [dc, (ch 1, dc) 6 times] in next dc, skip 5 dc, sc in next dc; rep from * 13 more times, turn. (14 fans of 7 dc and 6 ch-1 sps each, 15 sc)
Row 4 (picot edge): Ch 1, sl st in first sc, *(sc in next ch-1 sp, ch 3) 5 times, sc in next ch-1 sp, sl st in next sc; rep from * 13 more times. (14 fans with 6 sc and 5 ch-3 loops each, 15 sl st)
Fasten off and weave in ends.
Why the math works: The panel is 169 sts wide, which is 28 x 6 + 1. Each lattice repeat uses 6 header sts. The border Row 1 conversion also gives 6 sts per repeat (5 sc per arc + 1 per knot), so it lines up exactly with the header. The fan repeat is 12 sts, and 14 x 12 + 1 = 169, so every fan sits between two anchor sc with nothing left over. Each fan spans exactly two lattice repeats, or 3 in (7.6 cm).
Tab Loops
Turn the panel so the foundation chain is at the top, with RS facing. Number the free loops of the foundation chain as sts 1 to 169 from right to left. There are 17 tabs, each 5 sts wide. The first starts at st 3, and each of the others starts 10 sts after the one before (sts 3, 13, 23 and so on up to 163). That leaves 5 sts between tabs and 2 sts at each end.
Each tab, Row 1: Join Color A in the starting st, ch 1, sc in same st and in next 4 sts, turn. (5 sc)
Rows 2 to 24: Ch 1, sc in each sc across, turn. (5 sc)
Fasten off, leaving a 12 in (30.5 cm) tail. Each tab is about 5.25 in (13.3 cm) long.
Fold each tab to the WS and whipstitch its last row to the WS of header Row 8, directly behind the tab’s base. Count the rows on every tab so the loops hang level. The loops fit rods up to 1.25 in (3.2 cm) in diameter and rise about 2.5 in (6.4 cm) above the top edge.
Final Blocking
- Weave in all ends along header rows, border rows or through knots. Never weave along a bare chain arc, where the end will show.
- Soak the panel in cool water with a little wool wash for 15 minutes.
- Press out the water gently in towels. Do not wring.
- Lay the panel flat on towels or a bed. Pin the header straight at 42.25 in (107.3 cm).
- Ease the lattice down to 77.25 in (196.2 cm), keeping the knots in straight vertical and diagonal lines.
- Pin the border straight at 42.25 in (107.3 cm), then pin the tip of each fan’s center loop to open the scallops.
- Let it dry completely. Hang it and let it settle for a day before you judge the final length, since cotton lattice relaxes slightly.
Final Quality-Control Checklist
- Header and border are both 169 sts and 42.25 in (107.3 cm) wide.
- Every Row 1 type has 28 arcs and 27 knots; every Row 2 type has 28 knots.
- Knots sit in clean diagonal lines, with no skipped or doubled arcs.
- Header plus lattice measures about 79 in (200.7 cm) hanging.
- There are 14 fans, each with 5 ch-3 picot loops.
- All 17 tabs have 24 rows, are sewn level, and fit your rod.
- Total length is 81.5 in (207.0 cm), not counting the tabs.
- No ends show on the RS.
Troubleshooting
The lattice pulls narrower than the header. Your chains are too tight. Loosen them, or work only the ch-7 arcs with a 5 mm hook.
The diagonal lines wander. You probably put a knot in the 3rd or 5th ch instead of the 4th. Count the chains on every arc until it becomes automatic.
The edges are uneven. Check that each Row 2 type starts with ch 4 plus ch 3 and ends with ch 3 plus tr. A missing half arc pulls the edge in.
The hem ruffles. Border Row 1 was worked too loosely or with too many sc per arc. Rework it with exactly 5 sc per arc.
The fans cup. Your dc are too tight. Go up half a hook size for Rows 3 and 4 only.
The panel is too long after hanging. Remove pairs of lattice rows before the border, or block the next panel shorter. Cotton lattice can grow up to 1 in (2.5 cm) per yard.
Care
Hand wash in cool water, or machine wash on a gentle cycle in a mesh laundry bag, then reshape and dry flat. Do not tumble dry, and do not hang the panel while it is wet, since the weight will stretch the lattice.
Final Notes
The whole panel depends on one chain of measurements. The header sets the width at 169 sts and 42.25 in (107.3 cm). The lattice uses 6 sts per repeat with 28 repeats across, and each row adds 0.75 in (1.9 cm), for 77.25 in (196.2 cm) in total. Border Row 1 converts back to 169 sts, the 12-st fans divide that evenly, and the border adds 2.5 in (6.4 cm) for a finished length of 81.5 in (207.0 cm). Check your swatch, count your arcs, and always measure the panel hanging.
Happy crocheting!