

This hanging holder stores three spare rolls in a small amount of wall space. Three round baskets with chevron lace sit one above the other on a solid back strip. A wooden ring at the top lets you hang it from any towel hook.
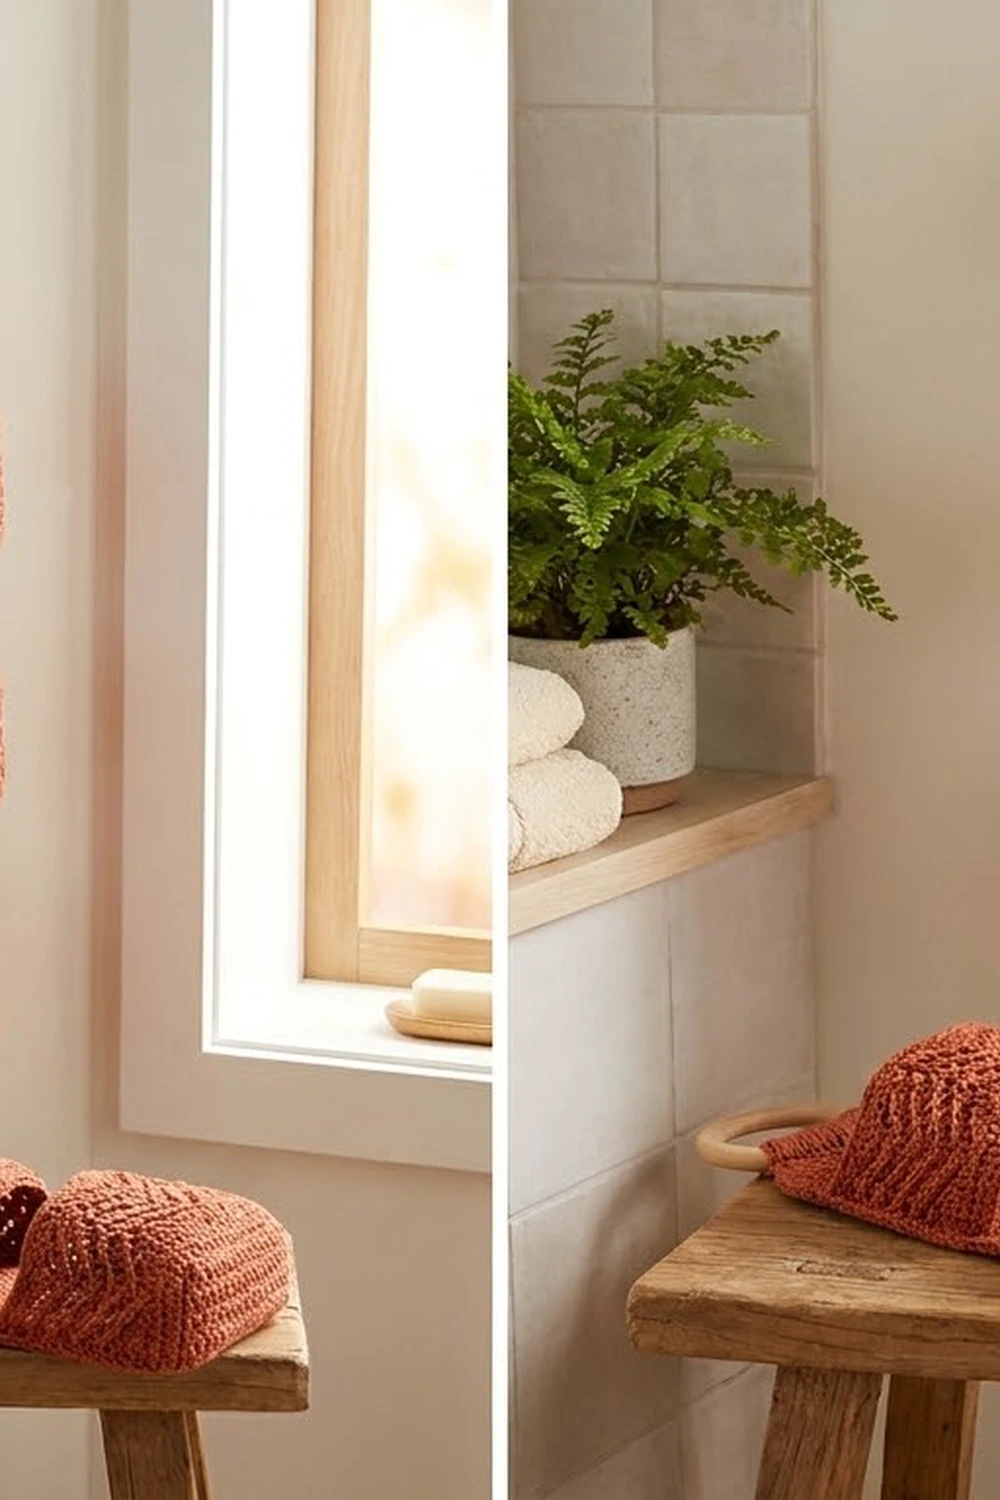
The sample is worked in one warm rust/terracotta shade. The lace lets the white rolls show through, and the solid rims and bases keep the baskets firm. It looks boho and natural and suits bathrooms with plants, wood and cream tile.
The pattern uses US crochet terms. Each basket is 5.5 in (14.0 cm) across and 4 in (10.2 cm) tall. The bordered back strip is 4.5 in (11.4 cm) wide. From the bottom edge to the top of the folded tab, the holder is 18.25 in (46.4 cm) long, not counting the ring.
You work each basket from the bottom up in joined rounds: a flat base, a turning ridge, a chevron lace body and a solid rim. The back strip and tab are one piece worked in rows. You sew the baskets onto the strip, add a simple edging and wrap the tab around the ring.
Finished Size and Construction
- Finished size: 4.5 in (11.4 cm) wide x 18.25 in (46.4 cm) long, not counting the ring
- Skill level: Easy–Intermediate
- Terminology: US
- Yarn weight: Worsted (#4), cotton or cotton blend
- Hook: US H-8 (5.0 mm)
- Number of pieces: 4 (3 baskets + 1 back strip with tab)
- Layout: 1 column x 3 baskets, stacked vertically
- Basket size: 5.5 in (14.0 cm) diameter x 4 in (10.2 cm) tall
- Strip size before border: 4 x 15 in (10.2 x 38.1 cm), plus a 5.75 in (14.6 cm) tab
- Border depth: 0.25 in (0.6 cm)
Materials
Yarn: Use a firm worsted-weight cotton or cotton blend. Cotton holds the basket shape, copes with bathroom humidity and keeps the lace crisp. Acrylic gives softer, floppier baskets.
- Rust/Terracotta: 200 g, about 380 m (415 yd), based on roughly 190 m per 100 g
- Each basket: about 45 g
- Back strip and tab: about 45 g
- Border and seaming: about 15 g
These quantities include a small safety margin.
Tools:
– US H-8 (5.0 mm) crochet hook
– 3.5 in (8.9 cm) wooden ring
– Tapestry needle
– Locking stitch markers (at least 6)
– Rust-proof pins
– Measuring tape
– Blocking mat or towel
– A spare toilet roll to use as a shaping form
Abbreviations (US Terms)
- ch – chain
- sl st – slip stitch
- sc – single crochet
- hdc – half double crochet
- dc – double crochet
- sc2tog – single crochet 2 together
- BLO – back loop only
- sp – space
- sk – skip
- st(s) – stitch(es)
- RS / WS – right side / wrong side
Special stitch, dc3tog (double crochet 3 together): Yarn over, insert hook in the next st or sp, yarn over and pull up a loop, yarn over and draw through 2 loops. Repeat from * to * twice more (3 times in total). You now have 4 loops on the hook. Yarn over and draw through all 4. This forms the valley of each zigzag.
Counting positions: In the lace rounds, every dc, every dc3tog and every ch-1 space counts as one position. Each lace round has 60 positions.
Gauge and Checkpoints
Gauge: 14 sc x 16 rows = 4 in (10.2 cm) in sc worked in rows.
Lace gauge: 6 chevron repeats around = 17.1 in (43.4 cm) circumference.
Make one basket first and check it before you make the others.
- After Base Rnd 10: the base lies flat and measures 5.25–5.5 in (13.3–14.0 cm) across.
- After Rnd 12: the wall stands upright at a sharp right angle to the base.
- After Rnd 16: the wall is about 2.5 in (6.4 cm) tall from the turning ridge.
- After Rnd 21: the wall is 4 in (10.2 cm) tall and a standard roll slides in easily.
- Back strip, Row 60: 4 x 15 in (10.2 x 38.1 cm).
If the piece is too big: go down half a hook size (4.5 mm). If it is too small: go up half a size (5.5 mm). If the base ruffles, your increases are too loose, so go down a size for the base only. If the base cups, go up a size for the base only.
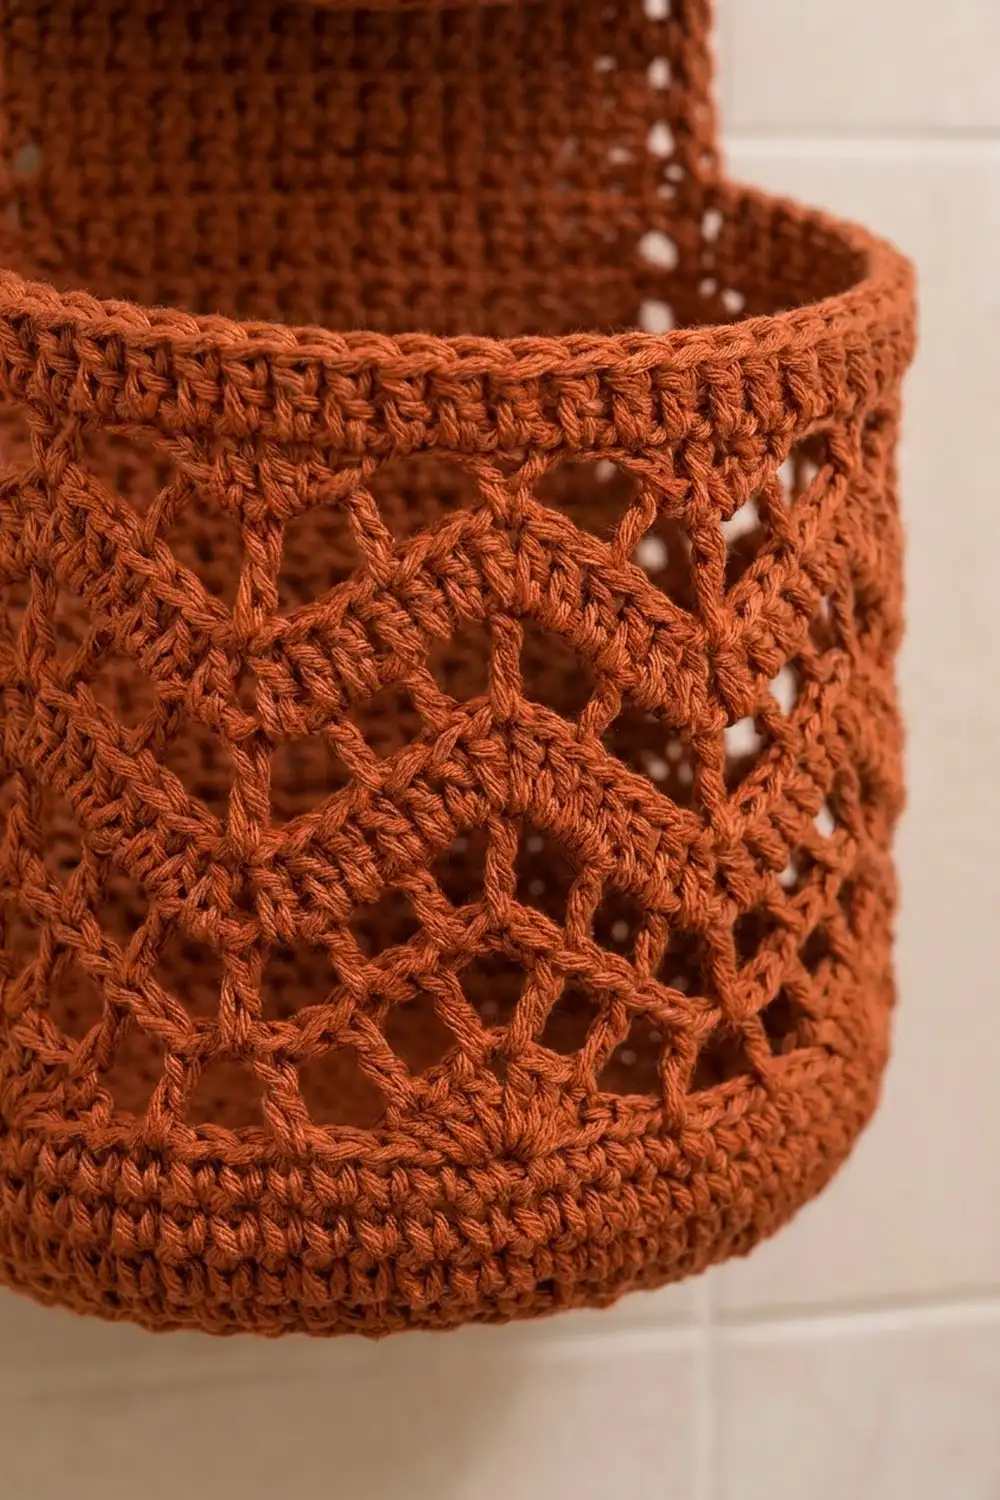
Basket (Make 3)
Base
Worked in joined rounds with the RS facing. Ch 1 at the start of a round does not count as a stitch.
Rnd 1: Make a magic ring, ch 1, 6 sc in ring, join with sl st to first sc. (6 sc)
Rnd 2: Ch 1, 2 sc in each st around, join. (12 sc)
Rnd 3: Ch 1, sc in next st, 2 sc in next st, repeat 6 times, join. (18 sc)
Rnd 4: Ch 1, sc in next 2 sts, 2 sc in next st, repeat 6 times, join. (24 sc)
Rnd 5: Ch 1, sc in next 3 sts, 2 sc in next st, repeat 6 times, join. (30 sc)
Rnd 6: Ch 1, sc in next 4 sts, 2 sc in next st, repeat 6 times, join. (36 sc)
Rnd 7: Ch 1, sc in next 5 sts, 2 sc in next st, repeat 6 times, join. (42 sc)
Rnd 8: Ch 1, sc in next 6 sts, 2 sc in next st, repeat 6 times, join. (48 sc)
Rnd 9: Ch 1, sc in next 7 sts, 2 sc in next st, repeat 6 times, join. (54 sc)
Rnd 10: Ch 1, sc in next 8 sts, 2 sc in next st, repeat 6 times, join. (60 sc)
Checkpoint: 5.25–5.5 in (13.3–14.0 cm) across, lying flat.
Wall: Bottom Band
Rnd 11 (turning ridge): Ch 1, sc in BLO of each st around, join. (60 sc) The unworked front loops of Rnd 10 make a ridge around the base. Do not cut them; you will use them for seaming.
Rnd 12: Ch 1, sc in each st around, join. (60 sc)
Wall: Chevron Lace
Rnd 13 (set-up): Ch 4 (counts as dc + ch 1), dc in same st. This is the first peak. Ch 1, sk next st, dc in next st, ch 1, sk next st, dc3tog over next 3 sts, ch 1, sk next st, dc in next st, ch 1, sk next st.
(Dc, ch 1, dc) in next st, ch 1, sk next st, dc in next st, ch 1, sk next st, dc3tog over next 3 sts, ch 1, sk next st, dc in next st, ch 1, sk next st. Repeat 5 more times. Join with sl st to 3rd ch of beg ch-4.
(60 positions: 30 sts + 30 ch-1 sps, 6 repeats)
Each repeat uses exactly 10 sc and makes exactly 10 positions: peak (3) + ch (1) + dc (1) + ch (1) + dc3tog (1) + ch (1) + dc (1) + ch (1).
Rnd 14: Sl st in next ch-1 sp (the peak sp). Ch 4 (counts as dc + ch 1), dc in same sp. Ch 1, sk next dc, dc in next ch-1 sp, ch 1, sk next dc, dc3tog over (next ch-1 sp, dc3tog, next ch-1 sp), ch 1, sk next dc, dc in next ch-1 sp, ch 1, sk next dc.
(Dc, ch 1, dc) in next peak ch-1 sp, ch 1, sk next dc, dc in next ch-1 sp, ch 1, sk next dc, dc3tog over (next ch-1 sp, dc3tog, next ch-1 sp), ch 1, sk next dc, dc in next ch-1 sp, ch 1, sk next dc. Repeat 5 more times. Join to 3rd ch of beg ch-4.
(60 positions, 6 repeats)
Rnds 15–16: Repeat Rnd 14. (60 positions each)
Peaks stack on peaks and valleys on valleys, which forms the zigzag lace.
Wall: Leveling and Rim
Rnd 17 (leveling): Ch 1. In each repeat, starting in the same st as the join: sc in next dc, sc in peak sp, sc in next dc, hdc in next ch-1 sp, hdc in next dc, dc in next ch-1 sp, dc in dc3tog, dc in next ch-1 sp, hdc in next dc, hdc in next ch-1 sp. Repeat 6 times in total, then join.
(60 sts: 18 sc + 24 hdc + 18 dc, worked 1 per existing position)
Taller stitches fill the valleys so the rim sits level.
Rnds 18–21: Ch 1, sc in each st around, join. (60 sc each)
Fasten off and leave a 24 in (61.0 cm) tail for seaming. Mark the round join, which will face the back strip.
Checkpoint: the wall is 4 in (10.2 cm) tall and the basket is 5.5 in (14.0 cm) across.
Back Strip with Hanging Tab (Make 1)
Row 1: Ch 15, sc in 2nd ch from hook and in each ch across. (14 sc)
Rows 2–60: Ch 1, turn, sc in each st across. (14 sc each)
Checkpoint: 4 x 15 in (10.2 x 38.1 cm).
Row 61: Ch 1, turn, sc2tog, sc in next 10 sts, sc2tog. (12 sc)
Row 62: Ch 1, turn, sc2tog, sc in next 8 sts, sc2tog. (10 sc)
Row 63: Ch 1, turn, sc2tog, sc in next 6 sts, sc2tog. (8 sc)
Rows 64–83: Ch 1, turn, sc in each st across. (8 sc each)
Fasten off. The tab (Rows 61–83) is 5.75 in (14.6 cm) long and about 2.3 in (5.8 cm) wide.
Make All Pieces
- Baskets: 3 in Rust/Terracotta (about 45 g each)
- Back strip with tab: 1 in Rust/Terracotta (about 45 g)
Layout, front view, with strip rows counted from the bottom:
        [ wooden ring ]
          | TAB |          Rows 61–83
   +---------------+
   |  top margin   |       Rows 57–60
   |  [BASKET 3]   |       Rows 41–56
   |     gap       |       Rows 37–40
   |  [BASKET 2]   |       Rows 21–36
   |     gap       |       Rows 17–20
   |  [BASKET 1]   |       Rows 1–16
   +---------------+
Each basket covers 16 rows, or 4 in (10.2 cm). Each gap is 4 rows, or 1 in (2.5 cm).
Joining
Method: Whipstitch with the basket’s own yarn tail, using matching stitches.
Placement: Lay the strip RS up. Mark stitches 2 and 13 of the strip. Leave the outer stitch on each side (sts 1 and 14) free for the border. Center each basket’s round join against the strip, between those markers.
Rim seam (1:1): Count 6 sts to each side of the basket’s round join on Rnd 21, for 12 sts in total. Whipstitch these 12 rim sts to strip sts 2–13 on Row 16 (Basket 1), Row 36 (Basket 2) or Row 56 (Basket 3). That is one rim stitch to one strip stitch.
Base seam (1:1): Whipstitch the matching 12 free front loops from Rnd 10 to strip sts 2–13 on Row 1, Row 21 or Row 41.
Side seams: Sew each side of the basket wall from rim to base along strip columns 2 and 13. The 11 wall rounds match the 16 strip rows like this:
– Rnds 11–12: 1 strip row each
– Rnds 13–16 (lace): 2 strip rows each
– Rnd 17: 2 strip rows
– Rnds 18–21: 1 strip row each
That adds up to 16 rows.
Tension: Pull each stitch snug but not tight. The strip should stay flat, with no puckering behind the basket.
Checkpoint: The strip still measures 4 x 15 in (10.2 x 38.1 cm). Each basket sits flat-backed and round-fronted, and the gaps measure 1 in (2.5 cm).
Border
Border gauge: 3.5 sc per in along every edge. Sc row height is 0.25 in, so 4 rows = 1 in. The edging needs 3.5 sc per 4 rows, which is the same as 7 sc for every 8 row-ends. You get this by skipping every 8th row-end.
Rnd 1: With the RS facing, join yarn in the first foundation ch at the bottom-right corner, then ch 1.
- Bottom edge: 3 sc in first st, sc in next 12 sts, 3 sc in last st. (18 sc = 14 worked 1 per st + 4 extra in the corners)
- First long side, between corners: Work 1 sc in each row-end for Rows 2–60, skipping the row-ends of Rows 8, 16, 24, 32, 40, 48 and 56 (59 − 7 = 52). Then work Rows 61–82, skipping Rows 66 and 74 (22 − 2 = 20). (72 sc)
- Tab top: 3 sc in first st of Row 83, sc in next 6 sts, 3 sc in last st. (12 sc = 8 + 4 corner extras)
- Second long side: Work as for the first side, from Row 82 down to Row 2 with the same skips. (72 sc)
Join with sl st to first sc. (174 sc: 18 + 72 + 12 + 72)
The corner groups are counted inside the bottom and top counts only. The long-side counts sit between the corners, so no corner is counted twice.
Rnd 2: Ch 1, sl st loosely in each sc around, join. (174 sl st) Fasten off.
Why the math works: 52 sc ÷ 3.5 = 14.86 in, which matches Rows 2–60 (14.75 in) almost exactly, so the edges neither ruffle nor pull. Each side gains 0.25 in (0.6 cm), so the 4 in strip becomes 4.5 in (11.4 cm) wide.
Attach ring: Pass the tab from front to back through the wooden ring. Fold Rows 73–83 to the WS, so the top 2.75 in (7.0 cm) lies over Row 62. Whipstitch the top edge in place. The visible tab (Rows 61–72) is 3 in (7.6 cm).
Final Blocking
- Mist the whole holder until it is evenly damp. Do not soak it.
- Lay it face up on a blocking mat or towel.
- Pin the strip to 4.5 x 15.25 in (11.4 x 38.7 cm), with the edges straight.
- Push a spare toilet roll into each basket so the walls stand round and upright.
- Use your fingers to open the lace, pulling each peak up and each valley down.
- Press the turning ridges so each base sits flat.
- Leave it to dry completely, which takes 24 hours for cotton.
- Remove the pins and check that the length is 18.25 in (46.4 cm).
Final Quality-Control Checklist
- [ ] Each basket base is 5.5 in (14.0 cm) and lies flat
- [ ] Each wall is 4 in (10.2 cm) tall with 6 even zigzag repeats
- [ ] Every lace round has 60 positions
- [ ] Each rim top is level (Rnd 17 done correctly)
- [ ] Round joins are hidden against the strip
- [ ] Rim and base seams are 12 sts to 12 sts
- [ ] Gaps between baskets are 1 in (2.5 cm)
- [ ] Border Rnd 1 has 174 sc and lies flat
- [ ] The tab is stitched securely around the ring
- [ ] All ends are woven in through solid stitches
Troubleshooting
The zigzags drift sideways. You started a lace round in the wrong place. Always sl st into the peak ch-1 sp first.
The stitch count is off in a lace round. Count positions, not stitches. A dc3tog counts as 1, and so does each ch-1 sp.
The rim is wavy. The leveling round was skipped or misplaced. The dc stitches must land over the valleys.
The basket sags forward. Tighten the side seams, or use a firmer cotton or a smaller hook.
The strip edges ruffle. You did not skip the row-ends. Skip every 8th one.
The tab stretches. Sew the fold through both layers in every stitch, and double the seam yarn.
Care
Hand wash in cool water, roll it in a towel and reshape it over toilet rolls to dry flat. Do not tumble dry, because heat can shrink cotton and distort the baskets.
Final Notes
Keep the measurement chain in order:
1. Gauge: 14 sc = 4 in (10.2 cm).
2. Basket base: 60 sts and 5.5 in (14.0 cm).
3. Basket wall: 60 positions in every round and 4 in (10.2 cm) tall.
4. Back strip: 14 sts x 60 rows = 4 x 15 in (10.2 x 38.1 cm).
5. Seams: 12 sts to 12 sts.
6. Border: 174 sc, 4.5 in (11.4 cm) wide.
7. Finished length: 18.25 in (46.4 cm), not counting the ring.
If each checkpoint matches, the finished holder will match. Happy crocheting!