

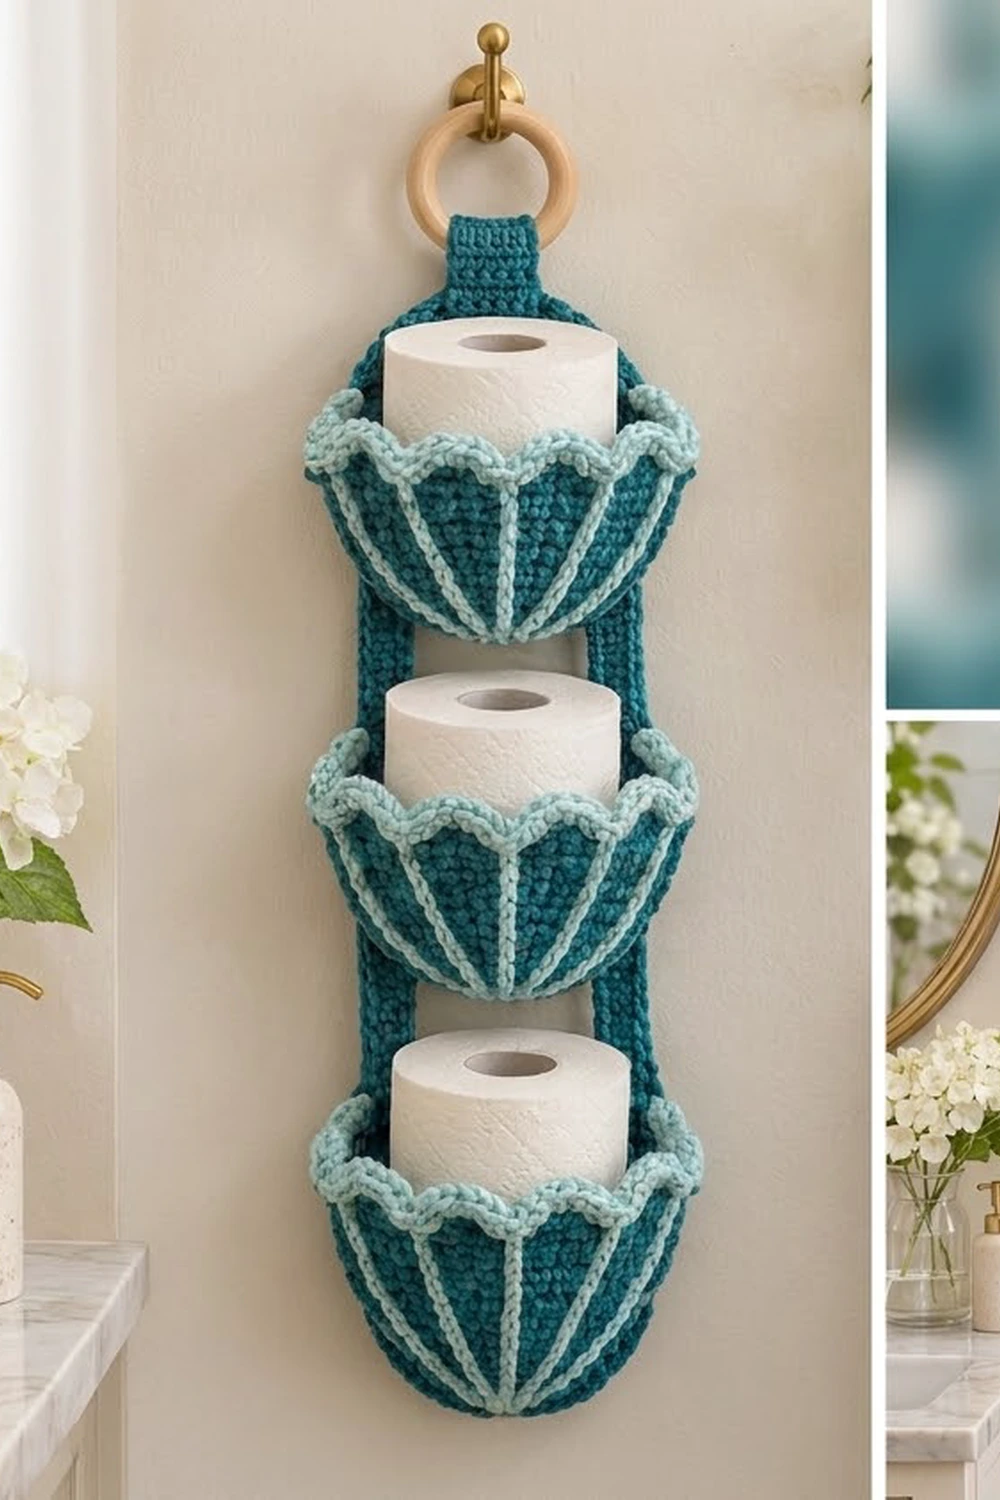
This hanging toilet paper holder keeps three standard rolls in a neat vertical column. Each roll sits in its own rounded, shell-shaped pocket. The pockets are sewn to a long back panel that hangs from a wooden ring on a wall hook.
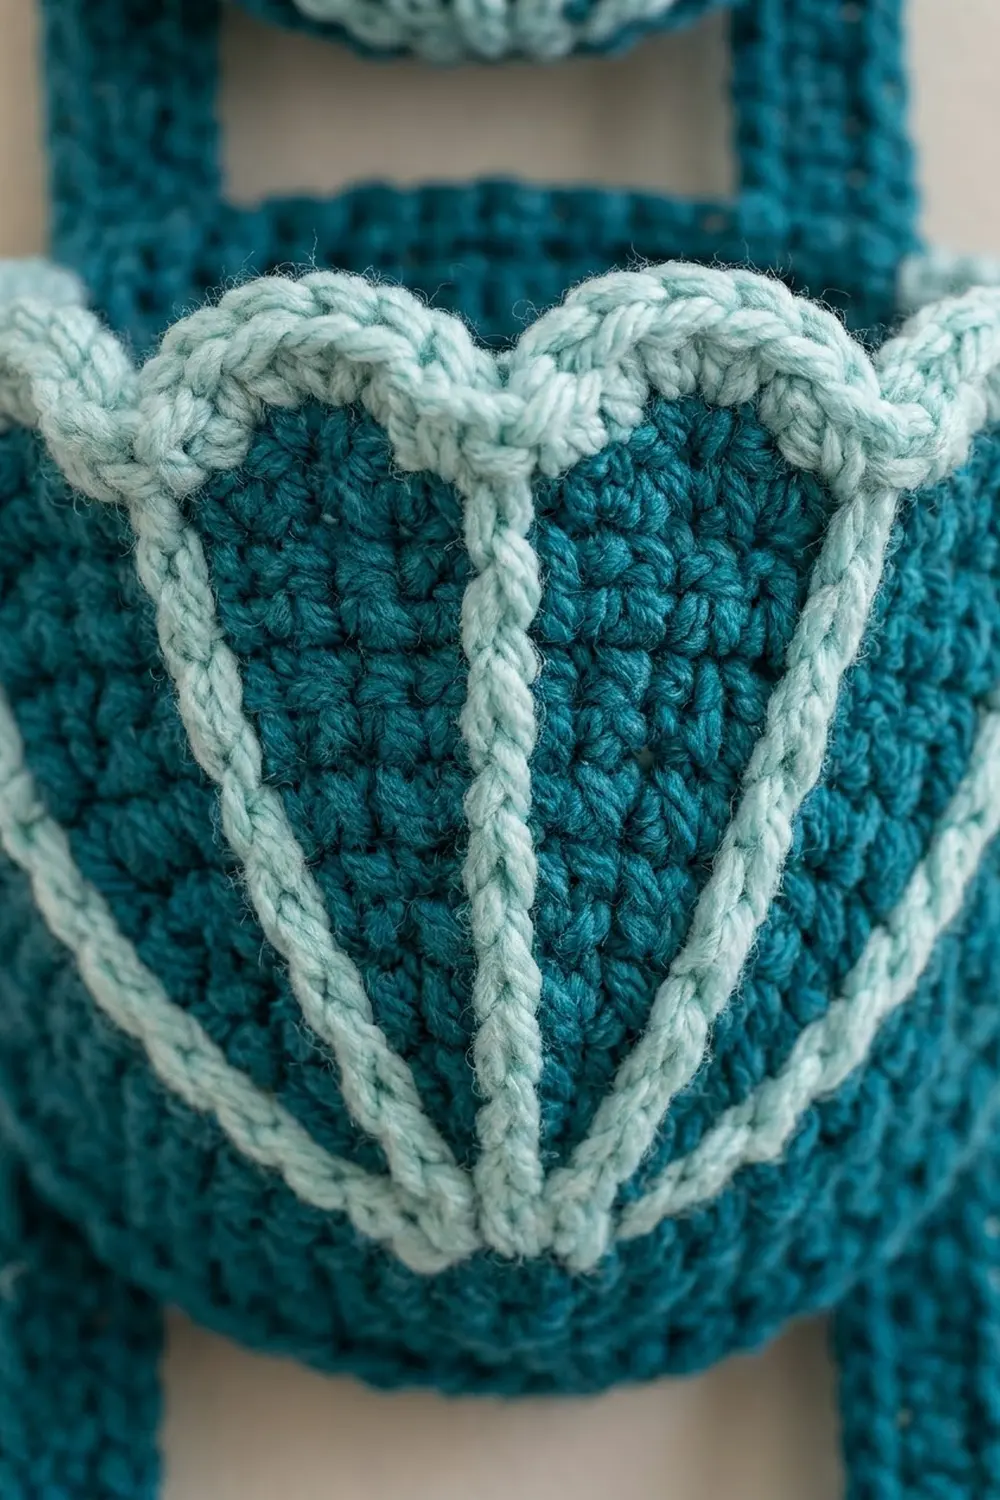
The main color is a deep teal. A light aqua accent forms raised ribs up each pocket and a scalloped rim around each opening, so every pocket looks like a scallop shell. The style is coastal, simple, and sturdy enough for daily use.
The pattern uses US crochet terms. The finished holder measures 5.5 in (14.0 cm) wide at the panel and 24.75 in (62.9 cm) long, not counting the ring. Each pocket opening measures 15 in (38.1 cm) around.
First you crochet the back panel in rows, with two open windows and a narrow hanging tab. Next you crochet three cup-shaped pockets in spiral rounds, add surface slip stitch ribs, and work a two-round scalloped rim. Finally, you sew the pockets to the panel and fold the tab over the ring.
Finished Size and Construction
- Finished size: 5.5 in x 24.75 in (14.0 cm x 62.9 cm), excluding the ring
- Skill level: Easy-intermediate
- Terminology: US crochet terms
- Yarn weight: Aran / Medium (#4), cotton or cotton blend
- Hook: 5.0 mm (H-8)
- Number of pieces: 4 crocheted pieces (1 back panel, 3 pockets), plus 1 wooden ring
- Layout: 3 pockets stacked in a single vertical column
- Pocket size: 15 in (38.1 cm) around the opening, about 3.5 in (8.9 cm) deep before the rim
- Panel size before border: 5 in x 24.5 in (12.7 cm x 62.2 cm)
- Border depth: panel edging 0.25 in (0.6 cm); pocket scallop rim 0.75 in (1.9 cm)
Materials
Choose a firm cotton or cotton-acrylic blend. Cotton holds the bowl shape well and does not stretch much under the weight of the rolls. Avoid very soft or splitty yarns, because the pockets need body.
The amounts below assume a yarn of about 170 m per 100 g.
- Main color (MC), teal: 300 g, about 510 m
- Contrast color (CC), light aqua: 80 g, about 136 m
These amounts include a margin of about 15 percent for your gauge swatch and small differences in tension.
Tools:
- 5.0 mm (H-8) crochet hook
- Wooden ring, 2.75 in (7.0 cm) outer diameter
- 12 or more locking stitch markers
- Tapestry needle
- Scissors
- Measuring tape
- Rustproof pins and a blocking mat or folded towel
Abbreviations (US Terms)
- ch – chain
- sc – single crochet
- hdc – half double crochet
- dc – double crochet
- sl st – slip stitch
- sc2tog – single crochet 2 together (decrease)
- inc – 2 sc in the same stitch
- st(s) – stitch(es)
- rnd(s) – round(s)
- RS / WS – right side / wrong side
- MC / CC – main color / contrast color
Surface slip stitch (surf sl st): Hold the CC yarn behind the work. Insert the hook from the RS through the fabric, yarn over behind, and pull a loop through the fabric and through the loop on the hook. Move up one round and repeat. This makes a raised chain line on the surface.
Gauge and Checkpoints
Gauge: 16 sc and 16 rows (or rnds) = 4 in (10.2 cm) in MC. That is 4 sts and 4 rows per 1 in (2.5 cm).
Make one pocket first and use it as your test piece. A pocket is quick to work and shows your real gauge in the round.
Checkpoints:
- Pocket, after Rnd 5: the flat base measures 2.5 in (6.4 cm) across.
- Pocket, after Rnd 15: flattened, the cup measures 7.5 in (19.1 cm) wide, or 15 in (38.1 cm) around.
- Pocket, after Rnd 22: the cup stands about 3.5 in (8.9 cm) tall.
- Panel, after Row 18: 5 in (12.7 cm) wide and 4.5 in (11.4 cm) long.
- Panel, after Row 80: 20 in (50.8 cm) long.
If your piece is too big, go down one hook size (4.5 mm). If it is too small, go up one hook size (5.5 mm). Width matters most on the pocket, because a pocket smaller than 15 in (38.1 cm) around will not hold a standard roll.
Pocket (Make 3)
Work in continuous spiral rounds with MC. Don’t join the rounds. Mark the first stitch of each round and move the marker up as you go.
Rnd 1: Make a magic ring, 6 sc in the ring. (6 sts)
Rnd 2: Inc in each st around. (12 sts)
Rnd 3: Sc in next st, inc in next st; repeat from * around. (18 sts)
Rnd 4: Sc in next 2 sts, inc in next st; repeat around. (24 sts)
Rnd 5: Sc in next 3 sts, inc in next st; repeat around. (30 sts)
The base is now 2.5 in (6.4 cm) across. From here, plain rounds alternate with increase rounds, so the sides curve up into a bowl.
Rnd 6: Sc in each st around. (30 sts)
Rnd 7: Sc in next 4 sts, inc in next st; repeat around. (36 sts)
Rnd 8: Sc in each st around. (36 sts)
Rnd 9: Sc in next 5 sts, inc in next st; repeat around. (42 sts)
Rnd 10: Sc in each st around. (42 sts)
Rnd 11: Sc in next 6 sts, inc in next st; repeat around. (48 sts)
Rnd 12: Sc in each st around. (48 sts)
Rnd 13: Sc in next 7 sts, inc in next st; repeat around. (54 sts)
Rnd 14: Sc in each st around. (54 sts)
Rnd 15: Sc in next 8 sts, inc in next st; repeat around. (60 sts)
Flatten the cup. It should measure 7.5 in (19.1 cm) wide.
Rnds 16–22: Sc in each st around. (60 sts each round)
At the end of Rnd 22, sl st in the next st to smooth the step left by the spiral. Fasten off MC and weave in the tail on the inside. Turn the cup so the RS faces outward.
Shell Ribs
Each pocket has 12 ribs. On Rnd 22, place a marker in every 5th st: sts 5, 10, 15, and so on up to 60. On Rnd 4, place a marker in every 2nd st: sts 2, 4, 6, and so on up to 24. Each Rnd 22 marker pairs with the Rnd 4 marker directly below it.
With CC and the RS facing, start at a Rnd 4 marker. Work surf sl st straight up, one stitch per round, following the line toward the matching Rnd 22 marker. You will work 19 surf sl sts, one in each of Rnds 4 through 22. Pull the tail to the inside and fasten off.
Repeat for all 12 ribs. The ribs fan out as the cup widens, which creates the shell look.
Panel
With MC, ch 21.
Row 1: Sc in 2nd ch from hook and in each ch across. Turn. (20 sts)
Rows 2–18: Ch 1 (does not count as a st), sc in each st across. Turn. (20 sts)
The panel measures 5 in x 4.5 in (12.7 cm x 11.4 cm).
First Window
Row 19: Ch 1, sc in the first 5 sts only. Turn. (5 sts)
Rows 20–26: Ch 1, sc in each of the 5 sts. Turn. (5 sts)
Fasten off. This is the first rail.
Leave the next 10 sts of Row 18 unworked. With the WS facing, join MC in the last st of Row 18 (st 20), so you work toward the window. Ch 1, sc in the same st and in the next 4 sts. (5 sts) This is Row 19 of the second rail. Work 7 more rows of 5 sc (Rows 20–26). You finish at the outer edge. Don’t fasten off.
Row 27: Ch 1, sc in the 5 sts of this rail, ch 10, sc in the 5 sts of the first rail. Turn. (10 sc and 10 ch)
Row 28: Ch 1, sc in each of the 5 sc, sc in each of the 10 ch, sc in each of the 5 sc. Turn. (20 sts)
The window is 2.5 in (6.4 cm) wide and 2 in (5.1 cm) tall.
Rows 29–44: Ch 1, sc in each st across. Turn. (20 sts)
Second Window
Rows 45–53: Repeat Rows 19–27. The rails are Rows 45–52, and Row 53 is the ch-10 closing row.
Row 54: Repeat Row 28. (20 sts)
Rows 55–80: Ch 1, sc in each st across. Turn. (20 sts)
The panel is now 20 in (50.8 cm) long.
Tab Shaping
Row 81: Ch 1, sc2tog, sc in next 16 sts, sc2tog. Turn. (18 sts)
Row 82: Ch 1, sc2tog, sc in next 14 sts, sc2tog. Turn. (16 sts)
Row 83: Ch 1, sc2tog, sc in next 12 sts, sc2tog. Turn. (14 sts)
Row 84: Ch 1, sc2tog, sc in next 10 sts, sc2tog. Turn. (12 sts)
Row 85: Ch 1, sc2tog, sc in next 8 sts, sc2tog. Turn. (10 sts)
Row 86: Ch 1, sc2tog, sc in next 6 sts, sc2tog. Turn. (8 sts)
The panel is now 21.5 in (54.6 cm) long.
Rows 87–110: Ch 1, sc in each st across. Turn. (8 sts)
The tab is 6 in (15.2 cm) long. Fasten off and leave a 12 in (30.5 cm) tail for sewing.
Make All Pieces
You need 4 crocheted pieces in total:
- MC: 1 panel and 3 pocket bodies
- CC: 36 ribs (12 per pocket) and 3 scalloped rims
Layout, top to bottom:
      [ ring ]
      [ tab, folded ]
 [ panel top, Rows 71-86 ]
 [ POCKET 1, rim at Row 70 ]
 [ window, Rows 45-52 ]
 [ POCKET 2, rim at Row 44 ]
 [ window, Rows 19-26 ]
 [ POCKET 3, rim at Row 18 ]
Border
Pocket Scallop Rim
Border gauge: each scallop uses 5 sts of Rnd 22, which is 1.25 in (3.2 cm). The rim adds 0.75 in (1.9 cm) of height.
Rnd 23: Join CC with a sl st in st 1 of Rnd 22. Ch 1, sc in each st around. Join with a sl st to the first sc. (60 sts: 60 worked 1-per-stitch + 0 added)
Rnd 24: Ch 1, sc in next st, hdc in next st, 3 dc in next st, hdc in next st, sc in next st; repeat from * 11 more times. Join with a sl st to the first sc. (84 sts: 60 worked 1-per-stitch + 24 added, 2 extra per scallop; 12 scallops)
Fasten off and weave in the ends.
Why the math works: 60 sts divide evenly into 12 repeats of 5. Each rib sits on a multiple of 5, so every rib ends in a dip, where the last sc of one scallop meets the first sc of the next. The 2 extra dc in each scallop make the rim flare slightly, like the edge of a shell.
Panel Edging
Border gauge: 1 sc per row end, which matches the panel’s gauge of 4 sts and 4 rows per 1 in (2.5 cm).
With RS facing, join MC at the left edge of Row 86.
Edging row: Ch 1. Work 86 sc down the left side, 1 in each row end. Ch 1 at the corner. Work 20 sc across the bottom, 1 in each free loop of the foundation chain. Ch 1 at the corner. Work 86 sc up the right side, 1 in each row end. Fasten off. (192 sc: 86 left, 20 bottom, 86 right; the 2 corner chains are not counted)
Each side’s 86 count includes the row ends of the rails, so it is the same along the windows.
Why the math works: the gauge is square, 4 sts by 4 rows per 1 in (2.5 cm), so 1 sc per row end lies flat without ruffling or pulling. The edging adds 0.25 in (0.6 cm) to each side and to the bottom. The panel becomes 5.5 in (14.0 cm) wide and 21.75 in (55.2 cm) long below the tab.
Joining
Sew each pocket to the panel with MC and a tapestry needle, using whipstitch.
Stitch-to-stitch logic: Each pocket has 60 sts in Rnd 22. Choose 20 consecutive sts for the back of the pocket, for example sts 6–25. Sew those 20 sts to the 20 sts of the panel’s target row, one stitch to one stitch. The other 40 sts curve outward to form the front of the pocket.
- Pocket 3: sew the rim to Row 18.
- Pocket 2: sew the rim to Row 44.
- Pocket 1: sew the rim to Row 70.
Next, flatten the back of each cup against the panel. Tack the center of Rnd 1 to the center of the panel, 14 rows below the rim row. Then add a few tacking stitches up the center back line, from the base to the rim.
Tension: Keep the whipstitch snug but not tight. The rim should sit flat against the panel, with no gathering. Weave each tail through the seam twice to secure it.
Fold the tab: Pass the tab through the wooden ring from front to back. Fold it down behind the panel and sew Row 110 to the back of Row 86.
Size checkpoint: The holder measures 24.75 in (62.9 cm) from the fold of the tab to the bottom edge. Each pocket rim is about 6 in (15.2 cm) across at the front.
Final Blocking
- Wet-block by soaking the piece and gently squeezing out the water, or just mist it lightly.
- Lay the panel flat and pin it to 5.5 in x 24.75 in (14.0 cm x 62.9 cm).
- Fill each pocket with a roll wrapped in a plastic bag, or a rolled towel, so it dries in a round bowl shape.
- Pin the scallops so each one is evenly rounded.
- Let everything dry completely, which usually takes about 24 hours.
- Remove the pins and the filling.
Final Quality-Control Checklist
- Each pocket has 60 sts in Rnd 22 and 12 scallops in Rnd 24.
- All 12 ribs end at a dip between scallops.
- Each pocket holds a standard roll without strain.
- Both windows are 2.5 in (6.4 cm) wide and 2 in (5.1 cm) tall.
- The panel edging has 86 sc on each side and 20 sc across the bottom.
- The pockets sit at Rows 18, 44, and 70, centered on the panel.
- The tab seam is hidden behind the panel.
- All ends are woven in on the inside.
Troubleshooting
The pocket is too tight for a roll. Your gauge is too tight. Remake the pocket with a 5.5 mm hook.
The pocket base is flat, not rounded. You may have skipped a plain round. Check that Rnds 6, 8, 10, 12, and 14 have no increases.
The ribs wander sideways. Follow the line from the Rnd 4 marker to the Rnd 22 marker, and check it every few stitches.
The scallops look crowded. Recount Rnd 23. It must have exactly 60 sts.
The panel edging ripples. You added extra sts. Work exactly 1 sc per row end.
The pocket droops forward. Add more tacking stitches along the center back of the cup.
Care
Hand wash in cool water and lay flat to dry, reshaping the pockets while damp. Don’t tumble dry.
Final Notes
The measurements build on each other. A gauge of 4 sts and 4 rows per 1 in (2.5 cm) gives a 60-stitch pocket with a 15 in (38.1 cm) opening. Twenty of those 60 sts match the 20-stitch panel exactly. The 60 sts split into 12 even repeats for the ribs and scallops. The 86 panel rows match the 86 edging sts on each side. If you check each measurement as you go, the holder will hang straight and hold all three rolls.
Happy crocheting!