

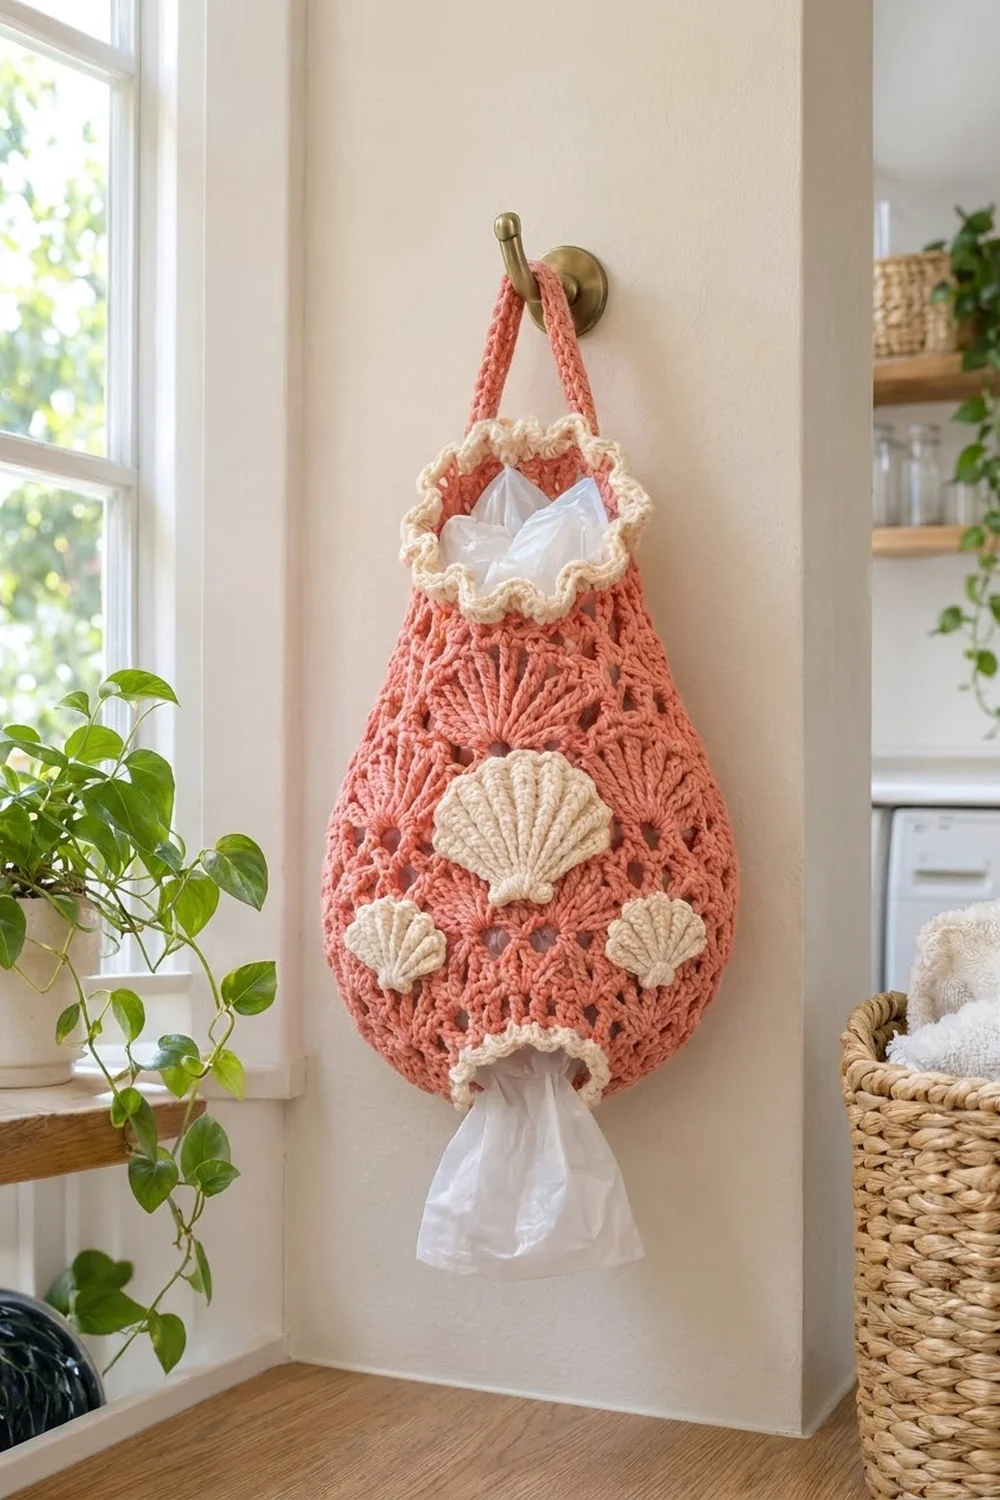
This coral bag holder looks a little like a beach-house teardrop. The body is worked in an airy fan stitch, both openings get soft cream ruffles, and three textured seashells are sewn to the front. Stuff plastic bags in the top and pull them out one at a time from the bottom.
There are two colors: a warm coral for the body and strap, and a creamy off-white for the ruffles and shells. The style is cottage-coastal, and it suits a kitchen, laundry room, or pantry.
The pattern uses US crochet terms. The finished holder measures about 13.25 in (33.7 cm) tall from ruffle edge to ruffle edge and 8.5 in (21.6 cm) wide flat at the widest point. The strap loop rises about 5.5 in (14.0 cm) above the top rim.
You start at the bottom opening with a chain ring and work upward in joined rounds. There are three double-crochet increase rounds, then fan rounds, then smaller fans to narrow the neck. After that you add the ruffles, make three shells and a strap, and sew everything in place.
Finished Size and Construction
- Finished size: 13.25 in (33.7 cm) tall × 8.5 in (21.6 cm) wide flat, without the strap
- Skill level: Intermediate (post stitches and working in the round)
- Terminology: US
- Yarn weight: Worsted (#4), cotton or cotton blend
- Hooks: 5 mm (H-8) for the body, trims, and strap; 4 mm (G-6) for the shells
- Number of pieces: 1 body, 1 strap, 3 shell appliqués (1 large, 2 small)
- Layout: large shell at center front, small shells below it to the left and right
- Body size before trims: 11.25 in (28.6 cm) tall
- Top opening before trim: 5.75 in (14.6 cm) flat
- Bottom opening before trim: 3.5 in (8.9 cm) flat
- Trim depth: about 1 in (2.5 cm) at each opening
Materials
Choose a smooth worsted cotton or cotton blend. Cotton keeps the fans crisp, stretches less when it hangs, and washes well. Acrylic will work, but the body will drape and lengthen more.
- Coral: 120 g / about 210 m (230 yd)
- Cream: 35 g / about 60 m (66 yd)
These quantities include a margin of about 15%.
Tools:
- 5 mm (H-8) and 4 mm (G-6) crochet hooks
- Tapestry needle
- 4 stitch markers
- Rust-proof pins
- Scissors
- Measuring tape
- A rolled towel for blocking
Abbreviations (US Terms)
- ch: chain
- sl st: slip stitch
- sc: single crochet
- hdc: half double crochet
- dc: double crochet
- FPdc: front post double crochet
- BPdc: back post double crochet
- sk: skip
- st(s): stitch(es)
- rnd(s): round(s)
- RS / WS: right side / wrong side
Special stitches:
- Shell: 5 dc in the same stitch.
- Small shell: 3 dc in the same stitch.
- Center dc: the 3rd dc of a shell, or the 2nd dc of a small shell.
Gauge and Checkpoints
Gauge (5 mm hook): 14 dc and 7 dc rows = 4 in (10.2 cm).
Fan pattern gauge: 2 shell repeats (12 sts) = 3.4 in (8.6 cm), and 10 shell rounds = 6 in (15.2 cm).
Use Rounds 1–4 as your test piece and measure before you continue. Everything after them depends on that base.
Checkpoints:
- After Rnd 1: the ring is about 3.5 in (8.9 cm) across when flattened.
- After Rnd 4: the piece is about 2 in (5.1 cm) tall and 8.5 in (21.6 cm) across when flattened.
- After Rnd 14: the body is about 8 in (20.3 cm) tall.
- After Rnd 19: the body is about 11 in (27.9 cm) tall.
- After Rnd 20: the body is about 11.25 in (28.6 cm) tall, and the top is 5.75 in (14.6 cm) flat.
If your piece is too big: use a hook 0.5 mm smaller and restart.
If your piece is too small: use a hook 0.5 mm larger and restart.
Get the width right first. Height can be adjusted by adding or removing one fan round in Rnds 7–14, and that doesn’t change any stitch counts.
Body
Use the 5 mm hook and coral. Don’t turn between rounds, so the RS always faces you. Join each round with a sl st to its first stitch, and mark that stitch.
Foundation: Leave a 12 in (30.5 cm) tail. Ch 24 and join with a sl st to the first ch to form a ring, without twisting the chain.
Rnd 1: Ch 1, sc in each ch around, then join. (24 sc)
Leave the free loops of the foundation chain unworked. The bottom ruffle goes there later.
Rnd 2 (growth): Ch 3 (counts as dc throughout), dc in the same st, dc in the next st. 2 dc in the next st, dc in the next st. Repeat from * 11 times, then join. (36 dc)
Rnd 3 (growth): Ch 3, dc in the same st, dc in the next 2 sts. 2 dc in the next st, dc in the next 2 sts. Repeat from * 11 times, then join. (48 dc)
Rnd 4 (growth): Ch 3, dc in the same st, dc in the next 3 sts. 2 dc in the next st, dc in the next 3 sts. Repeat from * 11 times, then join. (60 dc)
Check gauge now. Because 60 is a multiple of 6, the fan pattern fits exactly 10 times.
Rnd 5 (set-up fan round): Ch 1, sc in the first st. Sk 2 sts, shell in the next st, sk 2 sts, sc in the next st. Repeat from * 8 more times. Then sk 2 sts, work a shell in the next st, sk the last 2 sts, and join to the first sc. (10 shells + 10 sc = 60 sts)
Rnd 6 (fan round): Sl st in each of the next 3 dc to reach the center dc of the first shell. Ch 1, sc in that center dc. Shell in the next sc, sc in the center dc of the next shell. Repeat from * 8 more times. Then work a shell in the last sc and join to the first sc. (10 shells + 10 sc = 60 sts)
Each new shell sits on an sc, and each new sc sits in the center of a shell. This offsets the fans like brickwork and leaves eyelet gaps between them.
Rnds 7–14: Repeat Rnd 6 eight more times. (60 sts in each round)
The body now measures 8 in (20.3 cm) tall.
Rnd 15 (conversion round): Sl st in each of the next 3 dc to reach the center dc of the first shell. Ch 1, sc in that center dc. Small shell in the next sc, sc in the center dc of the next shell. Repeat from * 8 more times. Then work a small shell in the last sc and join. (10 sc + 10 small shells of 3 dc = 10 + 30 = 40 sts)
Each repeat drops from 6 sts to 4 sts. This narrows the neck without breaking the fan rhythm.
Rnd 16 (small-fan round): Sl st in each of the next 2 dc to reach the center dc of the first small shell. Ch 1, sc in that center dc. Small shell in the next sc, sc in the center dc of the next small shell. Repeat from * 8 more times. Then work a small shell in the last sc and join. (40 sts)
Rnds 17–19: Repeat Rnd 16 three more times. (40 sts in each round)
The body now measures 11 in (27.9 cm) tall.
Rnd 20 (rim): Ch 1, sc in each st around, then join. (40 sc)
Fasten off. Flatten the body so the round joins run up the center back. That puts 20 rim sts on the front and 20 on the back.
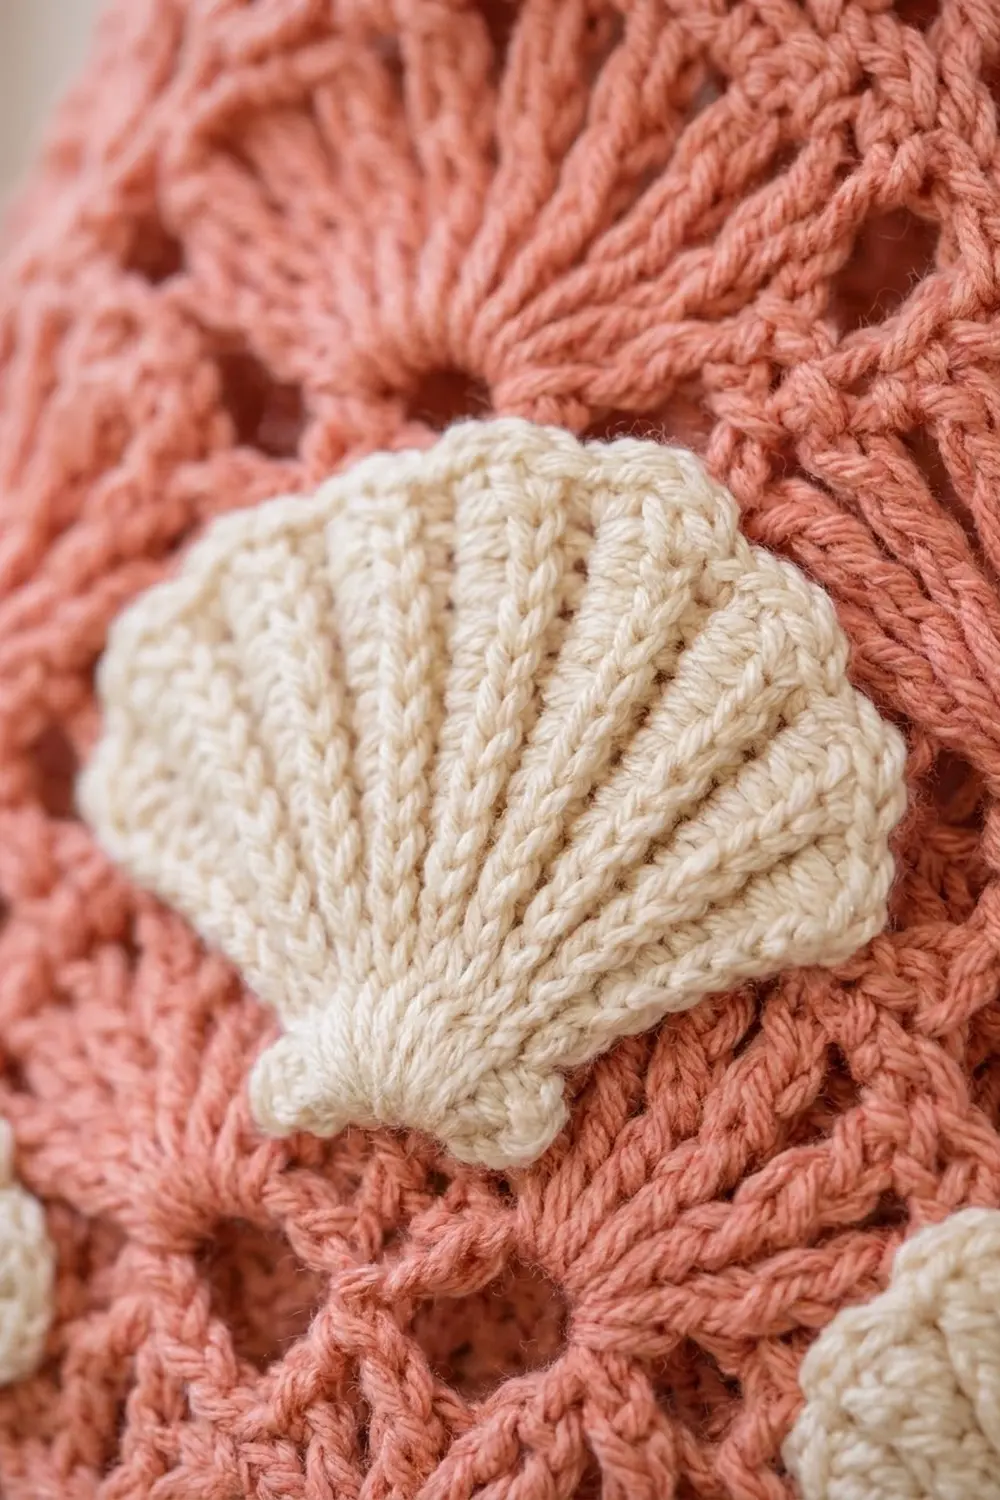
Shell Appliqués
Use the 4 mm hook and cream. The smaller hook keeps the ribs crisp.
Large Shell (make 1)
Row 1 (RS): Ch 2, 5 hdc in the 2nd ch from the hook, then turn. (5 hdc)
Row 2 (WS): Ch 2 (does not count as a st), 2 dc in each st, then turn. (10 dc)
Row 3 (RS, conversion): Ch 2. FPdc around the next st, 2 dc in the next st. Repeat from * 5 times in total, then turn. (10 sts worked + 5 extra = 15 sts: 5 FPdc + 10 dc)
Row 4 (WS, conversion): Ch 2. BPdc around the next FPdc, 2 dc in the next dc, dc in the next dc. Repeat from * 5 times in total, then turn. (15 sts worked + 5 extra = 20 sts)
Working BPdc on the WS keeps the ribs raised on the RS.
Row 5 (RS, scallop edge): Ch 1. Sc in the next BPdc, sk the next dc, 5 dc in the next dc, sk the next dc. Repeat from * 5 times in total. (5 scallops)
Hinge: Don’t turn. Ch 1 and work 6 sc evenly down the side edge. Work (hdc, dc, hdc) into the base, then 6 sc evenly up the other side. Sl st to the first sc of Row 5. Fasten off and leave a 12 in (30.5 cm) tail.
Size: about 3 in (7.6 cm) wide × 2.75 in (7.0 cm) tall.
Small Shell (make 2)
Rows 1–3: Work as for the Large Shell. (15 sts)
Row 4 (WS, scallop edge): Ch 1. Sc in the next FPdc, 3 hdc in each of the next 2 dc. Repeat from * 5 times in total. (5 scallops of 6 hdc)
Hinge: Don’t turn. Ch 1, work 4 sc down the side edge, (hdc, dc, hdc) into the base, and 4 sc up the other side. Sl st to Row 4. Fasten off and leave a 10 in (25.4 cm) tail.
Size: about 2 in (5.1 cm) wide × 1.75 in (4.4 cm) tall.
Strap
Use the 5 mm hook and coral. Leave a 12 in (30.5 cm) starting tail.
Row 1: Ch 46. Sc in the 2nd ch from the hook and in each ch across, then turn. (45 sc)
Rows 2–3: Ch 1, sc in each st across, then turn. (45 sc)
Fasten off and leave a 12 in (30.5 cm) tail. The strap measures about 13 in (33.0 cm) × 0.75 in (1.9 cm).
Attaching the Shells and Strap
- Flatten the body with the round joins at the center back.
- Pin the large shell at center front with the hinge down. The hinge sits on Rnd 8 and the scallops reach Rnd 12.
- Pin the small shells with their hinges on Rnd 5. Center each one 2.75 in (7.0 cm) to the left or right of the center line.
- Whipstitch around each shell’s edge, catching only the front layer of the body.
- Sew each strap end inside a side fold, overlapping 1 in (2.5 cm) down Rnds 18–20. Box-stitch through both layers.
Border (Ruffle Trims)
Border gauge: the cream sc matches the body gauge of 14 sts = 4 in (10.2 cm). Each trim is about 1 in (2.5 cm) deep.
Top Ruffle
Join cream with the 5 mm hook in any sc of Rnd 20.
Rnd 1: Ch 1, sc in each st, then join. (40 sc: 20 per flat side)
Rnd 2 (conversion): Ch 3, dc in the same st, then 2 dc in each remaining st. Join. (40 sts worked + 40 extra = 80 dc: 40 per flat side)
Rnd 3: Ch 1, sc in each st, then join. (80 sc: 40 per flat side)
Fasten off.
Bottom Ruffle
Turn the body upside down. Join cream in any free loop of the foundation chain.
Rnd 1: Ch 1, sc in each free loop, then join. (24 sc: 12 per flat side)
Rnd 2 (conversion): Ch 3, dc in the same st, then 2 dc in each remaining st. Join. (24 sts worked + 24 extra = 48 dc: 24 per flat side)
Rnd 3: Ch 1, sc in each st, then join. (48 sc: 24 per flat side)
Fasten off.
Why the math works: Rnd 1 of each trim matches its edge stitch for stitch, so it lies flat. Rnd 2 doubles the count. At gauge, 80 sts would lie flat over about 22.9 in (58.2 cm), but the top edge is only about 11.4 in (29.0 cm) around. The extra length has nowhere to go, so it rolls into waves. The bottom trim uses the same 2:1 ratio, so the two ruffles match.
Final Blocking
- Weave in all ends, running each one at least 2 in (5.1 cm) along the stitches.
- Soak the holder in cool water for 10 minutes. Press it in a towel to remove water, without wringing.
- Stuff a rolled towel inside until the body measures 8.5 in (21.6 cm) wide flat and 11.25 in (28.6 cm) tall between the trims.
- Open each fan with your fingers so the eyelets are even.
- Pinch the ruffles into even waves and pin the shell scallops flat.
- Let it dry completely, with the strap laid straight.
Final Quality-Control Checklist
- 60 sts in Rnds 4–14 and 40 sts in Rnds 15–20
- 10 offset fans in every fan round
- 80 sts in the top ruffle and 48 sts in the bottom ruffle
- 5 ribs and 5 scallops on each shell
- Shells sewn through the front layer only
- Strap ends secure at both side folds
- A bag pulls out of the bottom without distorting the opening
Troubleshooting
- Fans lean or drift: you missed the center dc. Count to it before placing each sc.
- Base cups too much: your increase rounds are tight. Go up 0.5 mm for Rnds 2–4.
- Ruffle is flat instead of wavy: make sure Rnd 2 has 2 dc in every stitch.
- Shell ribs sink: work the Row 4 BPdc from the WS.
- Bottom opening is too loose: work Rnd 1 of the bottom ruffle with the 4 mm hook.
Care
Hand wash in cool water, reshape, and dry flat. Avoid the dryer, which flattens the ruffles and shells.
Final Notes
The measurement chain runs like this:
- A 24-st ring grows to 60 sts, 8.5 in (21.6 cm) wide flat.
- Ten fan rounds bring the body to 8 in (20.3 cm) tall.
- Small shells narrow it to 40 sts, and the rim reaches 11.25 in (28.6 cm).
- Two 1 in (2.5 cm) ruffles finish it at 13.25 in (33.7 cm).
If each checkpoint matches, the finished holder will too.
Happy crocheting!