

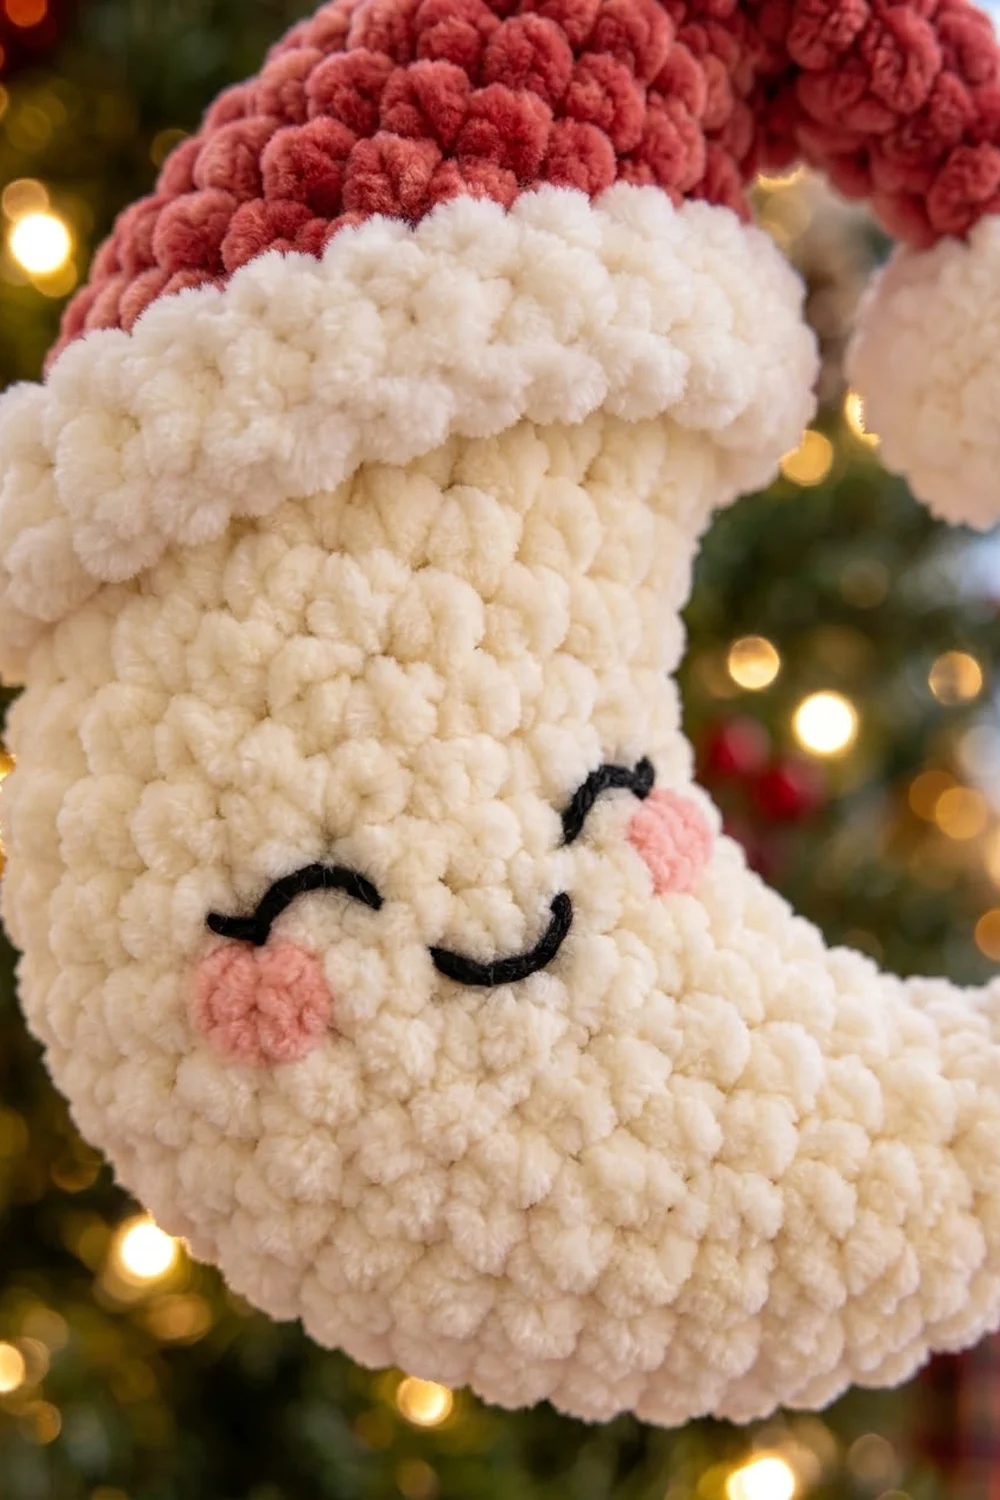
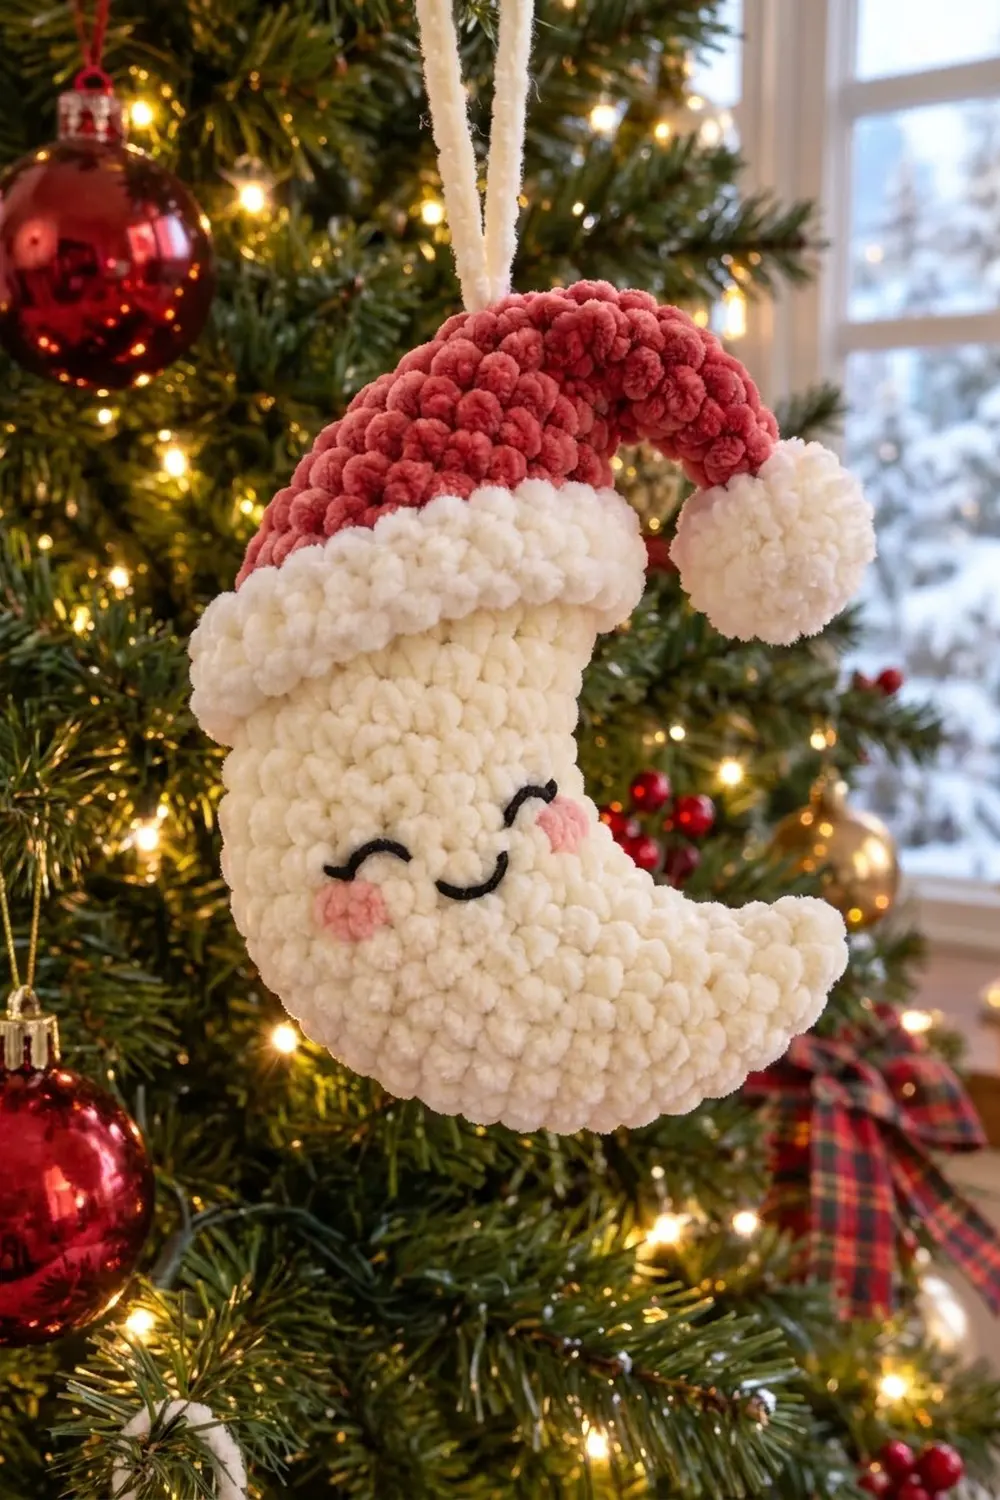
This ornament is a plump, smiling crescent moon in creamy chenille. It wears a slouchy raspberry-red Santa hat with a fluffy white brim and a round white pompom. The face has closed, happy eyes, a tiny smile and two soft pink cheeks. A cream chain loop on top of the hat lets it hang from a branch.
The colors are cream for the moon and loop, raspberry red for the hat, bright white for the brim and pompom, black for the face and light pink for the cheeks. The style is cozy and kawaii, and the velvet yarn gives the stitches a soft, bobbly look.
This pattern uses US crochet terms. The finished ornament is about 4.5 in (11.4 cm) tall and 3.5 in (8.9 cm) wide, not counting the hanging loop. The loop adds about 3 in (7.6 cm).
The moon is worked in continuous spiral rounds from the lower tip up to the top of the head. “Curve rounds” have half double crochet on one half and single crochet on the other, and they bend the tube into a crescent. The hat is worked from the tip down. The white brim is crocheted straight onto the hat’s edge. A small stuffed pompom and a chain loop finish it off.
Finished Size and Construction
- Finished size: about 4.5 in (11.4 cm) tall x 3.5 in (8.9 cm) wide, plus a 3 in (7.6 cm) loop
- Skill level: Easy to Intermediate (amigurumi basics)
- Terminology: US crochet terms
- Yarn weight: bulky (5) chenille or velvet yarn, plus fine scraps for the face
- Hook: 4.0 mm (G-6)
- Number of pieces: 1 ornament made from 4 parts (moon body, hat with brim, pompom, hanging loop)
- Layout: single 3D ornament, with the hat sewn over the top of the moon and tilted to the right
- Piece size: moon body is about 4 in (10.2 cm) tall in a straight line from tip to top
- Size before border: hat without brim is about 3.75 in (9.5 cm) long from tip to edge
- Border depth: white brim is about 7/8 in (2.2 cm) deep
Materials
Choose a smooth bulky chenille or velvet yarn. Chenille stitches are hard to see, so use a stitch marker and work in good light. Use the same yarn line for all three main colors so the gauge matches.
- Cream (moon body and loop): 22 g / 22 m
- Raspberry red (hat): 12 g / 12 m
- Bright white (brim and pompom): 8 g / 8 m
- Black worsted or DK scrap (face): about 1 m
- Light pink worsted or DK scrap (cheeks): about 1 m
These amounts include a margin of about 20 percent, so a slightly loose tension won’t leave you short.
Tools:
- 4.0 mm (G-6) crochet hook
- Stitch marker
- Polyester fiberfill, about 10 g
- Tapestry needle with a large eye
- Sharp embroidery needle for the face
- Scissors and a few straight pins
Abbreviations (US Terms)
- MR: magic ring
- ch: chain
- sl st: slip stitch
- sc: single crochet
- hdc: half double crochet
- inc: 2 sc in the same stitch
- dec: single crochet 2 together (an invisible decrease is recommended)
- BLO: back loop only
- st(s): stitch(es)
- ( ): stitch count at the end of the round
Special technique, curve round: work hdc in each stitch of the first half of the round, then sc in each stitch of the second half. The taller hdc stitches make one side of the tube longer, which bends it into a crescent. The stitch count does not change.
Gauge and Checkpoints
Gauge is 7 sc and 7 rounds = 2 in (5.1 cm), worked in the round with the 4.0 mm hook.
Make the moon body first and check it before you start the hat. The fabric should be tight enough that no stuffing shows between stitches.
Checkpoints:
- After body Rnd 8, the piece is about 2.25 in (5.7 cm) long from the tip and about 2.5 in (6.4 cm) wide when flattened.
- After body Rnd 19, the tube is about 6.9 in (17.5 cm) around at the head.
- The finished, stuffed body is about 4 in (10.2 cm) tall in a straight line and about 2.2 in (5.6 cm) thick through the head.
- After hat Rnd 13, the opening is about 7.7 in (19.6 cm) around.
If your piece is too big or stuffing shows through, go down to a 3.5 mm hook. If it is too small or very stiff, go up to a 4.5 mm hook. Change the hook, not the stitch counts.
Moon Body
With cream, work in continuous spiral rounds and don’t join them. Put the marker in the first stitch of each round and move it up as you go.
Rnd 1: 4 sc in MR. (4)
Rnd 2: [sc, inc] x2. (6)
Rnd 3: [2 sc, inc] x2. (8)
Rnd 4: [3 sc, inc] x2. (10)
Rnd 5: [4 sc, inc] x2. (12)
Rnd 6: [5 sc, inc] x2. (14)
Rnd 7: [6 sc, inc] x2. (16)
Rnd 8: [7 sc, inc] x2. (18)
Check the first checkpoint now. Each round’s two increases fall at the ends of the two halves, so both halves grow evenly.
Rnd 9 (curve): hdc in next 9 sts, sc in next 9 sts. (18)
Rnd 10: [8 sc, inc] x2. (20)
Rnd 11 (curve): hdc in next 10 sts, sc in next 10 sts. (20)
Rnd 12: [9 sc, inc] x2. (22)
Rnd 13 (curve): hdc in next 11 sts, sc in next 11 sts. (22)
Rnd 14: [10 sc, inc] x2. (24)
Rnd 15 (curve): hdc in next 12 sts, sc in next 12 sts. (24)
Rnd 16: sc in each st around. (24)
Rnd 17 (curve): hdc in next 12 sts, sc in next 12 sts. (24)
Rnds 18–19: sc in each st around. (24)
The hdc half becomes the rounded outer back of the crescent, and the sc half becomes the inner curve. The narrow tip should now curl toward the sc side.
Face embroidery (do this now, while the top is still open):
Hold the moon so the tip curls down and to the right. Center the face on the front, where the hdc half meets the sc half.
- Eyes: with black, embroider two curved, closed eyes on Rnd 16. Make each one 2 sts wide, with 4 sts between them, and shape each as a gentle arch of 2–3 short backstitches.
- Mouth: on Rnd 15, centered between the eyes, embroider a small U-shaped smile 2 sts wide.
- Cheeks: with pink, work 3–4 satin stitches over 1 st on Rnd 15, just outside and below each eye.
Knot all tails on the inside.
Stuffing: stuff the tip lightly with small tufts first, then fill the curve and head firmly. Keep the tip soft so it stays slim.
Rnd 20: [2 sc, dec] x6. (18)
Rnd 21: [sc, dec] x6. (12)
Add the last of the stuffing.
Rnd 22: dec x6. (6)
Fasten off, leaving a 6 in (15.2 cm) tail. Weave the tail through the front loops of the last 6 sts, pull it closed and hide the tail inside.
Hat
With raspberry red, work in continuous spiral rounds from the tip down.
Rnd 1: 4 sc in MR. (4)
Rnd 2: [sc, inc] x2. (6)
Rnd 3: sc in each st around. (6)
Rnd 4: [2 sc, inc] x2. (8)
Rnd 5: sc in each st around. (8)
Rnd 6: [3 sc, inc] x2. (10)
Rnd 7: [4 sc, inc] x2. (12)
Rnd 8: [3 sc, inc] x3. (15)
Rnd 9: [4 sc, inc] x3. (18)
Rnd 10: [5 sc, inc] x3. (21)
Rnd 11: [6 sc, inc] x3. (24)
Rnd 12: [7 sc, inc] x3. (27)
Rnd 13: sc in each st around. (27)
Sl st into the next st to smooth out the step at the end of the spiral, then fasten off the red. The hat should be about 3.75 in (9.5 cm) long, with a 7.7 in (19.6 cm) opening. Don’t stuff the tip, because it needs to flop over.
Pompom
With white, work in continuous rounds.
Rnd 1: 6 sc in MR. (6)
Rnd 2: inc x6. (12)
Rnd 3: [3 sc, inc] x3. (15)
Rnd 4: sc in each st around. (15)
Rnd 5: [3 sc, dec] x3. (12)
Stuff firmly.
Rnd 6: dec x6. (6)
Fasten off with an 8 in (20.3 cm) tail and pull the opening closed. The pompom is about 1.25 in (3.2 cm) across.
Hanging Loop
With cream, ch 24 and leave 6 in (15.2 cm) tails at both ends. The chain is about 6 in (15.2 cm) long and folds into a 3 in (7.6 cm) loop.
Fold the hat so the tip falls to the right, and find the highest point of the fold, around Rnd 7. Thread both tails from the outside to the inside there, one stitch apart. Knot them firmly inside the hat and trim them to 1 in (2.5 cm).
Border: White Hat Brim
The brim is the hat’s border, worked straight onto Rnd 13.
Border gauge: same as the main fabric, 7 sc and 7 rounds = 2 in (5.1 cm). Three rounds give a depth of about 7/8 in (2.2 cm).
The hat is round, so it has no sides. Instead, count the 27 stitches as 3 equal sections of 9, which keeps the flare even.
Rnd 1: join white with a sl st in the BLO of any st of Rnd 13. Ch 1, then sc in the BLO of each st around and continue in a spiral. (27 = 9 per section)
Rnd 2 (flare): [8 sc, inc] x3. That is 27 sts worked one into each existing st, plus 3 extra = 30. (30 = 10 per section)
Rnd 3: sc in each st around. (30 = 10 per section)
Sl st into the next st and fasten off, leaving a 12 in (30.5 cm) tail.
Why the math works: Rnd 1 matches Rnd 13 exactly (27 into 27), so the color change lies flat. Working in the BLO leaves a ridge of red front loops that makes a crisp line under the white. Rnd 2 adds 1 stitch for every 9, about 11 percent, so the brim flares just enough to sit outside the hat and look puffy. The finished brim is 30 sts around, about 8.6 in (21.8 cm), which fits easily over the 6.9 in (17.5 cm) stuffed head.
Attaching the Hat
- Set the hat on the moon so the brim covers Rnds 19–22 at the front and dips slightly at the back. Tilt it a little to the right and pin it in place.
- With the white tail, whipstitch the inner edge of brim Rnd 1 to the body all the way around. Catch only the outer loops so the seam hides in the pile.
- Fold the hat tip down over the right side and tack it with 1–2 hidden stitches so it rests just above the brim.
- Sew the pompom to the tip, then add 2 anchor stitches from the pompom to the side of the hat.
- Thread all tails through the body and trim them close.
Final Blocking
Never press chenille or steam it hard. Use this gentle method:
- Fluff the whole ornament with your fingers to lift any flattened pile.
- Hold a steam iron about 2 in (5.1 cm) above the moon and give short bursts of steam. Don’t let the iron touch the yarn.
- While it’s still warm, curl the tip into a smooth crescent and flatten the face area slightly.
- Plump the brim and pompom into rounded shapes.
- Let it cool and dry in position for about 30 minutes.
- Measure it. It should be about 4.5 in (11.4 cm) tall and 3.5 in (8.9 cm) wide.
Final Quality-Control Checklist
- The head is firmly stuffed and the tip is soft and slim.
- The crescent clearly curls to the right and the outer back is smooth.
- The eyes are level, the same size and 4 sts apart.
- The smile is centered between the eyes.
- The pink cheeks match and sit at the same height.
- The brim covers the top of the moon with no gap at the back.
- The hat tip folds to the right and the pompom sits just above the brim.
- The loop is knotted securely at the top.
- No stuffing shows between stitches, and all tails are hidden.
- The ornament measures about 4.5 in (11.4 cm) x 3.5 in (8.9 cm).
Troubleshooting
The moon is straight instead of curved. The hdc stitches have drifted off one half. Re-mark the start of the round and pull out the work back to Rnd 9.
The tip is too fat. It has too much stuffing. Pull a little out between the stitches with your hook.
Stuffing shows through. Remake the piece with a smaller hook.
The brim ruffles. Work Rnd 2 as sc in each st instead (27).
You keep losing stitches in the chenille. Move the marker every round and count the V-shaped stitch tops, not the bumps.
The pompom swings. Add another anchor stitch to the side of the hat.
Care
Spot clean with a damp cloth and mild soap, then let it air dry flat. Don’t machine wash or tumble dry it, because chenille can lose its pile.
Final Notes
Here is how the measurements build on each other. The body grows from 4 to 24 sts by Rnd 14, so the head is about 6.9 in (17.5 cm) around. The hat grows from 4 to 27 sts, for a 7.7 in (19.6 cm) opening. The brim flares from 27 to 30 sts, about 8.6 in (21.8 cm) around and 7/8 in (2.2 cm) deep. Five curve rounds bend the body into a crescent about 4 in (10.2 cm) tall. With the hat on, the finished ornament is about 4.5 in (11.4 cm) tall and 3.5 in (8.9 cm) wide, plus a 3 in (7.6 cm) loop.
Happy crocheting!