

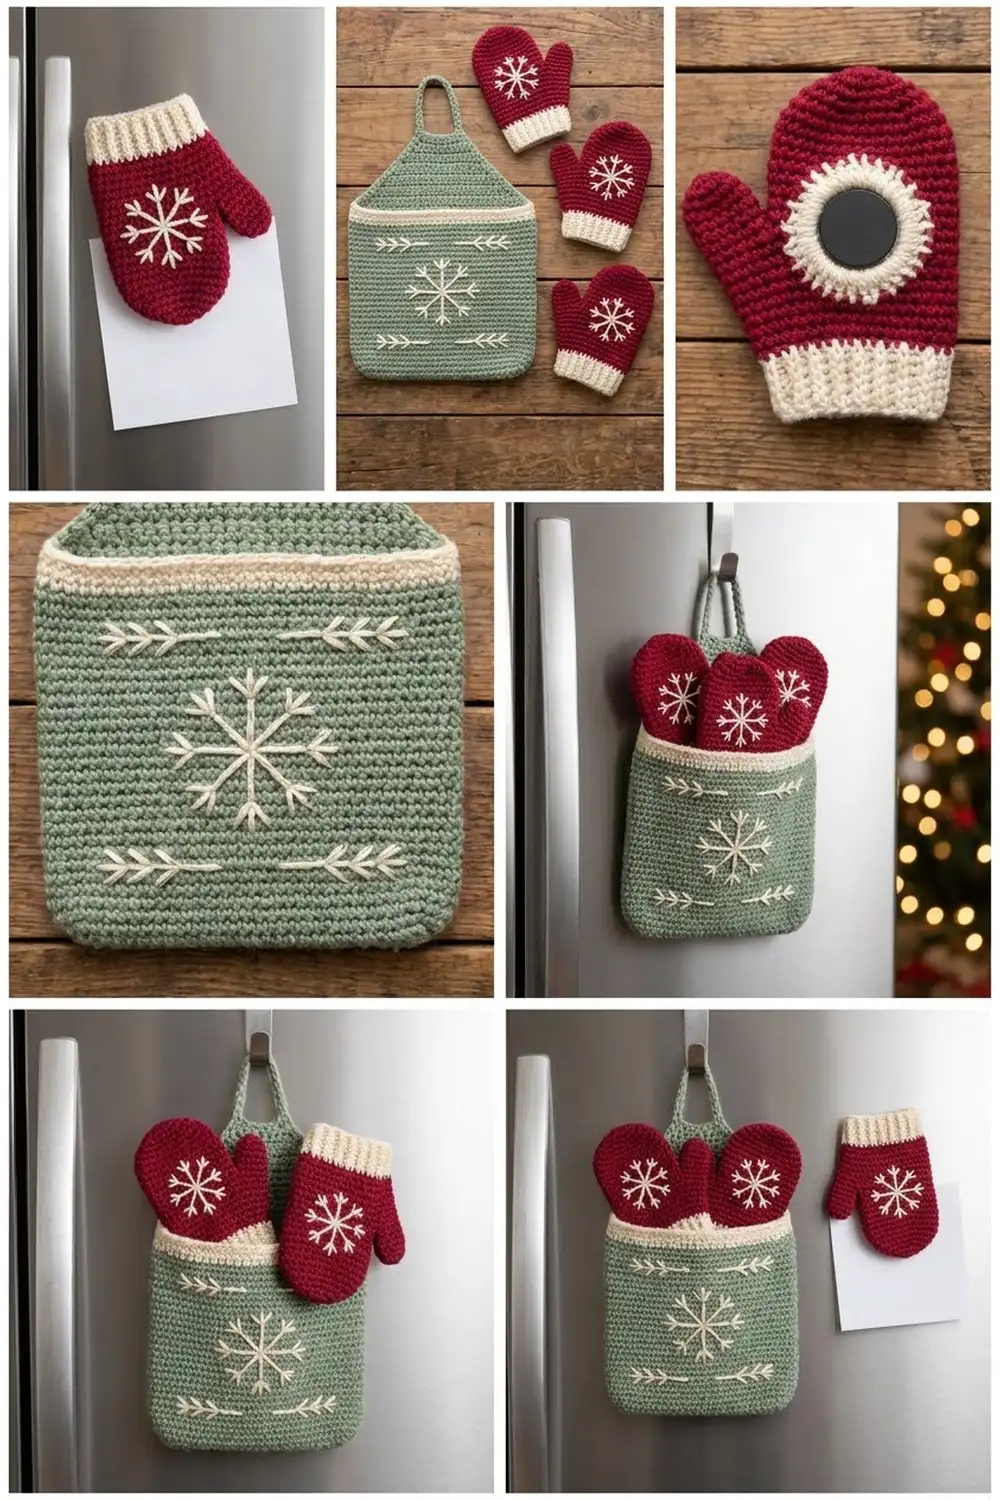
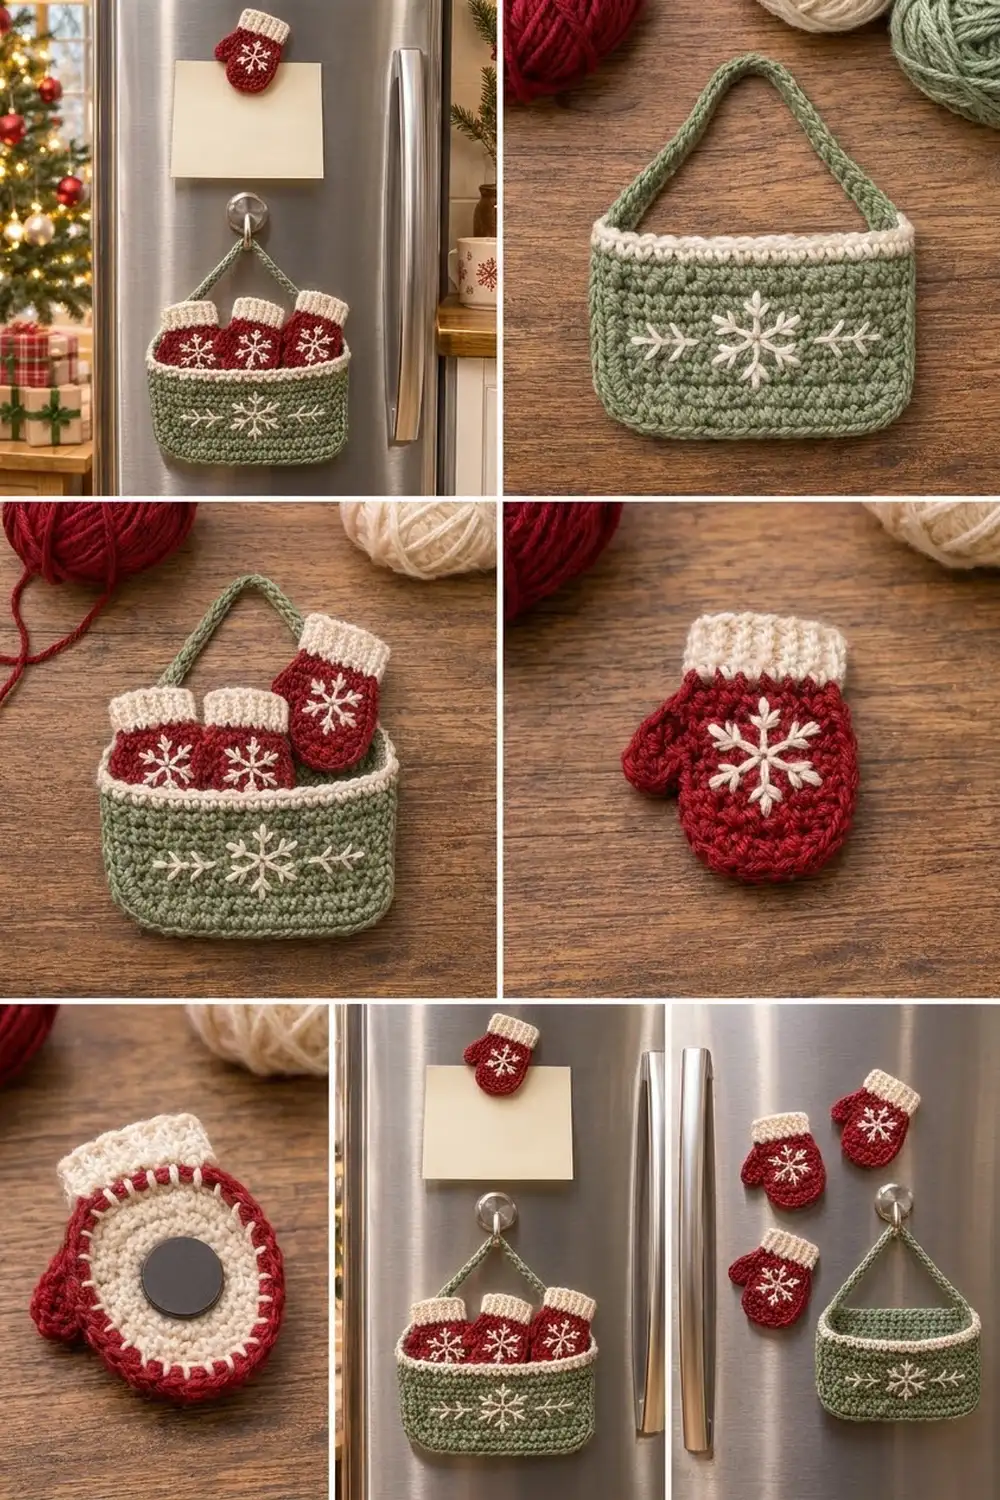
This little fridge set has four red mitten magnets and a sage-green hanging pocket to hold them. Each mitten has a cream ribbed cuff and an embroidered snowflake. The pocket has a cream rim, a green hanging strap, and a snowflake between two arrow sprigs stitched on the front.
The colors are cranberry red, warm cream, and soft sage green, for a cozy Nordic-style Christmas look. Everything is worked in plain single crochet, which makes a dense fabric that holds embroidery well. This pattern uses US terms.
Each finished mitten measures 3.1 in (7.9 cm) wide at the thumb by 3.7 in (9.4 cm) tall. The pocket measures 7.3 in (18.5 cm) wide by 3.4 in (8.6 cm) tall, not counting the strap.
You work each mitten body flat in rows, add the thumb, then crochet an edging around it. The cuff is a short strip worked sideways in back-loop rows and then sewn on. A cream ring holds the magnet on the back. For the pocket, you join two panels with green single crochet, add a cream rim, and sew on a strap.
Finished Size and Construction
- Finished mitten: 3.1 in (7.9 cm) x 3.7 in (9.4 cm)
- Finished pocket: 7.3 in (18.5 cm) x 3.4 in (8.6 cm), plus strap
- Skill level: Easy
- Terminology: US
- Yarn weight: Worsted (#4 medium)
- Hook: 4.0 mm (G-6)
- Number of pieces: 4 mitten magnets + 1 pocket (2 panels + 1 strap)
- Layout: the pieces stay separate; the mittens rest in the pocket or hold notes on the fridge
- Pocket panel size: 6.9 in (17.5 cm) x 2.8 in (7.1 cm)
- Pocket size before rim: 7.3 in (18.5 cm) x 3.0 in (7.6 cm)
- Rim depth: 0.4 in (1.0 cm), 2 rounds
Materials
Use a smooth worsted-weight acrylic or cotton. Smooth yarn keeps the embroidery crisp. The amounts below assume about 200 m per 100 g.
- Red: 20 g (40 m): mitten bodies and edging
- Cream: 20 g (40 m): cuffs, magnet rings, pocket rim, embroidery
- Sage green: 30 g (60 m): pocket panels, joining round, strap
All amounts include about a 30% margin.
Tools:
- 4.0 mm (G-6) crochet hook
- Tapestry needle
- 4 round magnets, 1 in (2.5 cm) diameter
- Fabric glue
- Stitch markers
- Scissors and a tape measure
- Pins and a blocking mat
Abbreviations (US Terms)
- ch: chain
- sc: single crochet
- sc2tog: single crochet 2 together
- sl st: slip stitch
- BLO: back loop only
- st(s): stitch(es)
- RS / WS: right side / wrong side
- Rnd: round
Special stitch, sc2tog: Insert your hook in the next st, yarn over, and pull up a loop. Do the same in the following st (3 loops on hook). Yarn over and pull through all 3 loops.
The ch 1 at the start of each row never counts as a stitch.
Gauge and Checkpoints
Gauge: 18 sc and 20 rows = 4 in (10.2 cm), or 4.5 sts and 5 rows per inch (2.5 cm).
Make one full mitten first and measure it before making the rest.
Checkpoints:
- Mitten Row 2: 9 sts = 2.0 in (5.1 cm) wide
- Mitten Row 5: 12 sts = 2.7 in (6.9 cm) wide
- Mitten Row 13: 2.6 in (6.6 cm) tall
- After edging: hand 2.4 in (6.1 cm), thumb 3.1 in (7.9 cm)
- Cuff strip: 2.2 in (5.6 cm) x 0.9 in (2.3 cm)
- Pocket panel: 6.9 in (17.5 cm) x 2.8 in (7.1 cm)
If your pieces are too big, use a 3.75 mm (F-5) hook. If they are too small, use a 4.5 mm (7) hook. Row gauge matters most for the pocket: if the panel comes out too tall, the mittens sit too deep.
Mitten Body (Make 4, Red)
Row 1 begins at the end farthest from the slip knot. That edge is edge A, the thumb edge. The other edge is edge B. Odd rows begin at edge A, and even rows end at edge A.
Row 1: Ch 10, sc in 2nd ch from hook and in each ch across. (9 sc)
Row 2: Ch 1, turn, sc in each st across. (9 sc)
Row 3: Ch 1, turn, 2 sc in first st (edge A), sc in next 8 sts. (10 sc)
Row 4: Ch 1, turn, sc in next 9 sts, 2 sc in last st (edge A). (11 sc)
Row 5: Ch 1, turn, 2 sc in first st (edge A), sc in next 10 sts. (12 sc)
Checkpoint: the piece is 2.7 in (6.9 cm) wide. Edge A now slants outward; this is the base of the thumb.
Row 6: Ch 1, turn, sc in next 9 sts. Leave the last 3 sts at edge A unworked for the thumb. (9 sc)
Rows 7–10: Ch 1, turn, sc in each st across. (9 sc each row)
Row 11: Ch 1, turn, sc2tog, sc in next 5 sts, sc2tog. (7 sc)
Row 12: Ch 1, turn, sc2tog, sc in next 3 sts, sc2tog. (5 sc)
Row 13: Ch 1, turn, sc2tog, sc in next st, sc2tog. (3 sc)
Fasten off. Rows 11–13 shape the rounded top.
Thumb
Row T1: With the RS facing, join red in the first unworked st of Row 5 next to the hand. Ch 1, sc in the same st and in the next 2 sts. (3 sc)
Row T2: Ch 1, turn, sc in each st across. (3 sc)
Row T3: Ch 1, turn, sc2tog, sc in last st. (2 sc)
Row T4: Ch 1, turn, sc2tog. (1 sc)
Fasten off. The thumb rises 0.8 in (2.0 cm) above Row 5, which leaves a clear notch between the thumb and the hand.
Edging Round
Join red at the Row 1 row-end on edge B. Ch 1, then work:
- Up edge B: 1 sc in each row-end of Rows 1–13 (13 sc)
- Across the top: sc in first st, 3 sc in center st, sc in last st (5 sc)
- Down the hand on edge A: 1 sc in each row-end of Rows 13–7 (7 sc)
- At the notch: sc2tog over the Row 6 row-end and the inner row-end of Row T1 (1 sc)
- Up the inner side of the thumb: 1 sc in each row-end of Rows T2–T4 (3 sc)
- Thumb tip: 3 sc in the top of Row T4 (3 sc)
- Down the outer side of the thumb: 1 sc in each row-end of Rows T4–T1 (4 sc)
- Down edge A: 1 sc in each row-end of Rows 5–1 (5 sc)
Total: 13 + 5 + 7 + 1 + 3 + 3 + 4 + 5 = 41 sc. Fasten off. Don’t work across the wrist; the cuff goes there.
The body now measures 2.4 in (6.1 cm) across the hand, 3.1 in (7.9 cm) across the thumb, and 2.8 in (7.1 cm) tall.
Cuff (Make 4, Cream)
The cuff is worked sideways, so the back-loop ridges run up and down like knit ribbing.
Row 1: Ch 5, sc in 2nd ch from hook and in each ch across. (4 sc)
Rows 2–11: Ch 1, turn, sc BLO in each st across. (4 sc each row)
Fasten off and leave a 12 in (30.5 cm) tail. The strip is 2.2 in (5.6 cm) long and 0.9 in (2.3 cm) tall, with 11 row-ends along each long edge.
Magnet Ring (Make 4, Cream)
Foundation: Ch 12, then sl st to the first ch to form a ring.
Rnd 1: Ch 1, (sc in next ch, 2 sc in next ch) 6 times, sl st to first sc. (18 sc)
Rnd 2: Ch 1, (sc in next 2 sts, 2 sc in next st) 6 times, sl st to first sc. (24 sc)
Fasten off and leave a 12 in (30.5 cm) tail. The ring is about 1.7 in (4.3 cm) across. The center opening is smaller than the 1 in (2.5 cm) magnet, so the ring catches the magnet’s edge.
Embroidery
Mitten snowflake: Using cream yarn, center the snowflake over Rows 4–11 on the RS. Make 3 straight stitches that cross at one point to form 6 arms, about 1.25 in (3.2 cm) across. Add a small V of 2 stitches at the tip of each arm.
Pocket front: Embroider the front panel before joining. Center a snowflake 1.5 in (3.8 cm) across over Rows 4–11. Leave a gap of 0.5 in (1.3 cm) on each side, then stitch a horizontal sprig 1.25 in (3.2 cm) long. Each sprig is a stem with 3 pairs of short diagonal stitches angled toward the center, so the sprigs look like arrows pointing outward. Keep your stitches loose.
Pocket Panels (Make 2, Green)
Row 1: Ch 28, sc in 2nd ch from hook and in each ch across. (27 sc)
Row 2: Ch 1, turn, 2 sc in first st, sc in next 25 sts, 2 sc in last st. (29 sc)
Row 3: Ch 1, turn, 2 sc in first st, sc in next 27 sts, 2 sc in last st. (31 sc)
Rows 4–14: Ch 1, turn, sc in each st across. (31 sc each row)
Fasten off. Rows 2–3 round off the bottom corners. Each panel measures 6.9 in (17.5 cm) x 2.8 in (7.1 cm).
Strap (Make 1, Green)
Row 1: Ch 41, sc in 2nd ch from hook and in each ch across. (40 sc)
Row 2: Ch 1, turn, sc in each st across. (40 sc)
Fasten off and leave a 10 in (25.4 cm) tail at each end. The strap is 8.9 in (22.6 cm) long and 0.4 in (1.0 cm) wide.
Make All Pieces
- Red: 4 mitten bodies with thumbs and edging
- Cream: 4 cuffs, 4 magnet rings, plus embroidery
- Green: 2 panels and 1 strap
The pieces stay separate. Display layout:
         /\          <- strap on hook
   [M1] [M2] [M3]    <- mittens tucked in
  +==============+   <- cream rim
  |  >-  *  -<   |   <- sprig, snowflake, sprig
  +--------------+   <- green pocket
  [M4] holds a note above
Joining
Cuff to mitten: The wrist edge has 11 places to sew into: the first edging sc, the 9 foundation chain loops, and the last edging sc. The cuff has 11 row-ends along its long edge. With the cream tail, whipstitch them together one to one, so the cuff sits under the wrist. Because the counts match, the cuff won’t gather or flare.
Magnet to mitten: Glue the magnet to the center of the mitten’s WS. Lay the ring over it, then whipstitch the outer edge of Rnd 2 to the mitten through all 24 sts. Keep your needle in the back layer only.
Pocket panels: Hold the panels WS together with the embroidered panel facing you. Join green at the top of the right edge and work through both layers:
- Down the right side: 1 sc in each row-end of Rows 14–1 (14 sc)
- Across the bottom, into the foundation loops: 2 sc in first loop, sc in next 25 loops, 2 sc in last loop (29 sc)
- Up the left side: 1 sc in each row-end of Rows 1–14 (14 sc)
Total: 14 + 29 + 14 = 57 sc. Fasten off. Leave the top open.
Keep your joining stitches the same size as the panel stitches. If they’re too tight, the bottom cups; if they’re too loose, the edge ripples. Checkpoint: the pocket should measure 7.3 in (18.5 cm) x 3.0 in (7.6 cm).
Border (Cream Rim)
Border gauge: same as the main fabric. Each round adds 0.2 in (0.5 cm).
Rnd 1: Join cream at the top of the right side seam. Ch 1, then work: sc in the top of the seam (1), sc across the front panel (31), sc in the top of the left seam (1), sc across the back panel (31). Sl st to first sc. (64 sc)
Rnd 2: Ch 1, sc in each st around, sl st to first sc. (64 sc)
Fasten off.
Why the math works: The rim has 31 + 31 stitches from the panel tops plus 1 from each side seam, for 64. You work one stitch into each existing stitch with no increases, so the rim lies flat. Two rounds take the pocket from 3.0 in (7.6 cm) to 3.4 in (8.6 cm) tall.
Strap: Tuck 0.5 in (1.3 cm) of each strap end inside the back panel at the side seams, just below the rim, and sew through the back layer only.
Final Blocking
- Lightly mist all the pieces with water.
- Pin each mitten to 3.1 in (7.9 cm) x 3.7 in (9.4 cm), easing the thumb out so the notch stays open.
- Slide a card cut to 6.9 in (17.5 cm) x 3.2 in (8.1 cm) inside the pocket.
- Pin the pocket to 7.3 in (18.5 cm) x 3.4 in (8.6 cm).
- Let everything dry completely. Don’t use heat near the magnets.
Final Quality-Control Checklist
- Each mitten edging has 41 sc, and the thumb notch is clear
- Each cuff has 11 rows, with ribs running vertically
- Each magnet is centered and held firmly in its ring
- The pocket joining round has 57 sc, and both rim rounds have 64 sc
- The sprigs point outward from the snowflake
- Three mittens fit in the pocket with their cuffs showing
Troubleshooting
The thumb looks like a bump: Check that Row 6 leaves exactly 3 sts unworked.
The cuff is shorter than the wrist: Add a 12th row, or stretch the cuff slightly as you sew.
The magnet slips out: Add more glue, or remake the ring with a 10-ch foundation.
The pocket bottom cups: Rework the joining round more loosely.
The rim flares: Recount; each rim round needs exactly 64 sc.
The embroidery puckers: Remove it and restitch more loosely.
Care
Spot clean with a damp cloth and lay flat to dry. Don’t machine wash, because the magnets can come loose.
Final Notes
Here is how the measurements build: a 9-st wrist of 2.0 in (5.1 cm) widens to 12 sts. With the edging and cuff, the mitten reaches 3.1 in (7.9 cm) x 3.7 in (9.4 cm). Each 31-st panel is 6.9 in (17.5 cm) wide. The 57-sc joining round brings the pocket to 7.3 in (18.5 cm) x 3.0 in (7.6 cm), and the 64-sc rim finishes it at 3.4 in (8.6 cm) tall.
Happy crocheting!