

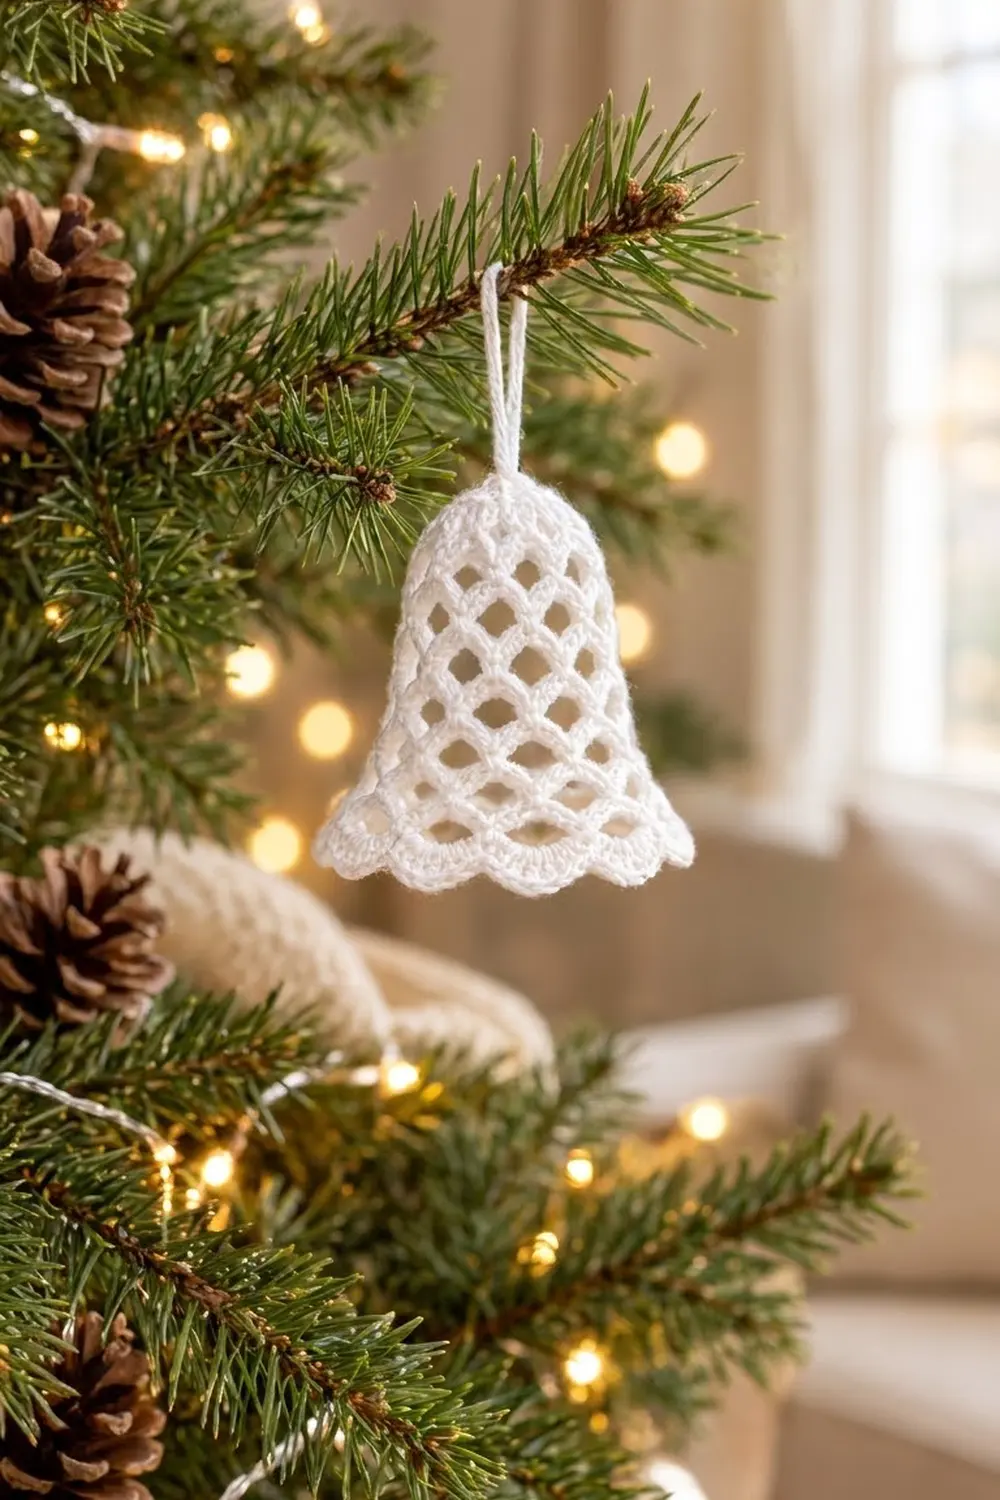
The Snowlace Bell is a small, airy ornament made in crisp white cotton thread. It has a solid little crown, a diamond-mesh body and a soft scalloped hem. From across the room it clearly reads as a bell, and up close it looks delicate.
The design uses just one color, which gives it a classic heirloom feel. It looks good on a green or white tree, in a window or tied to a gift. In white it looks like frost or snow lace. The same pattern also works in cream, silver metallic thread or pale gold.
This pattern uses US crochet terms. Without the hanging loop, the finished bell is 3 in (7.6 cm) tall and 3.75 in (9.5 cm) wide at the hem when pressed flat. The hanging loop adds 1.5 in (3.8 cm).
The construction is simple. You work from the top down in joined rounds. First comes a flat crown of double crochet. Next are seven rounds of chain-loop mesh, with the loops getting longer to create the flare. A single crochet band and a shell scallop edge finish the hem. You then add a chain loop at the top and stiffen the bell over a form.
Finished Size and Construction
- Finished size: 3 in (7.6 cm) tall, 3.75 in (9.5 cm) wide flat at the hem
- Skill level: Intermediate (thread work, chain-space mesh)
- Terminology: US crochet terms
- Yarn weight: Size 10 cotton crochet thread (lace weight, 0)
- Hook: 1.75 mm steel hook
- Number of pieces: 1
- Layout: One 3D bell worked top-down in joined rounds
- Piece size: 3 in (7.6 cm) tall x 3.75 in (9.5 cm) flat hem width
- Size before border (after Round 10): 2.7 in (6.9 cm) tall x 3.5 in (8.9 cm) flat hem width
- Border depth: 0.3 in (0.8 cm) of scallops
Materials
Choose a mercerized size 10 cotton crochet thread. Mercerized cotton has a slight sheen and crisp stitch definition, and it takes stiffener well. Avoid acrylic thread, which will not reliably hold a stiffened shape.
- White, size 10 cotton thread: 6 g, about 38 m (42 yd) per bell
This amount includes a margin of about 20% for your test bell, the hanging loop and weaving in ends. If you plan to make a set, multiply by the number of bells and round up to a full ball. A 50 g ball makes several bells.
Tools:
- 1.75 mm steel crochet hook
- Tapestry needle with a small eye
- 1 stitch marker
- Small sharp scissors
- Fabric stiffener or a thick starch solution
- A bell form: a small plastic cup, egg cup or shot glass about 2.25 in (5.7 cm) across the base, wrapped in plastic wrap
- Rustproof pins and a ruler
Abbreviations (US Terms)
- ch: chain
- sl st: slip stitch
- sc: single crochet
- dc: double crochet
- st(s): stitch(es)
- sp: space
- ch-sp: chain space
- MR: magic ring
- rep: repeat
Special stitch (Shell): Work 7 dc into the same stitch.
Gauge and Checkpoints
Gauge: 10 sc = 1 in (2.5 cm) in size 10 thread with a 1.75 mm hook.
Gauge matters because the bell has no seams you can adjust later. Make a test bell first, or at least work through Round 5 and measure before you continue. Measure the piece lying flat and gently pressed, not stretched.
Checkpoints:
- After Round 2: the crown is 0.75 in (1.9 cm) across.
- After Round 5: the bell is 2 in (5.1 cm) wide flat at the bottom edge.
- After Round 7: the bell is 2.75 in (7.0 cm) wide flat.
- After Round 9: the bell is 3.25 in (8.3 cm) wide flat and 2.6 in (6.6 cm) tall.
- After Round 10: the bell is 3.5 in (8.9 cm) wide flat and 2.7 in (6.9 cm) tall.
- After Round 11: the bell is 3.75 in (9.5 cm) wide flat and 3 in (7.6 cm) tall.
If your bell is too big, go down to a 1.5 mm hook. If it is too small, go up to a 2 mm hook. If only the flare is off, you can lengthen or shorten the chains in Rounds 6 to 9 by one chain. Keep all the loops in a round the same length.
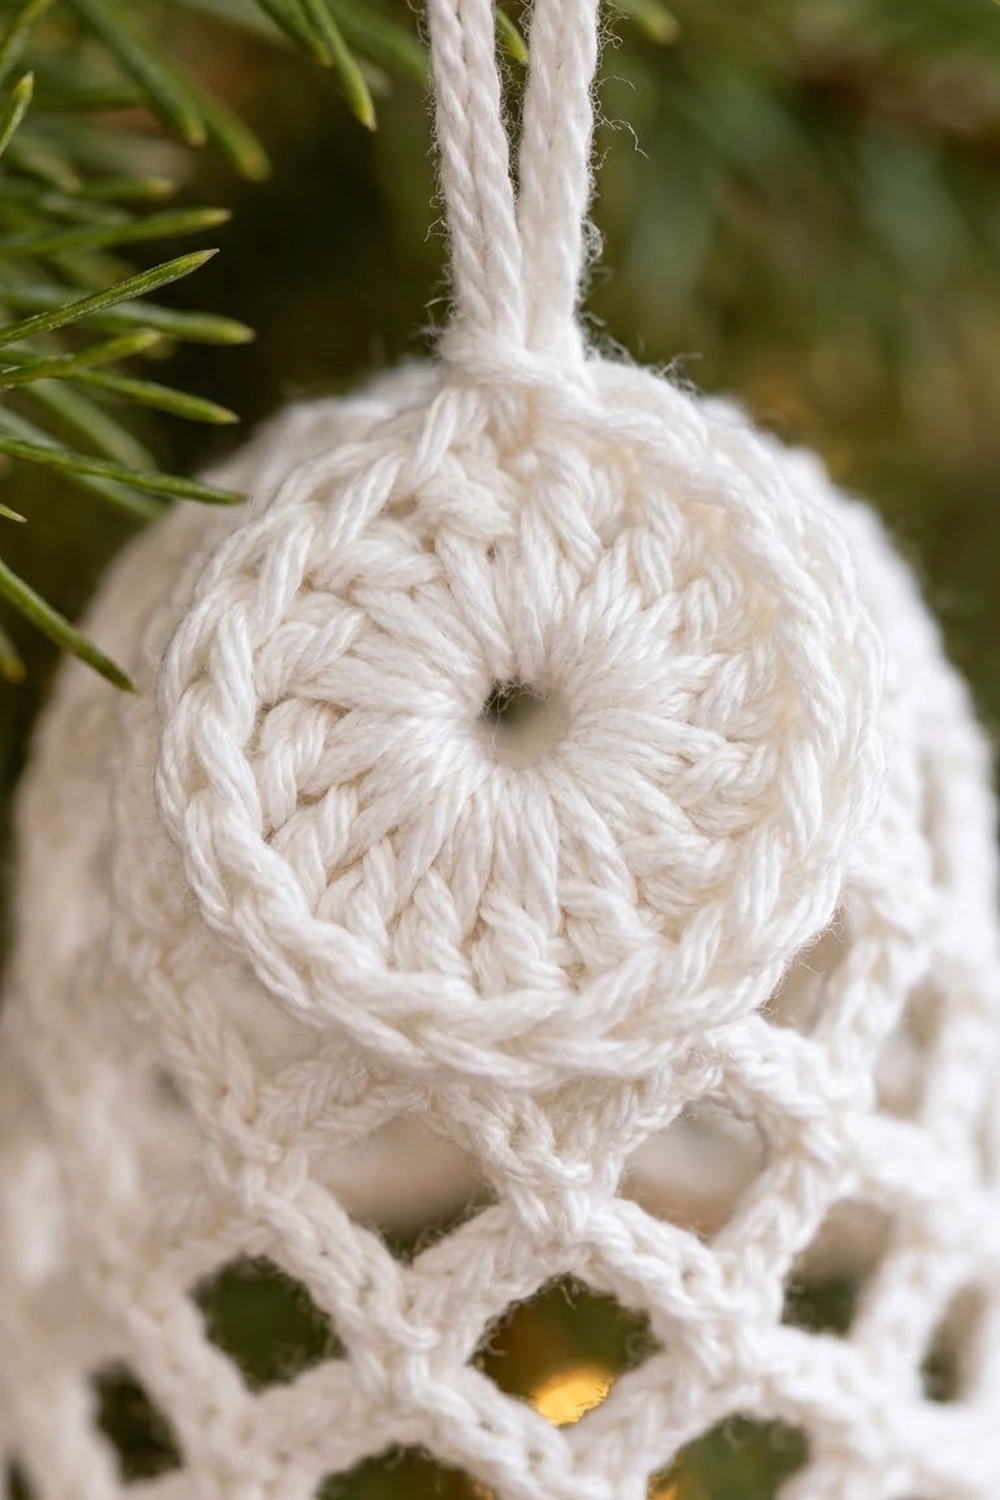
Crown
The crown is the flat, solid circle at the top of the bell.
Round 1: Make a MR. Ch 3 (counts as dc), then work 11 dc in the ring. Sl st to the top of the beginning ch-3. Pull the ring closed, leaving a tiny center hole. (12 dc)
Round 2: Ch 3 (counts as dc), then dc in the same st as the join. Work 2 dc in each remaining st around. Sl st to the top of the beginning ch-3. (24 dc)
Lay the crown flat. It should measure 0.75 in (1.9 cm) across and lie flat without ruffling. If it cups, your stitches are too tight. If it waves, they are too loose.
Bell Body (Diamond Mesh)
The mesh creates the diamond pattern. Every round has 12 loops. Each sc sits in the center of a loop from the round before, which staggers the loops into diamonds. The bell flares because the loops get longer, not because more loops are added.
At the end of each round, you slip stitch across a few chains to reach the center of a loop. The number of slip stitches is given for each round. Keep your chains even and relaxed; loose chains give rounder diamonds.
Round 3: Ch 1, then sc in the same st as the join. Ch 4, skip 1 st, sc in next st. Rep from * 10 more times. Ch 4, then skip the last st. Sl st to the first sc. Sl st in each of the next 2 ch. (12 sc, 12 ch-4 loops)
In this round the crown edge starts to turn downward. Place a marker in the first sc and move it up each round.
Round 4: Ch 1, then sc in the same ch-sp. Ch 4, sc in next ch-4 sp. Rep from * 10 more times. Ch 4. Sl st to the first sc. Sl st in each of the next 2 ch. (12 ch-4 loops)
Round 5: Rep Round 4. (12 ch-4 loops)
Checkpoint: the piece now looks like a short tube with a closed top and is 2 in (5.1 cm) wide flat.
Round 6: Ch 1, then sc in the same ch-sp. Ch 5, sc in next ch-4 sp. Rep from * 10 more times. Ch 5. Sl st to the first sc. Sl st in each of the next 2 ch. (12 ch-5 loops)
Round 7: Ch 1, then sc in the same ch-sp. Ch 5, sc in next ch-5 sp. Rep from * 10 more times. Ch 5. Sl st to the first sc. Sl st in each of the next 2 ch. (12 ch-5 loops)
Checkpoint: 2.75 in (7.0 cm) wide flat.
Round 8: Ch 1, then sc in the same ch-sp. Ch 6, sc in next ch-5 sp. Rep from * 10 more times. Ch 6. Sl st to the first sc. Sl st in each of the next 3 ch. (12 ch-6 loops)
Round 9: Ch 1, then sc in the same ch-sp. Ch 6, sc in next ch-6 sp. Rep from * 10 more times. Ch 6. Sl st to the first sc. (12 ch-6 loops)
Do not move to the loop center at the end of Round 9. Checkpoint: 3.25 in (8.3 cm) wide flat and 2.6 in (6.6 cm) tall.
Border (Hem Band and Scallops)
Border gauge: 10 sc = 1 in (2.5 cm), the same as the main gauge. The band is the base for the scallops, so its count must be exact.
Round 10 (conversion round): Sl st into the next ch-6 sp. Ch 1, then work 6 sc in the same ch-sp. Work 6 sc in each of the remaining 11 ch-6 sps. Sl st to the first sc. (12 loops x 6 sc = 72 sc)
This round turns the open loops into a solid band. Each ch-6 loop holds exactly 6 sc, one for each chain, so the band lies smooth without cupping or ruffling. Checkpoint: 3.5 in (8.9 cm) wide flat and 2.7 in (6.9 cm) tall.
Round 11 (scallop round): Ch 1, then sc in the same st as the join. Skip 2 sts, Shell (7 dc) in next st, skip 2 sts, sc in next st. Rep from * 10 more times. Skip 2 sts, Shell in next st, skip the last 2 sts. Sl st to the first sc. Fasten off. (12 shells and 12 sc: 84 dc + 12 sc = 96 sts)
Why the math works: each scallop repeat uses 6 band stitches (1 sc, 2 skipped, 1 shell stitch, 2 skipped). 72 band stitches divided by 6 gives exactly 12 repeats, so there is one scallop under each of the 12 mesh loops. Each group of 6 band sc came from one loop, so each shell sits right below a diamond and the scallops line up with the mesh all the way around. The 7-dc shells spread the hem from 3.5 in (8.9 cm) to 3.75 in (9.5 cm) flat and add 0.3 in (0.8 cm) of depth.
Hanging Loop
Join new thread with a sl st into the center ring of the crown, working from the outside. Ch 30. Sl st into the same spot. Fasten off.
The 30-chain loop folds into a doubled strand 1.5 in (3.8 cm) tall. Weave both tails down into the crown. Weave all other ends into the solid crown or the hem band, where they hide best.
Final Blocking
- Wash the bell gently in lukewarm water to relax the thread, then press out the extra water in a towel.
- Wrap your bell form in plastic wrap so the stiffener will not stick.
- Soak the bell in fabric stiffener or thick starch until it is fully saturated.
- Squeeze out the excess. Blot with a paper towel so the mesh holes stay open and are not filled with film.
- Slip the bell over the form with the crown centered on top.
- Ease each diamond into an even shape with your fingers or a blunt needle. Line up the scallops so they hang straight down.
- Pin each scallop point slightly outward so the hem flares evenly to 3.75 in (9.5 cm).
- Check the height: it should be 3 in (7.6 cm) from the crown to the scallop tips.
- Straighten the hanging loop while the bell is on the form so it dries upright.
- Let the bell dry completely, at least 24 hours, before taking it off the form.
Final Quality-Control Checklist
- The crown is flat and 0.75 in (1.9 cm) across, with a tiny closed center.
- Every mesh round has exactly 12 loops.
- All loops in a round are the same length.
- The diamonds are evenly staggered, with no twisted column at the round joins.
- The hem band has 72 sc and lies flat.
- There are 12 scallops, each centered under a mesh loop.
- The bell measures 3 in (7.6 cm) tall and 3.75 in (9.5 cm) wide flat.
- The hanging loop is 1.5 in (3.8 cm) tall and firmly anchored at the center.
- All ends are woven in securely and are invisible.
- The bell holds its shape without sagging after drying.
Troubleshooting
The crown ruffles. Your tension in Round 2 may be loose. Rework it more firmly, or use a smaller hook for the crown only.
The diamonds slant in a spiral. You are not reaching the loop center before starting the round. Count the slip stitches exactly as written.
The bell does not flare. Your chains may be too tight. Loosen your chain tension, or add one chain to each loop in Rounds 8 and 9.
The hem band ruffles. You have more than 72 sc. Count each group of 6.
The hem band cups inward. Your sc are too tight compared with your chains. Relax your tension and rework Round 10.
The scallops do not line up with the diamonds. You started Round 11 in the wrong stitch. Start in the first sc of a 6-sc group.
The bell collapses after drying. Use more stiffener, or add a second coat and let it dry fully on the form.
There is shiny film in the holes. Too much stiffener was left in. Blot more thoroughly, or rinse lightly and reshape.
Care
Store the bell in a small box with tissue so it keeps its shape, and dust it gently with a soft dry brush. Washing removes the stiffener, so re-stiffen and reshape the bell after any wash.
Final Notes
The whole bell depends on a short chain of measurements. The crown reaches 0.75 in (1.9 cm) with 24 dc. Twelve mesh loops grow from ch-4 to ch-6, taking the bell from 2 in (5.1 cm) to 3.25 in (8.3 cm) wide flat. The band turns 12 loops into 72 sc at 3.5 in (8.9 cm). Twelve shell scallops finish the hem at 3.75 in (9.5 cm) wide and 3 in (7.6 cm) tall.
If your crown and your Round 5 width match the checkpoints, the rest of the bell will follow. Make one, check it, then make a whole set for the tree.
Happy crocheting!