

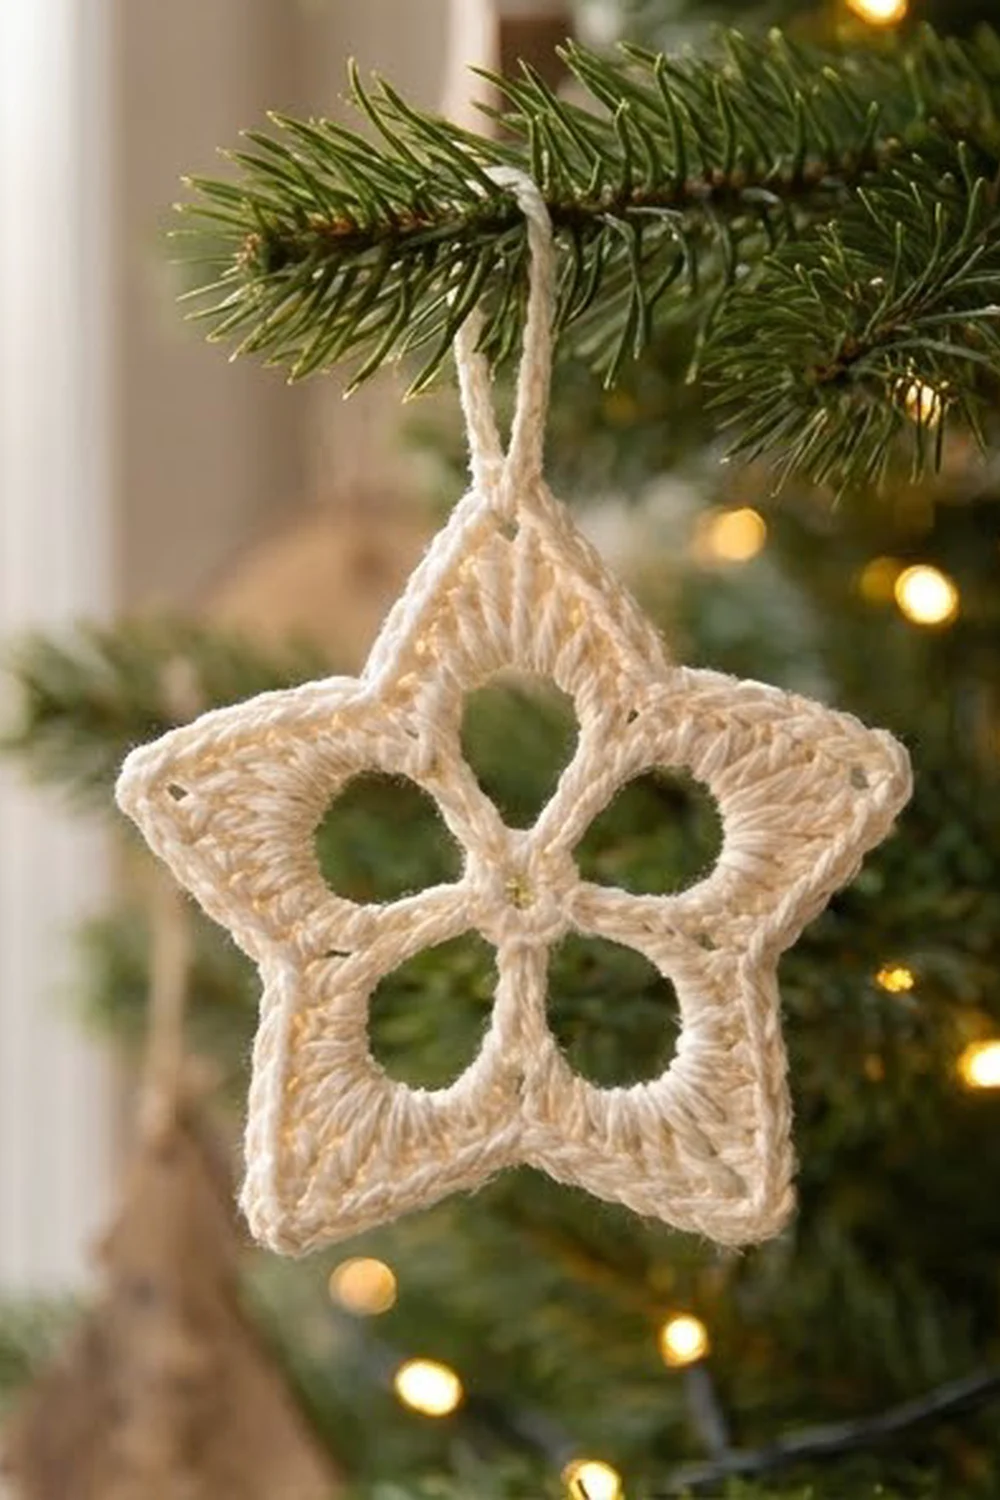
The Snowlight Star is a small, light ornament with a lot of structure. Each of its five arms has a round open window, and the five windows meet at a tiny center hole. That gives the star a lacy, snowflake-like look while the solid edge keeps the shape crisp.
This sample is worked in one color, a soft cream cotton, which looks like old porcelain or fresh snow against pine branches. It suits a natural, Scandinavian-style tree, gift toppers, or a window garland made of single stars hung one at a time. The pattern uses US crochet terms throughout.
The finished star measures about 4 in (10.2 cm) wide from point to point and 3.75 in (9.5 cm) tall, not counting the hanging loop. The loop adds about 1.5 in (3.8 cm).
Construction is quick: you work a small ring, then five chain loops. Next you work graduated fans of stitches around each loop to build the five arms, then finish with one round of single crochet and the hanging loop. The whole star takes four rounds and is a single piece with no sewing.
Finished Size and Construction
- Finished size: 4 in (10.2 cm) wide x 3.75 in (9.5 cm) tall
- Hanging loop: about 1.5 in (3.8 cm) long
- Skill level: Easy / advanced beginner
- Terminology: US crochet terms
- Yarn weight: DK (weight 3) cotton
- Hook: 3.5 mm (E-4)
- Number of pieces: 1 (one single motif)
- Layout: single five-pointed star worked in the round
- Piece size: 4 in (10.2 cm) point to point
- Size before border (after Round 3): 3.75 in (9.5 cm) wide x 3.5 in (8.9 cm) tall
- Border depth: about 0.125 in (0.3 cm) on each side (one round of sc)
Materials
Yarn: Use a smooth, mercerized or combed DK cotton. Cotton holds the points well and blocks crisp. Avoid fuzzy or very soft acrylics, because the windows will close up and the points will curl.
- Cream / ivory: 8 g, about 20 m (22 yd) per star
The quantity includes a margin for the swatch round, tails, and the hanging loop. One 50 g ball makes at least six stars.
Tools:
- 3.5 mm (E-4) crochet hook
- Tapestry needle
- 1 stitch marker
- Scissors
- Rust-proof pins and a blocking mat or foam board
- Spray bottle with water
- Optional: fabric stiffener or light spray starch
Abbreviations (US Terms)
- ch – chain
- sl st – slip stitch
- sc – single crochet
- hdc – half double crochet
- dc – double crochet
- tr – treble crochet (yarn over twice, insert hook, pull up a loop, [yarn over, pull through 2 loops] 3 times)
- sc2tog – single crochet 2 together
- sk – skip
- sp – space
- st(s) – stitch(es)
Special stitch – sc2tog (valley decrease): Insert hook in the next stitch and pull up a loop. Insert hook in the following stitch and pull up a loop (3 loops on hook). Yarn over and pull through all 3 loops. In this pattern, sc2tog always joins the last sc of one arm to the first sc of the next arm, which pulls in the inner corner (valley) of the star.
Gauge and Checkpoints
A flat swatch doesn’t tell you much for an ornament this small. The best gauge test is the star itself, so make one star first and check it against the measurements below before you make a set.
Reference gauge: 20 sc = 4 in (10.2 cm) in DK cotton with a 3.5 mm hook.
Checkpoints:
- After Round 1: the ring is about 0.5 in (1.3 cm) across.
- After Round 2: the five loops spread to about 2.5 in (6.4 cm) across when laid flat.
- After Round 3: the star measures 3.75 in (9.5 cm) point to point and 3.5 in (8.9 cm) tall.
- After Round 4: the star measures 4 in (10.2 cm) point to point and 3.75 in (9.5 cm) tall.
If your star is too big (over 4.25 in / 10.8 cm wide), go down to a 3.25 mm hook, or tighten the chains in Round 2.
If your star is too small (under 3.75 in / 9.5 cm wide after Round 4), go up to a 3.75 mm hook. If the tall stitches look crammed and cupped, work the Round 2 chains a little more loosely.
Small differences are fine for an ornament. Just keep all the stars in a set on the same hook so they match.
Pattern
Round 1 – Center Ring
Ch 4, sl st in the first ch to form a ring.
Round 1: Ch 1 (does not count as a st), work 10 sc into the ring. Sl st in the first sc to join. (10 sts)
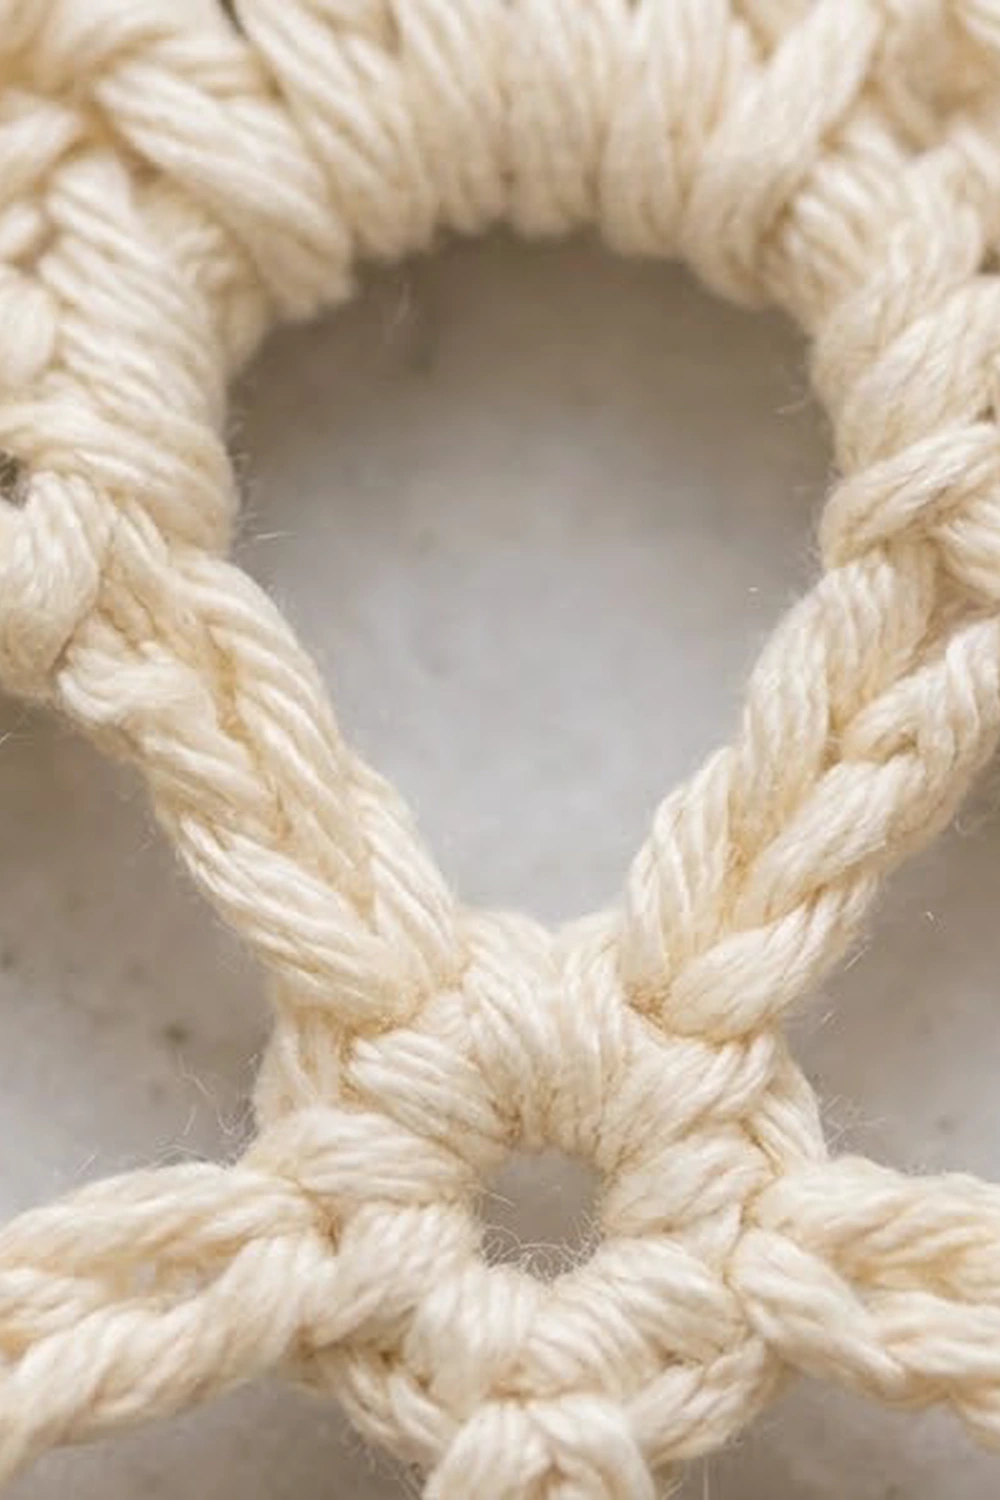
Pull the starting tail gently so the ring closes to a small center hole of about 0.25 in (0.6 cm). Don’t close it completely, because the open center is part of the design.
Round 2 – Five Petal Loops
Round 2: Ch 1, sc in the same st as the join. Ch 14, sk next sc, sc in next sc. Repeat from * to * 3 more times. Ch 14, sk last sc, sl st in the first sc to join. (5 sc, 5 ch-14 loops)
The 5 sc you worked into become the spokes between the windows. The 5 sc you skipped leave tiny gaps around the center hole, which makes the center lacy.
Lay the piece flat. The five loops should sit side by side like flower petals, each about 0.75 in (1.9 cm) across. Check that no loop is twisted before you go on.
Round 3 – Building the Star Arms
Each ch-14 loop becomes one star arm. All stitches in this round are worked into the loop (around the chain), not into individual chains. This keeps the window round and open while the stitches fan outward into a point.
Round 3: Sl st into the first ch-14 loop.
In the same loop, work: ch 1 (does not count as a st), sc, hdc, 3 dc, 3 tr, tr, ch 2, tr, 3 tr, 3 dc, hdc, sc.
Go directly to the next ch-14 loop. Do not work into the sc spoke. In the next loop, work: sc, hdc, 3 dc, 3 tr, tr, ch 2, tr, 3 tr, 3 dc, hdc, sc. Repeat from * to * 3 more times. Sl st in the first sc to join.
Per arm count: 1 sc + 1 hdc + 3 dc + 4 tr, then ch 2, then 4 tr + 3 dc + 1 hdc + 1 sc = 18 sts + 1 ch-2 sp
Round total: 90 sts and 5 ch-2 sps (18 sts x 5 arms)
As you work, push the stitches along the loop so they sit evenly. The sc and hdc at each end stay low near the spoke, and the trebles stand tallest at the center to form the point. The ch-2 space is the tip of the arm.
Checkpoint: The star should now measure 3.75 in (9.5 cm) point to point and 3.5 in (8.9 cm) tall. Each window should be a clear round opening about 0.75 in (1.9 cm) across.
Border
The border is a single round of sc that firms the edge, sharpens the points, and pulls in the valleys.
Border gauge: One round of sc adds about 0.125 in (0.3 cm) on every side, which brings the star from 3.75 in (9.5 cm) to 4 in (10.2 cm) point to point.
Round 4 – Edge and Points
Work this round into the top loops of the Round 3 stitches. You’ll start just past the first sc of arm 1.
Round 4: Ch 1, sc in the first hdc of arm 1 and place a marker in this sc. Sc in each of the next 7 sts (3 dc, 4 tr), for 8 sc total. Work (sc, ch 1, sc) in the ch-2 sp. Sc in each of the next 8 sts (4 tr, 3 dc, 1 hdc). Sc2tog over the last sc of this arm and the first sc of the next arm.
Sc in each of the next 8 sts, (sc, ch 1, sc) in the ch-2 sp, sc in each of the next 8 sts, sc2tog over the last sc of this arm and the first sc of the next arm. Repeat from * to * 3 more times.
The final sc2tog joins the last sc of arm 5 to the first sc of arm 1. Work into that sc itself, under the Round 3 joining sl st. Sl st in the marked sc to join.
Per arm count: 8 sc + 2 sc at the point + 8 sc + 1 sc2tog = 19 sts + 1 ch-1 sp
Round total: 95 sts and 5 ch-1 sps (19 sts x 5 arms)
Why the math works: Round 3 has 90 sts. The 5 valley sc2tog decreases each turn 2 sts into 1, which removes 5 sts and leaves 85. Each point adds 2 sc into a ch-2 space that held no stitches before, which adds 10 sts. 85 + 10 = 95, the same as 19 x 5. Each straight edge of the star (from valley to point) has 8 sc plus 1 point sc, so all 10 edges match and the star sits symmetrically.
Hanging Loop
Do not fasten off. Sl st in each of the next 8 sc, then sl st into the ch-1 sp at the tip of arm 1. Ch 18, sl st in the same ch-1 sp. Fasten off, leaving a 6 in (15.2 cm) tail.
The loop is about 1.5 in (3.8 cm) long. For a longer loop, add 4 chains for each extra 0.5 in (1.3 cm) you want.
Weave the tail back through the base of the loop and along the edge to secure the loop, then weave in the starting tail around the center ring.
Final Blocking
Cotton stars really benefit from blocking. It opens the windows and sharpens the points.
- Dampen: Spray the star until it is evenly damp but not dripping. If you want a stiffer ornament, use light starch or diluted fabric stiffener instead of plain water.
- Shape the center: Lay the star face up on the mat. Put one pin through the center hole to anchor it.
- Pin the points: Pin each of the five ch-1 point spaces outward so each point sits 2 in (5.1 cm) from the center pin. This gives a 4 in (10.2 cm) point-to-point span.
- Pin the valleys: Push each valley gently toward the center and pin it. The edges between the points should run straight, not bow outward.
- Open the windows: Use your fingertip or the end of a pencil to round out each window. If one closes up, pin it open from the inside with two pins.
- Shape the loop: Lay the hanging loop straight up from the top point.
- Dry fully: Leave the star pinned until completely dry, usually 6 to 8 hours. Unpin it and check the size again.
Final Quality-Control Checklist
- Round 2 has 5 even loops of ch 14 with no twists.
- Round 3 has 18 sts per arm (90 total) plus 5 ch-2 points.
- Round 4 has 19 sts per arm (95 total) plus 5 ch-1 points.
- All 10 star edges have the same number of sc.
- The five windows are round, open, and about the same size.
- The center hole is small and open, not pulled shut.
- The finished star measures about 4 in (10.2 cm) point to point and 3.75 in (9.5 cm) tall.
- The hanging loop is secure, centered on the top point, and about 1.5 in (3.8 cm) long.
- All tails are woven in invisibly and trimmed close.
Troubleshooting
The star cups or ruffles. The Round 2 chains are too tight for the 18 sts packed into each loop. Redo Round 2 with looser chains, or add 1 chain to each loop (ch 15).
The windows are closing up. The stitches in Round 3 are bunched in the middle of the loop. Spread them evenly along the full length of the loop, and block with a pin inside each window.
The points are rounded, not sharp. Make sure the tallest stitches sit next to the ch-2 space, then pin the points firmly during blocking. Starch helps the points hold.
The valleys are bulging out. You may have skipped the sc2tog. Check that each valley has one sc2tog joining the end of one arm to the start of the next.
The arms are different sizes. Recount each arm in Round 3. A missing or extra treble is the most common cause.
The ornament flops on the branch. Use a stiffer finish, such as fabric stiffener, and let it dry completely before hanging.
Care
Hand wash the star in cool water with mild soap, press out the water in a towel, and re-block it flat to dry. Store the ornaments flat in tissue paper so the points and loops keep their shape.
Final Notes
The measurement chain for this star is short and easy to track. The ring is 0.5 in (1.3 cm) across. Round 2 makes five loops spreading to 2.5 in (6.4 cm). Round 3 builds the arms to 3.75 in (9.5 cm) point to point. The Round 4 border adds 0.125 in (0.3 cm) per side for a finished 4 in (10.2 cm) star with a 1.5 in (3.8 cm) hanging loop. If you check your piece at each step, every star you make will match the first one.
Happy crocheting!