

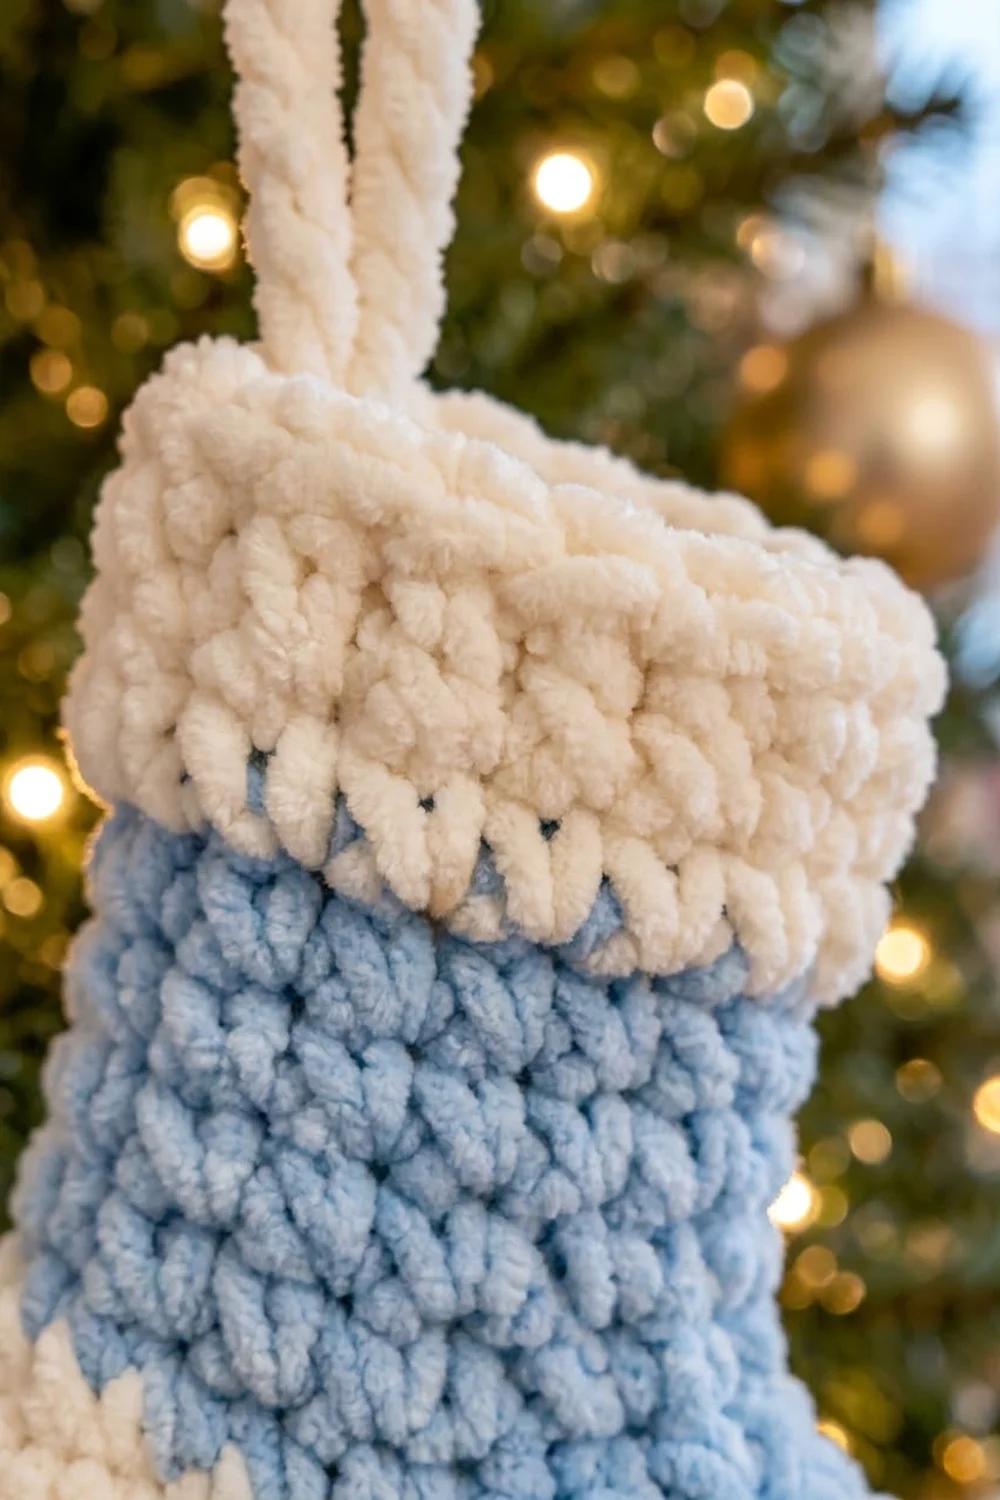
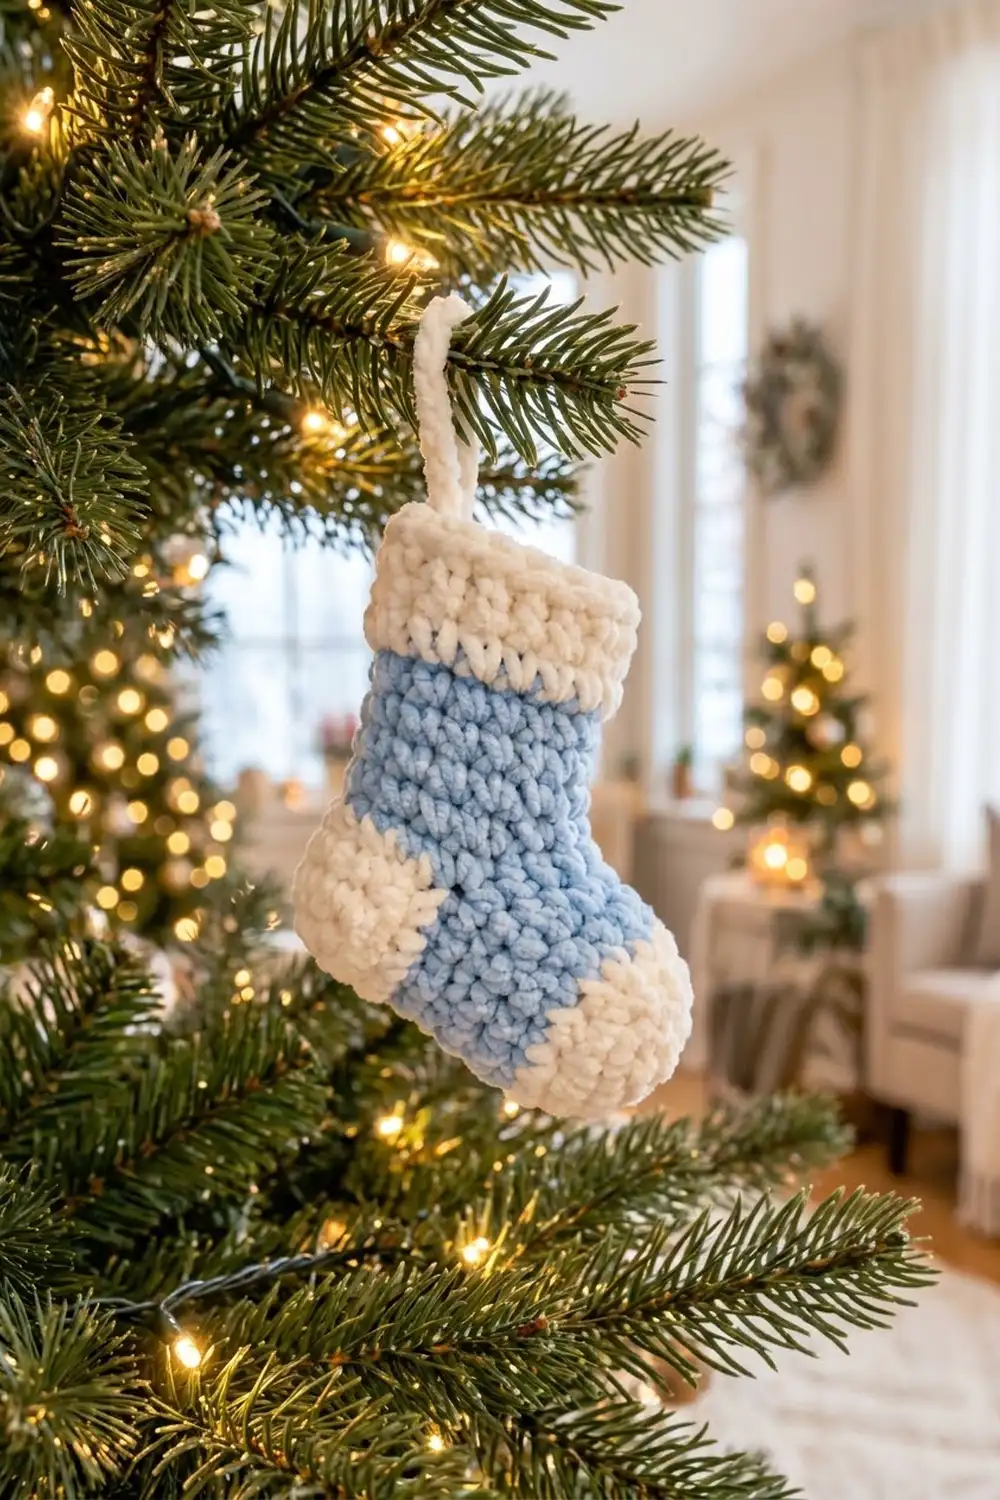
This little stocking is soft, plush and quick to make. It has a powder-blue leg and foot, a rounded cream heel and toe, a cream cuff with a rolled edge, and a sturdy loop for hanging. Chenille yarn makes the stitches look like velvet, so even simple single crochet looks rich.
The style is a classic Christmas sock in a small size. The blue and cream look wintry and works with gold, silver or natural tree decorations.
The pattern uses US crochet terms. The finished ornament is about 5.25 in (13.3 cm) tall and 4.5 in (11.4 cm) wide, lying flat, not counting the loop. The loop adds about 1.75 in (4.4 cm).
You make the stocking in one piece, from the top down. First crochet a blue leg tube. Then work a cream heel flap in rows, pick up stitches for the blue foot, and finish with a cream toe that you sew closed. Last, crochet the cream cuff into the starting chain and add the loop.
Finished Size and Construction
- Finished size: 5.25 in (13.3 cm) tall x 4.5 in (11.4 cm) wide, lying flat
- With loop: about 7 in (17.8 cm) tall
- Skill level: Advanced beginner
- Terminology: US
- Yarn weight: Bulky (#5) chenille or velvet yarn
- Hook: 5.0 mm (H-8)
- Number of pieces: 1 (the loop is crocheted onto the stocking)
- Layout: Single ornament, worked in rounds, lies flat on its side
- Leg width, flattened: 3 in (7.6 cm), which is 9 stitches across one face
- Size before the cuff: 3 in (7.6 cm) leg width x 4 in (10.2 cm) from the starting chain to the bottom of the heel
- Cuff depth: 1.25 in (3.2 cm)
Materials
Yarn advice: Choose a smooth bulky chenille or velvet yarn. Plush yarn hides stitch gaps and gives the soft, padded look in the photo. Chenille can shed if you pull it hard, so keep your stitches relaxed. Blanket-style yarn is too thick for this size.
- Color A, light powder blue: 12 g, about 15 m
- Color B, cream/off-white: 10 g, about 12 m (includes the loop)
These amounts include a margin of about 20 percent for your gauge swatch and yarn tails.
Tools:
– 5.0 mm (H-8) crochet hook
– 2 stitch markers in contrasting colors
– Tapestry needle with a large eye
– Scissors
– Optional: a small pinch of fiberfill to puff up the toe and heel
Abbreviations (US Terms)
- ch: chain
- sl st: slip stitch
- sc: single crochet
- sc2tog: single crochet 2 together (a decrease)
- 2 sc in next: 2 single crochet in the same stitch (an increase)
- rev sc: reverse single crochet
- st(s): stitch(es)
- rnd(s): round(s)
- RS / WS: right side / wrong side
Special stitch: reverse sc (crab stitch). Work single crochet from left to right instead of right to left. Insert the hook into the next stitch to the right, yarn over, pull up a loop, yarn over, and pull through both loops. This twists each stitch and makes the rounded, corded top edge of the cuff.
Gauge and Checkpoints
Gauge: 12 sc x 12 rnds = 4 in (10.2 cm) in sc worked in the round, Color A, 5.0 mm hook. That works out to 3 sts and 3 rnds per inch (2.5 cm).
Make the leg first as your test. It shows your gauge before you spend time on the heel.
Checkpoints:
1. After Leg Rnd 1: Flatten the tube. Each face should be 9 sts, or 3 in (7.6 cm) wide.
2. After Leg Rnd 6: The leg should be 2 in (5.1 cm) tall.
3. After Heel Row 6: From the starting chain to the bottom of the heel should be about 4 in (10.2 cm).
4. After the toe: The foot, lying flat, should be about 4.5 in (11.4 cm) from the back of the heel to the tip of the toe.
5. After the cuff: The full height without the loop should be 5.25 in (13.3 cm).
If your leg is too wide: Go down to a 4.5 mm (7) hook. If it’s too narrow or stiff: Go up to a 5.5 mm (I-9) hook. Change the hook, not the stitch counts. All the shaping depends on the 18-stitch tube.
Leg
Work in continuous rounds with Color A. Do not join or turn. Put a marker in the first stitch of each round.
Foundation: Ch 18. Sl st into the first ch to make a ring, making sure the chain isn’t twisted.
Rnd 1: Ch 1, sc in each ch around. (18 sts)
Use the second marker to mark st 5. This is the center back, where the heel goes. St 14 is the center front. Whenever you lay the stocking flat, st 5 should sit on the left fold and st 14 on the right fold.
Rnds 2–6: Sc in each st around. (18 sts in each round)
Check now that the leg is 2 in (5.1 cm) tall and 3 in (7.6 cm) wide when flattened.
On the last st of Rnd 6, change to Color B on the final yarn over. Keep Color A attached. You’ll carry it up the inside later, or cut it and leave a 4 in (10.2 cm) tail.
Heel
The heel is worked in rows over sts 1–9 only, the back half of the leg. Sts 10–18 sit unworked; they become the instep, the top of the foot.
Row 1 (RS): With Color B, sc in sts 1–9. Turn. (9 sts)
Rows 2–4: Ch 1, sc in each st across. Turn. (9 sts in each row)
These 4 rows make the heel flap, about 1.3 in (3.3 cm) deep.
Row 5 (RS): Ch 1, sc2tog, sc in next 5 sts, sc2tog. Turn. (7 sts)
Row 6 (WS): Ch 1, sc2tog, sc in next 3 sts, sc2tog. (5 sts)
Fasten off Color B, leaving a 4 in (10.2 cm) tail. Rows 5 and 6 pull the bottom of the flap in, so it curves into the rounded heel.
The heel has 6 rows, so each side edge has 6 row-ends. You’ll pick up 4 stitches along each side so the gusset (the shaping where the heel meets the foot) lies flat.
Foot
Go back to working in continuous rounds with Color A.
Rnd 1 (setup): With RS facing, join Color A in the first st of Heel Row 6.
– Sc in each of the 5 heel sts.
– Work 4 sc evenly along the side of the heel. Skip about every third row-end.
– Sc in each of the 9 instep sts (leg sts 10–18).
– Work 4 sc evenly along the other side of the heel.
(5 + 4 + 9 + 4 = 22 sts) Move your marker to the first st.
Rnd 2 (gusset decrease): Sc in next 7 sts, sc2tog, sc in next 9 sts, sc2tog, sc in next 2 sts. (20 sts)
Rnd 3 (gusset decrease): Sc in next 6 sts, sc2tog, sc in next 9 sts, sc2tog, sc in next st. (18 sts)
The foot is now back to the same 18 sts as the leg. The 9 instep sts haven’t changed and stay centered on top.
Rnd 4: Sc in each st around. (18 sts)
On the last st, change to Color B. Fasten off Color A and weave in the tail on the inside.
Toe
Rnd 5: With Color B, sc in each st around. (18 sts)
Rnd 6: [Sc in next 7 sts, sc2tog] 2 times. (16 sts)
Rnd 7: [Sc in next 2 sts, sc2tog] 4 times. (12 sts)
Fasten off and leave a 10 in (25.4 cm) tail.
Close the toe: If you want a puffier toe and heel, push in a small pinch of fiberfill now. Lay the stocking on its side with the heel on the left. Line up the 12 sts as 6 on the front face and 6 on the back face. Whipstitch the 6 pairs together through both loops. The seam runs up and down at the tip of the toe and is about 2 in (5.1 cm) long. Pull the tail inside.
The toe takes 3 rounds, or 1 in (2.5 cm). It tapers from 3 in (7.6 cm) tall at the foot to a 2 in (5.1 cm) seam, which gives it a rounded cap.
Cuff Border
The cuff is the border of this piece. Work it into the free loops on the other side of the starting chain, so it grows up from the top of the leg.
Border gauge: Same as the body, 3 sts per inch (2.5 cm).
Rnd 1 (conversion round): With RS facing, join Color B in the free loop of the foundation ch directly above st 1.
– Ch 1.
– Sc in next 4 ch.
– 2 sc in next ch (above st 5, the back fold).
– Sc in next 8 ch.
– 2 sc in next ch (above st 14, the front fold).
– Sc in next 4 ch.
(18 worked one per chain + 2 extra = 20 sts. That’s 10 sts per face.)
Rnds 2–3: Sc in each st around. (20 sts in each round, 10 per face)
Rnd 4: Ch 1, rev sc in each st around. Sl st to the first st. (20 sts, 10 per face)
Fasten off and leave a 4 in (10.2 cm) tail.
Why the math works: The leg has 9 sts per face, or 3 in (7.6 cm). The cuff has 10 sts per face, or about 3.3 in (8.4 cm). The extra 0.33 in (0.8 cm) of width gives the slight overhang you see in the photo. Each increase sits right on a fold, so the front and back faces stay the same width and the cuff doesn’t twist. Rnds 1–3 add 1 in (2.5 cm) of height, and the rolled rev sc edge adds about 0.25 in (0.6 cm). That makes the cuff 1.25 in (3.2 cm) deep. The heel-to-starting-chain height is 4 in (10.2 cm), so the stocking ends up 5.25 in (13.3 cm) tall.
Hanging Loop
Join Color B in the cuff’s Rnd 4 st directly above the back fold (above st 5). Ch 15, then sl st into the same st to close the ring.
Work 20 sc into the ch-15 loop, packing them in tightly so they cover the chain. Sl st into the cuff st where you started. Fasten off. Weave the tail down into the cuff on the inside so the base of the loop is secure.
The finished loop stands about 1.75 in (4.4 cm) above the cuff.
Final Blocking
Chenille doesn’t like heat or stretching, so block it gently.
- Weave in all remaining tails on the inside. Trim them to 0.5 in (1.3 cm).
- Lay the stocking on its side with the heel to the left and the toe to the right.
- Line up the folds. St 5 runs straight down the left edge of the leg and st 14 down the right edge.
- Mist it lightly with cool water. Don’t soak it.
- Use your fingers to shape the heel and toe into smooth curves. Fold the cuff slightly outward so it sits on top of the leg.
- Check the size: 5.25 in (13.3 cm) tall and 4.5 in (11.4 cm) wide.
- Leave it flat to dry completely. Don’t use pins; they can leave marks in the pile.
Final Quality-Control Checklist
- Leg is 9 sts, or 3 in (7.6 cm), across each face
- Heel color change is neat, with no blue showing through the cream
- Gusset corners are flat, with no holes where you picked up stitches
- Foot is back to 18 sts before the toe
- Toe seam is centered at the tip and about 2 in (5.1 cm) long
- Cuff has 20 sts with the increases on the folds, and the rolled edge is even all the way around
- Loop is centered above the heel side and firmly attached
- Finished size is 5.25 in x 4.5 in (13.3 cm x 11.4 cm)
Troubleshooting
There are holes at the gusset corners. Pick up stitches through a full row-end, not just one strand. You can also close a small gap from the inside with a tail.
The heel is too pointed. Your tension in Rows 5–6 was probably tight. Redo them more loosely, or add a little fiberfill.
The foot points up or down instead of sideways. You didn’t use sts 1–9 for the heel. Check that the heel is centered on st 5.
The cuff flares like a bell. Your rev sc is too loose. Redo it with a 4.5 mm (7) hook.
The yarn is shedding or breaking. Chenille is weak when stretched. Work with a relaxed hand and don’t frog the same section over and over.
Your stitch count is off. Count after each gusset round. It’s easiest to fix an extra or missing stitch before the toe.
Care
Spot clean it with cool water and mild soap, then reshape it and let it dry flat. Store it in tissue paper so the loop and cuff don’t get crushed.
Final Notes
Everything depends on the 18-stitch leg at 3 sts per inch. That gives a leg 3 in (7.6 cm) wide and 2 in (5.1 cm) tall. The 9-stitch heel brings the height to 4 in (10.2 cm). The gusset goes from 22 to 18 sts so the foot matches the leg, and the toe closes to a 2 in (5.1 cm) seam, for a total width of 4.5 in (11.4 cm). The 20-stitch cuff adds 1.25 in (3.2 cm), for a finished height of 5.25 in (13.3 cm). If your first checkpoint is right, the rest of the measurements will follow.
Happy crocheting!