

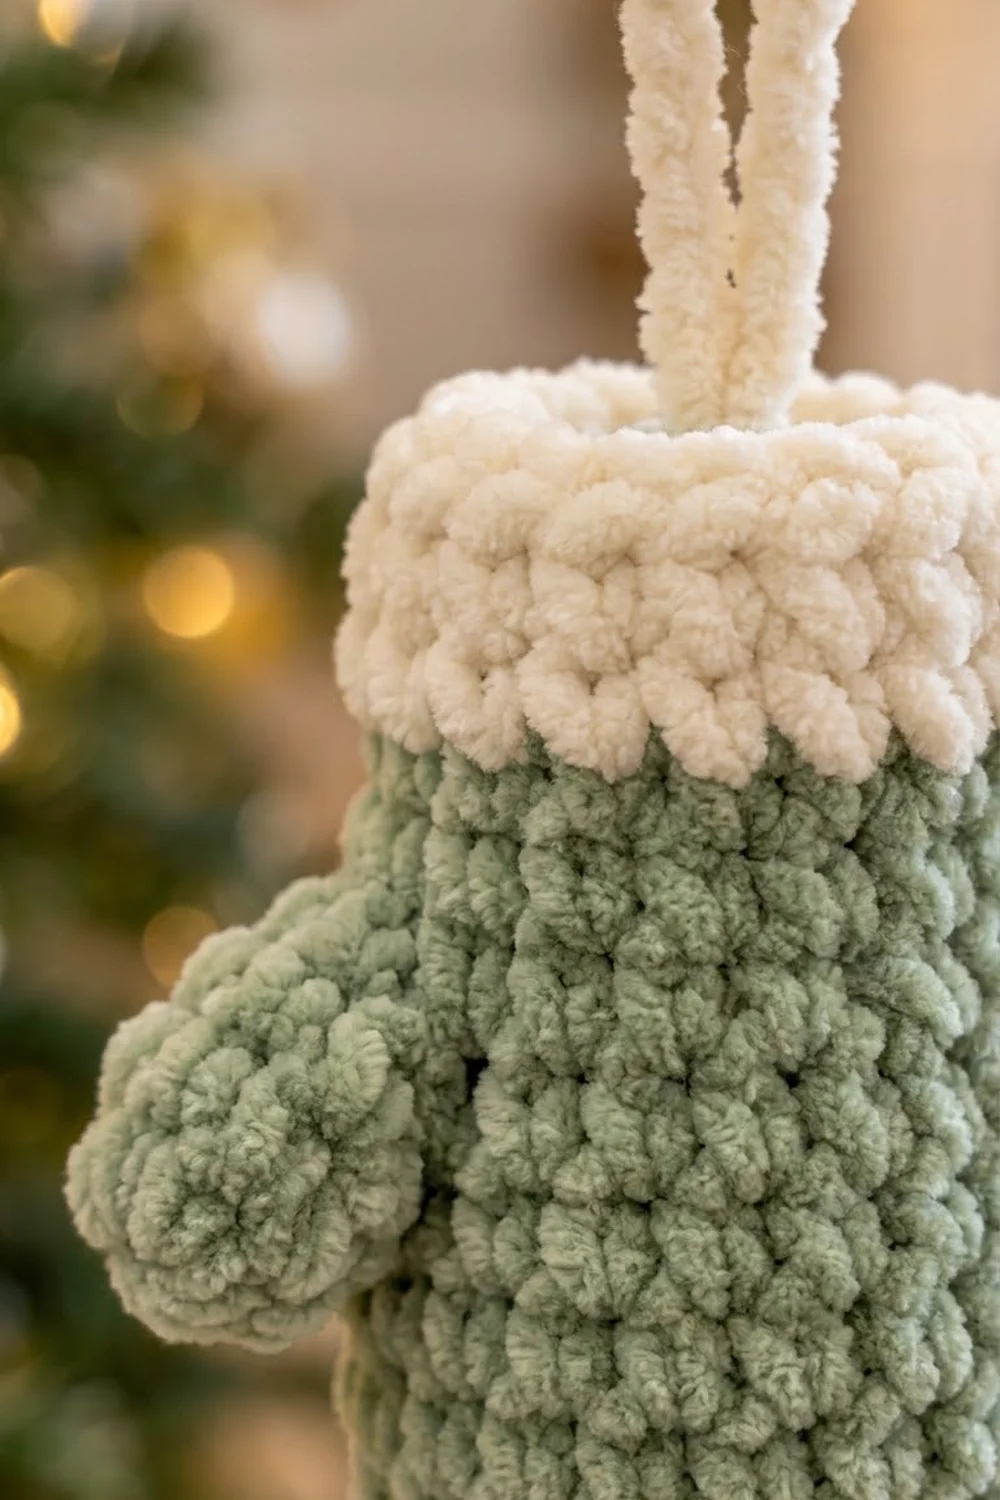
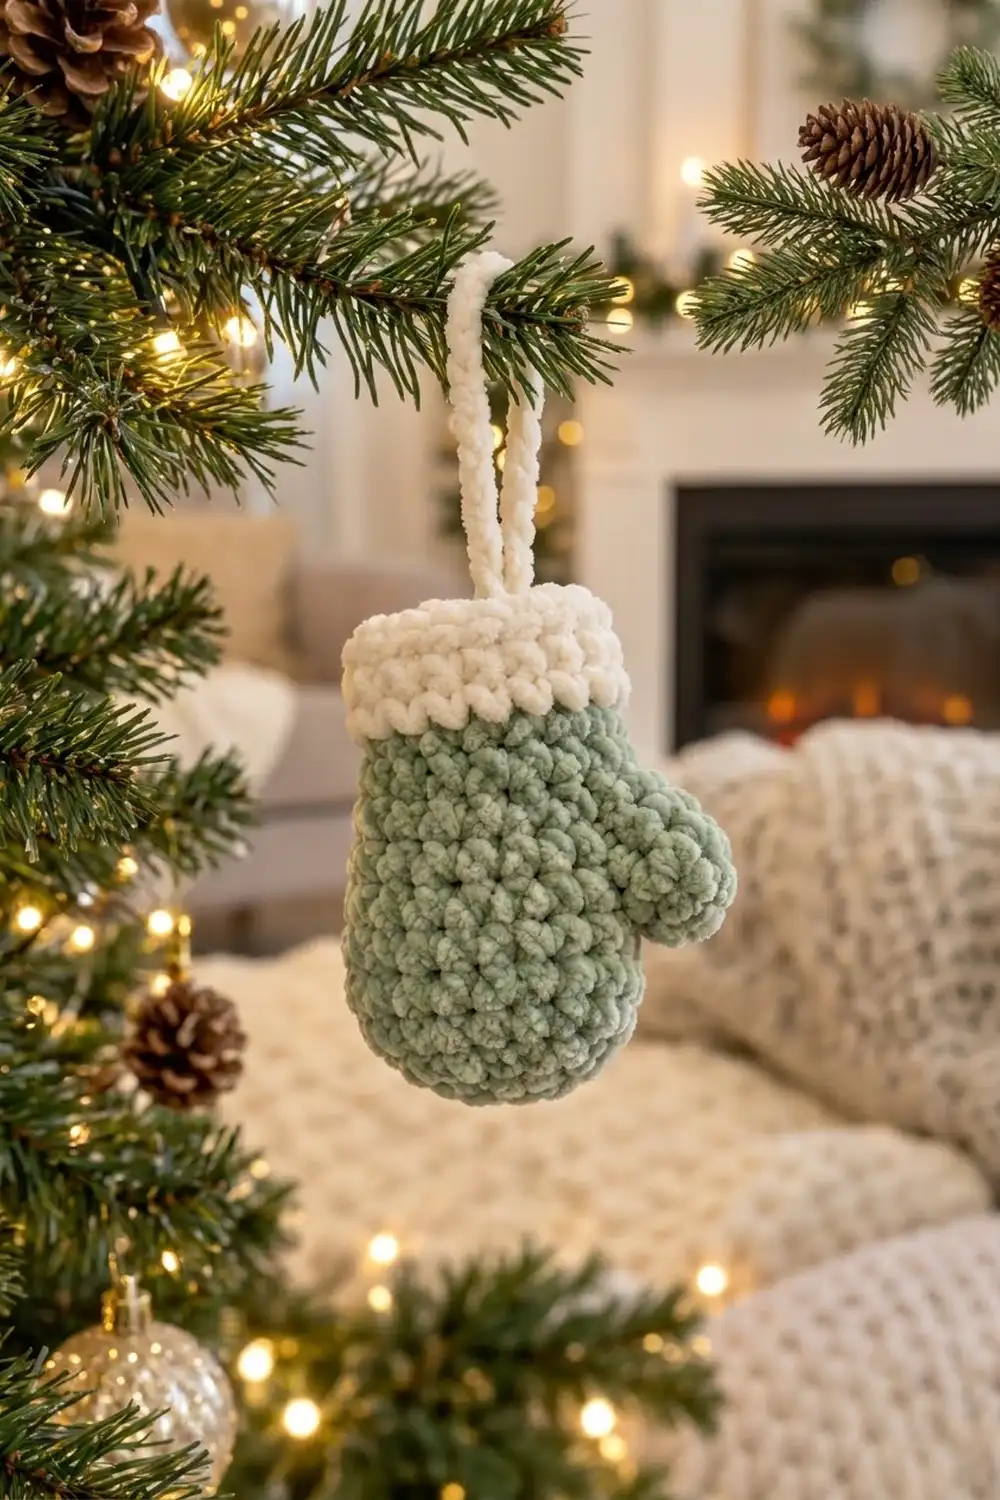
This little mitten ornament is plump and soft. The hand is sage green chenille, the cuff is creamy white, and a sturdy cream loop holds it on a branch. The plush yarn turns plain single crochet into a pebbled, velvety texture that catches the light of the tree.
The style is quiet and Nordic-inspired: one muted green, one warm neutral and no extra trims. The pattern uses US crochet terms throughout. The finished mitten is about 3¼ in (8.3 cm) tall without the loop and 3 in (7.6 cm) wide across the thumb.
You start with the small thumb in the round and set it aside. Next you work the hand from the fingertip upward and join the thumb as you go. You then switch to cream for the cuff, stuff the mitten lightly, close the top flat and catch the hanging loop into the closing row.
Each ornament takes well under an hour once you know the steps. Make one, check it against the measurements below, and then make as many as you like.
Finished Size and Construction
- Finished size: 3¼ in (8.3 cm) tall × 3 in (7.6 cm) wide across the thumb, without the loop
- Hanging loop: rises about 2 in (5.1 cm) above the cuff
- Skill level: Easy / advanced beginner
- Terminology: US crochet terms
- Yarn weight: Bulky (#5) chenille or velvet yarn
- Hook: 4.5 mm (US 7)
- Number of pieces: 1 ornament made from 2 parts (thumb and hand), joined while you crochet
- Layout: Single standalone ornament
- Hand width (flattened): about 2.3 in (5.8 cm)
- Size before the cuff: 2.3 in (5.8 cm) wide × 2.25 in (5.7 cm) tall
- Cuff depth: ¾ in (1.9 cm), plus the closing row at about ¼ in (0.6 cm)
Materials
Yarn: Use a bulky (#5) polyester chenille or velvet yarn. Pick one that recommends a hook of about 4.5–5 mm. Chenille hides stitch definition and makes a soft, even fabric. It can “worm” (pull out of its own stitches) if your tension is loose, so a slightly tight hand works best here.
- Sage green (hand and thumb): 12 g, about 14 m
- Cream (cuff and loop): 6 g, about 7 m
Both quantities include a margin of roughly 25% for your gauge swatch, tails and small differences in tension.
Tools:
– 4.5 mm (US 7) crochet hook
– Locking stitch markers (at least 2)
– Tapestry needle with a large eye
– Polyester fiberfill (a small handful)
– Scissors
– Ruler or measuring tape
Abbreviations (US Terms)
- MR – magic ring
- ch – chain
- sc – single crochet
- inc – increase (2 sc in the same stitch)
- sc2tog – single crochet 2 together (decrease)
- sl st – slip stitch
- BLO – back loop only
- st(s) – stitch(es)
- Rnd – round
Special technique – Invisible decrease (optional): Insert the hook into the front loop only of each of the next 2 stitches, yarn over and pull through both front loops, then yarn over and pull through the 2 loops on the hook. In chenille this hides the decrease better than a standard sc2tog. You can use either method.
Gauge and Checkpoints
Gauge: 7 sc and 8 rounds = 2 in (5.1 cm), worked in continuous rounds. That works out to 3.5 sc and 4 rounds per inch (2.5 cm).
Don’t swatch a flat square. Make the thumb, then the hand through Rnd 6, and measure there. That piece is your gauge test.
Checkpoints:
– Thumb after Rnd 3: about ¾ in (1.9 cm) long and 0.9 in (2.3 cm) wide when flattened.
– Hand after Rnd 3: the flat circle measures about 1.5 in (3.8 cm) across.
– Hand after Rnd 6: flattened, about 2.3 in (5.8 cm) wide and 1.5 in (3.8 cm) tall from the tip.
– Before the cuff (after Rnd 9): 2.3 in (5.8 cm) wide × 2.25 in (5.7 cm) tall.
– Finished mitten: 3¼ in (8.3 cm) tall without the loop.
Too big? Go down to a 4.0 mm hook, or tighten your tension. Chenille worked loosely looks open and lets the stuffing show.
Too small? Go up to a 5.0 mm hook. Don’t add stitches, because every count in this pattern depends on the 16-stitch hand.
Pattern
All parts are worked in continuous spiral rounds. Don’t join with a slip stitch at the end of a round. Mark the last stitch of every round and move the marker up as you go.
Thumb (Sage Green)
Rnd 1: Make a MR, then work 6 sc into the ring. Pull the ring tight. (6 sts)
Rnd 2: Sc in each st around. (6 sts)
Rnd 3: Sc in each st around. (6 sts)
Fasten off and leave a 10 in (25.4 cm) tail for sewing. Don’t stuff the thumb, because chenille is thick enough to hold the round, bobble-like shape. Set it aside.
Hand (Sage Green)
Rnd 1: Make a MR, then work 6 sc into the ring. Pull it tight. (6 sts)
Rnd 2: Inc in each st around. (12 sts)
Rnd 3: (Sc in next 2 sts, inc in next st) 4 times. (16 sts)
Checkpoint: the flat circle measures about 1.5 in (3.8 cm) across.
Rnds 4–6: Sc in each st around. (16 sts per round)
The rounded fingertip end is now complete. Flatten the tube so the round marker sits on one folded side edge. This side is where the thumb attaches. Sts 1–8 form one face of the mitten and sts 9–16 form the other face.
Joining the Thumb (Rnd 7)
Rnd 7: Sc in the next 13 sts of the hand. Three hand stitches (sts 14–16) remain before the marker.
Hold the thumb against that side edge with its rounded tip pointing down toward the fingertip end of the hand. Sc in 3 consecutive stitches of the thumb’s open edge, using the 3 that face away from the hand. Skip hand sts 14–16. (13 hand sts + 3 thumb sts = 16 sts)
The 3 skipped hand stitches and the 3 unworked thumb stitches now face each other in the crook between thumb and hand. Leave them for now. You’ll sew them closed 3-to-3 later.
Place the marker in the last thumb stitch you worked. It is now the end of the round.
Wrist
Rnd 8: (Sc in next 6 sts, sc2tog) 2 times. (14 sts)
This decrease pulls the wrist in just above the thumb, so the hand looks puffed and the thumb sticks out clearly.
Rnd 9: Sc in each st around. (14 sts)
Checkpoint: flattened, the hand measures 2.3 in (5.8 cm) at its widest and 2.25 in (5.7 cm) tall from tip to the top of Rnd 9.
Closing the Thumb Gap
Thread the thumb tail onto your needle. Whipstitch the 3 unworked thumb stitches to the 3 skipped hand stitches, matching them one to one. Pull snug so no hole remains in the crook. Weave the tail into the inside of the hand.
Cuff (Border)
The cuff is the border of this ornament. It is worked straight onto the hand in cream.
Border gauge: same as the hand, 3.5 sc and 4 rounds per inch (2.5 cm). Chenille in a lighter color can look fuller, so measure the cuff rather than relying on how it looks.
When the cuff is flattened, half of its stitches lie on the front face and half on the back face. Each face counts as one “side” for the per-side counts below.
Rnd 10 (conversion round): Change to cream on the last yarn-over of Rnd 9. Working in BLO, sc in each st around.
Count: (14 worked 1-per-existing-stitch) + (0 extra) = 14 sts, or 7 per side.
The unused front loops leave a ridge on the outside where the green meets the cream. That ridge makes the cuff look like a separate folded band.
Rnd 11 (flare round): (Sc in next 6 sts, inc in next st) 2 times.
Count: (14 worked 1-per-existing-stitch) + (2 extra) = 16 sts, or 8 per side.
Rnd 12: Sc in each st around. (16 sts, 8 per side)
Why the math works: At 3.5 sts per inch, 14 stitches make a 4 in (10.2 cm) circumference. That flattens to 2 in (5.1 cm), which is the narrow wrist. Rnd 11 brings the count back to 16 stitches, a 4.57 in (11.6 cm) circumference. That flattens to about 2.3 in (5.8 cm), the same width as the widest part of the hand. The cuff therefore flares out slightly from the wrist and lines up with the hand, as on a real knitted mitten cuff.
Stuffing
Add a small amount of fiberfill through the open cuff. Push it into the fingertip area first, then lightly into the palm. Stop when the mitten looks puffy but still lies flat on a table. Overstuffing pushes the thumb away from the body and stretches the chenille.
Hanging Loop (Cream)
Ch 16. Sl st in the back bump of the 2nd ch from the hook and in each ch across. (15 sl sts)
This makes a thick, firm cord about 4.25 in (10.8 cm) long. Fasten off with short tails.
Fold the cord in half. Push both ends about ½ in (1.3 cm) down into the center of the cuff opening, between the front and back layers.
Closing Row
Flatten the cuff so the round marker sits on a side edge, lined up with the thumb side. Line up the 8 front stitches with the 8 back stitches.
Closing row: Working through both layers at once, sc 8 across the top. Catch both loop ends in the 4th and 5th stitches. (8 sts)
Fasten off. Weave the tail down inside the cuff. Tug the loop gently to make sure both ends are held firmly.
The closing row adds about ¼ in (0.6 cm). That brings the finished height to 3¼ in (8.3 cm): 2.25 in (5.7 cm) of hand, ¾ in (1.9 cm) of cuff and ¼ in (0.6 cm) of closing row.
Final Blocking
Chenille can’t take heat or steam the way wool can, so block gently.
- Lay the ornament flat on a towel with the thumb pointing out and slightly down.
- Pinch the fingertip end into an even dome and roll the thumb tip between your fingers to round it.
- Press the cuff flat with your palm so the BLO ridge sits straight across.
- Mist the ornament very lightly with cool water, enough to dampen the surface but not soak it.
- Leave it flat to dry for a few hours, nudging it back into shape once or twice.
- Check the measurements: 3¼ in (8.3 cm) tall and 3 in (7.6 cm) wide across the thumb.
Final Quality-Control Checklist
- [ ] Thumb is 6 sts and 3 rounds, with a round tip pointing toward the fingertips
- [ ] Hand has 16 sts through Rnd 7 and 14 sts in Rnds 8–9
- [ ] No hole remains in the crook between thumb and hand
- [ ] BLO ridge runs cleanly all the way around where the green meets the cream
- [ ] Cuff has 16 sts in Rnds 11–12 and lines up with the hand width, 2.3 in (5.8 cm)
- [ ] Stuffing is light and even, with no lumps showing through
- [ ] Closing row has 8 sts, with the loop centered between sts 4 and 5
- [ ] Loop holds firmly when tugged
- [ ] All tails are woven inside and no chenille ends poke out
- [ ] Finished size is 3¼ in (8.3 cm) × 3 in (7.6 cm)
Troubleshooting
Chenille stitches pull out into loops (“worming”): Your tension is too loose. Go down a hook size and keep the working yarn snug.
Can’t see stitches to count them: Use a stitch marker in the first stitch of every repeat. Feel for the top “V” with your fingertip rather than relying on sight.
Thumb sits flat against the hand: Check that you worked into 3 thumb stitches and skipped 3 hand stitches in Rnd 7. Then make sure the Rnd 8 decrease pulled the wrist in.
Hole beside the thumb: Unpick the seam and whipstitch the 3 skipped hand stitches to the 3 thumb stitches again, pulling each stitch firmly.
Cuff looks narrower than the hand: You probably missed the increases in Rnd 11. Recount for 16 sts.
Loop slides out: The ends weren’t caught in the closing row. Sew them down from the inside with a matching strand of cream.
Ornament won’t lie flat: It has too much stuffing. Take some out through a stitch gap with a crochet hook, then pat it flat.
Care
Spot clean only, with cool water and a little mild soap, then lay flat to dry. Store the ornament flat in a box with tissue paper between ornaments so the plush pile doesn’t crush.
Final Notes
Each stage of this mitten builds on the one before. Your gauge of 3.5 sc and 4 rounds per inch (2.5 cm) produces the 16-stitch hand, 2.3 in (5.8 cm) wide. Nine rounds bring the hand to 2.25 in (5.7 cm) tall. The thumb’s 6 stitches split evenly, 3 worked into the round and 3 sewn to the side. The wrist narrows to 14 stitches. The cuff flares back to 16 stitches so it matches the hand width. The 8-stitch closing row squares off the top and finishes the ornament at 3¼ in (8.3 cm) tall and 3 in (7.6 cm) wide.
If your measurements match at each checkpoint, every ornament you make will come out the same size and shape.
Happy crocheting!