
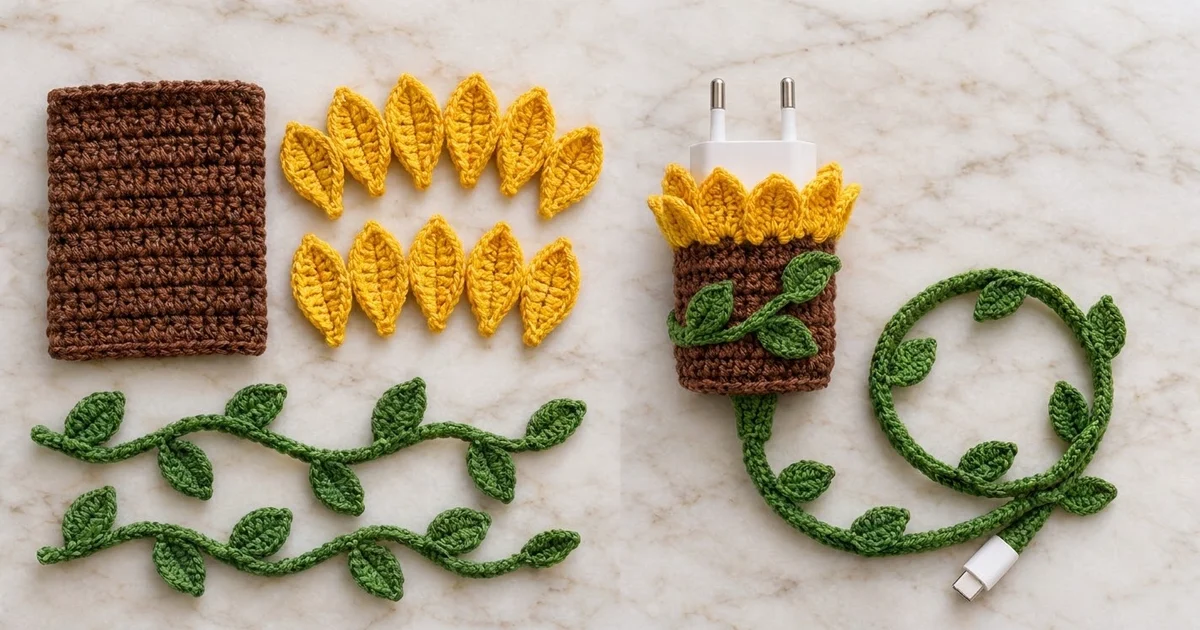
This sunflower charger cover turns a plain white wall plug into a small potted bloom. A snug brown sleeve stands in for the flower pot. A ring of bright yellow petals frames the top, a leafy green vine curls across the front, and a matching leafy wrap runs the length of the charging cable.
The palette is warm and earthy: chocolate brown, sunflower yellow and leaf green. The style is cottage-garden and cheerful, and the cover is sturdy enough for daily use. This pattern uses US crochet terms throughout.
The finished sleeve measures 6 in (15.2 cm) around and 2.9 in (7.4 cm) tall, or 3 in (7.6 cm) wide when flattened. The petal tips rise up to 1 in (2.5 cm) above the top edge, so the overall height is 3.9 in (9.9 cm). The cable wrap covers 35 in (88.9 cm) of cable.
The construction is simple. You work the brown sleeve in joined rounds and change to yellow for a two-round top band. Then you make 12 petals and sew them on in two staggered layers. The front vine is a slip-stitch stem with leaves worked directly off it. Finally, you crochet the cable wrap directly over the cable itself.
Finished Size and Construction
- Sleeve circumference: 6 in (15.2 cm), 30 sts
- Sleeve height: 2.9 in (7.4 cm); 3.9 in (9.9 cm) to the petal tips
- Skill level: Easy–Intermediate
- Terminology: US
- Yarn weight: DK (light worsted, #3), cotton or cotton blend
- Hook: 3.0 mm (US C/2–D/3)
- Number of pieces: 4 parts. These are the sleeve (with its yellow band), 12 petals, 1 front vine and 1 cable wrap.
- Layout: the petals sit in 2 rings of 6 on the top band, and the vine runs diagonally across the front
- Brown section before the band: 2.5 in (6.4 cm) tall
- Band (border) depth: 2 rounds, 0.4 in (1.0 cm)
- Fits: a compact charger body about 5.5–6 in (14.0–15.2 cm) around
Materials
Choose a smooth, matte DK cotton or cotton blend. Cotton holds the petal points crisply and doesn’t pill where the cable flexes.
- Brown: 10 g / 23 m (25 yd)
- Yellow: 8 g / 18 m (20 yd)
- Green: 15 g / 35 m (38 yd)
These quantities include a margin of about 20% for swatching and sewing.
Tools:
– 3.0 mm crochet hook
– Tapestry needle
– 4 stitch markers
– Rustproof pins
– Tape measure
– Scissors
– The charger and cable you want to cover
Abbreviations (US Terms)
- ch – chain
- sl st – slip stitch
- sc – single crochet
- hdc – half double crochet
- dc – double crochet
- BLO – back loop only
- st(s) – stitch(es)
- sp – space
- rnd – round
Special stitch – wrapped sc: With a loop on the hook, insert the hook under the cable instead of into a stitch. Yarn over, pull up a loop, yarn over, and pull through both loops. Each wrapped sc encloses the cable.
Special technique – surface sl st: Hold the yarn behind the work and insert the hook from the front through the fabric. Pull up a loop and draw it through the loop on the hook. This makes a chain line on the surface.
Gauge and Checkpoints
Gauge: 20 sc and 22 rnds = 4 in (10.2 cm) in sc worked in rounds. Cable wrap: 8 wrapped sc = 1 in (2.5 cm), pushed snugly together.
Make the sleeve first and test it on your charger before making anything else.
- After Rnd 1: the ring should measure 6 in (15.2 cm) around.
- After Rnd 7: the height should be 1.3 in (3.3 cm). Slide the sleeve onto the charger now. It should grip gently without straining the stitches.
- After Rnd 14: the brown height should be 2.5 in (6.4 cm).
- After Rnd 16: the total height should be 2.9 in (7.4 cm).
Too big? Go down to a 2.75 mm hook. Too small? Go up to a 3.25 mm hook. If your charger is much larger, add or remove sts in multiples of 5. That keeps the petal spacing even, because each petal uses 5 sts.
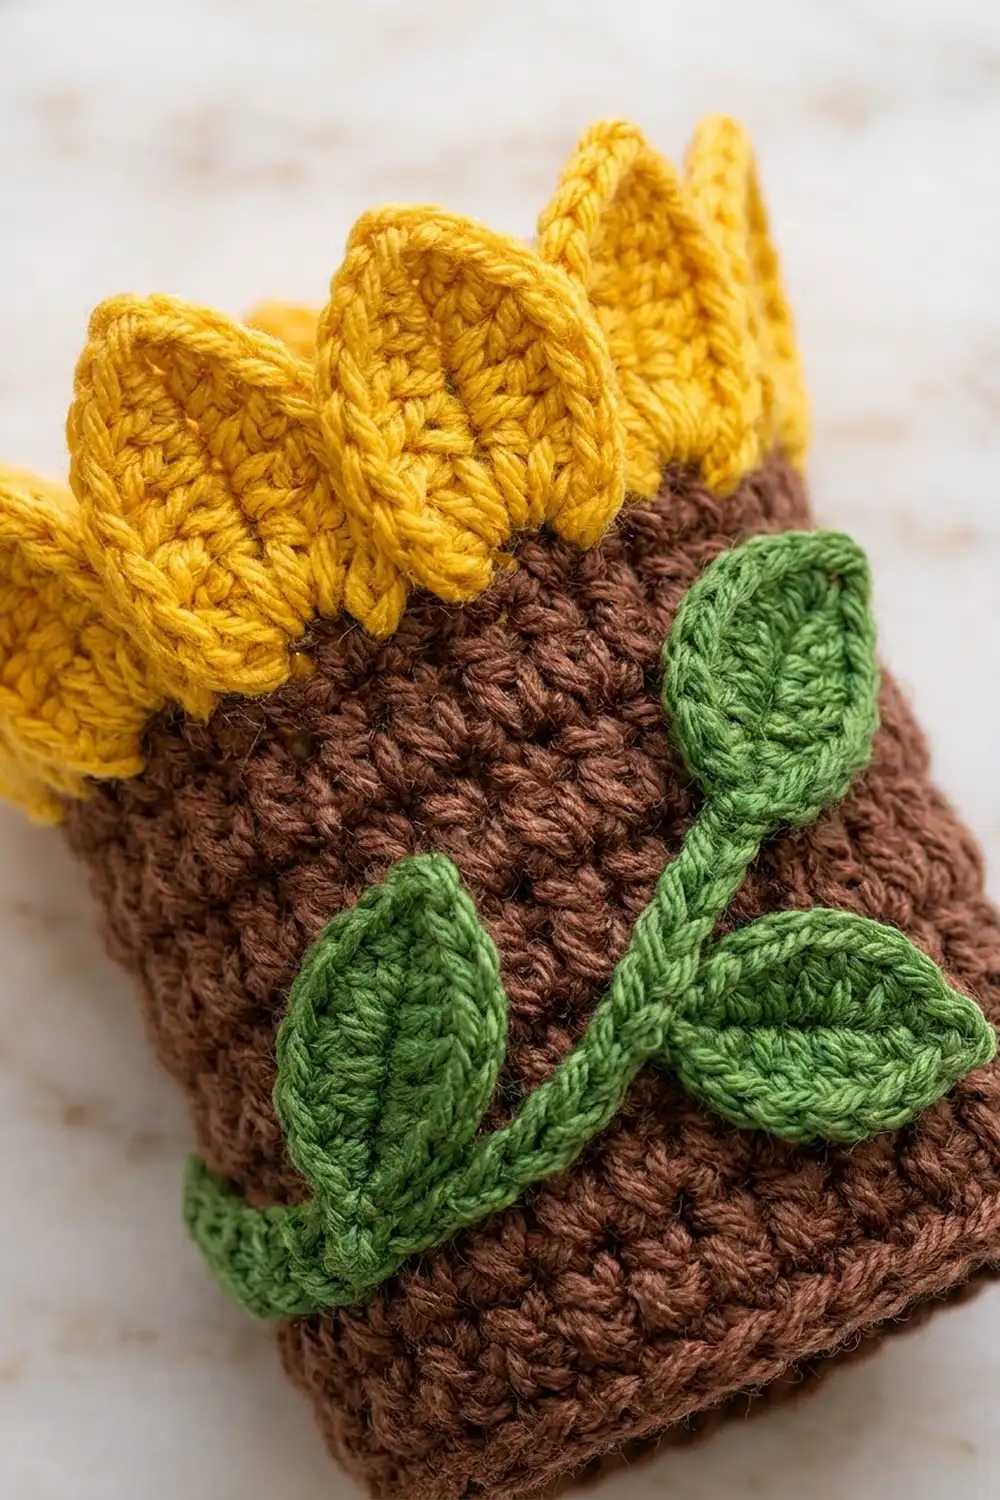
Sleeve (Brown)
The rounds are joined, and the ch 1 at the start of each round does not count as a stitch. Keep the join at the center back.
Foundation: With brown, ch 30. Join with a sl st to the first ch, taking care not to twist the chain.
Rnd 1: Ch 1, sc in each ch around, then join with a sl st to the first sc. (30 sc)
Rnds 2–14: Ch 1, sc in each st around, then join. (30 sc in each rnd)
Checkpoint: The brown section is 2.5 in (6.4 cm) tall and 3 in (7.6 cm) wide when flattened. Each flattened side has 15 sts.
Do not fasten off brown. Drop it and cut it at the end of Rnd 14, leaving a 4 in (10.2 cm) tail.
Top Band (Border)
Border gauge: the same as the sleeve, 20 sc = 4 in (10.2 cm). The band adds no stitches, so the top edge stays exactly 6 in (15.2 cm) around.
Starting count: 30 sts, or 15 per flattened side. This is the sleeve’s own count; nothing is added at the join.
Rnd 15: Join yellow with a sl st in the last brown sl st. Ch 1, sc in each st around, then join. (30 worked 1-per-stitch + 0 added = 30 sc; 15 per flattened side)
Rnd 16: Ch 1, sc in the BLO of each st around, then join. (30 worked 1-per-stitch + 0 added = 30 sc; 15 per flattened side)
Fasten off, leaving a 6 in (15.2 cm) tail.
Working in the back loops leaves the front loops of Rnd 15 free all the way around as a neat ridge. That ridge is your sewing line for the outer petal layer. Rnd 16 itself is the sewing line for the inner layer.
Why the math works: 30 sts divided by 6 petals per layer gives exactly 5 sts per petal, with no remainder. The two layers are offset by 2.5 sts, so every outer petal covers the gap between two inner petals. The band has no increases, so it can’t flare. All of the flare comes from the petals.
Checkpoint: The sleeve is 2.9 in (7.4 cm) tall and still 6 in (15.2 cm) around.
Petals (Yellow, Make 12)
Foundation: Ch 7.
Rnd 1:
1. Sc in the 2nd ch from the hook, then hdc in the next ch, dc in the next 2 chs and hdc in the next ch. (5 sts)
2. Work 3 sc in the last ch. This forms the rounded base. (3 sts)
3. Rotate the work. Working along the opposite side of the foundation chain, hdc in the next ch, dc in the next 2 chs, hdc in the next ch and sc in the next ch. (5 sts)
4. Work (sc, ch 2, sc) in the skipped tip ch, then join with a sl st to the first sc. (2 sts + ch-2 tip)
Petal total: 15 sts + 1 ch-2 tip sp.
Fasten off, leaving an 8 in (20.3 cm) tail on 6 of the petals (the inner layer) and on the other 6 (the outer layer). Tails can be shorter on any petals you plan to sew with a separate strand.
Checkpoint: Each petal measures 1.25 in (3.2 cm) long and 0.8 in (2.0 cm) wide. It has a sharp point, a rounded base and a visible center line where the foundation chain runs up the middle.
Front Vine (Green, Make 1)
Leaf (worked off the stem):
1. Ch 6. Working into the back bumps, sc in the 2nd ch from the hook, then hdc in the next ch, dc in the next ch, hdc in the next ch and sc in the next ch. (5 sts)
2. Sl st into the stem at the base.
3. Rotate the leaf. Working into the remaining loops of the same chain toward the tip, sc, hdc, dc, hdc and sc, one in each ch. (5 sts)
4. Ch 2, then sl st in the skipped tip ch.
5. Work 5 surface sl sts down the center of the leaf to make the vein, then sl st into the stem.
Leaf total: 10 sts + 1 ch-2 tip. Each leaf is 1 in (2.5 cm) long and 0.6 in (1.5 cm) wide.
Stem: Ch 25.
Row 1:
1. Sl st in the 2nd ch from the hook and in the next 3 chs. (4 sl sts)
2. Make a leaf, then sl st in the next 4 chs. Repeat from * 4 more times. (5 leaves)
Stem total: 24 sl sts and 5 leaves. Fasten off, leaving a 12 in (30.5 cm) tail.
Checkpoint: The stem measures about 4 in (10.2 cm), with a leaf every 4 sts.
The leaves all come off the same side of the stem as you work. Before sewing, twist the stem half a turn between leaves so they alternate above and below it, as in the photo.
Cable Wrap (Green, Make 1)
You crochet this piece directly onto a cable about 39 in (99.1 cm) long. Leave about 2 in (5.1 cm) of bare cable at each end, including the connector housings, so the plugs stay usable.
Setup: Start 2 in (5.1 cm) from the charger-end connector. Place a slip knot on the hook and lay the yarn tail along the cable so the first stitches cover it.
Wrap:
1. Work 10 wrapped sc.
2. Make a leaf, but in step 2 and step 5 sl st into the top of the last wrapped sc instead of into the stem. Rotate the cable a half turn. Work 20 wrapped sc. Repeat from * 12 more times. (13 leaves; 270 sc so far)
3. Make 1 more leaf. (14 leaves)
4. Work 10 wrapped sc. (280 wrapped sc)
Fasten off and weave the tail back under the last 10 sts.
Count check: 10 + (13 × 20) + 10 = 280 wrapped sc. At 8 sc per inch, 280 sc = 35 in (88.9 cm). Leaves sit every 2.5 in (6.4 cm).
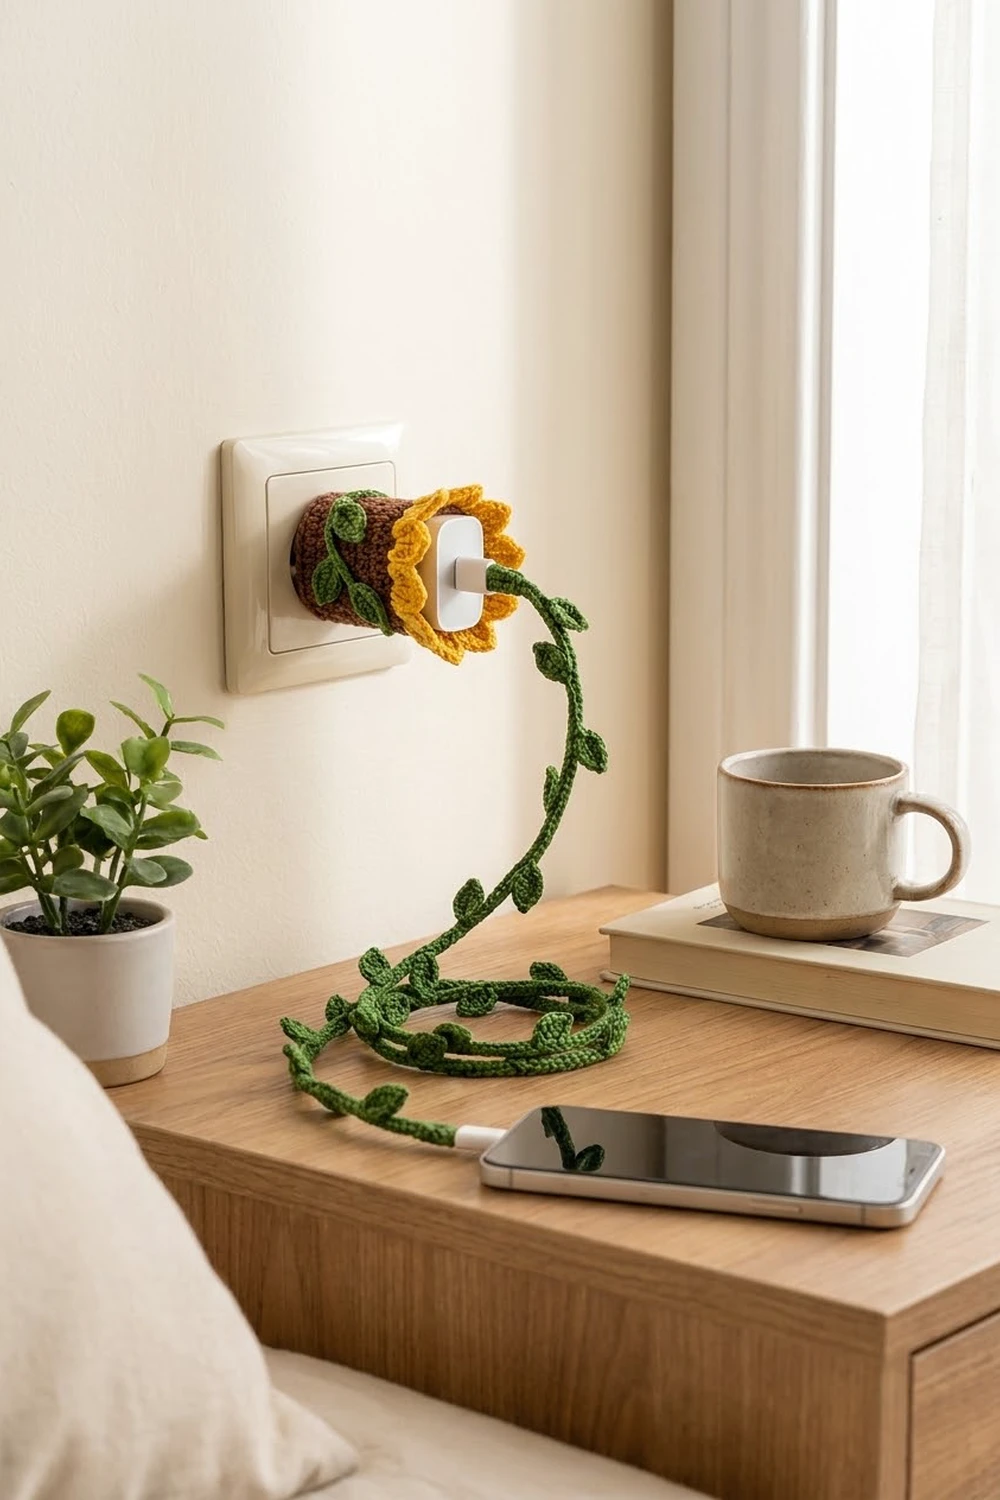
After every 20 sts, push the stitches toward the start. Packing them tightly is what turns them into the smooth, spiraling cord in the photo.
Make All Pieces
| Color | Piece | Quantity |
|---|---|---|
| Brown | Sleeve, Rnds 1–14 | 1 |
| Yellow | Top band, Rnds 15–16 | 1 (worked on the sleeve) |
| Yellow | Petals | 12 |
| Green | Front vine with 5 leaves | 1 |
| Green | Cable wrap with 14 leaves | 1 |
Layout (sleeve, front view, top to bottom):
 [I] [I] [I] [I] [I] [I]   <- inner petals (6), Rnd 16
   [O] [O] [O] [O] [O] [O] <- outer petals (6), Rnd 15 front loops
 ========================= <- yellow band, Rnds 15–16
 |  brown  ~~*~~*~~      |
 |       ~~*~~*~~*       | <- vine, lower left to upper right
 |_______________________| <- open bottom, Rnd 1
Joining (Assembly)
Method: Whipstitch with the yarn tails, using a tapestry needle. Keep the tension firm but not tight. The petals should stand upright without puckering the band.
Inner petals: Place the first base on the inside of the sleeve, centered over the gap between sts 30 and 1 of Rnd 16. Place the others over the gaps between sts 5 and 6, 10 and 11, 15 and 16, 20 and 21, and 25 and 26.
Sew the 3 base sc of each petal to the 2 sts on either side of its gap. That is 3 petal sts to 2 band sts; make 2 passes through the center petal st.
Outer petals: Place the bases on the outside of the sleeve, centered on sts 3, 8, 13, 18, 23 and 28 of Rnd 15. Sew each petal’s 3 base sc to that st and the sts on either side of it, using the free front loops. That is 1 petal st per band st.
Each outer petal now sits halfway between 2 inner petals. Tack each outer petal 0.25 in (0.6 cm) up from its base so it leans outward slightly.
Vine: Pin the stem diagonally across the front of the sleeve. Run it from about 0.5 in (1.3 cm) above the bottom edge on the left to just below the band on the right, curving onto the side.
Whipstitch the underside of the stem with one stitch for every sl st. Tack each leaf at its base and tip only, so the edges lift a little.
Size checkpoint: The sleeve should still slide onto the charger. The petal tips should rise 0.75–1 in (1.9–2.5 cm) above the band, and the inner layer should sit higher than the outer layer.
Final Blocking
- Lightly mist the sleeve and petals with water.
- Slide the sleeve onto the charger, or onto a cardboard form the same size, so it dries to shape.
- Pinch each petal tip to a point, and press the center line flat with your fingers.
- Fan the outer petals outward and stand the inner petals up straight.
- Shape the vine leaves flat against the sleeve.
- Lay the cable in loose curves on a towel, mist the leaves and flatten them by hand.
- Let everything dry completely, about 4–6 hours. Don’t use heat near the cable.
Final Quality-Control Checklist
- The sleeve measures 6 in (15.2 cm) around and 2.9 in (7.4 cm) tall.
- Rnds 15–16 each have 30 sts.
- There are 12 petals, 6 per layer, evenly staggered.
- Every petal has a pointed tip and a rounded base.
- The vine has 5 alternating leaves, each with a surface-stitch vein.
- The cable wrap has 280 wrapped sc and 14 leaves, spaced 2.5 in (6.4 cm) apart.
- 2 in (5.1 cm) of bare cable is left at each end.
- All ends are woven in, with nothing loose near the plug prongs.
Troubleshooting
- The sleeve is too loose: Go down a hook size, or remove 5 sts from the foundation chain.
- The rounds slant: Join into the first sc, not the ch 1, and keep the seam at the center back.
- The petals curl: Block them pinned flat, and check that you worked 3 sc in the base ch.
- The petal points are blunt: Pull the ch-2 tip snug and pinch it while it’s damp.
- The leaves twist: Work the first side into the back bumps only.
- The cable wrap shows gaps: Push the stitches together more often and keep the tension even.
- The wrap spirals too much: Rotate the cable after each leaf, as written, to balance the twist.
- The band ruffles: Check that you worked 30 sts. There are no increases in the band.
Care
Spot clean with a damp cloth and mild soap, and keep water away from the cable connectors. Lay the cover flat to dry, and unplug the charger before you remove the sleeve.
Final Notes
The measurement chain is short and reliable:
- 30 sts × 14 rnds = a 6 in × 2.5 in (15.2 cm × 6.4 cm) brown tube.
- 2 band rounds add 0.4 in (1.0 cm), for 2.9 in (7.4 cm) in total.
- 30 sts ÷ 5 = 6 petals per layer, with 2 layers offset by 2.5 sts.
- 280 wrapped sc ÷ 8 per inch = 35 in (88.9 cm) of cable wrap, with a leaf every 20 sts.
Check the gauge on the sleeve first and everything else will follow. Enjoy your little sunflower every time you plug in.
Happy crocheting!