
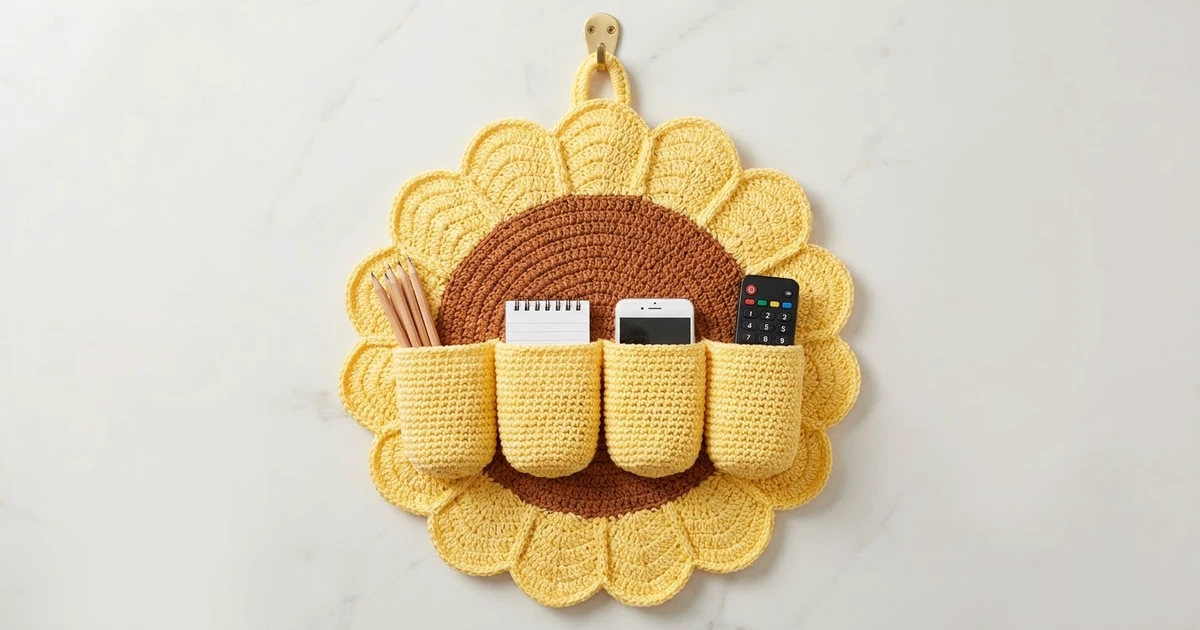
This cheerful sunflower hangs on the wall and keeps small things where you can find them. A brown center disc sits inside a ring of 16 rounded yellow petals, and four pocket cups run across the lower half. They hold pens, a small notepad, a phone and a remote.
The colors are cinnamon brown and soft butter yellow. The style is bold and graphic: smooth double-crochet rounds in the center, shell petals with a crisp single-crochet outline, and firm single-crochet cups that keep their shape when filled.
The pattern uses US crochet terms. The finished flower measures about 10.4 in (26.4 cm) across, plus a hanging loop that rises about 2.75 in (7.0 cm) above the top petal. The cup row is about 8.8 in (22.4 cm) wide.
Here’s how it’s built. You crochet a flat brown disc, then four yellow petal fans worked in rows. You sew the fans around the disc and work one continuous outline border around all 16 petals. Last, you make four cups and a loop and sew them on.
Finished Size and Construction
- Finished size: about 10.4 in (26.4 cm) across the petals
- Skill level: Intermediate beginner
- Terminology: US crochet terms
- Yarn weight: Worsted (#4), cotton or cotton blend
- Hook: 5.0 mm (H-8)
- Number of pieces: 10 (1 center disc, 4 petal fans, 4 cups, 1 hanging loop)
- Layout: 4 fans around 1 disc; 4 cups in a single horizontal row
- Piece sizes: disc 7 in (17.8 cm); each fan 1.45 in (3.7 cm) deep before the border; each cup 2.2 in (5.6 cm) wide and 3.25 in (8.3 cm) tall
- Size before border: 9.9 in (25.1 cm) across
- Border depth: 0.25 in (0.6 cm), for 1.7 in (4.3 cm) petals
Materials
Use a smooth worsted cotton. Cotton holds the cup shape, doesn’t stretch much on the wall, and gives clear stitch definition. Avoid fuzzy or very soft acrylic, because the cups will slump.
- Brown (center): 30 g, about 51 m
- Yellow (petals, border, cups, loop): 110 g, about 187 m
These quantities include a safety margin of about 20 percent.
Tools:
– 5.0 mm (H-8) crochet hook
– Tapestry needle
– Scissors
– Stitch markers (at least 6)
– Rustproof pins
– Measuring tape
– Blocking mat and spray bottle
– Optional: a small piece of stiff felt or plastic canvas, 7 in (17.8 cm) round, for the back
Abbreviations (US Terms)
- ch – chain
- sl st – slip stitch
- sc – single crochet
- dc – double crochet
- tr – treble crochet
- sc2tog – single crochet 2 together
- BLO – back loop only
- st(s) – stitch(es)
- rnd – round
- inc – 2 stitches in the same stitch
Special stitch – Petal shell: (2 dc, 3 tr, 2 dc) all in the same stitch. That’s 7 stitches, and the middle tr is the center tr.
Gauge and Checkpoints
Single crochet gauge: 14 sc and 16 rows = 4 in (10.2 cm).
Disc gauge: Rnds 1–3 = 3 in (7.6 cm) across. Each following dc round adds about 1 in (2.5 cm) to the diameter.
Make one cup base first (Rnds 1–4 of the cup) before you start the disc. It should measure 2.2 in (5.6 cm) across. This small test tells you whether your tension suits the whole project.
Checkpoints:
– Disc after Rnd 3: 3 in (7.6 cm)
– Disc after Rnd 7: 7 in (17.8 cm)
– Fan Row 1: about 6.0 in (15.2 cm) long
– Flower before border: 9.9 in (25.1 cm)
– Flower after border: 10.4 in (26.4 cm)
– Cup: 2.2 in (5.6 cm) wide, 3.25 in (8.3 cm) tall
Too big? Go down a hook size, to 4.5 mm.
Too small? Go up a hook size, to 5.5 mm.
Disc cupping? Your tension is tighter on increases. Go up half a size for the disc only.
Disc rippling? Go down half a size for the disc only.
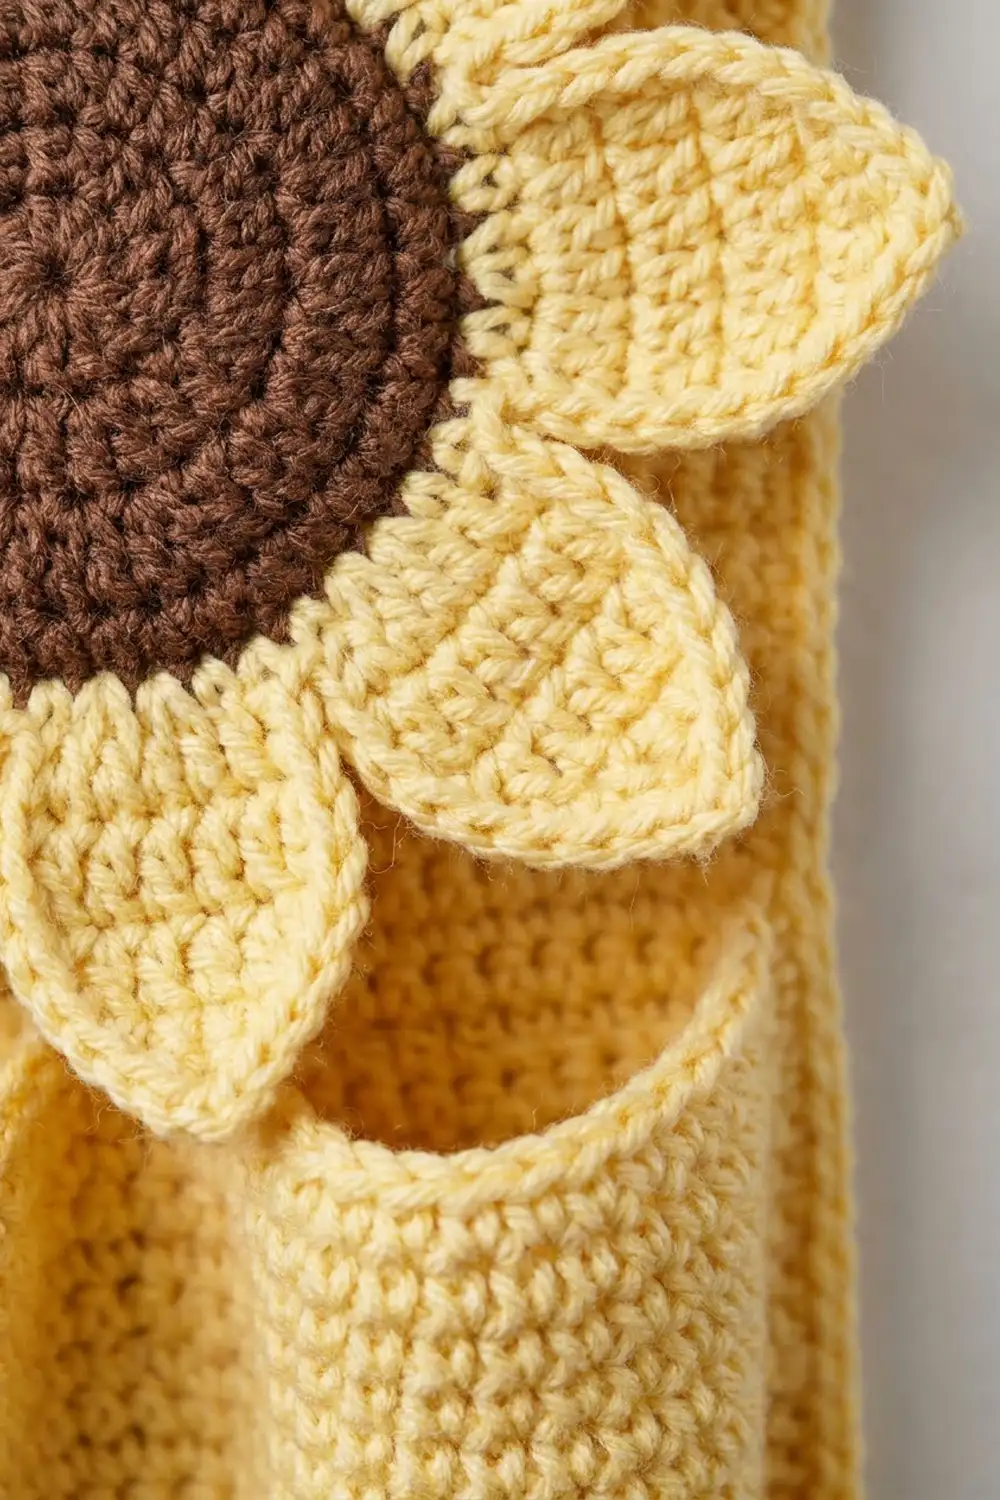
Center Disc (Brown, Make 1)
In every round, the ch 3 at the start counts as the first dc. Join each round with a sl st to the top of the beginning ch 3.
Rnd 1: Make a magic ring. Ch 3, then work 11 dc in the ring. Join. (12 dc)
Rnd 2: Ch 3, dc in the same st, then inc in each st around. Join. (24 dc)
Rnd 3: Ch 3, inc in the next st, dc in the next st, inc in the next st; repeat from * around. Join. (36 dc)
Check: 3 in (7.6 cm) across.
Rnd 4: Ch 3, dc in the next st, inc in the next st, dc in the next 2 sts, inc in the next st; repeat from * around. Join. (48 dc)
Rnd 5: Ch 3, dc in the next 2 sts, inc in the next st, dc in the next 3 sts, inc in the next st; repeat from * around. Join. (60 dc)
Rnd 6: Ch 3, dc in the next 3 sts, inc in the next st, dc in the next 4 sts, inc in the next st; repeat from * around. Join. (72 dc)
Rnd 7: Ch 3, dc in the next 4 sts, inc in the next st, dc in the next 5 sts, inc in the next st; repeat from * around. Join. (84 dc)
Fasten off, leaving a 6 in (15.2 cm) tail. Check: 7 in (17.8 cm) across, lying flat.
Place 4 markers to divide Rnd 7 into quarters of 21 dc each.
Petal Fan (Yellow, Make 4)
Each fan is worked flat in rows and becomes one quarter of the petal ring. Row 1 is the straight inner edge that gets sewn to the disc.
Row 1: Ch 22. Sc in the 2nd ch from the hook and in each ch across. Turn. (21 sc)
Check: about 6.0 in (15.2 cm) long.
Row 2 (growth row): Ch 3 (counts as dc) in the first st. Dc in the next 3 sts, inc in the next st; repeat from * 4 times. Dc in the last 4 sts. Turn. (25 dc)
Count check: the ch 3 covers 1 st, the 4 repeats cover 16 sts and make 20, and the last 4 sts make 4. That’s 1 + 16 + 4 = 21 sts worked, giving 1 + 20 + 4 = 25 dc.
Row 3 (petal row): Ch 1, sc in the first st. Skip 2 sts, petal shell in the next st, skip 2 sts, sc in the next st; repeat from * 4 times. (4 shells and 5 sc, 33 sts made)
Count check: each repeat uses 6 base sts, and 1 + (4 × 6) = 25 sts, so the row ends exactly on the last dc.
Fasten off and weave in the ends. The fan should be 1.45 in (3.7 cm) deep from Row 1 to the tip of a center tr. The outer edge fans out naturally into 4 rounded petals. The two end sc are the fan’s end valleys, and the 3 sc between shells are inner valleys.
Make All Pieces
Before assembling, check that you have:
- Brown: 1 center disc (84 dc in Rnd 7)
- Yellow: 4 petal fans (21 sc in Row 1, 4 shells each)
- Yellow: 4 cups (instructions below)
- Yellow: 1 hanging loop (instructions below)
Layout grid (front view):
            [ LOOP ]
        [  FAN A (top)  ]
[ FAN D ]  [ BROWN DISC ]  [ FAN B ]
   [ CUP 1 ][ CUP 2 ][ CUP 3 ][ CUP 4 ]
        [ FAN C (bottom) ]
Fans A to D each cover one 21-stitch quarter of the disc. The cups overlap the lower part of the disc and spill onto Fans B, C and D.
Joining
Method: Whipstitch with yellow yarn, working through both loops of the sc on the fan and both loops of the dc on Rnd 7 of the disc.
Stitch-to-stitch logic: Each fan’s Row 1 has 21 sc, and each disc quarter has 21 dc. Sew them 1 to 1: fan sc 1 to the first dc of the quarter, all the way to fan sc 21 and the last dc before the next marker. Nothing is skipped or doubled. With 4 fans × 21 sc = 84 sts, the whole disc edge is covered.
- Pin Fan A to the top quarter with the right sides facing up and the edges butted together.
- Whipstitch across all 21 stitches.
- Repeat for Fans B, C and D, going clockwise.
- Where two fans meet, sew their short side edges together from the disc out to the end valley sc. Use 3 to 4 stitches along the side of the Row 2 dc.
Tension: Pull each whipstitch snug enough to close the gap, but don’t pucker it. The seam should lie flat without rippling. If the petals start to cup forward, loosen up.
Size checkpoint: Lay the flower flat. It should measure 9.9 in (25.1 cm) across, from the tip of one petal to the tip of the opposite petal.
Border (Petal Outline)
Border gauge: the same as the sc gauge, 14 sc = 4 in (10.2 cm). The border adds 0.25 in (0.6 cm) on each petal, so the diameter grows by 0.5 in (1.3 cm).
Valleys: The ring has 16 valleys. There are 12 inner valleys (3 per fan × 4) and 4 seam valleys. Each seam valley is made of two touching end sc, one from each fan.
Border Rnd: Join yellow with a sc in any seam valley by working sc2tog across the two end sc. Then, for each petal:
- sc in the next 2 dc
- inc (2 sc) in the first tr
- 3 sc in the center tr
- inc (2 sc) in the third tr
- sc in the next 2 dc
- sc in the next valley. At an inner valley, sc in the valley sc. At a seam valley, sc2tog across the two end sc.
Repeat around. Skip the final valley stitch, because the round began there. Join with a sl st to the first st. (12 sc per petal: 1 valley + 2 + 2 + 3 + 2 + 2 = 12; 48 sc per fan; 192 sc total)
Why the math works: Each petal has the same 7 shell stitches plus one valley, so each one gets exactly 12 border stitches. Merging each pair of end sc into one sc2tog means the seams add no extra stitches. 16 petals × 12 = 192. The 3 sc in each center tr round the tip, and the 2-sc increases at the sides keep the outline from pulling the petal into a cup.
Fasten off. Check: 10.4 in (26.4 cm) across.
Pocket Cups (Yellow, Make 4)
Work in continuous spirals. Mark the first st of each round.
Rnd 1: Make a magic ring and work 6 sc in it. (6 sc)
Rnd 2: Inc in each st. (12 sc)
Rnd 3: Sc in the next st, inc in the next st; repeat around. (18 sc)
Rnd 4: Sc in the next 2 sts, inc in the next st; repeat around. (24 sc)
Check: 2.2 in (5.6 cm) across.
Rnd 5 (turning round): Sc in the BLO of each st around. (24 sc) This makes a sharp edge where the base meets the wall.
Rnds 6–17: Sc in each st around. (24 sc)
Sl st in the next st and fasten off. The finished cup is 2.2 in (5.6 cm) wide and 3.25 in (8.3 cm) tall. Weave in the ends.
Hanging Loop (Yellow, Make 1)
Row 1: Ch 26. Sc in the 2nd ch from the hook and in each ch across. (25 sc) The strip is about 7 in (17.8 cm) long.
Fasten off, leaving a long tail for sewing.
Attaching the Cups and Loop
- Lay the flower face up. Line the cups up side by side so the row is centered left to right and the cup bases sit 1.25 in (3.2 cm) above the tip of the bottom petal.
- Pin each cup through its back wall.
- Whipstitch each cup to the flower along a vertical line on its back, from Rnd 5 up to Rnd 14. Stitch through the disc and fans, but not through to the front of the neighboring cups.
- Sew the base edge (Rnd 5) of each cup to the flower across about 0.75 in (1.9 cm), so the cups won’t tip forward.
- Tack neighboring cups together at their touching points, at Rnd 8 and Rnd 15.
- Fold the loop strip in half. Sew 0.75 in (1.9 cm) of each end to the back of the top petal, just behind the border. The loop should stand about 2.75 in (7.0 cm) above the petal edge.
- If you like, glue or stitch a 7 in (17.8 cm) felt circle to the back of the disc for extra stiffness.
Final Blocking
- Before attaching the cups, mist the flower with water until it’s damp, not soaked.
- Pin it flat on the mat at 10.4 in (26.4 cm) across.
- Pin each petal tip at the center tr, spacing the 16 tips evenly.
- Smooth the disc flat with your palm. Don’t stretch it.
- Let it dry completely, at least 12 hours.
- After the cups are attached, stuff each cup firmly with a rolled towel, mist it lightly, and let it dry upright.
- Unpin everything and do a final measurement.
Final Quality-Control Checklist
- The disc measures 7 in (17.8 cm) and lies flat.
- All 4 fans have 21 sc sewn stitch to stitch.
- There are 16 evenly spaced petals.
- The border round has 192 sc, with 12 per petal.
- The flower measures 10.4 in (26.4 cm) across.
- Each cup has 24 sc per round and is 3.25 in (8.3 cm) tall.
- The cup row is 8.8 in (22.4 cm) wide and level.
- The loop is secure and centered on the top petal.
- All ends are woven in on the back.
Troubleshooting
The disc ruffles. You have too many stitches or loose increases. Recount each round, then go down a hook size if needed.
The disc cups. Your increases are too tight. Go up half a hook size.
There are gaps between the fans and the disc. Your whipstitch is too loose. Add a second pass between stitches.
The petals curl forward. The border is too tight. Rework it with a looser hand, or use a larger hook for the border only.
The fan seams look bulky. Make sure you used sc2tog at the seam valleys, not two separate sc.
The cups lean outward. Sew more of the base edge, and tack the cups together higher up.
The organizer tilts on the wall. The loop isn’t centered. Re-sew it directly above the middle of the disc.
Care
Hand wash in cool water, press out the water in a towel, and reshape it flat to dry. Don’t wring it or tumble dry it.
Final Notes
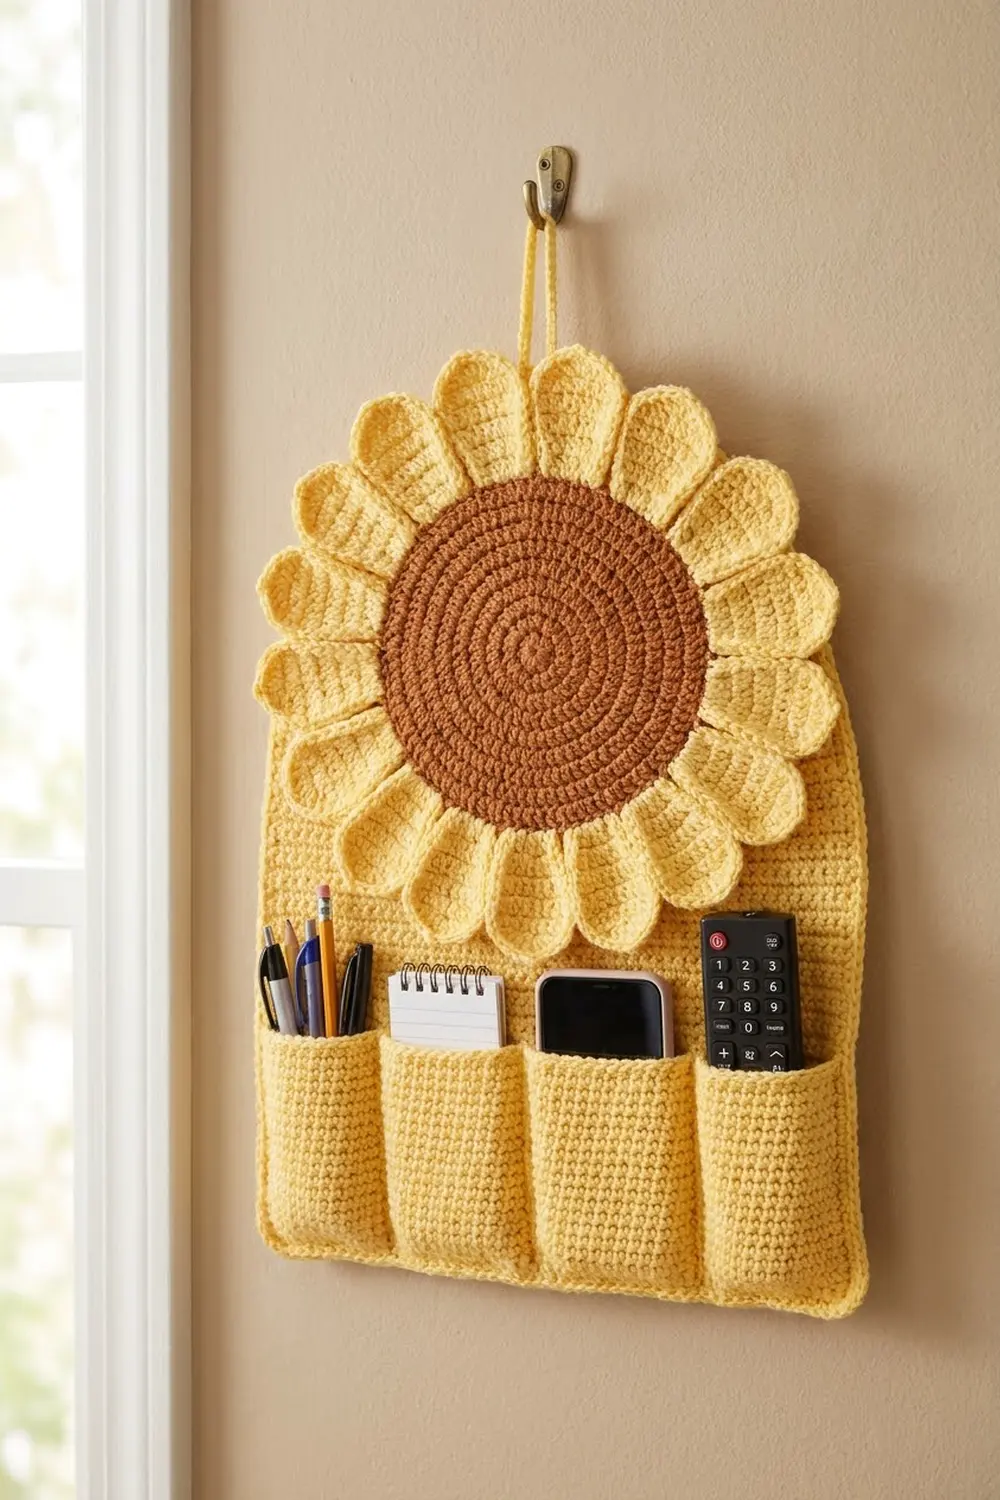
The measurement chain runs like this: the disc is 7 in (17.8 cm) with 84 dc. Each 21-stitch quarter takes a 21-sc fan, which brings the flower to 9.9 in (25.1 cm). The 192-stitch border, 12 per petal, finishes it at 10.4 in (26.4 cm). Four 24-stitch cups, each 2.2 in (5.6 cm) wide, make an 8.8 in (22.4 cm) pocket row. Check each link as you go, and the sunflower will come together flat, even and ready to hang.
Happy crocheting!