
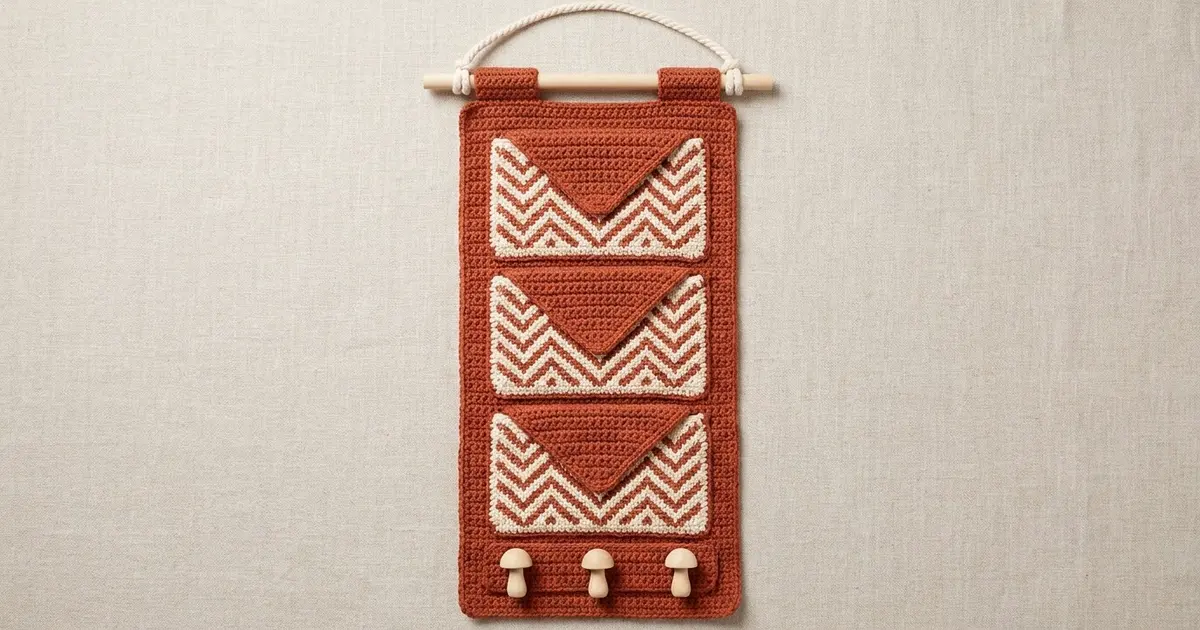
This wall organizer looks like a stack of three little envelopes. Each pocket has a rust and cream chevron front, a solid rust triangular flap, and a raised, rope-like edge. A strip of wooden pegs along the bottom holds keys, and the whole piece hangs from a wooden dowel on a simple cotton rope.
The colors are a warm terracotta rust and a soft cream, set off by natural wood. It’s a calm, modern style that fits an entryway, a home office, or a kitchen command center.
The pattern uses US crochet terms. The finished organizer measures 9.5 in wide x 23 in tall (24.1 x 58.4 cm), not counting the dowel and rope.
You’ll crochet one solid back panel, three tapestry chevron pocket fronts, three triangular flaps, one peg strip and two hanging tabs. Each flap is sewn to the top of a pocket. The pockets and peg strip are then sewn onto the back panel, and the tabs wrap the dowel.
Finished Size and Construction
- Finished size: 9.5 x 23 in (24.1 x 58.4 cm)
- Skill level: Intermediate (tapestry crochet, reverse single crochet)
- Terminology: US
- Yarn weight: Worsted (#4)
- Hook: 5.0 mm (H-8)
- Number of pieces: 10 (1 back panel, 3 pocket fronts, 3 flaps, 1 peg strip, 2 tabs)
- Layout: 3 pockets stacked vertically (1 column x 3 rows) above 1 peg strip
- Pocket size: 8.75 x 5 in (22.2 x 12.7 cm) with border
- Back panel before border: 8.5 x 22 in (21.6 x 55.9 cm)
- Border depth: 0.5 in (1.3 cm) per side, on the back panel and on each pocket
Materials
Use a smooth worsted-weight cotton or cotton blend so the chevrons look crisp and the pockets hold their shape. Quantities assume about 200 m per 100 g.
- Color A, Terracotta Rust: 250 g / 500 m
- Color B, Cream: 60 g / 120 m
Quantities include a margin of about 15% for gauge swatching and tension differences.
Tools and notions:
– 5.0 mm (H-8) crochet hook
– Tapestry needle
– Stitch markers
– 1 wooden dowel, 12 in (30.5 cm) long, 0.5 in (1.3 cm) diameter
– 28 in (71.1 cm) of 0.25 in (0.6 cm) cotton cord for the hanger
– 3 wooden mushroom pegs with tenons, about 1.5 in (3.8 cm) long
– 1 thin wood slat, 8 x 1.25 x 0.25 in (20.3 x 3.2 x 0.6 cm), drilled with 3 holes to fit the peg tenons
– Wood glue
– Blocking mats and rust-proof pins
Abbreviations (US Terms)
- ch: chain
- sc: single crochet
- sc2tog: single crochet 2 together (removes 1 stitch)
- sc3tog: single crochet 3 together (removes 2 stitches)
- sc5tog: single crochet 5 together
- rev sc: reverse single crochet (crab stitch)
- sp: space
- st(s): stitch(es)
- A / B: Color A / Color B
Tapestry sc: Work sc while carrying the unused color along the top of the row below, enclosing it inside each stitch. To change color, work the last sc of the old color until 2 loops remain on the hook, then yarn over with the new color and pull through.
Rev sc: Working from left to right without turning, insert the hook into the next stitch to the right, pull up a loop, yarn over and pull through both loops.
Gauge and Checkpoints
Gauge: 16 sc and 18 rows = 4 in (10.2 cm) in plain sc and in tapestry sc.
Make one complete pocket front first. It doubles as your gauge swatch and shows your colorwork tension.
Checkpoints:
– Pocket body after Row 18: 7.75 x 4 in (19.7 x 10.2 cm)
– Pocket after the border: 8.75 x 5 in (22.2 x 12.7 cm)
– Back panel after Row 99: 8.5 x 22 in (21.6 x 55.9 cm)
– Back panel after the border: 9.5 x 23 in (24.1 x 58.4 cm)
If your piece is too big, go down 0.5 mm. If it’s too small, go up 0.5 mm. Tapestry crochet often works up tighter than plain sc. If only the pocket is small, use a larger hook for the pockets alone.
Pocket Front (make 3)
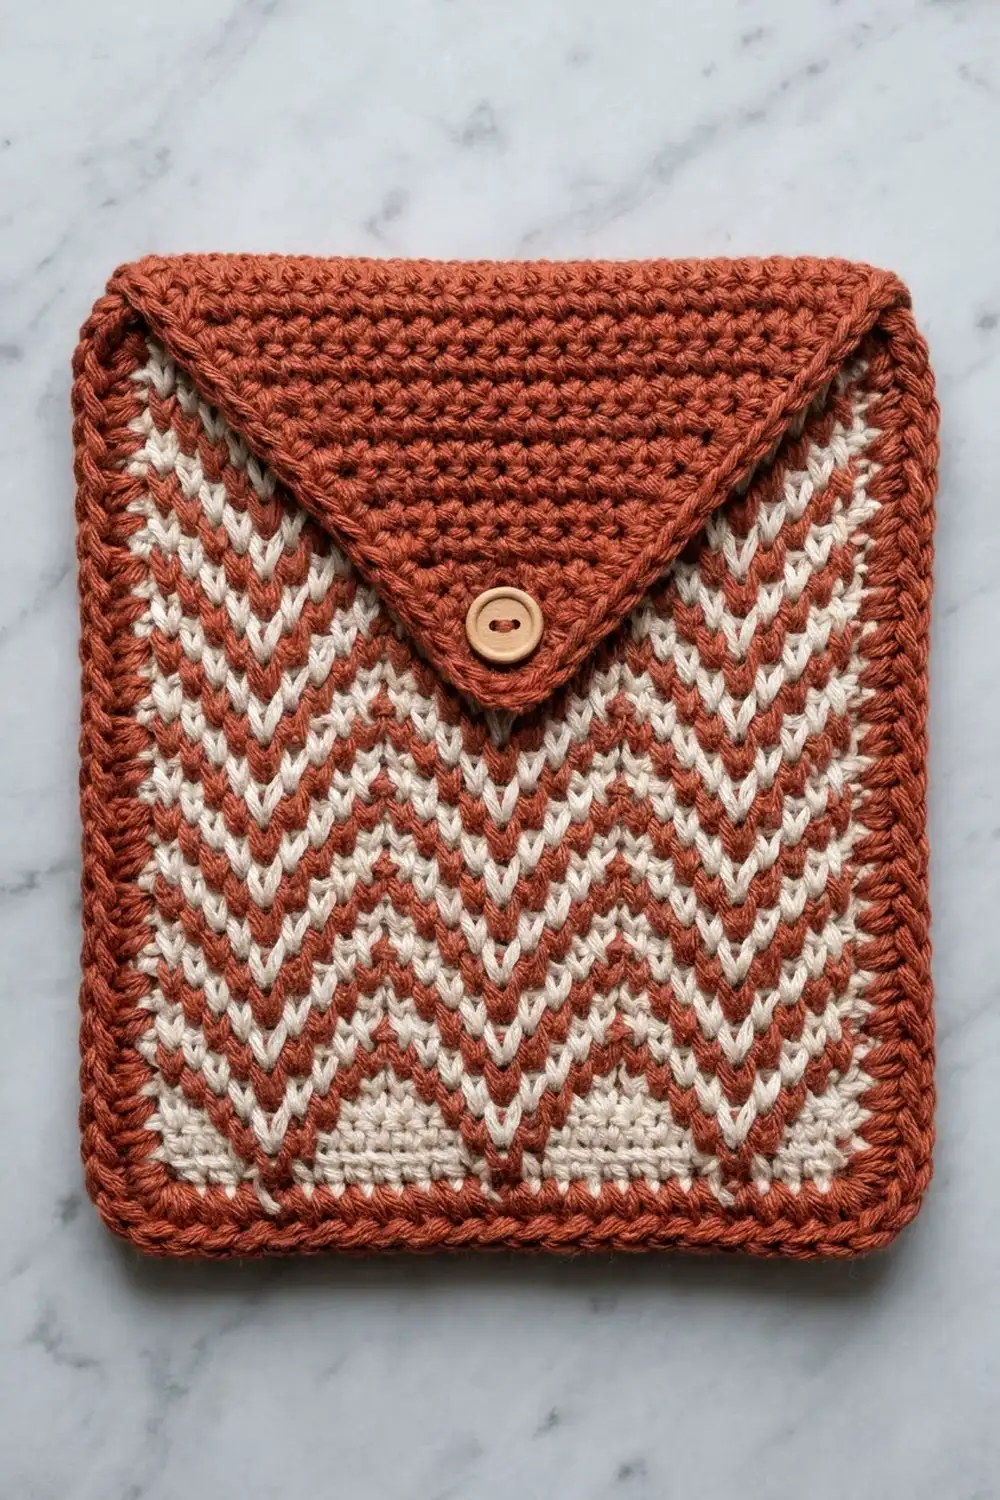
The pocket front is 31 stitches wide. The chevron repeat is 6 stitches plus 1, so every row reads the same from either end. That means you can follow the same instructions on right-side and wrong-side rows.
With A, ch 32.
Row 1: Starting in the 2nd ch from the hook, work tapestry sc as follows: *2 A, 3 B, 1 A; rep from * 4 more times, 1 A. Ch 1, turn. (31 sts)
Row 2: *3 A, 1 B, 2 A; rep from * 4 more times, 1 A. Ch 1, turn. (31 sts)
Row 3: *1 B, 5 A; rep from * 4 more times, 1 B. Ch 1, turn. (31 sts)
Row 4: *2 B, 3 A, 1 B; rep from * 4 more times, 1 B. Ch 1, turn. (31 sts)
Row 5: *3 B, 1 A, 2 B; rep from * 4 more times, 1 B. Ch 1, turn. (31 sts)
Row 6: *1 A, 5 B; rep from * 4 more times, 1 A. Ch 1, turn. (31 sts)
Rows 7–18: Repeat Rows 1–6 two more times. (31 sts per row, 3 chevron bands)
Cut B. Body checkpoint: 7.75 x 4 in (19.7 x 10.2 cm).
Pocket Border
Rnd 1 (sc conversion round): With A, do not turn.
– Ch 2 for the corner.
– Down the side: sc 16 evenly across the 18 row ends, working 8 sc for every 9 rows. Ch 2.
– Across the bottom: 1 sc in each foundation ch (31 sc). Ch 2.
– Up the other side: 16 sc. Ch 2.
– Across the top: 31 sc.
– Join with a slip stitch.
(94 sc + 4 ch-2 corner sps)
Rnd 2 (rev sc trim round): Ch 1. Work rev sc in each sc and 2 rev sc in each corner sp. Join and fasten off.
Count: 94 worked 1-per-stitch + 8 added = 102 rev sc.
Per-side counts, including both corner pairs: top 35, bottom 35, sides 20 each. The four corner pairs are shared by two sides, so 35 + 20 + 35 + 20 = 110, minus 8 shared = 102.
Why the math works: At 4 sts per in, 31 sc = 7.75 in, which matches the body width. 16 side sc = 4 in, which matches the 18 rows. The border adds 0.5 in (1.3 cm) per side, for 8.75 x 5 in (22.2 x 12.7 cm).
Triangle Flap (make 3)
The flap is worked from its top edge down to the point. On even rows you remove 2 stitches at each end, and on odd rows 1 stitch at each end. That gives a wide, shallow envelope point.
With A, ch 36.
Row 1: Sc in the 2nd ch from the hook and in each ch across. Ch 1, turn. (35 sts)
Row 2: Sc3tog, sc 29, sc3tog. Ch 1, turn. (31 sts)
Row 3: Sc2tog, sc 27, sc2tog. Ch 1, turn. (29 sts)
Row 4: Sc3tog, sc 23, sc3tog. Ch 1, turn. (25 sts)
Row 5: Sc2tog, sc 21, sc2tog. Ch 1, turn. (23 sts)
Row 6: Sc3tog, sc 17, sc3tog. Ch 1, turn. (19 sts)
Row 7: Sc2tog, sc 15, sc2tog. Ch 1, turn. (17 sts)
Row 8: Sc3tog, sc 11, sc3tog. Ch 1, turn. (13 sts)
Row 9: Sc2tog, sc 9, sc2tog. Ch 1, turn. (11 sts)
Row 10: Sc3tog, sc 5, sc3tog. Ch 1, turn. (7 sts)
Row 11: Sc2tog, sc 3, sc2tog. Ch 1, turn. (5 sts)
Row 12: Sc5tog. (1 st) Do not fasten off.
Flap edging:
1. Ch 1 and rotate to work up the first slanted edge: 20 sc evenly to the top corner.
2. Ch 1, then rev sc back down that edge (20 rev sc).
3. Work 3 rev sc at the point.
4. Rev sc up the second slanted edge, working directly into the row ends (20 rev sc).
5. Fasten off, leaving a 24 in (61.0 cm) tail.
The edging totals 43 rev sc (20 + 3 + 20). Leave the top edge unworked.
Flap checkpoint: 8.75 in (22.2 cm) across the top, which matches the pocket’s 35-stitch top edge. About 3 in (7.6 cm) deep at the point, including the edging.
Peg Strip (make 1)
With A, ch 31.
Rows 1–3: Sc in each st across, starting in the 2nd ch from the hook on Row 1. Ch 1, turn. (30 sts)
Row 4 (hole row): Sc 6, *ch 2, skip 2, sc 6; rep from * 2 more times. Ch 1, turn. (24 sc + 3 ch-2 sps)
Row 5: Sc in each sc and 2 sc in each ch-2 sp. Ch 1, turn. (30 sts)
Rows 6–7: Sc in each st. (30 sts)
Count check for Row 4: 6 + 2 + 6 + 2 + 6 + 2 + 6 = 30, so the holes are centered and evenly spaced.
Border:
– Rnd 1 (sc conversion round): Sc around, working 30 sc across the top and bottom, 6 sc across each 7-row side, and ch 2 at each corner. (72 sc + 4 ch-2 corner sps)
– Rnd 2 (rev sc trim round): Rev sc in each sc and 2 rev sc in each corner sp. Count: 72 + 8 = 80 rev sc.
Fasten off. Checkpoint: 8.5 x 2.5 in (21.6 x 6.4 cm).
Hanging Tabs (make 2)
With A, ch 7. Sc in the 2nd ch from the hook and in each ch across (6 sts). Work 11 more rows of sc, for 12 rows total. Fasten off with a long tail.
Checkpoint: 1.5 x 2.7 in (3.8 x 6.9 cm).
Back Panel (make 1)
With A, ch 35.
Row 1: Sc in the 2nd ch from the hook and in each ch across. Ch 1, turn. (34 sts)
Rows 2–99: Sc in each st across. Ch 1, turn. (34 sts per row)
Checkpoint: 8.5 x 22 in (21.6 x 55.9 cm). Add or remove rows in multiples of 9 if your row gauge is off. Then adjust the side border counts by 8 sc for each 9 rows.
Back Panel Border
Border gauge is the same 4 sc per in. Each round adds about 0.25 in (0.6 cm) per side.
Rnd 1 (sc conversion round): Do not turn.
– Ch 2 for the corner.
– Side: 88 sc across the 99 row ends (8 sc per 9 rows). Ch 2.
– Bottom: 34 sc. Ch 2.
– Side: 88 sc. Ch 2.
– Top: 34 sc.
– Join.
(244 sc + 4 ch-2 corner sps)
Rnd 2 (rev sc trim round): Rev sc in each sc and 2 rev sc in each corner sp. Count: 244 worked 1-per-stitch + 8 added = 252 rev sc.
Per-side counts, including both corner pairs: top and bottom 38 each, sides 92 each. 38 + 92 + 38 + 92 = 260, minus 8 shared corner stitches = 252.
Why the math works:
– 34 sc = 8.5 in, which matches the panel width.
– 88 sc = 22 in, which matches the 99 rows at 4.5 rows per in.
– Two border rounds add 0.5 in per side, so the panel finishes at 9.5 x 23 in (24.1 x 58.4 cm).
Make All Pieces
| Piece | Qty | Colors |
|---|---|---|
| Back panel | 1 | A |
| Pocket front | 3 | A + B |
| Triangle flap | 3 | A |
| Peg strip | 1 | A |
| Hanging tab | 2 | A |
Layout grid, top to bottom (centered on the panel):
[ tab ]           [ tab ]   <- wrap dowel
1.5 in (3.8 cm) margin
[ POCKET 1 + FLAP ]  5 in (12.7 cm)
0.75 in (1.9 cm) gap
[ POCKET 2 + FLAP ]  5 in (12.7 cm)
0.75 in (1.9 cm) gap
[ POCKET 3 + FLAP ]  5 in (12.7 cm)
1 in (2.5 cm) gap
[ o    PEG STRIP    o    o ]  2.5 in (6.4 cm)
1.5 in (3.8 cm) margin
Check the vertical total: 1.5 + 5 + 0.75 + 5 + 0.75 + 5 + 1 + 2.5 + 1.5 = 23 in (58.4 cm).
Joining
1. Flaps to pockets.
– Place a flap right side up on a pocket’s right side, with the flap’s foundation edge along the pocket’s top edge.
– The flap’s 35 foundation stitches line up one-to-one with the pocket’s 35 top rev sc.
– Whipstitch through each matching pair. The point hangs down over the chevrons.
2. Pockets to the back panel.
– Center each pocket so there is about 3/8 in (1.0 cm) of panel showing on each side.
– Pin the pockets using the layout grid.
– Whipstitch down one side (20 stitches), across the bottom (35 stitches) and up the other side (20 stitches). Make one whipstitch per pocket border stitch, catching the panel stitch directly underneath.
– Leave the top open. Mail slides in between the pocket front and the panel, behind the flap.
3. Peg strip.
– Pin the strip centered 1.5 in (3.8 cm) above the bottom edge.
– Whipstitch all four sides, one stitch per rev sc (80 total).
– Push each peg tenon through a strip hole and between the panel stitches behind it.
– Glue the tenons into the drilled wood slat on the back of the panel.
4. Tabs.
– Sew one end of each tab to the back of the panel, 0.75 in (1.9 cm) in from each side, at the top.
– Wrap the tabs over the dowel, then sew the other end down.
– Tie the cord to the dowel ends with overhand knots.
Tension advice: Sew snugly but don’t pull hard. Too much tension puckers the panel and narrows the pocket openings.
Size checkpoint: The assembled organizer should still measure 9.5 x 23 in (24.1 x 58.4 cm), lying flat with no rippling.
Final Blocking
- Before joining, wet-block each piece. Soak it in cool water, then press out the water in a towel.
- Pin the pockets to 8.75 x 5 in (22.2 x 12.7 cm), with square corners.
- Pin the flaps to 8.75 in (22.2 cm) across, with straight slanted sides.
- Pin the back panel to 9.5 x 23 in (24.1 x 58.4 cm).
- Let everything dry completely.
- After assembly, steam lightly from above without touching the fabric. Let the organizer cool flat before you hang it.
Final Quality-Control Checklist
- Each pocket shows 3 full chevron bands with no stray color specks.
- All borders lie flat, with square corners.
- Each flap is centered, and its point lands at the same height on all three pockets.
- The pocket tops are open and the sides and bottom are sewn closed.
- The pegs are firmly glued and the strip is level.
- The tabs are even and the dowel hangs level.
- All tails are woven in on the wrong side.
Troubleshooting
- Cream shows through the rust (or the reverse): Keep the carried strand flat along the top of the row below. Tighten the color changes.
- Pocket is narrower than the flap: Your tapestry gauge is tight. Go up 0.5 mm for the pocket only.
- Flap curls: Block it flat. Check that the edging isn’t tighter than the flap body.
- Panel borders ripple: Reduce the side sc slightly. Borders cup: add a few sc.
- Rev sc edge looks loose: Use a smaller hook for Rnd 2 only.
- Pegs droop: The tenons must reach the wood slat. Re-glue them, and don’t hang heavy items.
Care
Spot clean or hand wash in cool water after removing the dowel and pegs. Lay flat to dry and reshape while damp.
Final Notes
The measurement chain is:
– Pocket body: 7.75 x 4 in (19.7 x 10.2 cm), bordered to 8.75 x 5 in (22.2 x 12.7 cm)
– Flap: matches the pocket top at 8.75 in (22.2 cm)
– Back panel: 8.5 x 22 in (21.6 x 55.9 cm), bordered to 9.5 x 23 in (24.1 x 58.4 cm)
– Layout: the three pockets, gaps and peg strip fill the full 23 in (58.4 cm)
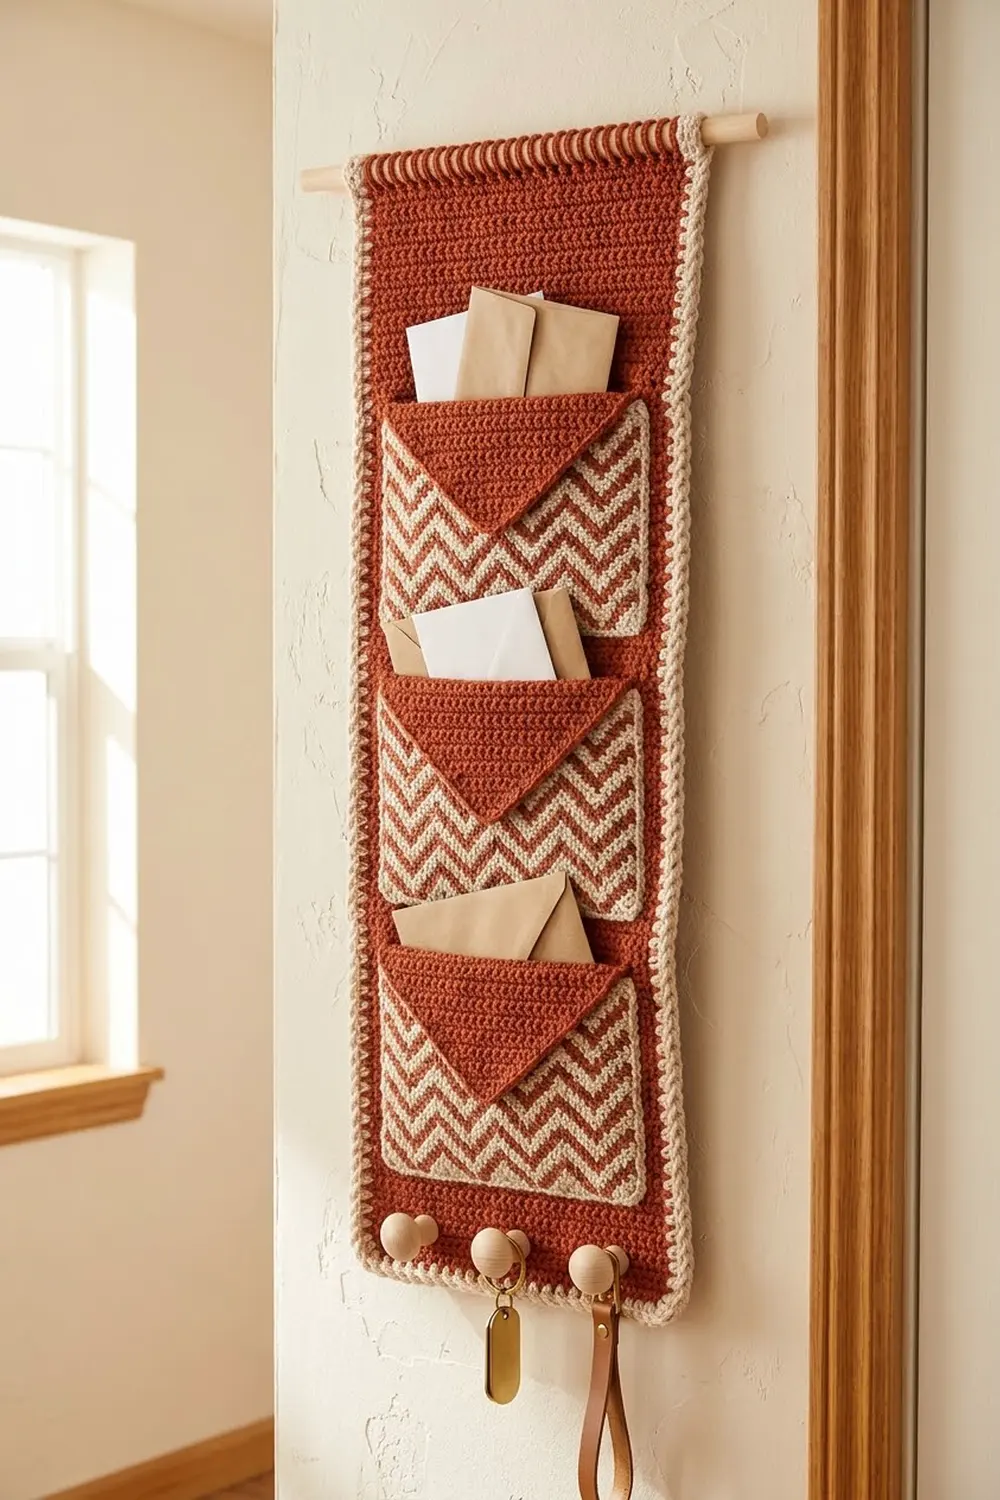
If each checkpoint matches, the finished organizer will hang straight and hold everyday mail and keys.
Happy crocheting!