

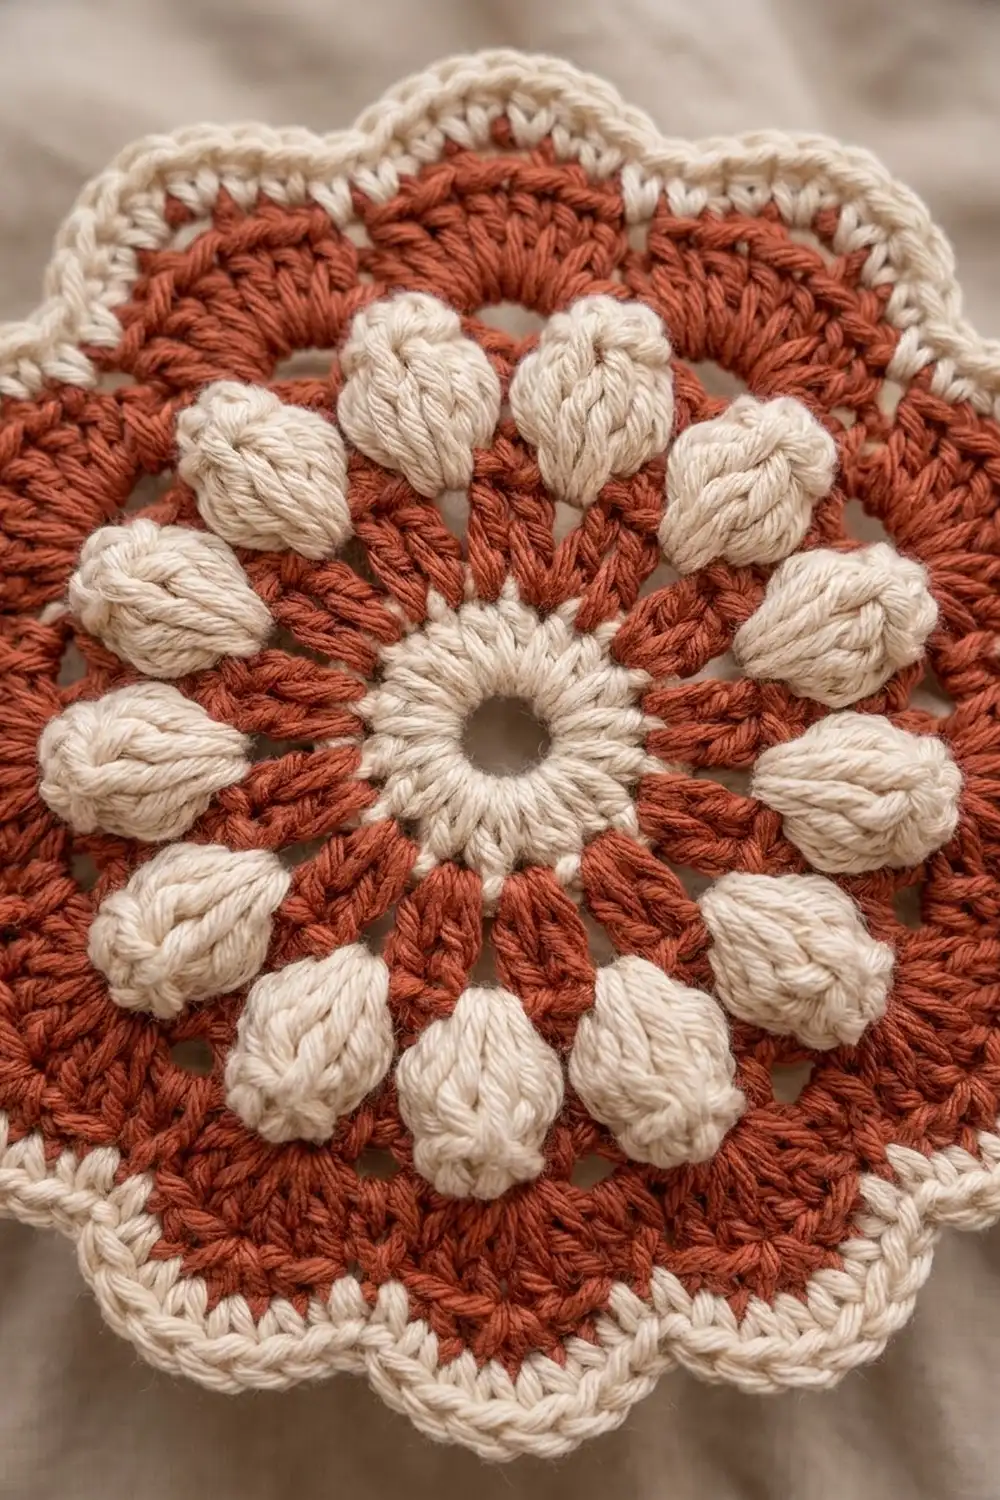
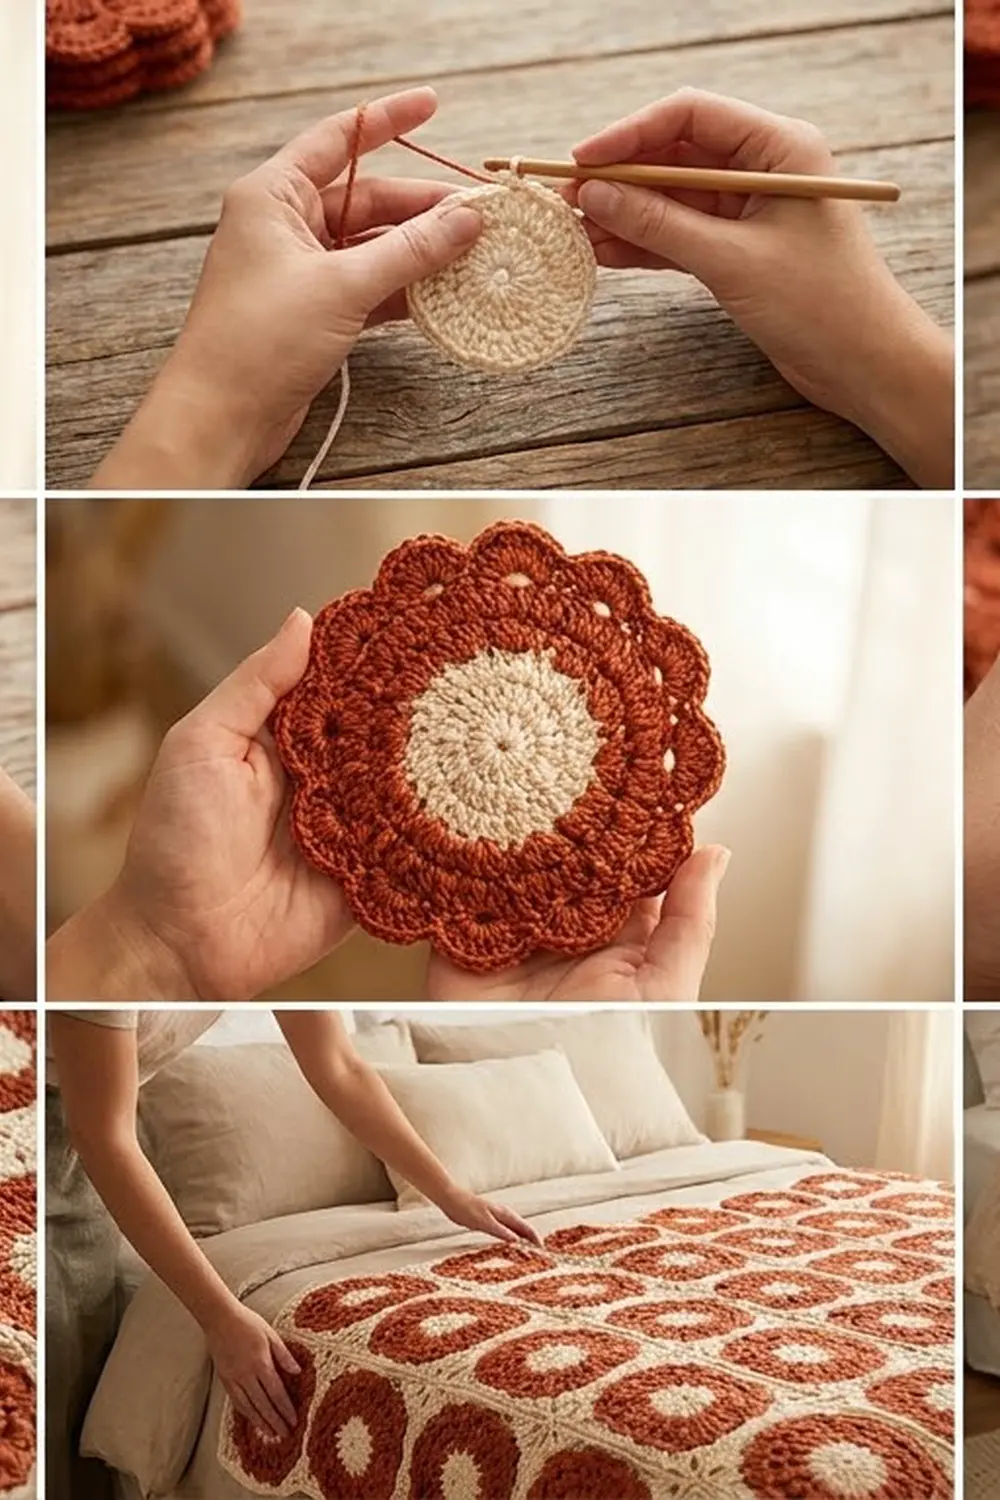
The Terracotta Bloom Bedspread is built from one round mandala motif repeated in a calm grid. Each motif has an open center, two rings of plump cream puff stitches, warm rust bands, and a scalloped cream edge. When the motifs are joined tip to tip, the open gaps between them make a light, lacy fabric that drapes well over a bed.
The palette is just two colors: rust (terracotta) and cream. That contrast makes the puff rings pop and gives the piece a warm boho farmhouse look. It works with neutral linens, wood furniture, and earthy pillows.
This pattern uses US crochet terms. Each motif measures 7 in (17.8 cm) from scallop tip to scallop tip. The finished bedspread is 71 x 85 in (180.3 x 215.9 cm) including the border.
Construction is simple. You crochet 120 motifs in the round, block them, whipstitch them together at the scallop tips in a grid 10 motifs wide and 12 tall, and then work a two-round cream border that follows the scalloped edge.
Finished Size and Construction
- Finished size: 71 x 85 in (180.3 x 215.9 cm)
- Skill level: Intermediate
- Terminology: US crochet terms
- Yarn weight: Worsted (#4)
- Hook: 5.0 mm (US H-8)
- Number of pieces: 120 identical motifs
- Layout: 10 motifs across x 12 motifs down
- Piece size: 7 in (17.8 cm) tip to tip
- Size before border: 70 x 84 in (177.8 x 213.4 cm)
- Border depth: 0.5 in (1.3 cm)
Materials
Yarn: Use a smooth worsted-weight yarn of about 200 yd (183 m) per 100 g. A cotton blend or soft acrylic both work well. Cotton gives crisper puffs and stitch definition. Acrylic is lighter and easier to wash at bedspread size. Buy each color from one dye lot.
- Rust (Color A): 2,900 g / 5,307 m (29 skeins). This is 22 g / 40 m per motif.
- Cream (Color B): 1,700 g / 3,111 m (17 skeins). This is 10 g / 18 m per motif, plus joining and border.
These quantities include a margin of roughly 10% for gauge swatches, tails, and small variations in tension.
Tools:
– 5.0 mm (US H-8) crochet hook
– Tapestry needle
– Locking stitch markers
– Blocking mats and rust-proof pins
– Spray bottle
– Measuring tape
Abbreviations (US Terms)
- ch – chain
- sl st – slip stitch
- sc – single crochet
- hdc – half double crochet
- dc – double crochet
- sp – space
- st(s) – stitch(es)
- yo – yarn over
- rev sc – reverse single crochet (crab stitch)
Special stitches:
- Puff: (Yo, insert hook in the stitch, pull up a loop to about 0.5 in / 1.3 cm) 3 times. Yo, pull through all 7 loops on the hook, then ch 1 to close.
- Large puff: (Yo, insert hook, pull up a long loop) 4 times. Yo, pull through all 9 loops, then ch 1 to close.
- Standing start: When you change colors, join the new color with a sl st in the stated stitch or space, then ch as directed.
Gauge and Checkpoints
Gauge: 16 dc x 8 rows = 4 in (10.2 cm) with a 5.0 mm hook.
Make and block one full motif before you commit to all 120. The finished bedspread size depends entirely on this one piece.
Check the size at each of these points:
- After Round 2: 2.25 in (5.7 cm) across
- After Round 4: 3.75 in (9.5 cm) across
- After Round 7: 5.5 in (14.0 cm) across
- After Round 8: 6.5 in (16.5 cm) across
- After Round 9: 7 in (17.8 cm) tip to tip, after blocking
Too big? Go down 0.5 mm in hook size.
Too small? Go up 0.5 mm in hook size.
Wavy or cupped? If your size is correct but the motif ripples, tighten up on Round 8. If it cups, loosen up on Rounds 5 and 7.
Motif (Make 120)
Cut and change colors as stated in each round. Every round is joined with a sl st, and the right side faces you throughout.
Round 1 (Cream): Ch 6 and sl st to the first ch to form a ring. Ch 2 (does not count as a st), work 24 hdc into the ring, and join with a sl st to the first hdc. Fasten off. (24 hdc)
The ring leaves an open center hole about 0.5 in (1.3 cm) wide.
Round 2 (Rust): Standing start in any hdc. Ch 1, sc in the next st, 2 sc in the next st. Repeat from * around and join. (36 sc)
Round 3 (Cream): Standing start in any sc. Ch 1, then work the first puff in the same st. Ch 2, skip 2 sts, puff in the next st, ch 2, skip 2 sts. Repeat from * around and join to the top of the first puff. Fasten off. (12 puffs, 12 ch-2 sps)
Round 4 (Rust): Standing start in any ch-2 sp. Ch 3 (counts as a dc), work 2 dc in the same sp, then dc in the top of the next puff. 3 dc in the next ch-2 sp, dc in the top of the next puff. Repeat from * around and join. (48 dc)
The rust now frames each puff on both sides.
Round 5 (Rust): Ch 3 (counts as a dc), dc in the next 2 sts, 2 dc in the next st. Dc in the next 3 sts, 2 dc in the next st. Repeat from * around and join. Fasten off. (60 dc)
Round 6 (Cream): Standing start in the 3rd dc after the join. Ch 1 and work a large puff in the same st. Ch 3, skip 4 sts, large puff in the next st, ch 3, skip 4 sts. Repeat from * around and join. Fasten off. (12 large puffs, 12 ch-3 sps)
Starting in the 3rd dc shifts the outer puffs so each one sits between two inner puffs, just like the motif in the photo.
Round 7 (Rust): Standing start in any ch-3 sp. Ch 3 (counts as a dc) and work 4 dc in the same sp, then dc in the top of the next large puff. 5 dc in the next ch-3 sp, dc in the top of the next large puff. Repeat from * around and join. (72 dc)
Round 8 (Rust scallops): Ch 1. Sc in the next st, skip 2 sts, 7 dc in the next st, skip 2 sts. Repeat from * around and join to the first sc. Fasten off. (12 scallops; 12 sc + 84 dc = 96 sts)
Each repeat uses 6 sts of Round 7, and 12 x 6 = 72, so the scallops land evenly.
Round 9 (Cream edging): Standing start in any sc. Ch 1 and sc in the same st. Work 1 sc in each dc, but put 3 sc in the 4th (center) dc of each scallop. Join and fasten off. (96 sts worked 1 per st + 24 extra = 120 sc)
Each scallop now has 10 sc:
– Position 1 is the valley sc.
– Positions 2–4 are over the first 3 dc.
– Positions 5–7 are the 3 tip sc.
– Positions 8–10 are over the last 3 dc.
Weave in all ends on the wrong side, following the same color.
Make All Pieces
Make 120 motifs in total, all identical. That uses 22 g of rust and 10 g of cream per motif. Block each motif to 7 in (17.8 cm) tip to tip before you join anything.
Lay the motifs out with one scallop tip pointing straight up and call it scallop 0. Counting clockwise, scallop 3 points right, scallop 6 points down, and scallop 9 points left. Put a marker in the center tip sc of scallops 0, 3, 6, and 9 on every motif.
In the grid below, C = corner motif (4), E = edge motif (36), and I = interior motif (80):
C E E E E E E E E C
E I I I I I I I I E
E I I I I I I I I E
E I I I I I I I I E
E I I I I I I I I E
E I I I I I I I I E
E I I I I I I I I E
E I I I I I I I I E
E I I I I I I I I E
E I I I I I I I I E
E I I I I I I I I E
C E E E E E E E E C
All motifs are the same. The letters only mark where each one sits, which matters for the border counts.
Joining
Method: Whipstitch with cream yarn and a tapestry needle, as shown in the photo.
Stitch-to-stitch logic: Each join connects the 3 tip sc (positions 5–7) of one motif to the 3 tip sc of its neighbor, matched one to one:
– Horizontal neighbors: scallop 3 of the left motif joins scallop 9 of the right motif.
– Vertical neighbors: scallop 6 of the upper motif joins scallop 0 of the lower motif.
Working a join: Hold the two tips with right sides up and edges touching. Whipstitch through both loops of each matched pair of sc, 3 passes in total. Then make one more pass back through the center pair to lock the join.
Join count:
– Horizontal joins: 12 rows x 9 = 108
– Vertical joins: 10 columns x 11 = 110
– Total: 218
You can carry the cream yarn from one join to the next along the back of the scallop edge, then weave it in.
Tension: Pull each stitch snug enough that the tips sit flat against each other, but not so tight that they pucker. Each joined tip should still measure about 0.3 in (0.8 cm) wide. The diagonal scallops stay unjoined, which leaves the open lacy gaps.
Size checkpoint: Joining full rows one at a time is easiest. Measure after joining the first row: it should be 70 in (177.8 cm) wide, which is 10 x 7 in (10 x 17.8 cm). The full assembly should measure 70 x 84 in (177.8 x 213.4 cm).
Border
Border gauge: Work the border in cream with the same 5.0 mm hook. Use 1 sc per existing sc. Two rounds add 0.25 in (0.6 cm) each, for a total depth of 0.5 in (1.3 cm).
Stitches per motif along the edge
Joined tips (positions 5–7) are never worked. They are already used by the joins.
- Edge motif: 57 sts per side. On a top-edge motif, that runs from position 8 of scallop 9, over scallops 10, 11, 0, 1, and 2, to position 4 of scallop 3: 3 + 50 + 4 = 57.
- Corner motif: 87 exposed sts in total. These are split at the valley sc that points diagonally out at the blanket corner (position 1 of the scallop just past the diagonal). That valley sc is the corner stitch. Each side of the corner motif gets 44 sts, and both counts include the corner stitch: 44 + 44 − 1 = 87.
Per-side totals
- Top and bottom: 44 + (8 x 57) + 44 = 544 sts each
- Left and right: 44 + (10 x 57) + 44 = 658 sts each
- Round total: (2 x 544) + (2 x 658) − 4 shared corner stitches = 2,400 sts
Border Round 1 (Cream sc): With the right side facing, standing start in the corner valley sc of the top-left motif. Ch 1 and sc in the same st. Sc in each exposed st around.
At each seam, work the last st before the joined tip of one motif, then go straight to the first st after the joined tip of the next motif. Do not add any stitches. Join to the first sc. (544 / 658 / 544 / 658 per side; 2,400 sc total)
Border Round 2 (Cream rev sc): Ch 1 and rev sc in each st around. Join and fasten off. (2,400 rev sc)
Why the math works: The motifs were already shaped into full circles by Rounds 5, 7, and 9. The border just follows that curve, 1 st per st. A circle’s edge already has the extra length its curve needs, so no corner increases are required.
Skipping the joined tips gives the seams a gentle V-shaped notch, which keeps the scalloped edge from the photo. Adding stitches at the seams would ripple the edge, and decreasing there would pull it tight.
Final Blocking
- Lay the bedspread flat on blocking mats or a clean carpet covered with towels.
- Mist it evenly with water until it is damp but not dripping.
- Pin the four corner motifs first, so that the blanket measures 71 x 85 in (180.3 x 215.9 cm).
- Pin the scallop tips along each side, keeping the tips in a straight line.
- Gently open the puffs with your fingertips so they sit round and raised.
- Let it dry completely, usually 24–48 hours, before unpinning.
Final Quality-Control Checklist
- All 120 motifs measure 7 in (17.8 cm) tip to tip.
- Each motif has 12 small puffs, 12 large puffs, 12 scallops, and 120 sc in Round 9.
- All 218 joins use exactly 3 tip sc per side.
- The diagonal scallops are unjoined, and the gaps are open and even.
- The border has 544 sts on the top and bottom and 658 on each long side.
- The final size is 71 x 85 in (180.3 x 215.9 cm).
- All ends are woven in on the wrong side, in a matching color.
Troubleshooting
- Puffs look flat: Pull the loops up taller and keep them even before closing the puff.
- Center hole is too big: Pull the starting ch-6 tail to snug the ring after Round 1.
- Motif cups: Your Round 5 or Round 7 tension is too tight. Loosen it or go up one hook size for those rounds.
- Scallops ruffle: Round 8 is too loose. Make your dc slightly shorter.
- Joins pucker: Your whipstitch is too tight. Redo the join with gentler tension.
- Border count is off: Recount a single motif’s side arc. It should be 57 sts, or 44 on each side of a corner motif.
- Blanket is skewed: Re-block and pin the corners square before you pin the edges.
Care
Machine wash cold on a gentle cycle in a large laundry bag, or hand wash for cotton. Lay flat to dry and re-shape the scallops while the bedspread is damp.
Final Notes
The whole bedspread comes from one measurement chain:
– Gauge: 16 dc = 4 in (10.2 cm)
– One motif: 7 in (17.8 cm)
– Grid of 10 x 12 motifs: 70 x 84 in (177.8 x 213.4 cm)
– Border of 0.5 in (1.3 cm) on every side: 71 x 85 in (180.3 x 215.9 cm)
If your first motif measures correctly, every number after it will follow. Take your time with that test piece, block it, and enjoy watching the terracotta blooms add up.
Happy crocheting!