
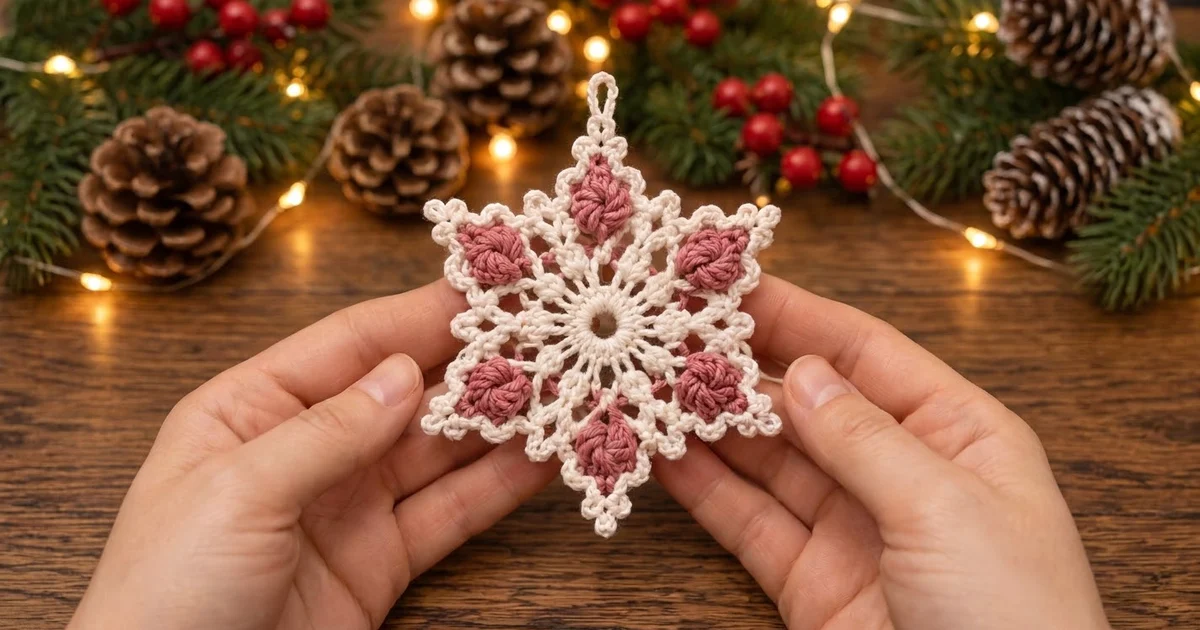
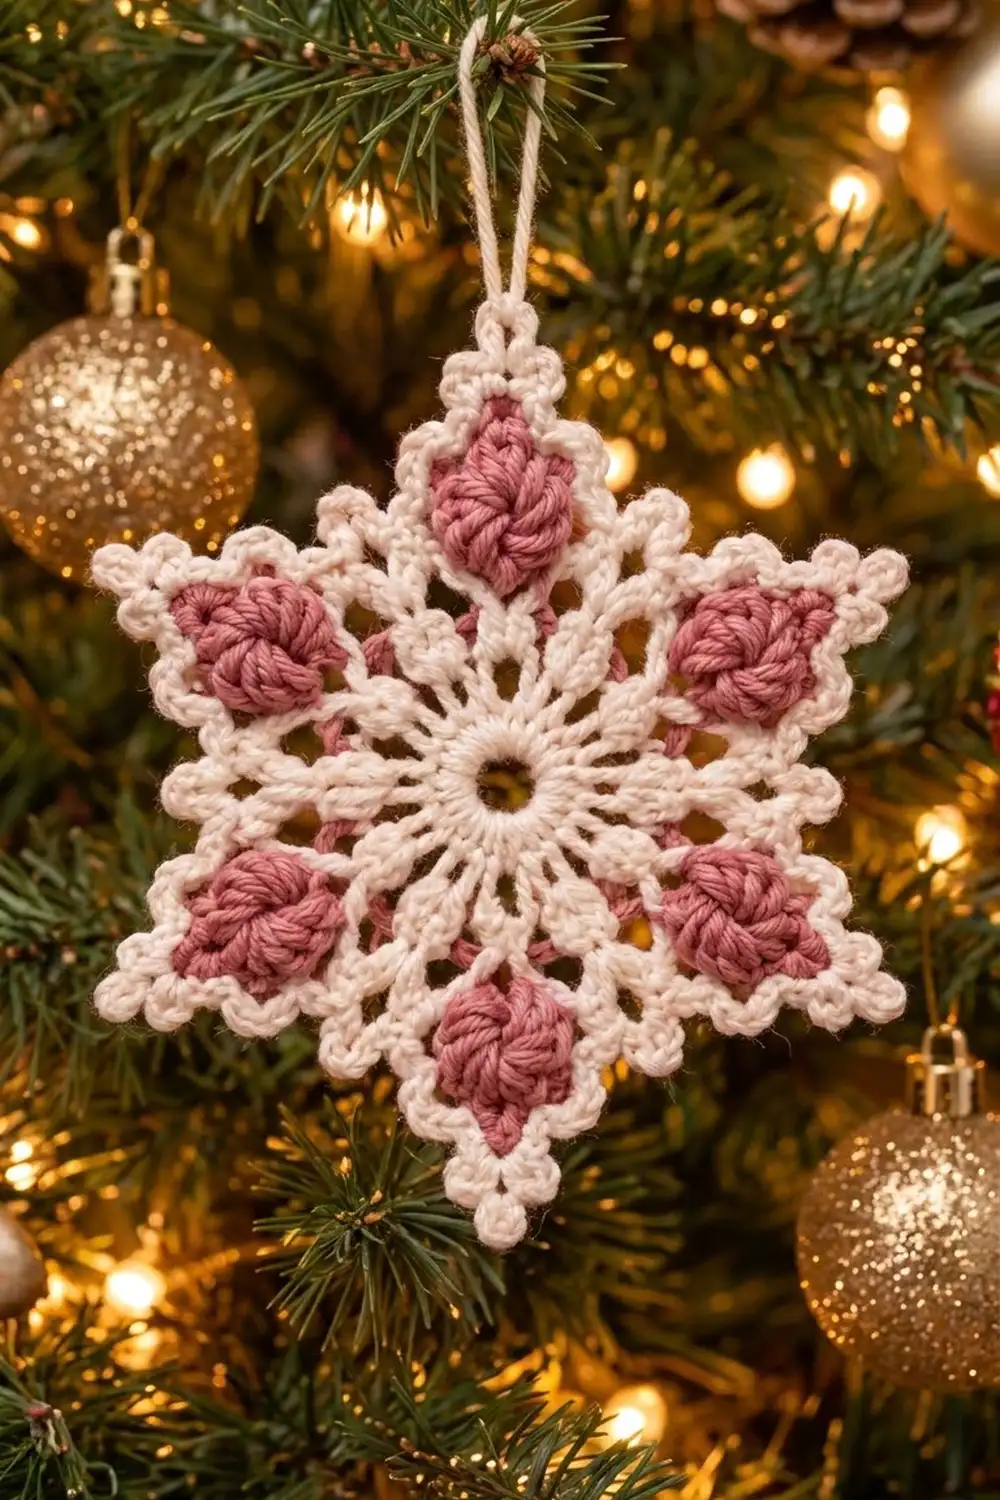
The Rosy Frost Snowflake is a six-pointed holiday ornament that pairs creamy white lace with soft dusty-rose bobbles. Each point holds one plump, knotted rose cluster. Crisp cream stitches frame each cluster and taper into a picot tip. The result looks vintage and cozy, and it suits a tree, a gift tag or a window.
The design uses two colors: an off-white or cream for the lace and the frame, and a muted dusty rose for the bobble centers. Cotton yarn gives the clearest stitch definition and holds its shape after blocking.
This pattern is written in US crochet terms. The finished ornament measures 5.5 in (14.0 cm) from point to point, not counting the hanging loop.
The snowflake is worked in the round from the center out in six rounds. The center ring, spokes and chain loops come first in cream. The rose bobble clusters are added in Round 4. A cream round then builds the pointed frames, and a final cream round adds the picot edge and the hanging loop. It is a single piece, so there is no joining.
Finished Size and Construction
- Finished size: 5.5 in (14.0 cm) point to point
- Skill level: Easy-intermediate
- Terminology: US crochet terms
- Yarn weight: DK / light worsted (#3) cotton
- Hook: 3.5 mm (E-4)
- Number of pieces: 1
- Layout: One single six-pointed snowflake, worked in the round
- Piece size: 5.5 in (14.0 cm) point to point
- Size before edging (after Round 5): 4.75 in (12.1 cm) point to point
- Edging depth (Round 6): about 0.375 in (1.0 cm) at each tip
- Hanging loop: about 2 in (5.1 cm) tall
Materials
Yarn: Use a smooth DK or light worsted cotton or cotton blend. Mercerized cotton gives the sharpest picots, and a matte cotton gives a softer, rustic look. Avoid fuzzy acrylics, because the halo hides the lace.
- Color A – Cream / Off-White: 10 g, about 23 m
- Color B – Dusty Rose: 4 g, about 9 m
These quantities include a margin for a gauge swatch and weaving in ends.
Tools:
- 3.5 mm (E-4) crochet hook
- Tapestry needle
- Scissors
- Stitch marker
- Blocking mat or folded towel
- Rust-proof pins
- Spray bottle with water (optional: light spray starch)
Abbreviations (US Terms)
- ch – chain
- sl st – slip stitch
- sc – single crochet
- dc – double crochet
- sp – space
- st(s) – stitch(es)
- rnd – round
Special stitches:
- Bobble (5-dc bobble): Yarn over, insert hook in the indicated space, yarn over and pull up a loop, yarn over and draw through 2 loops. Repeat from * to * 4 more times (6 loops on hook). Yarn over and draw through all 6 loops.
- Picot: Ch 3, sl st in the 3rd ch from the hook.
- Tip picot: Ch 4, sl st in the 4th ch from the hook.
Gauge and Checkpoints
Exact gauge is not critical for an ornament, but it controls the final size. Work Rounds 1–2 first as a test piece and measure before continuing.
- After Round 1: 1.25 in (3.2 cm) across
- After Round 2: 2.25 in (5.7 cm) across
- After Round 3: 3 in (7.6 cm) across
- After Round 4: 3.75 in (9.5 cm) across the bobble tops
- After Round 5: 4.75 in (12.1 cm) point to point
- After Round 6: 5.5 in (14.0 cm) point to point
If your test piece is too big (more than 2.5 in / 6.4 cm after Round 2), go down to a 3.25 mm hook. If it is too small (under 2 in / 5.1 cm), go up to a 3.75 mm hook. Also check that the Round 2 spokes lie flat. If they cup, your chains are too tight. If they ruffle, your chains are too loose.
Pattern
Round 1 – Center Ring (Color A)
With Color A, ch 8 and sl st to the first ch to form a ring.
Ch 3 (counts as the first dc), work 23 dc into the ring. Sl st to the top of the beginning ch-3.
Stitch count: 24 dc.
The ch-8 ring leaves the small open hole in the center.
Round 2 – Spokes (Color A)
Ch 5 (counts as dc + ch 2). Dc in the next dc, ch 2. Repeat from * to * 22 more times. Sl st to the 3rd ch of the beginning ch-5.
Stitch count: 24 dc and 24 ch-2 spaces.
Each dc stands like a spoke, which gives the lacy wheel around the center.
Round 3 – Chain Loops (Color A)
Sl st into the first ch-2 sp. Ch 1, sc in the same sp, ch 4, skip the next ch-2 sp. Sc in the next ch-2 sp, ch 4, skip the next ch-2 sp. Repeat from * to * 10 more times. Sl st to the first sc.
Stitch count: 12 sc and 12 ch-4 loops.
This round converts 24 spaces into 12 loops: 1 sc in every other space plus 1 ch-4 loop over each skipped space. The loops alternate between point loops (A) and valley loops (B). Place a marker in the first loop and call it loop A.
Fasten off Color A.
Round 4 – Rose Bobble Clusters (Color B)
Join Color B with a sl st in the marked loop A. Ch 2 (does not count as a stitch).
In the same loop A: bobble, ch 1, bobble. This makes one compact cluster. Ch 3, sc in the next loop B, ch 3.
In the next loop A: bobble, ch 1, bobble. Ch 3, sc in the next loop B, ch 3. Repeat from * to * 4 more times.
Sl st to the top of the first bobble. Fasten off Color B.
Stitch count: 12 bobbles (6 clusters), 6 sc, 6 ch-1 tip spaces and 12 ch-3 side spaces.
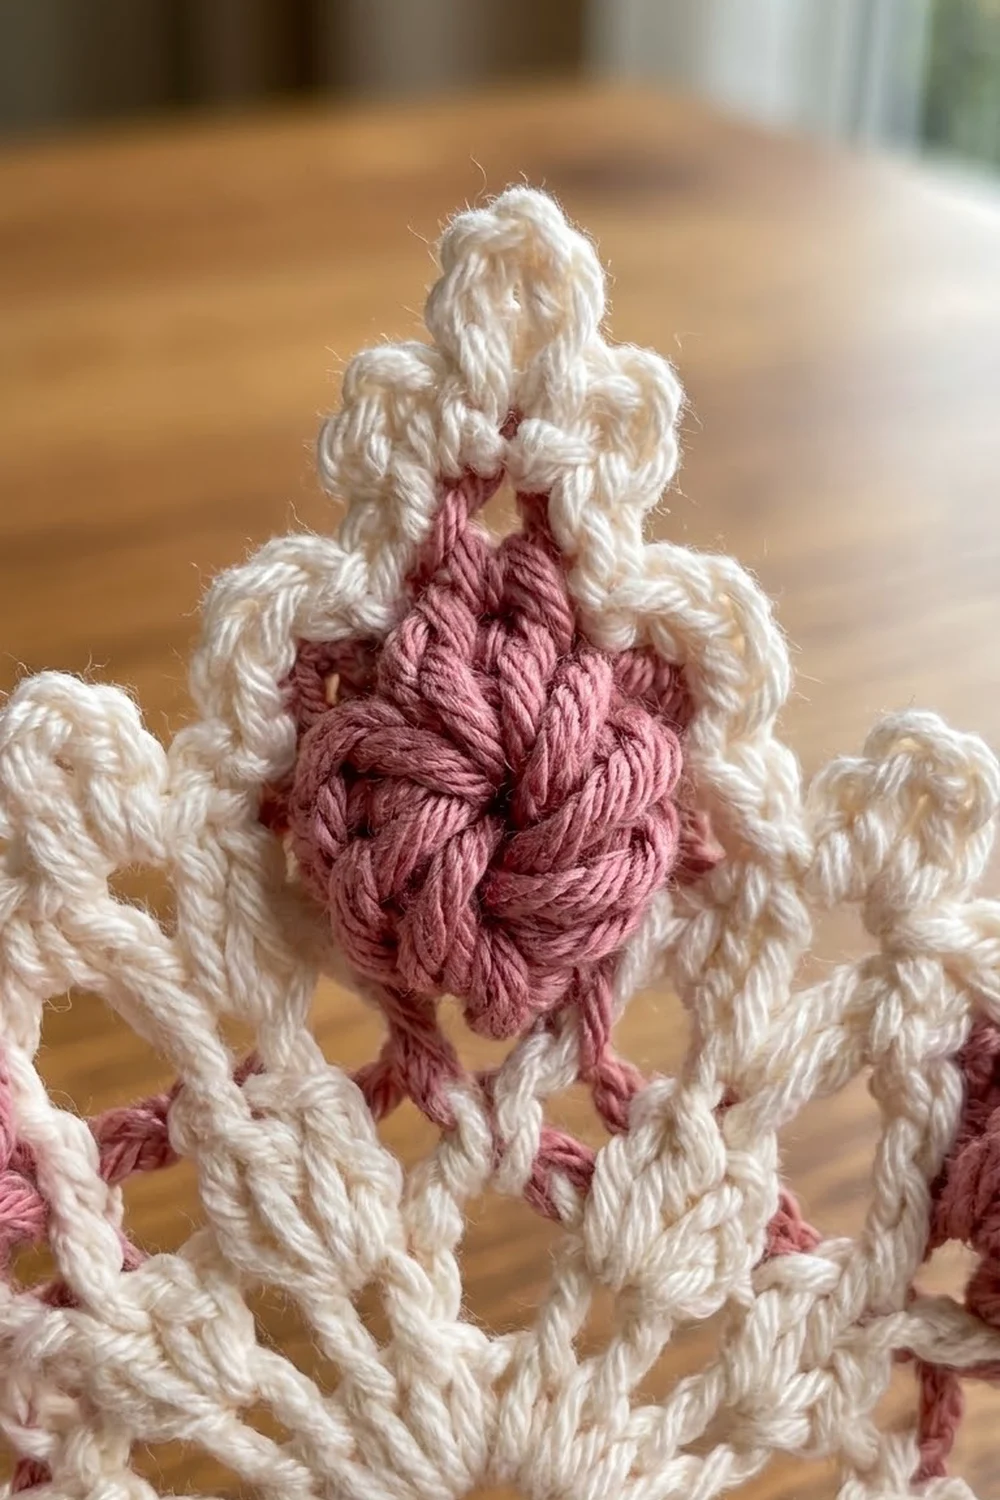
Push each pair of bobbles to the right side so they puff out and read as one knobbly rose cluster in each future point.
Round 5 – Pointed Frames (Color A)
Join Color A with a sl st in any Round 4 sc (in a valley). Ch 1.
Sc in the valley sc. 3 dc in the next ch-3 sp. (2 dc, ch 3, 2 dc) in the next ch-1 tip sp, directly above the cluster. 3 dc in the next ch-3 sp. Repeat from * to * 5 more times. Sl st to the first sc.
Stitch count per point: 1 sc + 3 dc + 4 dc + 3 dc = 11 stitches, plus 1 ch-3 tip.
Round total: 6 sc, 60 dc (66 stitches) and 6 ch-3 tip spaces.
The short sc in each valley pulls the edge in, and the dc rise on either side of the cluster to the ch-3 tip. This forms the cream triangle that frames each rose cluster and the sharp V between points.
Checkpoint: 4.75 in (12.1 cm) from point to point. Do not fasten off.
Round 6 – Picot Edge and Hanging Loop (Color A)
This round is the border. Ch 1, then sl st in the same valley sc.
First point (with hanging loop): Sc in the next dc, picot. Sc in the next 2 dc, picot. Sc in the next 2 dc. In the ch-3 tip sp: 2 sc, ch 15, sl st in the first of these 15 ch to form the hanging loop, 2 sc. Sc in the next 2 dc, picot. Sc in the next 2 dc, picot. Sc in the next dc.
Remaining 5 points: Sl st in the valley sc. Sc in the next dc, picot. Sc in the next 2 dc, picot. Sc in the next 2 dc. In the ch-3 tip sp: 2 sc, tip picot, 2 sc. Sc in the next 2 dc, picot. Sc in the next 2 dc, picot. Sc in the next dc. Repeat from * to * 4 more times.
Sl st to the first sl st. Fasten off, leaving a 6 in (15.2 cm) tail.
Stitch count per point: 1 sl st + 14 sc, with 4 picots plus 1 tip picot (or the hanging loop).
Round total: 6 sl st, 84 sc, 24 picots, 5 tip picots and 1 hanging loop.
Why the math works: Each point in Round 5 has 10 dc and 1 ch-3 tip, plus its valley sc. In Round 6, each of the 10 dc gets 1 sc (10 sc), and the tip space gets 4 sc (2 + 2), for 14 sc per point. The valley sc takes 1 sl st. So 6 × 14 = 84 sc and 6 × 1 = 6 sl st. No corners are counted twice, because the tip space is the only place where stitches are added.
Edging gauge: The sc edge adds about 0.375 in (1.0 cm) at each tip, which takes the piece from 4.75 in (12.1 cm) to 5.5 in (14.0 cm) point to point. The picots sit evenly, with 2 on each side of every point.
Final Blocking
- Weave in all ends along the back of stitches of the same color. Leave them uncut for now.
- Lightly spray the snowflake with water until it is damp, not dripping. Cotton blocks very well this way.
- Lay it face up on the blocking mat.
- Pin the center hole open with one pin.
- Pin each of the six tips out to 2.75 in (7.0 cm) from the center, which gives 5.5 in (14.0 cm) point to point. Check that opposite tips line up across the center.
- Pin each valley in toward the center so the V stays sharp.
- Pin out each tip picot and push the small picots outward with your fingertip.
- Shape the rose clusters so they stand up and look round.
- For a stiff ornament, mist lightly with spray starch.
- Let it dry completely, then unpin and trim the woven ends.
Final Quality-Control Checklist
- The center hole is open and round.
- Round 2 has exactly 24 spokes.
- There are 6 rose clusters, each centered under a tip.
- Each point has 11 stitches in Round 5 and 14 sc in Round 6.
- Every point has 2 small picots on each side and 1 tip picot (or the loop).
- The valleys are sharp V shapes, not rounded.
- The piece measures 5.5 in (14.0 cm) point to point.
- The hanging loop is about 2 in (5.1 cm) tall and sits at the top point.
- No ends show on the front.
Troubleshooting
The center cups or bowls. Round 2 chains are too tight. Rework Round 2 with looser ch-2 spaces, or use a hook 0.25 mm larger for that round only.
The center ruffles. The Round 2 chains are too loose. Tighten them, or work ch 1 plus a slightly taller dc.
The bobbles look flat or uneven. Keep every yarn-over pull-up the same height, and pull firmly when you close the bobble. Push each finished bobble to the right side.
The rose clusters sit between points instead of under them. Round 5 was joined in a ch-3 space instead of an sc. Pull it out and rejoin in a valley sc.
The points look rounded. Check that you worked exactly 1 sc in each valley in Round 5 and a sl st there in Round 6. Block with pins right at each tip.
The edge waves. You may have added extra sc. Count 14 sc per point.
The hanging loop twists. Keep the 15 chains untwisted before you sl st to close the loop.
Care
Hand wash in cool water with mild soap, press out the water in a towel and re-block flat to dry. Store flat or hang it so the points don’t get crushed.
Final Notes
The size of the Rosy Frost Snowflake builds in a simple chain. Round 1 measures 1.25 in (3.2 cm), the spokes reach 2.25 in (5.7 cm), and the chain loops reach 3 in (7.6 cm). The rose clusters bring it to 3.75 in (9.5 cm), the pointed frames to 4.75 in (12.1 cm), and the picot edge to a finished 5.5 in (14.0 cm). Check each stage as you go, and the six points will come out even and crisp. Make one for your own tree, or several to tie onto holiday gifts.
Happy crocheting!