
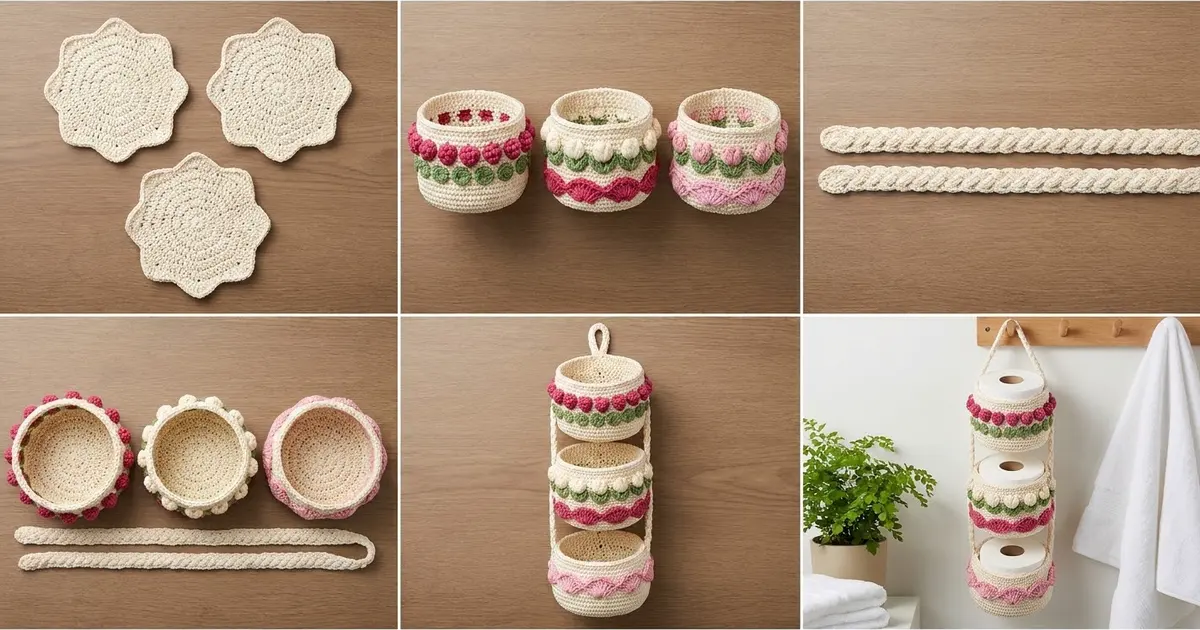
This hanging holder stacks three spare rolls on the wall in three soft, crown-topped baskets. Each basket has a band of pink puff berries, a row of cream tulips with little green leaves, a wavy pink fan band and a pointed cream crown rim.
The colors are cream, raspberry pink and leaf green. It’s a cottage-garden look that works in a bathroom, a guest room or a craft corner. The pattern uses US crochet terms throughout.
Each basket measures 5.75 in (14.6 cm) across, 3.25 in (8.3 cm) tall at the crown valleys and 4.25 in (10.8 cm) tall at the points. The assembled holder is about 21.5 in (54.6 cm) long from the bottom basket to the top of the hanging loop.
You’ll work each basket bottom-up in joined rounds: a flat circle base, a back-loop turning round, the colorwork wall, the crown and a single crochet edging. Then you crochet two Romanian cords and sew them to the sides of all three baskets.
Finished Size and Construction
- Basket size: 5.75 in (14.6 cm) diameter; 3.25 in (8.3 cm) at valleys, 4.25 in (10.8 cm) at points
- Holder length: about 21.5 in (54.6 cm)
- Skill level: Intermediate (puff stitches, spike stitches, color changes)
- Terminology: US
- Yarn weight: Worsted (#4) cotton
- Hook: 4.5 mm (US 7)
- Number of pieces: 5 (3 baskets, 2 cords)
- Layout: 3 baskets stacked vertically, 5 in (12.7 cm) apart from base to base
- Piece size before crown border: 3 in (7.6 cm) at valleys, 4 in (10.2 cm) at points
- Border depth: 0.25 in (0.6 cm), 1 round of sc
Materials
Use a smooth worsted-weight cotton or cotton blend. Cotton holds its shape, has good stitch definition for the puffs, and won’t stretch under the weight of the rolls. The amounts below assume about 155 m per 100 g.
- Cream (A): 180 g, about 280 m (bases, walls, crown, cords)
- Raspberry pink (B): 35 g, about 55 m (berry puffs, fan band)
- Leaf green (C): 25 g, about 40 m (stem rounds, spike leaves)
All quantities include a small safety margin above what the pieces actually use.
Tools:
– 4.5 mm (US 7) crochet hook
– Tapestry needle
– 10 stitch markers
– Measuring tape
– Scissors
– Wooden wall peg or hook
– Rust-proof pins and a blocking mat
Abbreviations (US Terms)
- ch – chain
- sl st – slip stitch
- sc – single crochet
- hdc – half double crochet
- dc – double crochet
- tr – treble crochet
- BLO – back loop only
- sc2tog – single crochet 2 together
- sp – space
- st(s) – stitch(es)
Special stitches
- Puff: (yo, insert hook in st, yo, pull up a loop to the height of a hdc) 4 times, yo, pull through all 9 loops on hook. A puff counts as 1 st.
- Spike sc: insert hook in the st 2 rounds below the next st, yo, pull up a loop to the height of the working round, yo, pull through both loops. Skip the st behind the spike. A spike sc counts as 1 st.
Rounds: join each round with a sl st to the first st and ch 1 to start the next. The ch 1 doesn’t count as a stitch. To change color, work the joining sl st with the new color.
Gauge and Checkpoints
Gauge: 16 sc and 18 rounds = 4 in (10.2 cm) in sc with a 4.5 mm hook.
Make one full basket before you start the others. It acts as your gauge swatch, and the other two baskets will match it.
Checkpoints:
– After Rnd 6 of the base: about 2.75 in (7.0 cm) across
– After Rnd 12 of the base: 5.75 in (14.6 cm) across, lying flat
– After Rnd 15: wall is 0.75 in (1.9 cm) tall
– After Rnd 20: wall is about 2 in (5.1 cm) tall
– After Rnd 22: wall is 2.75 in (7.0 cm) tall
– After Rnd 24: 3 in (7.6 cm) at valleys, 4 in (10.2 cm) at points
If the base is too big, go down half a hook size. If it’s too small, go up half a size. The base must be at least 5.5 in (14.0 cm) across so a standard roll fits. If the diameter is right but the walls are too short, you’re probably pulling the puffs too tight, so lift each puff loop to a full hdc height.
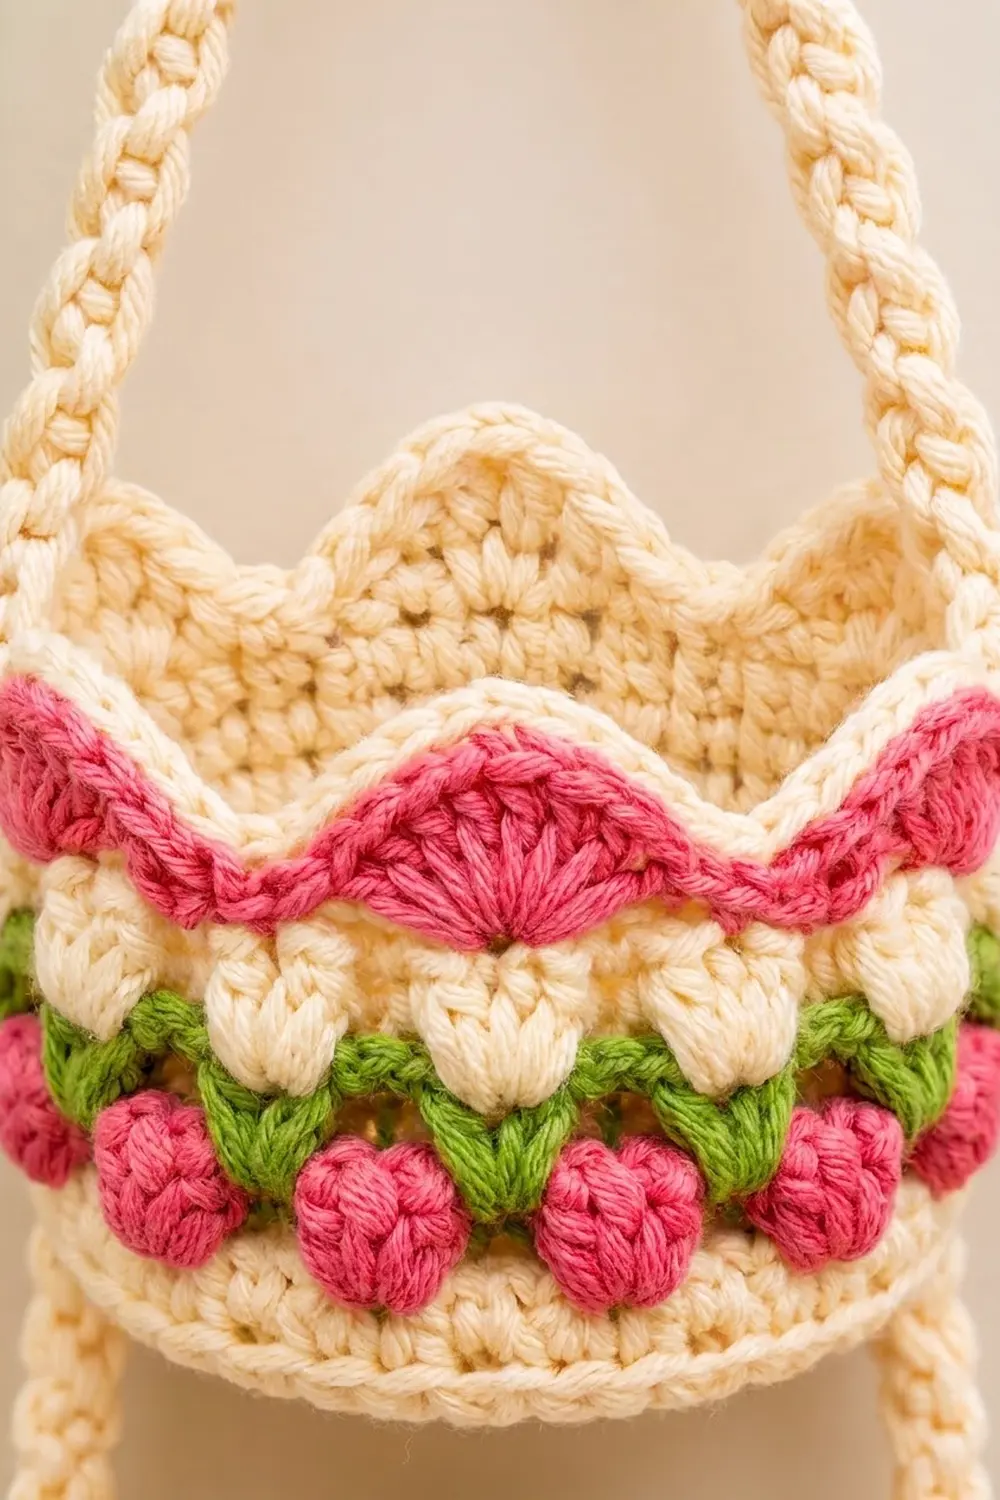
Basket (Make 3)
Base
With A, make a magic ring.
Rnd 1: 6 sc in ring, join. (6)
Rnd 2: 2 sc in each st around, join. (12)
Rnd 3: sc in next st, 2 sc in next st 6 times, join. (18)
Rnd 4: sc in next 2 sts, 2 sc in next st 6 times, join. (24)
Rnd 5: sc in next 3 sts, 2 sc in next st 6 times, join. (30)
Rnd 6: sc in next 4 sts, 2 sc in next st 6 times, join. (36)
Rnd 7: sc in next 5 sts, 2 sc in next st 6 times, join. (42)
Rnd 8: sc in next 6 sts, 2 sc in next st 6 times, join. (48)
Rnd 9: sc in next 7 sts, 2 sc in next st 6 times, join. (54)
Rnd 10: sc in next 8 sts, 2 sc in next st 6 times, join. (60)
Rnd 11: sc in next 9 sts, 2 sc in next st 6 times, join. (66)
Rnd 12: sc in next 10 sts, 2 sc in next st 6 times, join. (72)
The base measures 5.75 in (14.6 cm) across. The circumference is 72 sts ÷ 4 sts per inch = 18 in (45.7 cm), and every wall round stays at 72 sts until the crown.
Wall
Rnd 13: sc in BLO of each st around, join. (72) This round folds the edge up into the wall.
Rnds 14–15: sc in each st around, join. Change to B on the last join. (72)
Rnd 16 (B, berries): puff in next st, ch 1, sk next st, sc in next 2 sts 18 times, join. Change to C. (72: 18 puffs, 18 ch-1 sps, 36 sc)
Rnd 17 (C): sc in puff, sc in ch-1 sp, sc in next 2 sts 18 times, join. Change to A. (72)
Rnd 18 (A, tulips): sc in next 2 sts, puff in next st, ch 1, sk next st 18 times, join. Change to C. (72: 18 puffs, 18 ch-1 sps, 36 sc)
The cream tulips sit over the gaps between the pink berries.
Rnd 19 (C, leaves): spike sc into Rnd 17 below next st, sc in next st, sc in puff, sc in ch-1 sp 18 times, join. Change to A. (72)
Each spike makes a short green stroke beside a tulip.
Rnd 20 (A): sc in each st around, join. Change to B. (72)
Rnd 21 (B, fans): sc in next st, sk 3 sts, 7 dc in next st, sk 3 sts, sc in next st 8 times, join. Change to A. (72: 8 fans)
Each repeat uses 9 sts and makes 9 sts (1 + 7 + 1), so the count stays at 72.
Rnd 22 (A): dc in sc, hdc in first dc, sc in next 5 dc, hdc in last dc, dc in sc 8 times, join. (72)
The taller stitches fill the dips between fans and give an even base for the crown. The pink wave still shows below.
Crown
Place a marker in the 5th st of each 9-st repeat (above each fan’s center dc). There should be 8 markers.
Rnd 23: sc in next 2 sts, hdc in next st, dc in next st, (dc, ch 2, dc) in marked st, dc in next st, hdc in next st, sc in next 2 sts 8 times, join. (80 sts and 8 ch-2 sps)
Each repeat uses 9 sts and makes 10 sts plus one ch-2 sp.
Rnd 24: sl st in next st, sc in next st, hdc in next st, dc in next st, 2 dc in next st, (tr, ch 2, tr) in ch-2 sp, 2 dc in next st, dc in next st, hdc in next st, sc in next st, sl st in next st 8 times, join. (112 sts and 8 ch-2 sps)
Each repeat has 14 sts: 1 sl st, 6 sts rising to the point, the ch-2 tip, 6 sts falling and 1 sl st. Two sl sts meet at every valley.
Checkpoint: 3 in (7.6 cm) at valleys and 4 in (10.2 cm) at points. The crown flares slightly, and that’s correct.
Crown Border
Border gauge: 1 sc per stitch of Rnd 24, 3 sc in each tip, and a sc2tog at each valley. The border adds 0.25 in (0.6 cm) all around.
Rnd 25 (A): Join A in the 2nd st of any repeat (the first sc after a valley). sc in next 6 sts, 3 sc in ch-2 sp, sc in next 6 sts, sc2tog over next 2 sl sts 8 times, join with a sl st to the first sc. Fasten off. (128)
Per point: 6 + 3 + 6 + 1 = 16 sts. 16 × 8 points = 128 sts.
Why the math works: The 3 sc at each tip turn the outer edge around the point so it doesn’t cup. The sc2tog at each valley pulls the two sl sts together and keeps the dip sharp. Every non-sl st in Rnd 24 gets exactly one sc, so the edge doesn’t ruffle or pull.
The finished basket measures 3.25 in (8.3 cm) at valleys and 4.25 in (10.8 cm) at points. Weave in all ends on the inside.
Cords (Make 2)
With A, make a Romanian cord: ch 2, sc in 2nd ch from hook, turn the work clockwise. Insert hook under the 2 left-side loops, yo, pull up a loop, yo, pull through both loops, turn clockwise. Repeat from * until the cord measures 22 in (55.9 cm) slightly stretched. Fasten off and leave a 12 in (30.5 cm) tail.
The cord is about 0.4 in (1.0 cm) wide, with a braided look on both faces.
Make All Pieces
- Baskets: 3, each using about 50 g of A, 10 g of B and 7 g of C
- Cords: 2, each using about 12 g of A
Layout (side view, top to bottom):
          /\        <- cords meet over peg
         /  \
        /    \
  cord |BSKT1| cord   base at 10 in (25.4 cm)
       |     |
  cord |BSKT2| cord   base at 5 in (12.7 cm)
       |     |
  cord |BSKT3| cord   base at 0 in (cord ends)
Joining
Method: whipstitch each cord flat against the outside of the wall with the tapestry needle and A.
- On each basket, mark two sts exactly opposite each other on Rnd 13, with 35 sts between the markers on each side (36 sts apart).
- Mark the matching sts on Rnd 22 directly above.
- Bottom basket: line up the end of one cord with the base edge (Rnd 13). Whipstitch the cord to the marked column from Rnd 13 to Rnd 22. Use one stitch per wall round, catching the outer loops of the cord. Repeat with the second cord on the opposite side.
- Middle basket: measure 5 in (12.7 cm) up each cord from the end. Attach this basket’s Rnd 13 at that point, and sew up to Rnd 22 as before.
- Top basket: attach at 10 in (25.4 cm) from the cord ends in the same way.
- Sew one cord column per wall round on every basket, so each cord carries the load evenly.
Tension: Sew firmly but don’t pucker the wall. The cord should lie flat and straight against the basket, with no gaps.
Top: Bring the two free cord ends together above the top basket. Overlap them by 0.5 in (1.3 cm) and sew through both layers to make the hanging point. Each free leg is about 8.75 in (22.2 cm), which forms a tall triangle.
Size checkpoint: The top basket’s valleys sit 13.25 in (33.7 cm) above the cord ends. The whole holder hangs about 21.5 in (54.6 cm) long. Leave a 0.75 in (1.9 cm) gap between the lower crown points and the upper basket’s base.
Final Blocking
- Wet each basket thoroughly in cool water and gently squeeze out the excess. Don’t wring it.
- Roll the basket in a towel and press to remove more water.
- Slide a toilet roll wrapped in plastic into each basket so it dries round.
- Pin each crown point upward and slightly outward, and open each ch-2 tip with a pin.
- Pull the cords straight and pin them flat while they dry.
- Let everything air-dry completely, then remove the forms.
Final Quality-Control Checklist
- Base lies flat at 5.75 in (14.6 cm) across
- All wall rounds have 72 sts
- 18 pink berries, 18 cream tulips, 18 green spikes
- 8 pink fans, centered under 8 crown points
- Border round has 128 sts, with 16 per point
- Each basket is 3.25 in (8.3 cm) at valleys and 4.25 in (10.8 cm) at points
- Cords are 22 in (55.9 cm) and attached at the same heights on both sides
- Holder hangs straight and level, with no basket tilting
Troubleshooting
Puffs sink into the fabric: Pull each loop up to full hdc height, and don’t tighten the final yo too hard.
Wall leans outward: Your sc is too loose. Go down half a hook size for the wall rounds only.
Fans don’t line up with crown points: You’ve drifted a stitch. Recount Rnd 22 by repeats of 9, and move the markers before starting Rnd 23.
Crown points curl inward: Block the points with pins. Also check that you worked (tr, ch 2, tr) in the tip and not 2 dc.
Holder tilts: One cord is sewn higher than the other. Measure from each cord end and resew so the heights match.
Baskets sag: Add a second line of whipstitching on the inside of the wall behind each cord.
Care
Hand wash in cool water with mild soap, press out the water in a towel and dry flat over a roll form. Don’t tumble dry, because the cords may stretch.
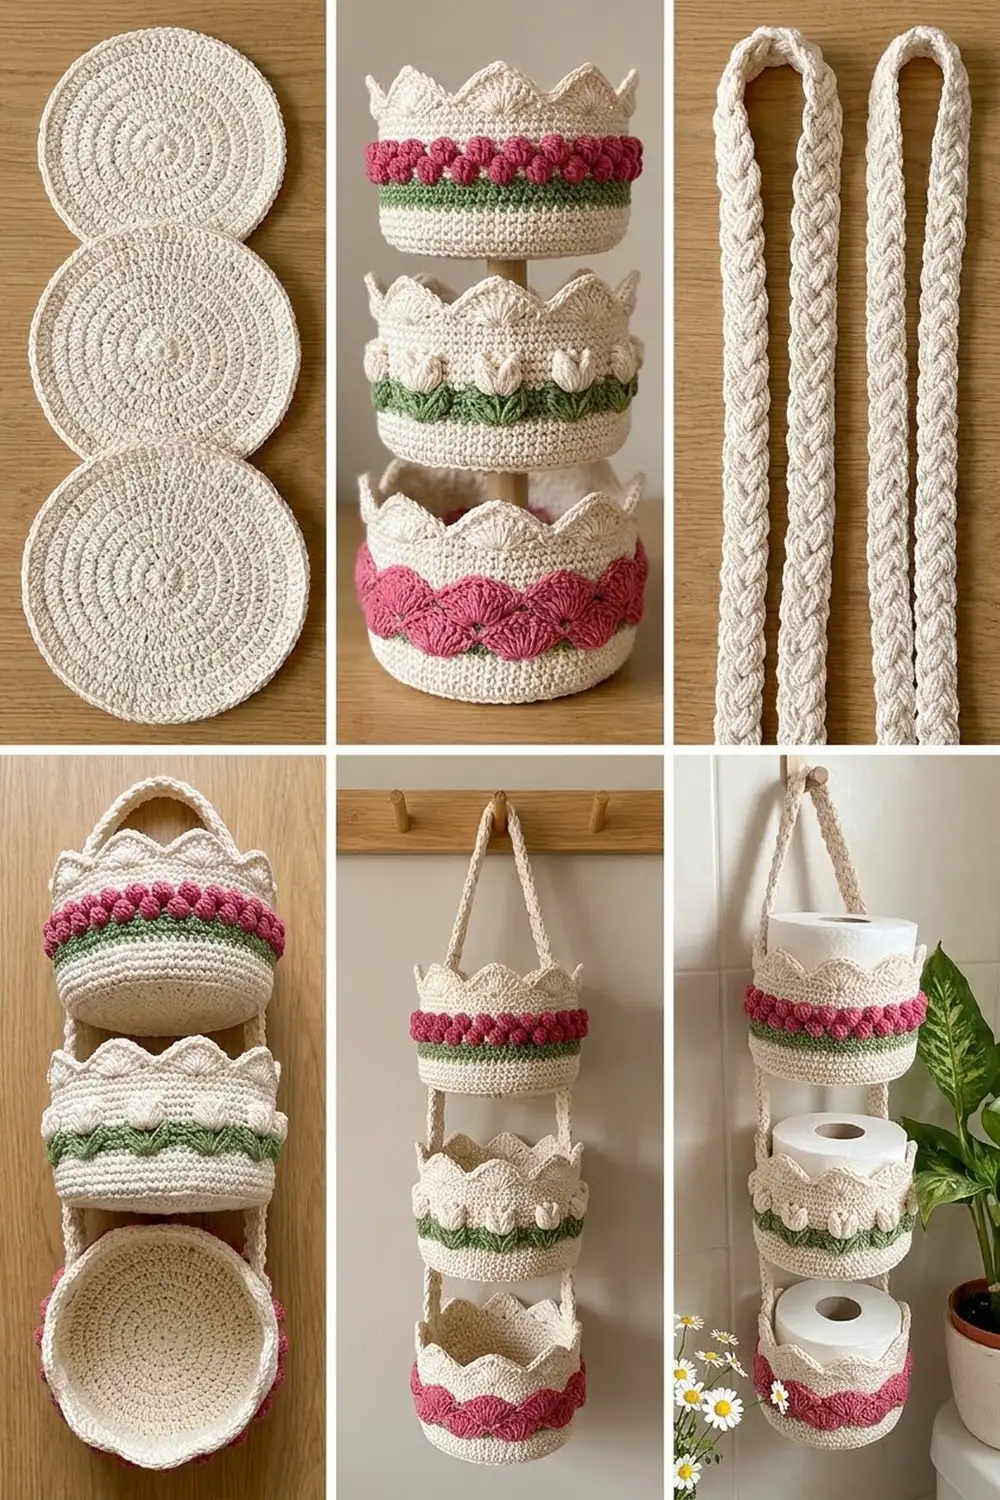
Final Notes
Here’s the full measurement chain. Gauge is 16 sc = 4 in (10.2 cm). That gives a 72-st base that’s 5.75 in (14.6 cm) across, and the wall stays at 72 sts through the berries, tulips and fans. The crown grows to 112 sts and the border finishes at 128 sts. Each basket ends up 3.25 in (8.3 cm) tall at the valleys. Space the baskets 5 in (12.7 cm) apart on two 22 in (55.9 cm) cords for a holder about 21.5 in (54.6 cm) long. Check each stage against these numbers and all three baskets will match.
Happy crocheting!