

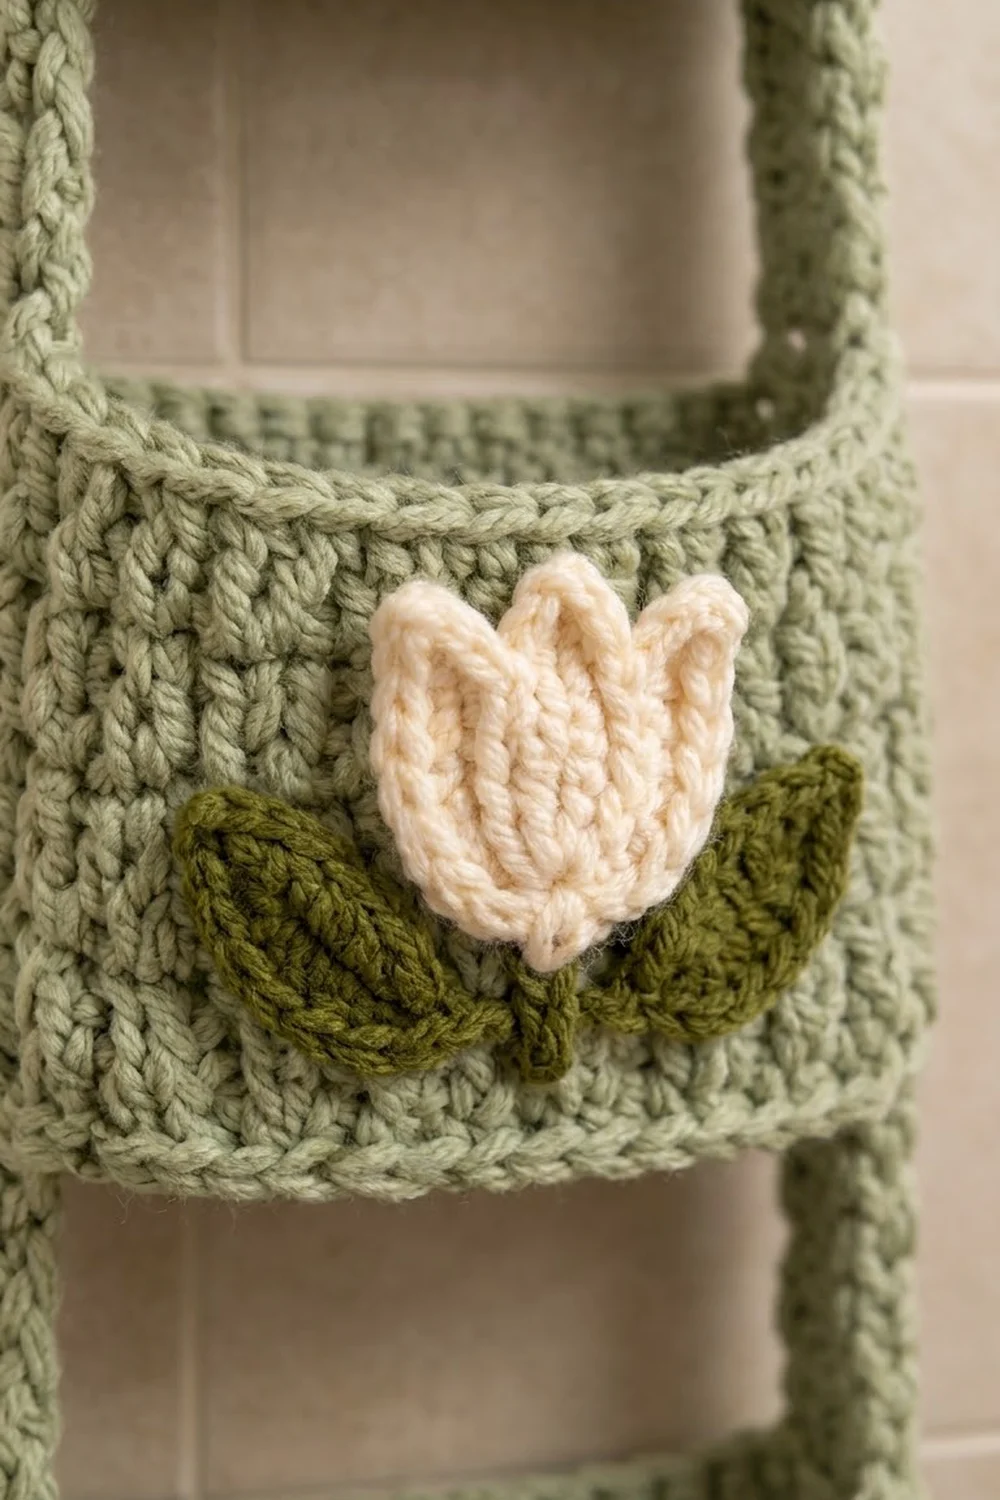
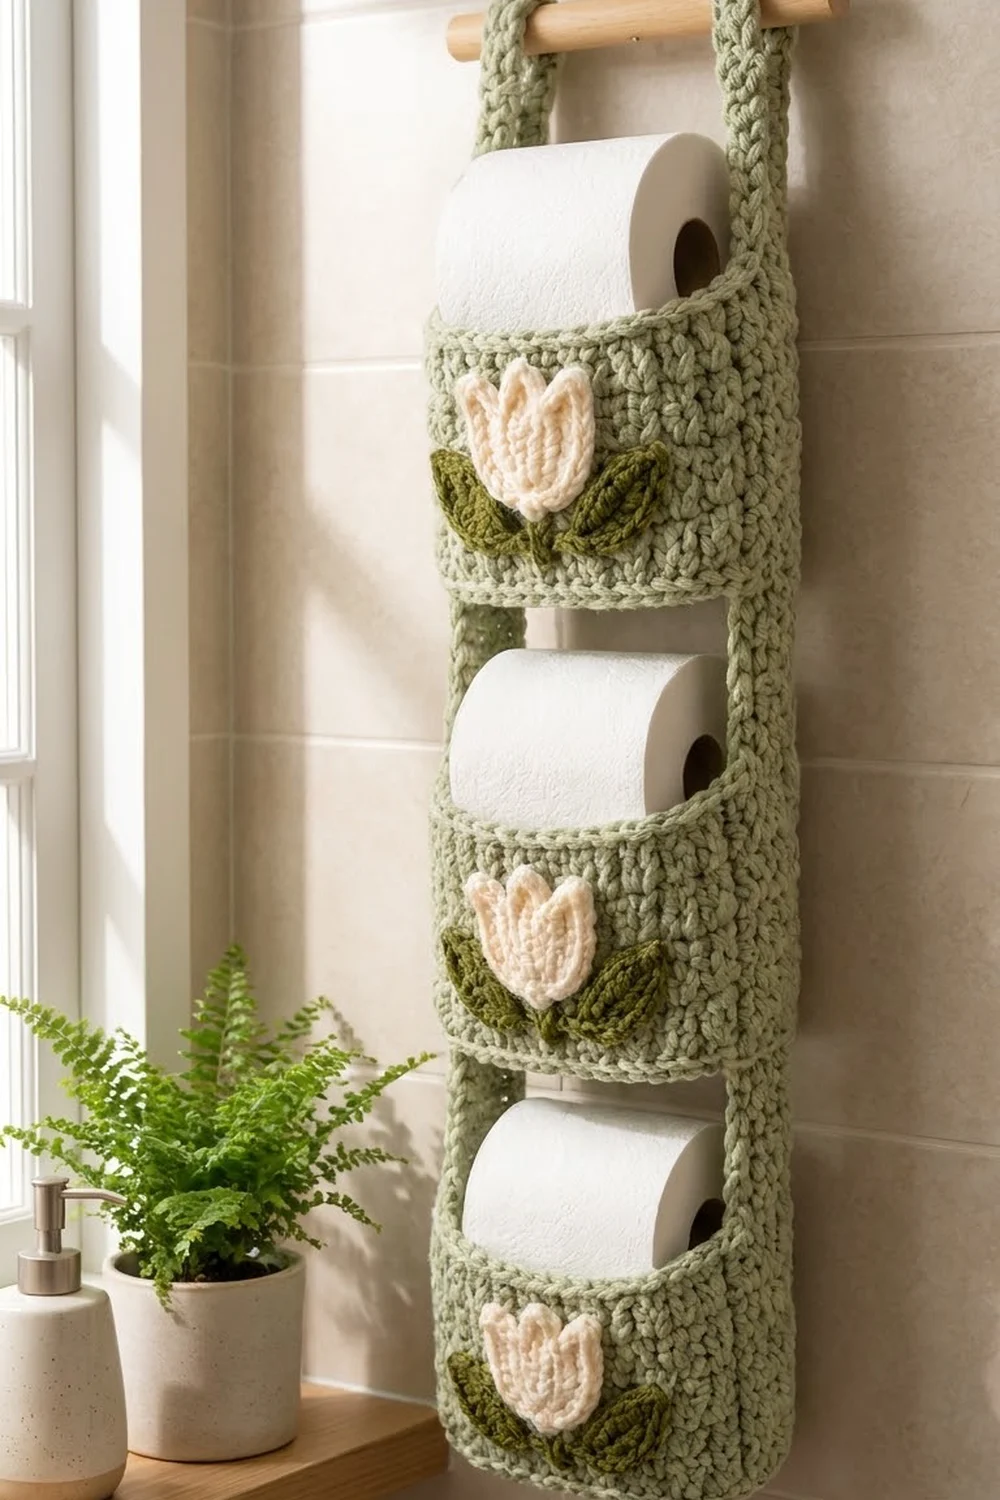
This hanging holder stores three rolls in a slim column on the wall. A sage-green back panel hangs from a wooden dowel, and three deep, rounded pockets hold the rolls upright. Each pocket front has a cream tulip with two olive leaves, so the piece looks like a small row of spring flowers.
The design uses three colors: soft sage for the structure, cream for the tulips, and olive for the leaves. Chunky yarn and dense half double crochet give it a cozy, knit-look texture that holds its shape when filled.
This pattern uses US crochet terms. The finished panel measures 7.2 in x 25.2 in (18.3 cm x 64.0 cm), plus 2.5 in (6.4 cm) hanging loops. Each pocket is about 5.1 in (13.0 cm) across and fits a standard roll up to 4.5 in (11.4 cm) wide.
Construction is simple. You work the back panel in rows, the pockets as round cups from the base up, and the tulips and leaves flat. Then you sew the pockets and appliqués on, add a border, and attach the straps.
Finished Size and Construction
- Finished size: 7.2 in x 25.2 in (18.3 cm x 64.0 cm), not counting loops
- Skill level: Easy to intermediate
- Terminology: US terms
- Yarn weight: Bulky (#5)
- Hooks: 6.0 mm for main pieces, 5.0 mm for appliqués
- Number of pieces: 15 (1 panel, 3 pockets, 2 straps, 3 tulips, 6 leaves)
- Layout: 3 pockets stacked in one vertical column
- Panel size before border: 6 in x 24 in (15.2 cm x 61.0 cm)
- Pocket size: 5.1 in (13.0 cm) across, 2.8 in (7.1 cm) tall
- Border depth: 0.6 in (1.5 cm) on each side
Materials
Choose a smooth bulky acrylic or cotton blend. Cotton blends hold their shape well in a bathroom. Avoid fuzzy or very stretchy yarn, because the pockets need to stay firm.
- Sage green: about 250 g / 325 m
- Cream: about 30 g / 39 m
- Olive green: about 20 g / 26 m
Quantities include a margin of about 10 percent for gauge swatches and sewing tails.
Tools:
– 6.0 mm and 5.0 mm crochet hooks
– Tapestry needle
– 4 to 6 stitch markers
– Straight pins or clips
– Wooden dowel, 12 in (30.5 cm) long and 0.75 in (1.9 cm) thick
– Twine or cord for hanging
– Measuring tape
Abbreviations (US Terms)
- ch chain
- sl st slip stitch
- sc single crochet
- hdc half double crochet
- dc double crochet
- tr treble crochet
- BLO back loop only
- st(s) stitch(es)
- MR magic ring
Picot: ch 2, sl st in 2nd ch from hook. It makes sharp petal and leaf tips. A picot does not count as a stitch.
Gauge and Checkpoints
With a 6.0 mm hook:
– hdc: 12 sts x 9 rows = 4 in (10.2 cm)
– sc: 12 sts x 13 rounds = 4 in (10.2 cm)
With a 5.0 mm hook (appliqués): 14 sc = 4 in (10.2 cm).
Make one pocket first. It is the best test piece because it uses both gauges and has to fit a roll.
Checkpoints:
– Pocket base after Round 8: 5 in (12.7 cm) across, lying flat
– Pocket wall: 2.8 in (7.1 cm) tall
– Back panel after Row 9: 4 in (10.2 cm) tall, 6 in (15.2 cm) wide
– Back panel after Row 54: 24 in (61.0 cm) tall
If your pieces are too big, go down a hook size. If they are too small, go up a hook size. Check again before you continue.
Back Panel (make 1)
With sage and the 6.0 mm hook.
Foundation: Ch 20.
Row 1: Hdc in 3rd ch from hook and in each ch across. (18 hdc) The skipped chains do not count as a stitch.
Rows 2–54: Ch 1 (does not count), turn, hdc in each st across. (18 hdc)
Fasten off. The panel should measure 6 in x 24 in (15.2 cm x 61.0 cm).
Mark the tops of Rows 9, 26, and 43 with stitch markers on both edges. These rows set the pocket rims at 4.0 in (10.2 cm), 11.6 in (29.5 cm), and 19.1 in (48.5 cm) from the bottom edge. The pockets are 17 rows, or 7.6 in (19.3 cm), apart.
Pocket (make 3)
With sage and the 6.0 mm hook. Work in joined rounds. Do not turn.
Base
Round 1: MR, ch 1, 6 sc in ring, sl st to first sc. (6)
Round 2: Ch 1, 2 sc in each st around, join. (12)
Round 3: Ch 1, [sc in next st, 2 sc in next st] 6 times, join. (18)
Round 4: Ch 1, [sc in next 2 sts, 2 sc in next st] 6 times, join. (24)
Round 5: Ch 1, [sc in next 3 sts, 2 sc in next st] 6 times, join. (30)
Round 6: Ch 1, [sc in next 4 sts, 2 sc in next st] 6 times, join. (36)
Round 7: Ch 1, [sc in next 5 sts, 2 sc in next st] 6 times, join. (42)
Round 8: Ch 1, [sc in next 6 sts, 2 sc in next st] 6 times, join. (48)
Checkpoint: the base is 5 in (12.7 cm) across.
Walls
Round 9: Ch 1, sc BLO in each st around, join. (48) This ridge turns the edge of the base up into a wall.
Rounds 10–14: Ch 2 (does not count), hdc in each st around, join. (48)
Round 15: Ch 1, sc in each st around, join. (48) This is the firm rim.
Fasten off, leaving a 30 in (76.2 cm) tail for sewing.
The wall is 2.8 in (7.1 cm) tall and the circumference is 16 in (40.6 cm). A standard roll stands upright inside and rises about 1.25 in (3.2 cm) above the rim.
Hanging Strap (make 2)
With sage and the 6.0 mm hook.
Foundation: Ch 5.
Row 1: Sc in 2nd ch from hook and next 3 ch. (4)
Rows 2–26: Ch 1, turn, sc in each st across. (4)
Fasten off, leaving a long tail. Each strap is 1.3 in (3.3 cm) wide and 8 in (20.3 cm) long.
Tulip (make 3)
With cream and the 5.0 mm hook. Work in rows.
Row 1: Ch 4, sc in 2nd ch from hook and next 2 ch. (3)
Row 2: Ch 1, turn, 2 sc in first st, sc in next st, 2 sc in last st. (5)
Row 3: Ch 1, turn, 2 sc in first st, sc in next 3 sts, 2 sc in last st. (7)
Row 4: Ch 1, turn, sc in each st across. (7)
Row 5 (petals): Ch 1, turn.
– Left petal: (hdc, dc, picot, dc) in st 1.
– Sl st in st 2. This forms the first V.
– Center petal: dc in st 3, (tr, picot, tr) in st 4, dc in st 5.
– Sl st in st 6. This forms the second V.
– Right petal: (dc, picot, dc, hdc) in st 7.
Row 5 total: 12 sts plus 3 picots. The center petal sits highest because it uses tr, which gives the tulip its three-point outline.
Fasten off, leaving a tail. The tulip is about 2 in (5.1 cm) wide and 2 in (5.1 cm) tall.
Leaf (make 6)
With olive and the 5.0 mm hook.
Foundation: Ch 8.
Round 1: Sl st in 2nd ch from hook, sc in next ch, hdc in next ch, dc in next 2 ch, hdc in next ch, (sc, picot, sc) in last ch. Rotate and work along the other side of the chain: hdc in next ch, dc in next 2 ch, hdc in next ch, sc in next ch, sl st in last ch. (14 sts plus 1 picot)
Fasten off, leaving a tail. Each leaf is about 2 in (5.1 cm) long and 0.8 in (2.0 cm) wide.
Make All Pieces
Sage: 1 back panel, 3 pockets, 2 straps
Cream: 3 tulips
Olive: 6 leaves
Layout (front view, top to bottom):
   [Strap]                 [Strap]
+-----------------------------------+
|  Rows 44–54: open space            |
|  Pocket 3: rim at Row 43           |
|     [leaf] [TULIP] [leaf]          |
|  Pocket 2: rim at Row 26           |
|     [leaf] [TULIP] [leaf]          |
|  Pocket 1: rim at Row 9            |
|     [leaf] [TULIP] [leaf]          |
|  Rows 1–2: below Pocket 1          |
+-----------------------------------+
Joining
Step 1: Appliqués on the pockets. Sew the appliqués on before you attach the pockets, while the inside is still easy to reach. Choose the front of a pocket, opposite the joining seam. Pin two leaves so their wide ends meet at the center, about 0.5 in (1.3 cm) above the Round 9 ridge, with the tips angling out and up. Pin the tulip on top so its base covers the spot where the leaves meet. Whipstitch around each outline with matching yarn through the outer loops only. Repeat on all 3 pockets.
Step 2: Pockets on the panel. Flatten each pocket so the tulip is centered at the front. The back third of the rim is 16 sts. The front 32 sts curve forward around the roll.
Stitch-to-stitch logic: the panel is 18 sts wide. Leave 1 st free at each edge, then match pocket rim sts 1–16 to panel sts 2–17 along the marked row. At gauge, 16 sts measure 5.3 in (13.5 cm) on both pieces, so the back of the pocket lies flat with no puckering.
Whipstitch the 16 rim sts to the panel. Then sew straight down the wall at each end of that 16-st section, through the row ends, to the base. Finish by sewing the back edge of the base to the panel. The pocket bases sit about 1.2 in (3.0 cm), 8.8 in (22.4 cm), and 16.3 in (41.4 cm) from the bottom edge.
Tension: Keep your sewing firm but not tight. If the panel ripples behind a pocket, take the stitches out and space them more evenly.
Checkpoint: The panel still lies flat and measures 6 in (15.2 cm) wide behind every pocket.
Border
With sage and the 6.0 mm hook. Border gauge is the sc gauge: 12 sts = 4 in (10.2 cm) along each edge.
Each side count includes that side’s 2 corner stitches (the center sc of each 3-sc corner).
Round 1: Join at the top right corner. Ch 1, 3 sc in first st, sc in next 16 sts, 3 sc in last st. Down the side, work 72 sc evenly into the row ends (4 sc for every 3 rows). Along the foundation chain, 3 sc in first st, sc in next 16 sts, 3 sc in last st. Up the other side, work 72 sc evenly. Join.
- Top and bottom: 20 sts each
- Long sides: 76 sts each
- Total: 188 sts
Round 2: Ch 1, sc in each st around, with 3 sc in each corner st. Join.
- Top and bottom: 22 sts each
- Long sides: 78 sts each
- Total: 196 sts
Fasten off.
Why the math works: 18 sts at 12 sts per 4 in gives 6 in (15.2 cm). 54 rows at 9 rows per 4 in gives 24 in (61.0 cm). 72 sc at 12 sts per 4 in also gives 24 in, so the sides lie flat. Each border round adds 2 sts per side, and those extra sts turn the corners. Two rounds add 0.6 in (1.5 cm) to each edge, for a finished size of 7.2 in x 25.2 in (18.3 cm x 64.0 cm).
Straps: Fold each strap in half over the dowel. Slip a top corner of the panel between the strap ends so one end is on the front and one is on the back. Each end should overlap the panel by 1.5 in (3.8 cm). Line the outer strap edge up with the panel edge and sew through all layers. This leaves a 2.5 in (6.4 cm) loop above the panel.
Final Blocking
- Remove the dowel and rolls.
- Lay the holder face down on a towel and pin the panel to 7.2 in x 25.2 in (18.3 cm x 64.0 cm).
- For acrylic, steam lightly from above without pressing. For cotton, mist with water until damp.
- Stuff each pocket with a rolled towel about 5 in (12.7 cm) wide so it dries round.
- Shape each tulip and leaf with your fingers so the tips are pointed.
- Let it dry completely, then insert the dowel and tie the twine to each end.
Final Quality-Control Checklist
- Panel measures 7.2 in x 25.2 in (18.3 cm x 64.0 cm)
- Border has 196 sts, and all corners lie flat
- Pockets are 7.6 in (19.3 cm) apart and centered
- Each pocket holds a roll upright with about 1.25 in (3.2 cm) showing
- Tulips have three sharp points and cover the spot where the leaves meet
- Straps are even, and the holder hangs straight
- All tails are woven in securely
Troubleshooting
- Pocket too tight for the roll: Go up a hook size, remake the pocket, and recheck the 5 in (12.7 cm) base.
- Base curls up like a bowl: Your tension is too tight. Go up a hook size for the base.
- Panel sags under the weight: Use a smaller hook or a cotton blend, and check that each pocket base is sewn down.
- Wavy border sides: There are too many sc. Rework with exactly 72 per side.
- Tulip points are soft: Pull the picot sl st snug and block the tips.
- Holder hangs crooked: Check that the strap ends overlap equally.
Care
Hand wash in cool water, press out the water in a towel, and lay flat to dry with the pockets stuffed. Do not tumble dry.
Final Notes
The measurement chain is simple. Gauge sets the panel at 6 in x 24 in (15.2 cm x 61.0 cm). Each 48-st pocket fits a roll, and its 16 back rim sts match 16 panel sts. Two border rounds bring the panel to 7.2 in x 25.2 in (18.3 cm x 64.0 cm), and the straps add 2.5 in (6.4 cm) loops. If you check each step, the finished holder will hang straight and stay neat.
Happy crocheting!