

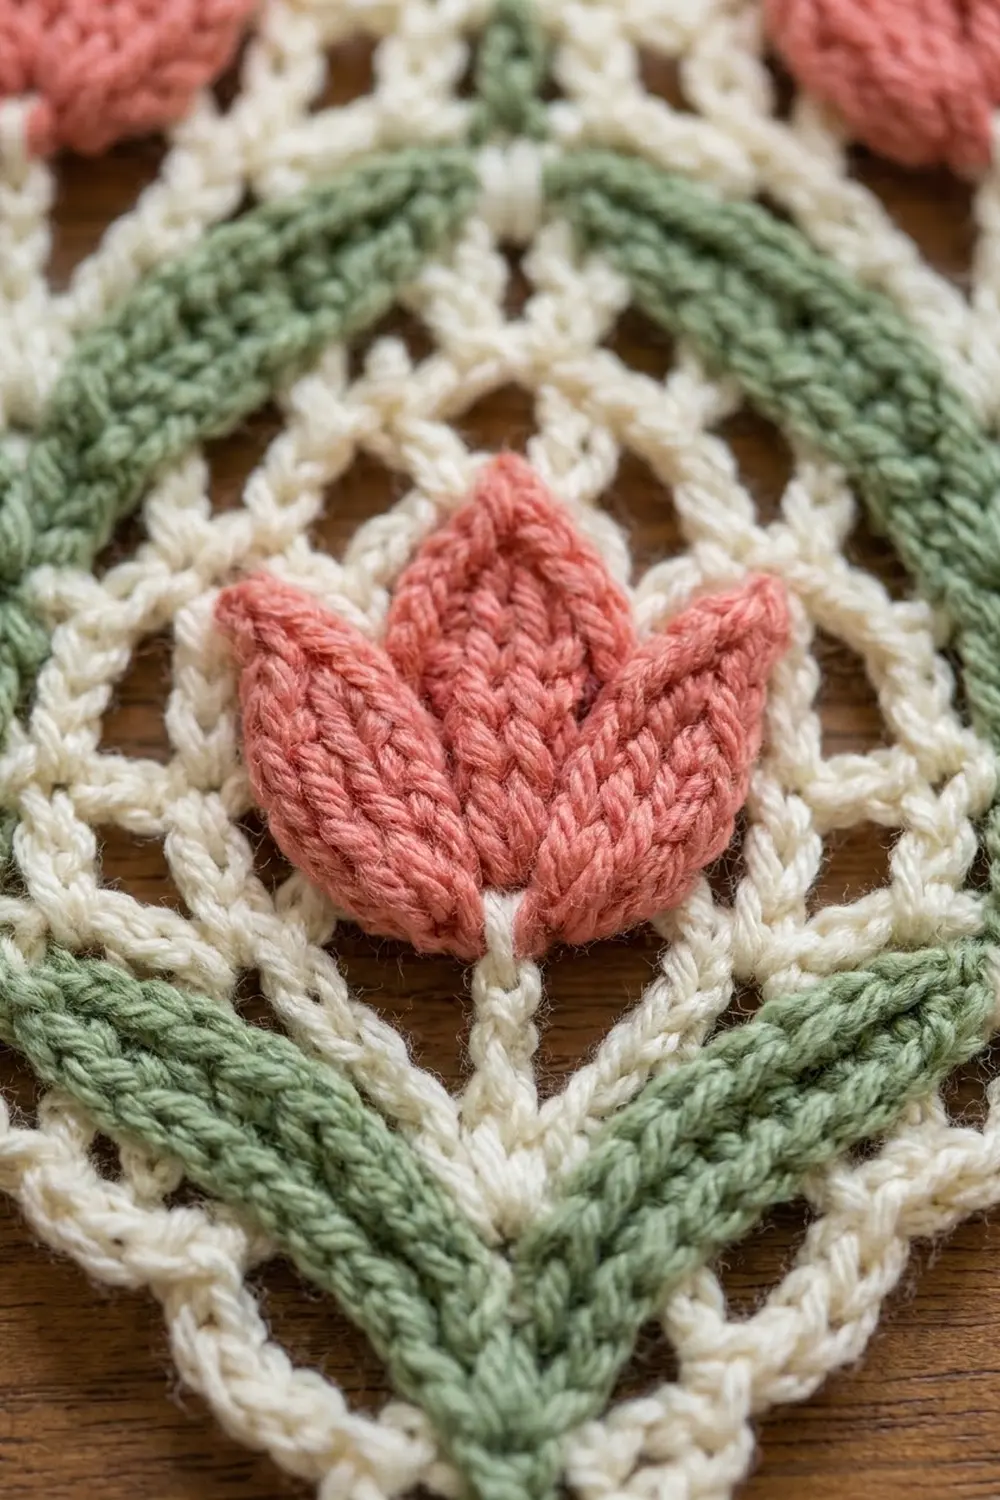
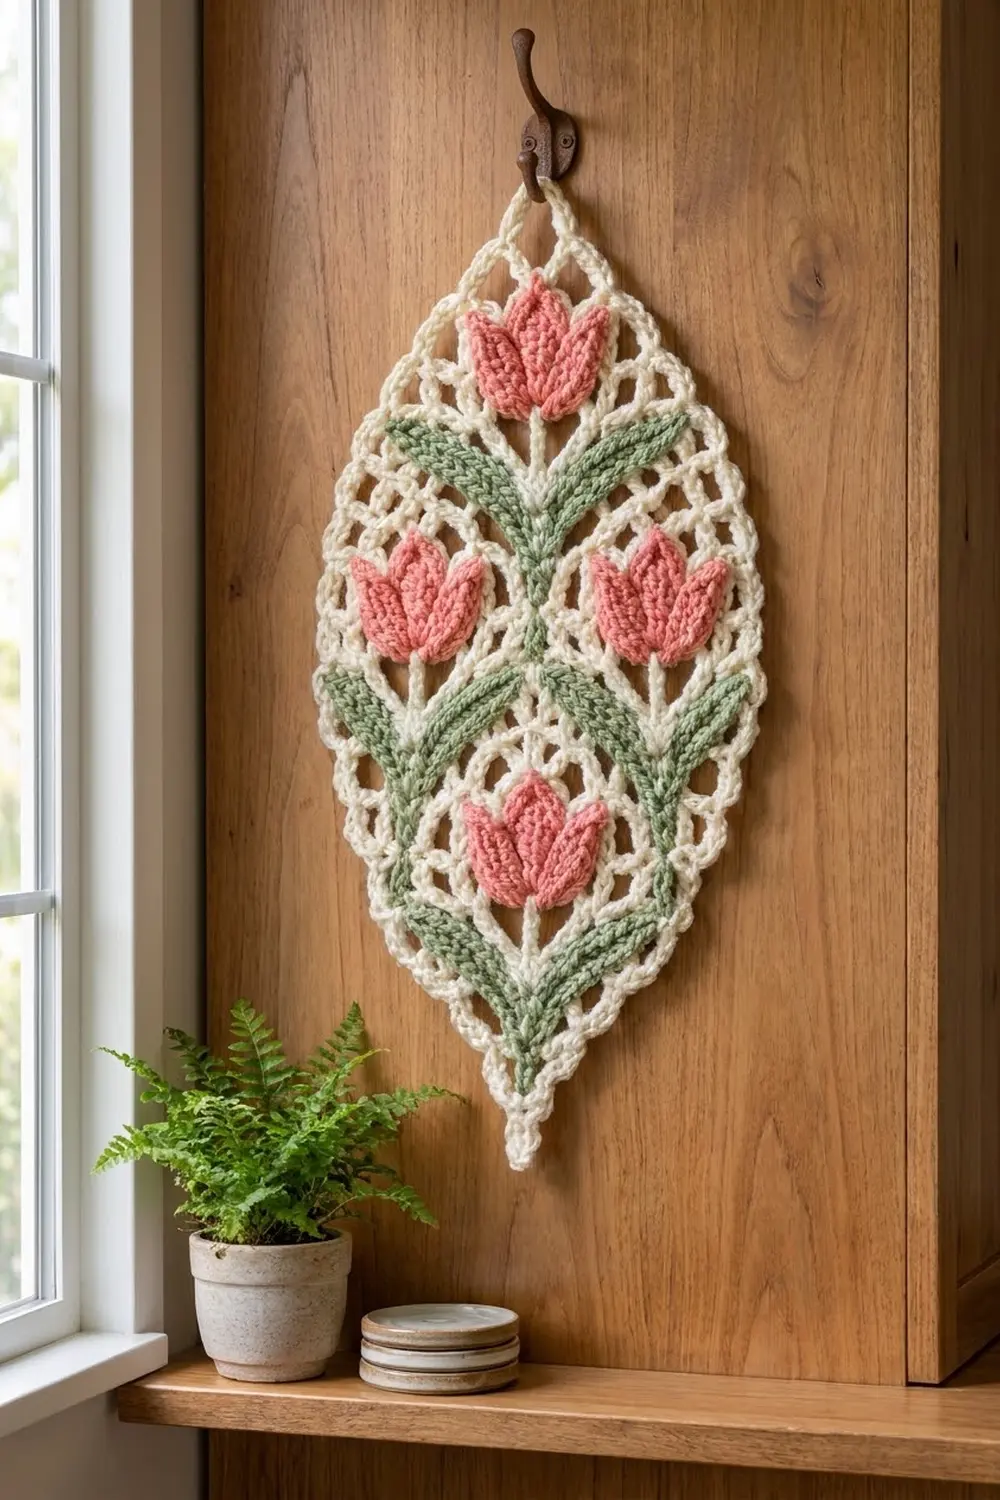
The Tulip Lattice Leaf Panel is a pointed oval of cream mesh with four raised tulips sewn on top. Coral-pink tulip heads sit on short cream stems, and sage-green leaves angle upward to form soft V shapes between the rows of tulips. A small chain loop at the top point finishes the outline.
The colors are cream, coral pink and sage green, which gives the panel a fresh, cottage-garden look. Behind the solid tulips and leaves you can still see the open mesh, so the panel stays light.
This pattern uses US crochet terms. The finished panel measures 6 in (15.2 cm) wide and 12 in (30.5 cm) long, not counting the hanging loop.
Here is how it’s made. You crochet the cream mesh body in filet rows from the bottom point to the top point, increasing and then decreasing at the edges. Then you make four tulips, eight leaves and four stems as separate small pieces and sew them onto the mesh. Two rounds of border smooth the stepped edges into a clean oval.
Finished Size and Construction
- Finished size: 6 in × 12 in (15.2 cm × 30.5 cm)
- Skill level: Intermediate
- Terminology: US crochet terms
- Yarn weight: Worsted (#4)
- Hook: 5 mm (H-8)
- Number of pieces: 1 panel, made of one mesh body plus 16 small appliqué pieces sewn on
- Layout: Single pointed oval with 4 tulips arranged 1–2–1 from top to bottom
- Body size before border: 5 in × 11 in (12.7 cm × 27.9 cm)
- Border depth: 0.5 in (1.3 cm) on every edge
Materials
Yarn: Use a smooth worsted-weight cotton or cotton blend. Cotton shows off the mesh clearly and holds the petal points well. Acrylic also works, but it will block a little softer.
- Cream: 35 g, about 60 m (body, stems, border)
- Coral pink: 8 g, about 14 m (tulips)
- Sage green: 10 g, about 17 m (leaves)
These amounts include a margin of about 25% for gauge swatches and sewing tails.
Tools:
– 5 mm (H-8) crochet hook
– Tapestry needle
– 4 locking stitch markers
– Rustproof pins
– Measuring tape
– Blocking mat and spray bottle
Abbreviations (US Terms)
- ch – chain
- sl st – slip stitch
- sc – single crochet
- hdc – half double crochet
- dc – double crochet
- sk – skip
- sp – space
- st(s) – stitch(es)
Special stitch – Filet square: One square is one dc plus the ch-1 space beside it, sitting over 1 skipped stitch. A row of n squares has n + 1 dc and n ch-1 spaces.
Special note – Turning chain: In the body, “ch 4” at the start of a row counts as 1 dc plus 1 ch-1 space. Its 3rd chain is the top of that dc.
Gauge and Checkpoints
Filet gauge: 4 squares and 4 rows = 2 in × 2 in (5.1 cm × 5.1 cm), so each square is 0.5 in (1.3 cm) wide and each row is 0.5 in (1.3 cm) tall.
Sc gauge (appliqués and border): 16 sc and 18 rows = 4 in (10.2 cm).
Make the tulip first as your test piece. It should measure about 1.75 in (4.4 cm) across Row 4. Then check the body at each stage:
- After Row 8: 8 squares = 4 in (10.2 cm) wide; height 4 in (10.2 cm)
- After Row 14: 10 squares = 5 in (12.7 cm) wide; height 7 in (17.8 cm)
- After Row 22: height 11 in (27.9 cm)
- After the border: 6 in × 12 in (15.2 cm × 30.5 cm)
If your squares come out too big, go down 0.5 mm in hook size. If they’re too small, go up 0.5 mm. If only the rows are too tall, pull up less in each dc instead of changing hooks.
Body (Cream Mesh)
The rows alternate: a shaping row, then a straight row. That gives an even slant on both edges.
Even row (n squares): Ch 4, turn, sk first sp, dc in next dc. Ch 1, sk next sp, dc in next dc; repeat from * across, working the last dc in the 3rd ch of the turning chain. (n squares)
Increase row: Ch 4, turn, dc in the first dc (the stitch at the base of the ch-4) to add 1 square. Ch 1, sk next sp, dc in next dc; repeat from * across, working the last dc in the 3rd ch of the turning chain. Ch 1, dc again in the same turning chain to add 1 square. (n + 2 squares)
Decrease row: Turn. Sl st in the first ch-1 sp and in the next dc. Ch 4, sk next sp, dc in next dc. Ch 1, sk next sp, dc in next dc; repeat from * until 1 square remains. Leave that last square unworked. (n − 2 squares)
Row 1: With cream, ch 8. Dc in the 6th ch from the hook (the skipped chains count as dc + ch-1), ch 1, sk next ch, dc in the last ch. (2 squares; 3 dc)
Row 2: Even row. (2 squares; 3 dc)
Row 3: Increase row. (4 squares; 5 dc)
Row 4: Even row. (4 squares; 5 dc)
Row 5: Increase row. (6 squares; 7 dc)
Row 6: Even row. (6 squares; 7 dc)
Row 7: Increase row. (8 squares; 9 dc)
Row 8: Even row. (8 squares; 9 dc)
Checkpoint: 4 in (10.2 cm) wide and 4 in (10.2 cm) tall.
Row 9: Increase row. (10 squares; 11 dc)
Rows 10–14: Even row. (10 squares; 11 dc in each row)
Checkpoint: 5 in (12.7 cm) wide and 7 in (17.8 cm) tall.
Row 15: Decrease row. (8 squares; 9 dc)
Row 16: Even row. (8 squares; 9 dc)
Row 17: Decrease row. (6 squares; 7 dc)
Row 18: Even row. (6 squares; 7 dc)
Row 19: Decrease row. (4 squares; 5 dc)
Row 20: Even row. (4 squares; 5 dc)
Row 21: Decrease row. (2 squares; 3 dc)
Row 22: Even row. (2 squares; 3 dc)
Fasten off and weave in the ends. The body is now 5 in × 11 in (12.7 cm × 27.9 cm), and the bottom half mirrors the top half exactly.
Tulips (Coral Pink, Make 4)
Row 1: Ch 6. Sc in the 2nd ch from the hook and in each ch across. (5 sc)
Row 2: Ch 1, turn, 2 sc in the first st, sc in the next 3 sts, 2 sc in the last st. (7 sc)
Row 3: Ch 1, turn, sc in each st across. (7 sc)
Row 4: Ch 1, turn, sc in each st across. (7 sc)
Row 5 (petals): Ch 1, turn, sl st in the 1st st.
– Side petal: Ch 4, sl st in the 2nd ch from the hook, sc in the next ch, hdc in the next ch. Sk the 2nd st, sl st in the 3rd st.
– Center petal: Ch 5, sl st in the 2nd ch from the hook, sc in the next ch, hdc in the next ch, dc in the next ch. Sk the 4th st, sl st in the 5th st.
– Side petal: Ch 4, sl st in the 2nd ch from the hook, sc in the next ch, hdc in the next ch. Sk the 6th st, sl st in the 7th st.
(3 petals, with the center one tallest.) Fasten off, leaving a 12 in (30.5 cm) tail for sewing.
Each tulip measures about 1.75 in × 1.75 in (4.4 cm × 4.4 cm). The skipped stitches between the petals make the small V-shaped notches.
Leaves (Sage Green, Make 8)
Ch 9.
- Side 1: Sl st in the 2nd ch from the hook, then sc, hdc, dc, dc, hdc and sc in the next 6 chs. (7 sts)
- Tip: Work (sc, ch 2, sc) in the last ch.
- Side 2: Working along the other side of the foundation chain, work sc, hdc, dc, dc, hdc and sc in the next 6 chs, then sl st in the same ch as the first sl st. (7 sts)
(16 sts plus 1 ch-2 tip.) Fasten off, leaving a 10 in (25.4 cm) tail.
Each leaf is about 2 in (5.1 cm) long and 0.75 in (1.9 cm) wide. Because you work both sides of one foundation chain, a raised ridge forms down the middle like a leaf vein.
Stems (Cream, Make 4)
Ch 7. Sl st in the 2nd ch from the hook and in each ch across. (6 sl sts)
Fasten off, leaving an 8 in (20.3 cm) tail. Each stem is about 1.5 in (3.8 cm) long.
Appliqué Placement and Sewing
Lay the body flat, right side up, with the bottom point toward you. Every row of the body is 0.5 in (1.3 cm) tall, so you can use the rows as a placement grid.
- Bottom tier: Pin one stem on the center line over Rows 4–6. Pin a tulip with its Row 1 edge on top of Row 6, at 3 in (7.6 cm) up. Its head then covers Rows 7–10.
- Middle tier: Pin two stems over Rows 10–12, each 1 in (2.5 cm) to the left or right of the center line. Pin a tulip on top of each stem, with its base at the top of Row 12, 6 in (15.2 cm) up.
- Top tier: Pin one stem on the center line over Rows 15–17, so it passes between the two middle tulips. Pin the last tulip with its base at the top of Row 17, 8.5 in (21.6 cm) up.
- Leaves: At the lower end of each stem, pin one leaf on each side. Point the tips upward and outward, about 30 degrees from vertical.
- The inner leaves of the two middle stems meet above the bottom tulip and form a V.
- The outer leaves angle toward the side edges.
- Keep every leaf tip at least 0.25 in (0.6 cm) inside the edge of the mesh.
- Sew stems first: Sew each stem with small running stitches through the mesh, then slip the tulip’s base slightly over the top of the stem.
- Sew tulips and leaves: Whipstitch around each tulip and leaf through the outer loops only. This keeps the pieces raised and textured. Take extra stitches at each petal tip and leaf tip so the points stay sharp.
Weave all the tails in on the back through solid stitches, not across the open mesh.
Border (Cream)
Border gauge: Work 2 sc into each dc row-end. Each row is 0.5 in (1.3 cm) tall, so that gives 4 sc per inch, which matches the 16 sc = 4 in (10.2 cm) sc gauge. On the slanted edges this runs slightly snug, which pulls the stepped rows into a smooth curve.
The panel has two long side edges, plus the narrow bottom and top ends. Row 1 has 5 base positions across the bottom (3 dc bases and 2 ch-sp bases). Row 22 has 5 top positions (3 dc and 2 ch-1 sps).
Round 1: Join cream at the bottom, in the center base position.
– Bottom point: 3 sc in the center base position (mark the middle sc as the bottom point). Sc in the next 2 base positions.
– Side 1: 2 sc in each row-end up the side. (44 sc)
– Top: Sc in the first 2 top positions. 3 sc in the center dc (mark the middle sc as the top point). Sc in the last 2 top positions.
– Side 2: 2 sc in each row-end down the other side. (44 sc)
– Finish: Sc in the remaining 2 base positions. Join with a sl st to the first sc.
(102 sc total.) Per section, that is:
– Bottom end: 3 + 2 + 2 = 7 sc
– Each long side: 44 sc
– Top end: 2 + 3 + 2 = 7 sc
– Total: 7 + 44 + 7 + 44 = 102 sc
Why the math works: The bottom point sc and the top point sc are each 51 stitches away from each other in either direction. 102 is even, so the loops in Round 2 sit symmetrically on both sides.
Round 2: Sl st into the bottom-point sc. Ch 1, sc in the same st.
– Ch 3, sk 1 sc, sc in the next sc; repeat from * up the side until you have worked the sc just before the top-point sc. (25 ch-3 loops)
– Ch 6, sk the top-point sc, sc in the next sc. This is the hanging loop.
– Ch 3, sk 1 sc, sc in the next sc; repeat from ** down the other side. (24 ch-3 loops)
– Ch 3, sk the last sc, join with a sl st to the first sc. (1 ch-3 loop)
(51 sc and 51 loops: 50 ch-3 loops plus 1 ch-6 loop.) The loop count works out because 102 sc ÷ 2 = 51 loops. A single sc sits at the bottom point, and the ch-6 loop is centered over the top point.
Fasten off. The border adds 0.5 in (1.3 cm) all around, so the panel is now 6 in × 12 in (15.2 cm × 30.5 cm).
Final Blocking
- Spray the panel until it’s evenly damp. Don’t soak it, or the tulips may lose their texture.
- Lay it face up on the blocking mat.
- Pin the bottom point and the base of the top loop exactly 12 in (30.5 cm) apart.
- Pin the widest part, at Rows 10–14, to 6 in (15.2 cm).
- Pin each ch-3 loop outward into a small arch, working from the middle toward the points so both curves match.
- Pinch the petal tips and leaf tips into points with your fingers. Don’t pin through the appliqués.
- Let it dry completely, then unpin.
Final Quality-Control Checklist
- The body has 22 rows, with 10 squares across Rows 9–14.
- The top half mirrors the bottom half: 2-2-4-4-6-6-8-8 squares.
- Each tulip has 3 petals, and the center petal is the tallest.
- There are 4 tulips, 8 leaves and 4 stems, laid out 1–2–1.
- Round 1 has 102 sc: 44 on each side and 7 at each end.
- Round 2 has 50 ch-3 loops and 1 ch-6 loop.
- The panel measures 6 in × 12 in (15.2 cm × 30.5 cm).
- No sewing shows through the open mesh on the front.
Troubleshooting
- The body is lopsided: You probably skipped an increase or decrease on one side. Count the squares in each row against the list above.
- The edges ruffle: Work 3 sc over every 2 row-ends instead of 2 sc per row-end, and keep the total even.
- The edges cup inward: Use a hook 0.5 mm larger for Round 1 only.
- The petals curl: Steam them lightly and finger-press them flat.
- The tulips look flat: Sew through the outer loops only, and don’t pull the sewing stitches tight.
- The mesh squares look slanted: Make sure every dc goes into a dc, not into a chain.
Care
Hand wash in cool water, press out the water in a towel, and dry flat to the blocked shape. Don’t wring the panel or hang it while it’s wet.
Final Notes
Here is how the measurements build on each other:
– Each square is 0.5 in (1.3 cm), so 10 squares give a body 5 in (12.7 cm) wide.
– Each row is 0.5 in (1.3 cm), so 22 rows give a body 11 in (27.9 cm) long.
– Round 1 picks up 2 sc per row-end for 102 sc. Round 2 turns those into 51 even loops.
– The 0.5 in (1.3 cm) border brings the panel to 6 in × 12 in (15.2 cm × 30.5 cm).
Check your gauge at each checkpoint and the tulips will line up in the right places. Happy crocheting!