

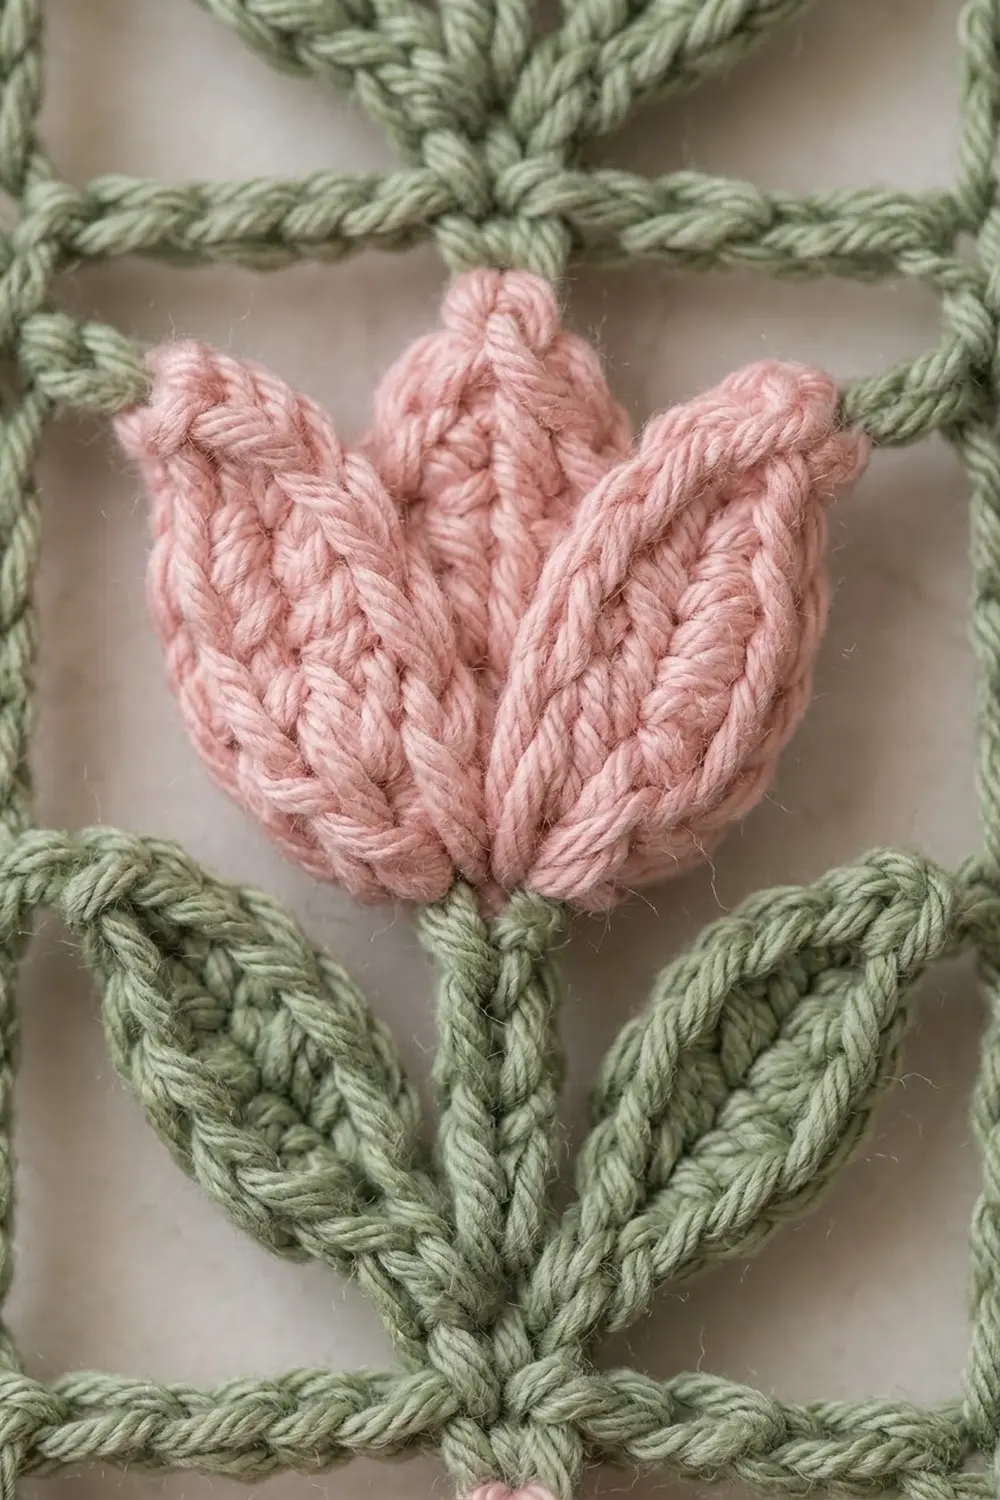
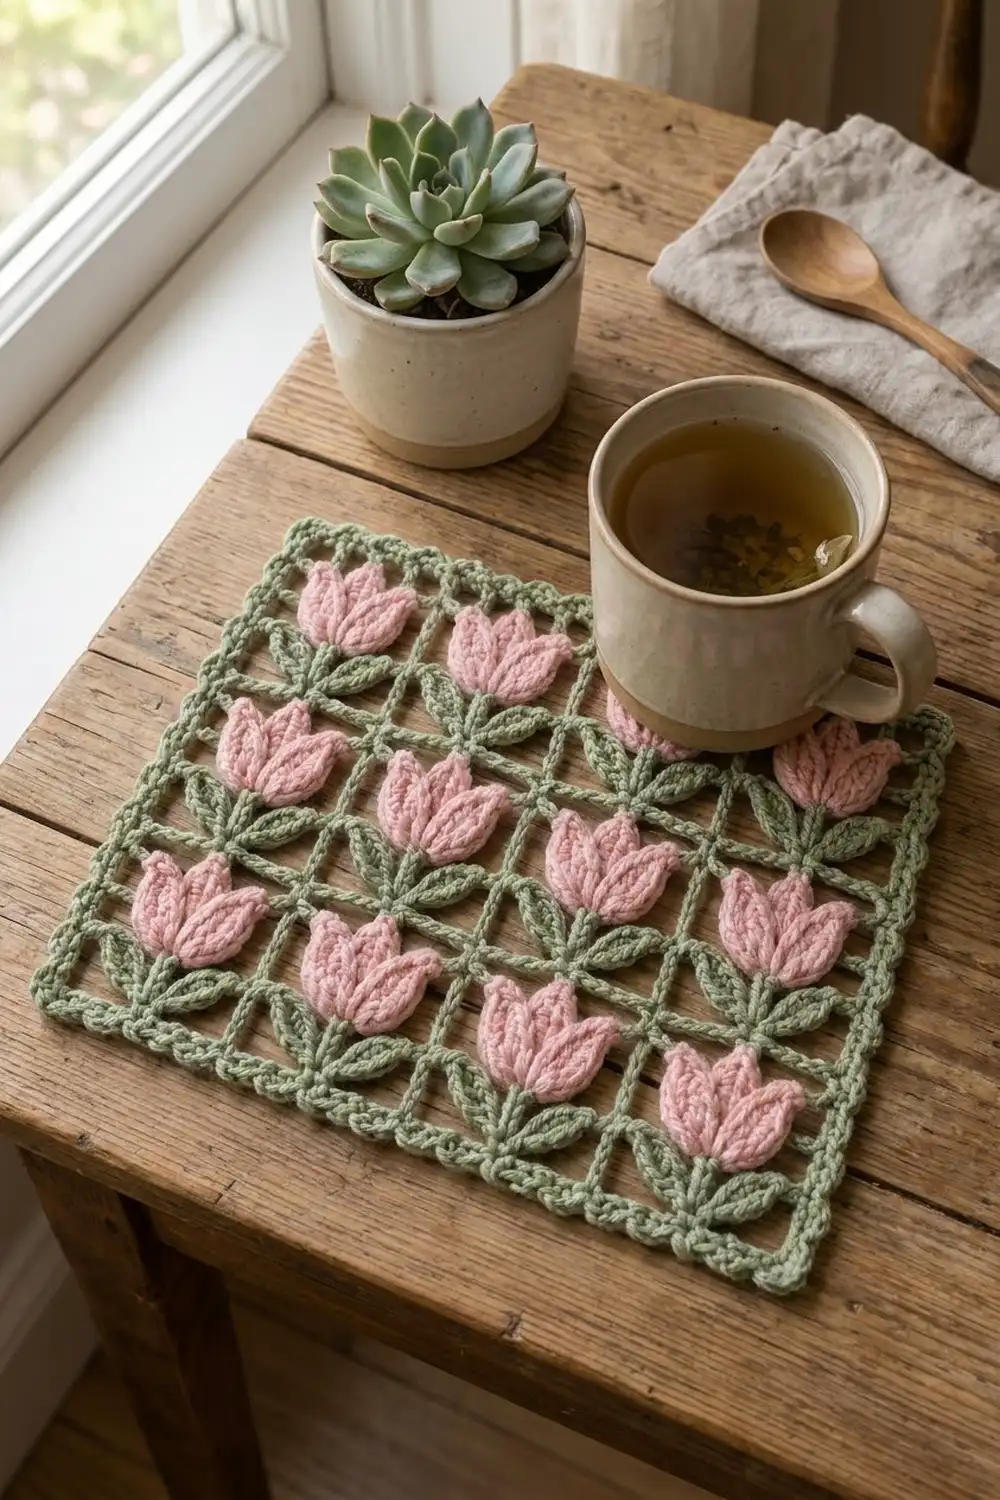
The Tulip Trellis Mesh Panel is an open sage green grid with a soft pink tulip in every other cell. Each tulip has a three-petal bloom, a straight stem and two pointed leaves. The overall look is a tiny garden trellis: neat lines, airy cells and flowers growing in tidy rows.
The panel uses just two colors. Sage green makes the grid, stems, leaves and border, and dusty pink makes the petals. Because the grid is so open, the tulips stand out clearly against whatever is underneath, whether that’s a wooden table, a linen runner or a window.
The finished panel measures 9.25 x 8.75 in (23.5 x 22.2 cm). It works well as a placemat, small table mat, tray liner or framed wall piece. All terms are US crochet terms.
Construction is simple. You crochet the green mesh flat in rows, alternating solid single crochet bars with tall treble posts. Then you make 12 small tulip appliqués, sew them onto the grid and finish with a three-round corded border.
Finished Size and Construction
- Finished size: 9.25 x 8.75 in (23.5 x 22.2 cm)
- Skill level: Easy-intermediate
- Terminology: US crochet terms
- Yarn weight: DK (#3 light), cotton or cotton blend
- Hook: 4.0 mm (G-6)
- Number of pieces: 1 mesh panel plus 12 sewn-on tulip appliqués
- Layout: 4 columns x 6 rows of open cells; 4 x 3 tulips, each one filling 2 stacked cells
- Cell size (center to center): 2 in (5.1 cm) wide x 1.25 in (3.2 cm) tall
- Size before border: 8.25 x 7.75 in (21.0 x 19.7 cm)
- Border depth: 0.5 in (1.3 cm) on each side
Materials
Use a smooth, mercerized DK cotton. It gives clear stitch definition, so the petal shaping stays crisp and the mesh bars stay straight. Fuzzy or very soft yarns blur the grid and make the cells sag.
- Sage green: 50 g, approx. 115 m (mesh, stems, leaves, border)
- Dusty pink: 30 g, approx. 70 m (36 petals)
Tools:
- 4.0 mm (G-6) crochet hook
- Tapestry needle
- Scissors
- Stitch markers
- Rust-proof pins and a blocking mat
- Ruler or measuring tape
- Spray bottle
These quantities include a margin of about 20% for your gauge swatch, sewing tails and weaving in ends.
Abbreviations (US Terms)
- ch – chain
- sl st – slip stitch
- sc – single crochet
- hdc – half double crochet
- dc – double crochet
- tr – treble crochet
- sk – skip
- sp – space
- st(s) – stitch(es)
- RS – right side
- rev sc – reverse single crochet (crab stitch)
Special stitch: reverse single crochet (rev sc). Work from left to right if you crochet right-handed. Insert the hook into the next stitch to the right, yarn over, pull up a loop, then yarn over and draw through both loops. This makes the rounded, corded edge.
Gauge and Checkpoints
Mesh gauge: 4 sts = 1 in (2.5 cm) across. One tr row is 1 in (2.5 cm) tall, and one sc bar row is 0.25 in (0.6 cm) tall.
Make a test first. Work Rows 1–3 of the mesh and one petal before you commit to the full panel.
- After Row 3: 8.25 in (21.0 cm) wide x 1.5 in (3.8 cm) tall
- One petal: about 1.25 in (3.2 cm) long x 0.75 in (1.9 cm) wide
- After Row 7: 4 in (10.2 cm) tall
- After Row 13: 8.25 x 7.75 in (21.0 x 19.7 cm)
- After the border: 9.25 x 8.75 in (23.5 x 22.2 cm)
Too big? Go down to a 3.5 mm hook. Too small? Go up to a 4.5 mm hook. If only the height is off, change how you work the tr posts: pull the first loop up higher for taller posts, or keep it snug for shorter ones. Never change the stitch counts to fix size, because the border math depends on them.
Mesh Panel
Use sage green. You work the panel in rows. Odd rows are solid sc bars, and even rows are tr posts with ch-7 spaces between them.
Foundation: Ch 34.
Row 1 (bar): Sc in 2nd ch from hook and in each ch across, turn. (33 sc)
Row 2 (posts): Ch 4 (counts as tr), sk first sc, ch 7, sk next 7 sc, tr in next sc; repeat from * 3 more times, turn. (5 tr + 4 ch-7 sps = 33 sts)*
Row 3 (bar): Ch 1, sc in first tr, 7 sc in next ch-7 sp, sc in next tr; repeat from * 3 more times, working the last sc into the 4th ch of the turning ch-4, turn. (33 sc)*
Check the math: 1 + (7 + 1) x 4 = 33. Every bar row has 33 sc, and every post row has 5 posts and 4 open spaces. The posts stack directly on top of each other, so the vertical lines stay straight.
Rows 4–13: Repeat Rows 2–3 five more times. Don’t turn at the end of Row 13. Fasten off.
Totals: 13 rows, made of 7 sc bars and 6 tr post rows. That gives 6 rows of cells with 4 cells each, for 24 open cells.
Checkpoint: 8.25 in (21.0 cm) wide x 7.75 in (19.7 cm) tall. The width is 33 sts ÷ 4 = 8.25 in. The height is 7 bars x 0.25 in + 6 posts x 1 in = 7.75 in.
The inside of each cell is 1.75 in (4.4 cm) across, which is the 7 chains, and 1 in (2.5 cm) high, which is the post height.
Tulip Appliqués
Make 12 tulips. Each tulip has one green stem-and-leaves piece and three separate pink petals. That comes to 36 petals and 12 stem pieces, with 24 leaves in total.
Petal (make 36 in pink)
Ch 6. Starting in the 2nd ch from hook, label the chains A to E, with E being the last ch.
Rnd 1: Sc in A, hdc in B, dc in C, dc in D, then work (hdc, ch 2, hdc) in E for the tip. Rotate and work along the opposite side of the foundation chain: dc in D, dc in C, hdc in B, sc in A. Sl st into the skipped first ch. (10 sts + 1 ch-2 tip)
Fasten off and leave an 8 in (20.3 cm) tail for sewing. The petal is a slim teardrop, widest near the tip, about 1.25 in (3.2 cm) long and 0.75 in (1.9 cm) wide. The paired dc down the middle form its raised center ridge.
Stem and Leaves (make 12 in green)
Stem: Ch 8. Sl st in the back bump of the 2nd ch from hook and in each of the next 6 chs. (7 sl st) You are now at the bottom of the stem. The stem is about 1.5 in (3.8 cm) long.
Leaf 1: Ch 6. Starting in the 2nd ch from hook, label the chains A to E. Sc in A, hdc in B, dc in C, hdc in D, then work (sc, ch 2, sc) in E for the tip. Working along the opposite side: hdc in D, dc in C, hdc in B, sc in A. Sl st into the bottom of the stem. (10 sts + 1 ch-2 tip)
Leaf 2: Repeat Leaf 1, ending with a sl st into the bottom of the stem.
Fasten off and leave an 8 in (20.3 cm) tail. Each leaf is about 1.25 in (3.2 cm) long and 0.5 in (1.3 cm) wide. It comes out slimmer than a petal because it has only one dc on each side.
Assemble Each Bloom
- Lay two petals side by side with their bases overlapping by about 0.25 in (0.6 cm). Tilt each tip outward by about 20°.
- Lay the third petal upright and centered on top, with its base covering both of the bases underneath.
- Tack the three bases together with a pink tail.
The finished bloom is about 1.5 in (3.8 cm) wide x 1.25 in (3.2 cm) tall. It fits inside the 1.75 in (4.4 cm) cell width with a little breathing room on each side.
Placing and Sewing the Tulips
Each tulip fills two stacked cells in one column. The leaves sit in the lower cell, the bloom sits in the upper cell, and the stem crosses the bar between them.
Cell rows, counted from the bottom:
CELL ROW 6: BLOOM  BLOOM  BLOOM  BLOOM
CELL ROW 5: LEAVES LEAVES LEAVES LEAVES
CELL ROW 4: BLOOM  BLOOM  BLOOM  BLOOM
CELL ROW 3: LEAVES LEAVES LEAVES LEAVES
CELL ROW 2: BLOOM  BLOOM  BLOOM  BLOOM
CELL ROW 1: LEAVES LEAVES LEAVES LEAVES
- Pin the bottom of the stem to the center of the bar below the leaf cell. Run the stem straight up, over the next bar and 0.25 in (0.6 cm) into the bloom cell.
- Fan the leaves upward and outward at about 45°, so their tips stop just short of the vertical posts.
- Pin the bloom over the top of the stem. The tip of the center petal can just touch the bar above.
- Whipstitch around each petal and leaf through the back loops only. Catch the mesh wherever a piece crosses a bar or post. Wherever a piece sits over open space, its outer edge stays free.
- Weave in all tails on the wrong side, running them through the bars.
Checkpoint: All 12 tulips should line up in straight columns and rows. Measure across the panel again. It should still be 8.25 in (21.0 cm). If it’s narrower, your sewing is too tight.
Border
Use sage green. Border gauge: 4 sc = 1 in (2.5 cm), the same as the mesh.
The corners are ch-2 spaces, not stitches. The side counts below are the stitches between the corner spaces.
Rnd 1: With RS facing, join with a sl st in the first sc of Row 13 (top right corner). Ch 1, then:
- Top: Sc in each st across. (33 sc) Ch 2.
- Side: Work along the row ends. Work 1 sc in the side of Row 13, 4 sc around each tr post row and 1 sc in the side of each sc bar row in between, ending with 1 sc in the side of Row 1. (31 sc) Ch 2.
- Bottom: Sc in each free loop of the foundation ch. (33 sc) Ch 2.
- Side: Work as for the first side. (31 sc) Ch 2.
- Sl st to the first sc.
Rnd 1 total: 128 sc (33 + 31 + 33 + 31) + 4 corner ch-2 sps.
Side math: 6 post rows x 4 sc + 5 inner bars x 1 sc + 2 end rows x 1 sc = 24 + 5 + 2 = 31.
Rnd 2: Ch 1, sc in each sc around, working (sc, ch 2, sc) in each corner sp. Sl st to the first sc. (35 + 33 + 35 + 33 = 136 sc + 4 corner ch-2 sps)
Rnd 3: Ch 1, rev sc in each sc around, with 2 rev sc in each corner sp. Sl st to the first st. (136 + 8 = 144 rev sc) Fasten off and weave in the ends.
Why the math works: The mesh is 8.25 in (21.0 cm) wide, and 8.25 x 4 = 33 sc, which matches the 33 bar stitches exactly. The mesh is 7.75 in (19.7 cm) tall, and 7.75 x 4 = 31 sc, which is what you work along each side. Because both directions use the same 4 sc per inch, the edges neither ruffle nor pull in. Rnd 2 adds only 1 sc on each side of each corner, which keeps the corners flat. The three rounds add 0.5 in (1.3 cm) on every side, so the width becomes 8.25 + 1 = 9.25 in (23.5 cm) and the height becomes 7.75 + 1 = 8.75 in (22.2 cm).
Final Blocking
- Soak the panel in lukewarm water for 10 minutes. Gently press the water out without wringing.
- Roll the panel in a towel to remove more moisture.
- Lay it flat on the blocking mat, RS up.
- Pin the four corners to 9.25 x 8.75 in (23.5 x 22.2 cm).
- Pin along each bar and post so every line is straight and every cell matches its neighbors.
- Smooth each petal and leaf flat with your fingers, and pinch the tips into points.
- Let the panel dry completely, for at least 12 hours, before you unpin it.
Final Quality-Control Checklist
- The mesh is 8.25 x 7.75 in (21.0 x 19.7 cm) before the border.
- Every bar row has 33 sc, and every post row has 5 tr and 4 ch-7 sps.
- There are 24 open cells in a 4 x 6 grid.
- There are 12 tulips: 36 petals, 12 stems and 24 leaves.
- Each bloom has two tilted petals with one centered petal on top.
- The stems are vertical and cross the bar between cells.
- Border Rnd 1 has 128 sc, Rnd 2 has 136 sc and Rnd 3 has 144 rev sc.
- The final size is 9.25 x 8.75 in (23.5 x 22.2 cm).
- All tails are woven into the bars and can’t be seen from the RS.
Troubleshooting
The vertical lines zigzag. You skipped the wrong number of stitches. Every ch-7 must skip exactly 7 sc, and every tr goes into the sc directly above a post.
The cells look short and squashed. Your tr posts are too tight. Pull the first loop up to the height of the ch-4.
The bar rows ripple. You worked more than 7 sc into a ch-7 sp. Count every space.
The petals curl. This is normal before blocking. Block them wet, or pin and steam them.
The tulips look crowded. Your petals are too big. Try a 3.5 mm hook for the appliqués only.
The border ruffles at the sides. You worked more than 4 sc around a tr post. Rework the side to exactly 31 sc.
The corners cup. Check that each corner of Rnd 2 is (sc, ch 2, sc) and not 3 sc.
Care
Hand wash in cool water with a mild detergent, then dry flat and reshape the tulips while they’re damp. Don’t tumble dry, because heat can shrink the cotton and distort the grid.
Final Notes
The whole design follows one measurement chain. At 4 sts per inch, 33 sts make an 8.25 in (21.0 cm) wide mesh. Thirteen rows, made of 7 bars at 0.25 in and 6 posts at 1 in, make it 7.75 in (19.7 cm) tall. The twelve tulips sit on top of the grid without changing its size. The border adds 0.5 in (1.3 cm) per side, for a finished panel of 9.25 x 8.75 in (23.5 x 22.2 cm). Check your gauge at each checkpoint, and every bar, post and petal will line up.
Happy crocheting!