

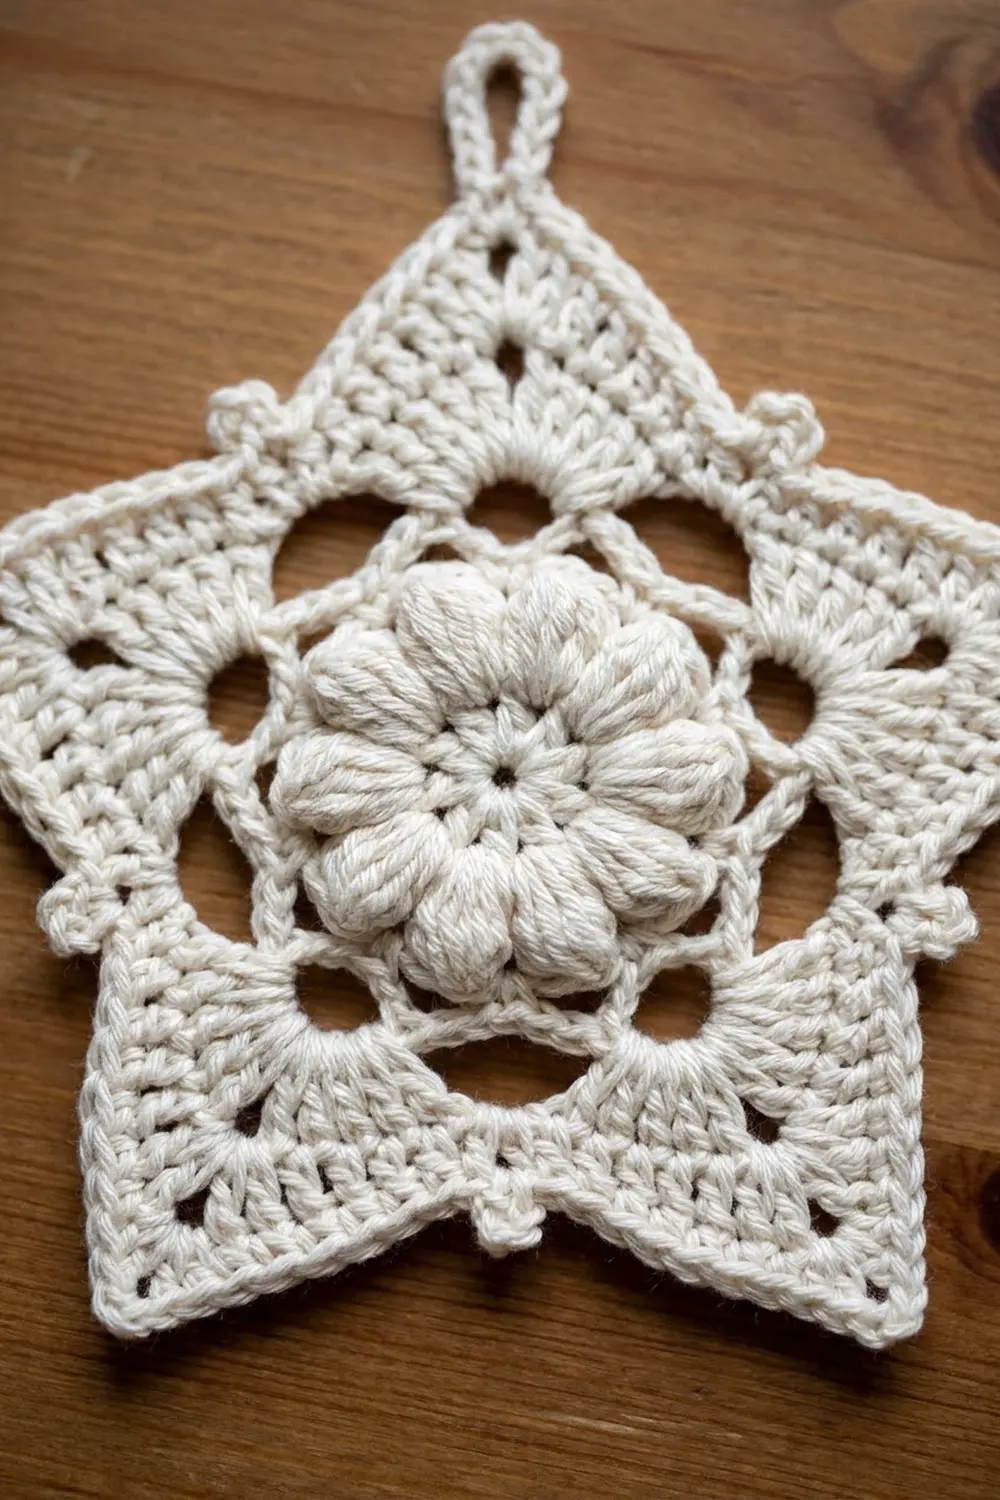
The Winter Bloom Star is one lacy five-point star worked in the round in soft ivory cotton. A puffy five-petal flower sits at the center, with open chain arches around it. Each of the five points is a fan of graduated stitches with a small eyelet near the tip. A neat single crochet edge goes around the whole star, with a tiny chain picot at every tip and a longer hanging loop at the top point.
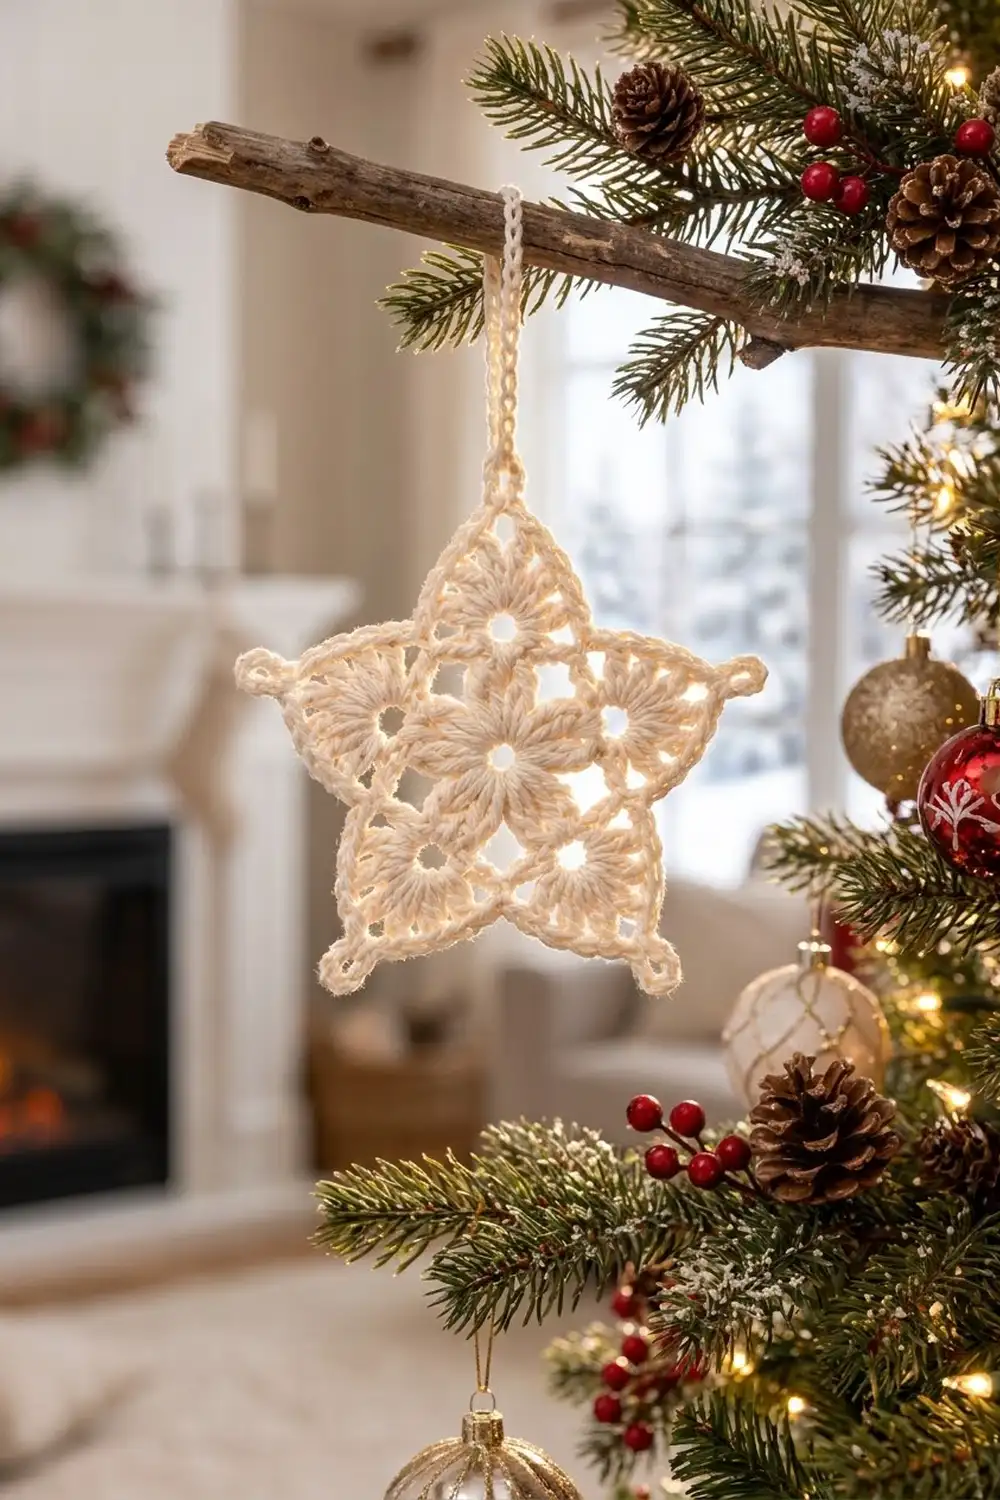
The look is calm and wintry: one color, plenty of texture, and enough open space for light to pass through the holes. It works as a tree ornament, gift tag, window hanging, or holiday coaster. You can make many and link them tip to tip, but this pattern covers one star from start to finish.
All instructions use US crochet terms. The finished star is 5.5 in (14.0 cm) wide from tip to tip. It’s 5.25 in (13.3 cm) tall from the top tip to the line between the two bottom tips, not counting the hanging loop.
Construction is simple. You work a magic ring, then a petal round, a chain-arch round, a round that builds the five points, and a single crochet border round with picots and a hanging loop. That’s five rounds and one piece, with only two ends to weave in.
Finished Size and Construction
- Finished size: 5.5 in (14.0 cm) wide x 5.25 in (13.3 cm) tall, plus a 0.75 in (1.9 cm) hanging loop
- Skill level: Easy-Intermediate
- Terminology: US crochet terms
- Yarn weight: DK / light worsted (CYC 3) cotton
- Hook: 4.0 mm (G-6)
- Number of pieces: 1
- Layout: single star motif, worked in joined rounds without turning
- Piece size: 5.5 in (14.0 cm) tip to tip
- Size before border: 4.75 in (12.1 cm) tip to tip after Round 4
- Border depth: about 0.25 in (0.6 cm), plus picots at the tips
Materials
Choose a smooth mercerized or combed cotton in DK or light worsted weight. Cotton gives crisp stitch definition, holds the point shape after blocking, and doesn’t fuzz over the holes. A cotton blend also works if it isn’t too stretchy. Avoid fluffy or brushed yarns because they hide the eyelets.
Yarn (one color):
– Ivory / cream: 10 g, about 22 m (24 yd)
One star uses roughly 6 to 7 g. The amount above includes extra for your test star, the tail ends, and one possible restart of Round 4.
Tools:
– 4.0 mm (G-6) crochet hook
– Tapestry needle
– Scissors
– Stitch marker (1)
– Rustproof pins and a foam blocking mat
– Spray bottle with water
– Ruler or tape measure
Abbreviations (US Terms)
- ch: chain
- sl st: slip stitch
- sc: single crochet
- hdc: half double crochet
- dc: double crochet
- tr: treble crochet
- sp(s): space(s)
- st(s): stitch(es)
- MR: magic ring
- rep: repeat
Special stitch, picot tip: (sc, ch 3, sc), all worked into the same space. This makes the small loop at the end of each point.
Special stitch, hanging loop tip: (sc, ch 12, sc), all worked into the same space. Use it on one point only.
Gauge and Checkpoints
Gauge isn’t critical for an ornament, but it controls the final size. Make and measure one star before you make more.
Base gauge: 18 sc and 20 rows = 4 in (10.2 cm) with the recommended yarn and hook.
Measurement checkpoints (lay the piece flat without stretching):
– After Round 1: the ring is 0.75 in (1.9 cm) across.
– After Round 2: the flower is 2.25 in (5.7 cm) across from petal tip to petal tip.
– After Round 3: the chain arches measure 3 in (7.6 cm) across.
– After Round 4: the star is 4.75 in (12.1 cm) from tip to tip.
– After Round 5: the star is 5.5 in (14.0 cm) wide and 5.25 in (13.3 cm) tall.
If your flower is larger than 2.25 in (5.7 cm): go down to a 3.5 mm (E-4) hook.
If your flower is smaller than 2.25 in (5.7 cm): go up to a 4.5 mm (7) hook.
If the Round 2 flower cups: your petal stitches are too tight, so relax your tension or go up a hook size. If it ruffles: go down a hook size.
Checking at Round 2 saves time. A difference of 0.25 in (0.6 cm) here grows to about 0.5 in (1.3 cm) by the finished star.
Pattern
Leave a 4 in (10.2 cm) starting tail. Don’t turn at any point. The right side always faces you.
A few habits make this star cleaner. Keep the hook in the same position for every tall stitch so the trebles match in height. Insert the hook fully into each chain space instead of catching only one chain loop, so the arches stay even. Count every round before you join. Each round depends on the exact number of spaces in the round before, so a small miscount always shows up later as one lopsided point.
Round 1: Center Ring
MR, ch 1, (sc, ch 4) 5 times into the ring. Pull the ring tightly closed. Join with sl st to the first sc.
Count: 5 sc and 5 ch-4 sps.
The ring should close fully, leaving a center hole no bigger than a pencil tip.
Round 2: Five-Petal Flower
Sl st into the first ch-4 sp.
In the ch-4 sp, work (sc, hdc, 5 dc, hdc, sc). Rep from * in each of the remaining 4 ch-4 sps. Join with sl st to the first sc.
Count: 45 sts (5 petals of 9 sts each: 2 sc, 2 hdc, 5 dc).
Each petal is rounded and raised. Gently pinch the petals into shape before moving on. Checkpoint: 2.25 in (5.7 cm) across.
Round 3: Chain Arches
Ch 1, sc in the same st (the first sc of petal 1). Place a marker in this sc.
Ch 7, skip the remaining 8 sts of this petal, sc in the first sc of the next petal. Rep from * 3 more times. Ch 7, skip the remaining 8 sts of the last petal, and join with sl st to the first sc.
Count: 5 sc and 5 ch-7 arches.
Each arch lies just behind and a little beyond one petal. This alignment matters because each arch becomes one star point, so the petals point straight toward the tips. The sc anchors sit in the gaps between petals and become the valleys of the star. Checkpoint: 3 in (7.6 cm) across.
Round 4: Star Points
Ch 4 (counts as dc and ch 1).
In the next ch-7 arch, work (hdc, 2 dc, tr, ch 3, tr, 2 dc, hdc), ch 1, dc in the next sc, ch 1. Rep from * 3 more times.
In the last ch-7 arch, work (hdc, 2 dc, tr, ch 3, tr, 2 dc, hdc), ch 1, and join with sl st to the 3rd ch of the beginning ch-4.
Count: 45 sts total.
– 5 valley dc (the beginning ch-4 counts as the first)
– 40 fan sts (5 points of 8 sts each: 2 hdc, 4 dc, 2 tr)
– 5 ch-3 tip sps
– 10 ch-1 sps (one on each side of every valley dc)
The hdc, dc, and tr get taller toward the middle of each fan and build it into a peak. The ch-3 at the peak leaves the small eyelet near each tip. The ch-1 spaces beside each valley dc open the small holes at the inner corners. Checkpoint: 4.75 in (12.1 cm) from tip to tip.
Before the border, lay the star flat and compare the five points. They should match in length within about 0.125 in (0.3 cm). If one point is clearly shorter, the fan on that point is usually missing a stitch, and it’s faster to fix it now than after the border.
Round 5: Border with Picots and Hanging Loop
The full instructions for this round are in the Border section below.
Border
Border gauge: the border is one round of sc, so it follows the base gauge of 18 sc = 4 in (10.2 cm). One sc goes into each stitch and each ch-1 space. Each tip gets 2 sc plus a loop.
Choose which point will be the top. Work the hanging loop on that point and picots on the other four.
Round 5: Ch 1, sc in the same st (the valley dc).
Sc in the next ch-1 sp, sc in each of the next 4 sts (hdc, dc, dc, tr), work a picot tip (sc, ch 3, sc) in the ch-3 sp, sc in each of the next 4 sts (tr, dc, dc, hdc), sc in the next ch-1 sp, sc in the next valley dc.
Rep from * around. On the point you chose as the top, work the hanging loop tip (sc, ch 12, sc) instead of the picot tip. On the final repeat, skip the last “sc in the next valley dc” and join with sl st to the first sc instead.
Count per point segment: 13 sc.
– 1 sc in the valley dc
– 1 sc in the ch-1 sp
– 4 sc up the first side of the point
– 2 sc at the tip
– 4 sc down the second side of the point
– 1 sc in the ch-1 sp
Count for the round: 5 segments x 13 sc = 65 sc, plus 4 ch-3 picots and 1 ch-12 hanging loop.
Fasten off, leaving a 4 in (10.2 cm) tail.
Why the math works: Round 4 has 45 sts and 10 ch-1 sps, for 55 places to work into. Round 5 puts exactly 1 sc into each of those 55 places, for 55 sc. The 5 tip sps take 2 sc each, adding 5 x 2 = 10 sc, so the round has 55 + 10 = 65 sc. The fan stitches already shape the star, so the border just follows that shape without adding or removing stitches along the sides. That keeps the edges flat. The single sc in each valley keeps the inner corners crisp. The 2 sc at each tip turn the sharp corner without pulling the picot out of line.
Checkpoint: 5.5 in (14.0 cm) wide and 5.25 in (13.3 cm) tall. The ch-12 loop hangs about 0.75 in (1.9 cm) above the top tip.
Final Blocking
- Weave in both tails along the back of the sc border, changing direction once so they can’t work loose.
- Mist the star with water until it’s damp but not dripping. You can also soak cotton briefly and press it in a towel.
- Lay it face up on the blocking mat.
- Pin the 5 tips first, through the picots, spacing them evenly so the star measures 5.5 in (14.0 cm) wide.
- Pin each of the 5 valleys toward the center so the inner corners stay sharp.
- Shape each petal of the center flower with your fingertips so it sits rounded and raised.
- Open the eyelets at each tip and valley with the tip of your hook.
- Pin the hanging loop straight up from the top tip.
- Let the star dry completely, usually 4 to 6 hours, before unpinning.
- For a firmer ornament, mist it with a light fabric stiffener before drying.
Final Quality-Control Checklist
- The center ring is pulled tight with no gap.
- All 5 petals are the same size and point toward the 5 tips.
- The 5 valley eyelets and 5 tip eyelets are open and about the same size.
- Round 5 has 65 sc, 4 picots, and 1 hanging loop.
- Each point segment has 13 sc.
- All 5 points are the same length.
- The edges lie flat, with no ruffling or cupping.
- The star measures 5.5 in (14.0 cm) wide and 5.25 in (13.3 cm) tall.
- The ends are woven in and can’t be seen from the front.
Troubleshooting
The center has a hole. Pull the magic ring tail tighter before weaving it in, then secure it with a small knot on the back.
The flower cups upward. The petals are too tight. Go up a hook size or loosen your dc.
The points are short and rounded. Make sure the tr are full height and that you worked ch 3 at the tip, not ch 1. Pinning the tips firmly during blocking also sharpens them.
The edge ruffles. Count Round 5. More than 13 sc in a segment usually means an extra sc went into a ch-1 sp or the tip.
The star cups in the middle. Check that each arch in Round 3 is ch 7, not ch 6. Short arches pull the points inward.
One point is longer than the others. Count the fan on that point. It should be exactly (hdc, 2 dc, tr, ch 3, tr, 2 dc, hdc).
The valleys look blunt. Make sure each valley gets only 1 sc, and pin the valleys inward while blocking.
The hanging loop twists. Keep the ch-12 relaxed, and make sure the second sc goes into the same ch-3 sp as the first.
Care
Hand wash in cool water with mild soap, press out the water in a towel, and dry flat, re-pinning the tips if needed. Store the star flat or hanging, where it won’t get crushed, so the points keep their shape.
Final Notes
The size of this star comes from a short chain of measurements:
– The Round 1 ring is 0.75 in (1.9 cm).
– The Round 2 flower is 2.25 in (5.7 cm).
– The Round 3 arches reach 3 in (7.6 cm).
– The Round 4 points span 4.75 in (12.1 cm).
– The Round 5 border brings the star to 5.5 in (14.0 cm) wide and 5.25 in (13.3 cm) tall.
Check the flower at Round 2, keep every point segment at 13 sc in Round 5, and block the tips sharp.
Once your first star matches the checkpoints, the next ones will match too, whether you hang one on a branch or tie a few to gifts.
Happy crocheting!