

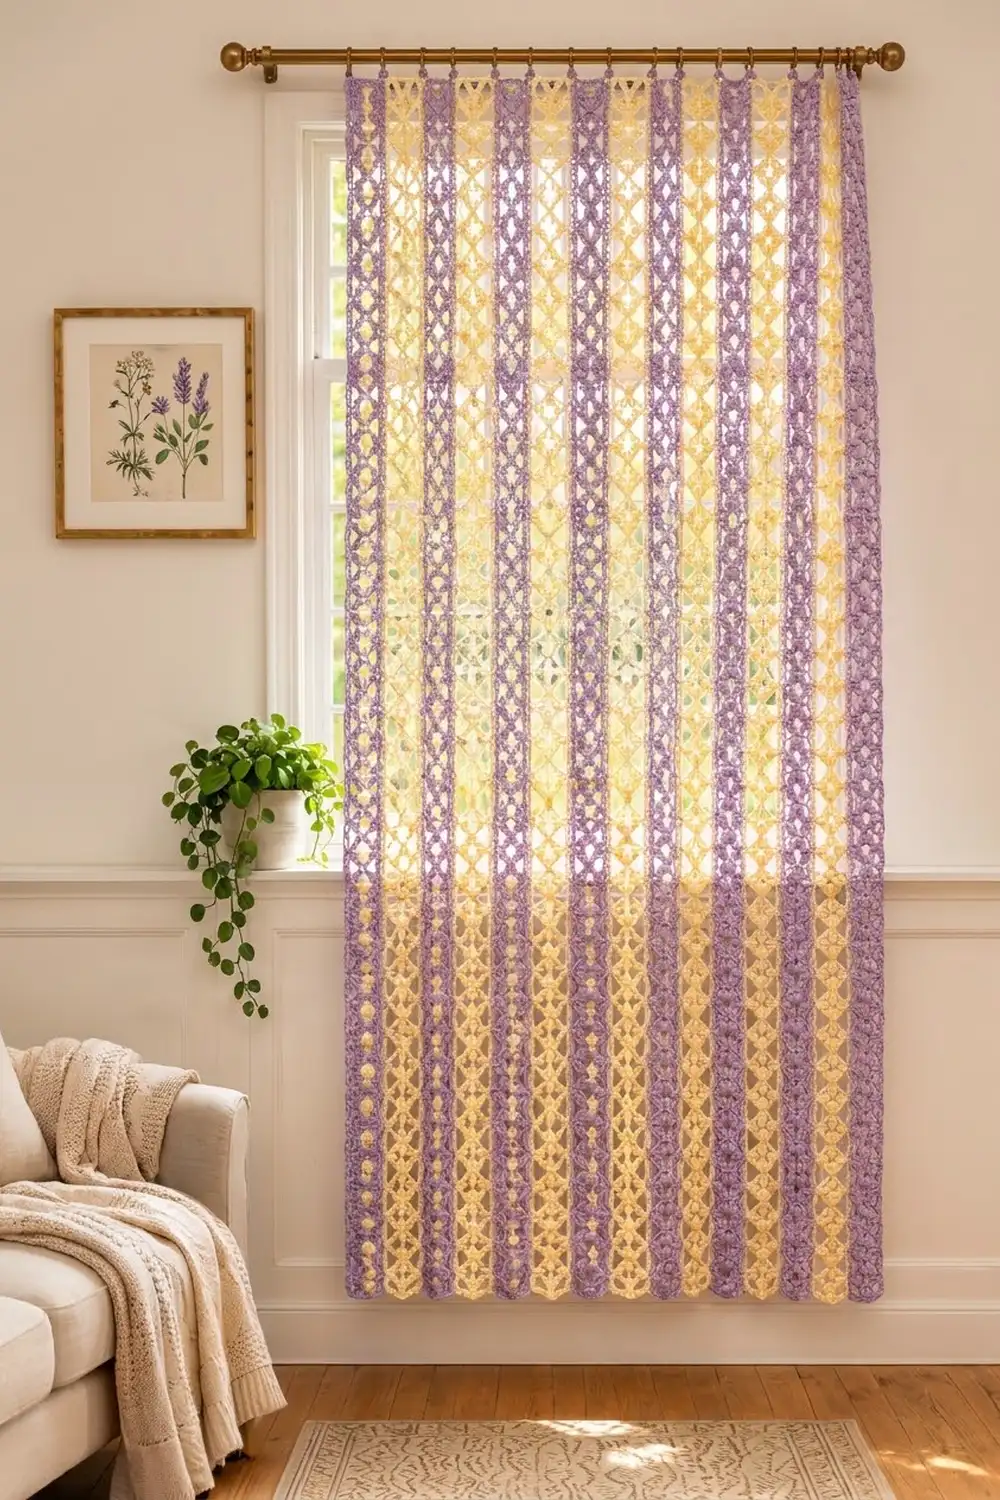
The Wisteria Ribbon Curtain is a light, airy window panel made from long, narrow strips. Each strip has a center column of textured diamonds, and every diamond has a bobble at its center. A lacy lavender frame surrounds the column, and the open triangles on each side let daylight through.
The strips alternate between a butter-yellow center and an all-lavender center, which gives the panel soft vertical stripes. It looks cottage-style and a little vintage, and it suits a kitchen window, a bedroom, or a sunny reading corner.
This pattern uses US crochet terms. The finished curtain measures 31.25 in × 51.75 in (79.4 cm × 131.4 cm) before the hanging loops. The loops add about 2 in (5.1 cm) of drop below the rod.
You work each strip from the center out. First you make a diamond column in rows, then you add three edging rounds. After that, you join 11 strips with a flat slip-stitch seam, work a two-round border, and add one row of rod loops across the top.
Finished Size and Construction
- Finished size: 31.25 in × 51.75 in (79.4 cm × 131.4 cm), plus loops of about 2 in (5.1 cm)
- Skill level: Intermediate
- Terminology: US
- Yarn weight: Worsted (#4) cotton or cotton blend
- Hook: 4.5 mm (US 7)
- Number of pieces: 11 strips (5 Strip A, 6 Strip B)
- Layout: 11 strips side by side, in 1 row
- Strip size: 2.75 in × 50.75 in (7.0 cm × 128.9 cm)
- Size before border: 30.25 in × 50.75 in (76.8 cm × 128.9 cm)
- Border depth: 0.5 in (1.3 cm), plus the top loops
Materials
Choose a smooth mercerized or matte cotton in worsted weight. Cotton holds its shape when it hangs, shows the bobbles clearly, and stands up to sunlight and washing. Avoid fuzzy yarns, because they blur the open triangles.
- Lavender: 550 g, about 850 m (930 yd)
- Butter yellow: 100 g, about 155 m (170 yd)
All quantities include a safety margin of roughly 15%.
Tools:
– 4.5 mm (US 7) crochet hook
– Tapestry needle
– 11 stitch markers
– Rust-proof pins and a large blocking surface
– Tape measure
– Spray bottle
Abbreviations (US Terms)
- ch: chain
- sl st: slip stitch
- sc: single crochet
- dc: double crochet
- tr: treble crochet
- sc2tog: single crochet 2 together
- sc3tog: single crochet 3 together
- sp: space
- st(s): stitch(es)
- RS / WS: right side / wrong side
Bobble: Work these steps 4 times into the same stitch: yarn over, insert the hook, yarn over and pull up a loop, then yarn over and pull through 2 loops. You now have 5 loops on the hook. Yarn over and pull through all 5. A bobble counts as 1 stitch. Bobbles are worked on WS rows so they pop out on the RS.
Gauge and Checkpoints
Base gauge: 16 sc and 16 rows = 4 in (10.2 cm).
Edge gauge: 4 sts = 1 in (2.5 cm) along the outside of every strip.
Make a test strip before anything else. Work the Diamond Core with 4 diamonds (17 rows), then work all three Edging rounds. Use these checkpoints:
- Core: 4.25 in (10.8 cm) long, with the widest row at 1.25 in (3.2 cm).
- Round 3: each long side has 19 sts, each end has 11 sts, and the strip measures 2.75 in × 4.75 in (7.0 cm × 12.1 cm).
If your test strip is too big, go down 0.5 mm in hook size. If it is too small, go up 0.5 mm. Width matters most, because any error is multiplied by 11 strips. If your strip is just 0.25 in (0.6 cm) too wide, the curtain grows by 2.75 in (7.0 cm).
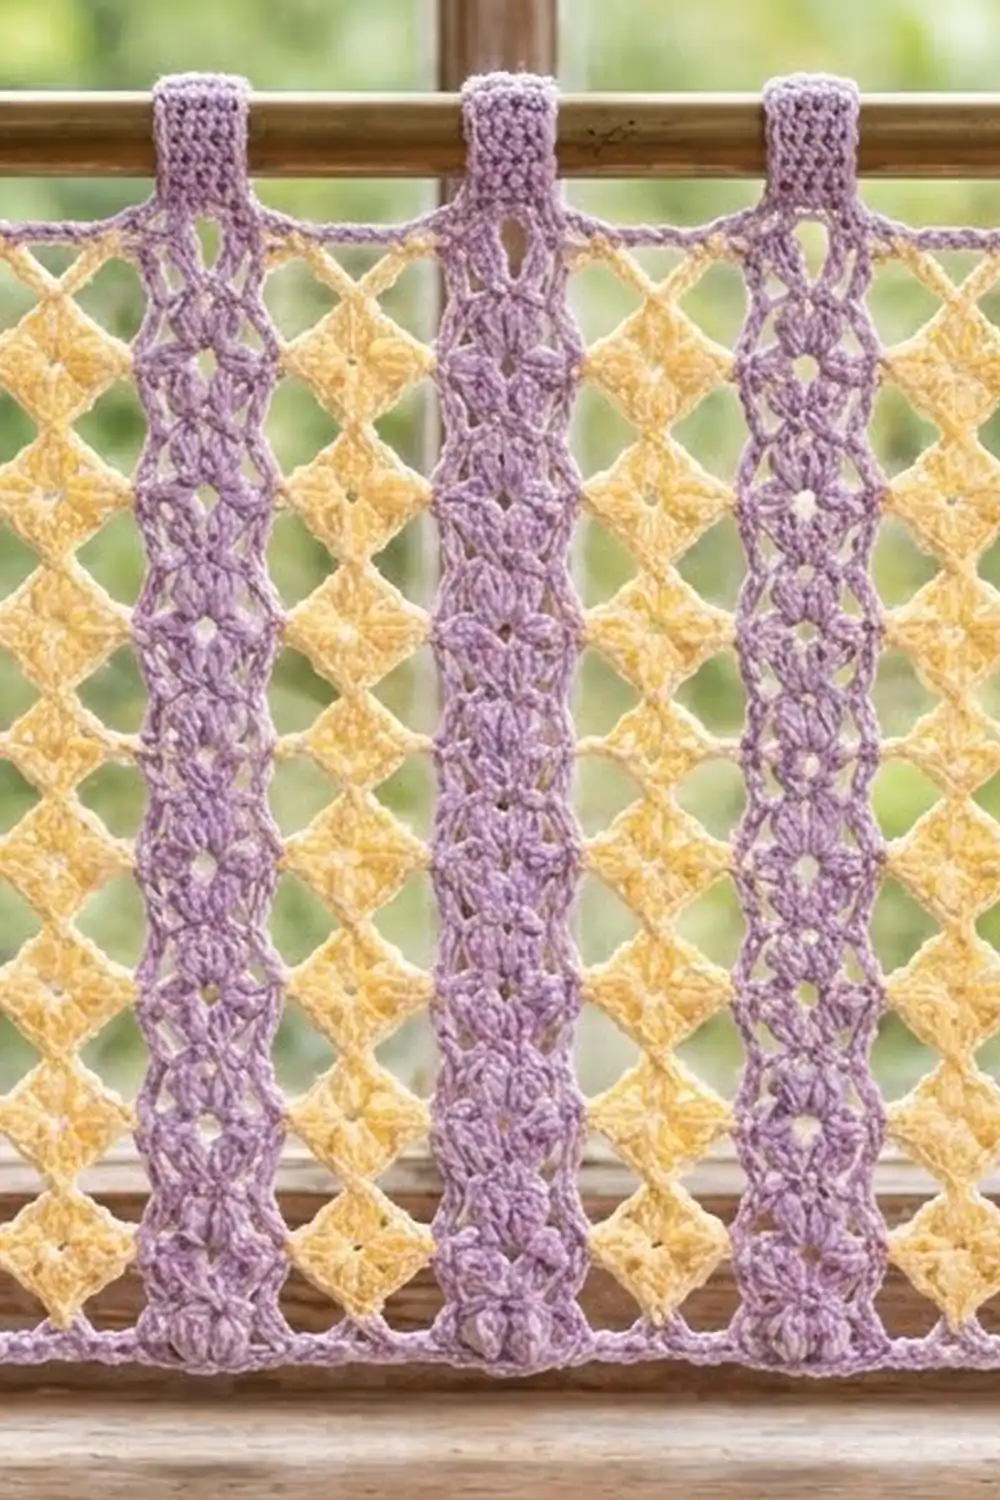
Diamond Core (make 11)
Make 5 cores in yellow (for Strip A) and 6 cores in lavender (for Strip B). The core is worked in rows. Each diamond has 4 rows with counts of 3, 5, 3 and 1 stitches, and the 1-stitch row forms the pinched waist between diamonds.
Row 1 (WS): Ch 2, sc in 2nd ch from hook. (1 st, the bottom tip)
Row 2 (RS): Ch 1, turn, 3 sc in sc. (3 sts)
Row 3 (WS): Ch 1, turn, 2 sc in first sc, bobble in next sc, 2 sc in last sc. (5 sts, the widest row)
Row 4 (RS): Ch 1, turn, sc2tog, sc in bobble, sc2tog. (3 sts)
Row 5 (WS): Ch 1, turn, sc3tog. (1 st, the waist)
Rows 2–5 make one diamond. Repeat Rows 2–5 another 49 times, for 50 diamonds in total. You will have 201 rows, and the last row is a 1-stitch tip. Fasten off.
Checkpoint: The core measures 50.25 in (127.6 cm) long. At 25 diamonds (101 rows) it should measure 25.25 in (64.1 cm). Place a marker every 10 diamonds so the counting is easier.
Lavender Edging (all 11 strips)
In the counts below, D = 50 diamonds. Chains count as stitches.
Round 1: With RS facing, join lavender with a sc in the bottom tip, then ch 2. For the first long side:
- Work [sc in the end of the next widest row, ch 2, sc in the end of the next waist row, ch 2] 49 times.
- Sc in the end of the last widest row, ch 2.
- Sc in the top tip, ch 2.
Work the second long side the same way, heading back down. Join with a sl st to the first sc.
(200 sc and 200 ch-2 sps; 4D of each)
Round 2: Ch 4 (counts as tr). In the same sc, work (ch 3, dc, ch 3, tr). This is the bottom fan. Then work the first long side:
- Ch 2, skip the ch-2 sp.
- Work [sc in the next sc, ch 2, skip the sp, tr in the next sc, ch 2, skip the sp] 49 times.
- Sc in the next sc, ch 2, skip the sp.
In the top-tip sc, work the top fan: (tr, ch 3, dc, ch 3, tr). Repeat the long side along the second edge, then join to the top of the beginning ch-4.
Count: Each fan has 9 sts, and each long side between the fans has 299 sts (6D − 1). The round total is 616 sts (12D + 16).
This round creates the lace. Each tr sits at a waist, and each sc sits at a widest row. The tall and short stitches level the outer edge into a straight line and leave an open triangle beside every diamond. The center dc in each fan is shorter than the tr on either side, so the end stays only slightly rounded.
Round 3: Work 1 sc in each sc, tr and dc. Work 1 sc in each ch-2 sp along the long sides, and 3 sc in each ch-3 sp on the fans. Work 3 sc in each of the 4 outer fan tr. The center sc of each 3-sc group is a corner st. Join and fasten off.
Count:
– Each long side has 203 sts (4D + 3), including both corners.
– Each end has 11 sts (corner + 1 + 3 + 1 + 3 + 1 + corner).
– The round total is 424 sts: 2 × 203 + 2 × 11 − 4 shared corners.
Checkpoint: The strip measures 2.75 in × 50.75 in (7.0 cm × 128.9 cm). At the edge gauge, 203 sts ÷ 4 = 50.75 in and 11 sts ÷ 4 = 2.75 in.
Make All Pieces
- Strip A (yellow core, lavender edging): 5
- Strip B (lavender core, lavender edging): 6
Lay the strips out with RS up, alternating as shown (A = yellow core, B = lavender core):
B | A | B | A | B | A | B | A | B | A | B
There is a lavender strip at each outer edge, which frames the panel.
Joining
Use a flat slip-stitch seam. Place two strips side by side with RS up and their long edges touching, with the ends lined up exactly.
- Insert the hook from front to back through the inside loop of the first corner st on the left strip. Then insert it through the matching inside loop on the right strip.
- Pull up lavender and sl st.
- Continue one stitch to one stitch, matching corner to corner, until you have worked all 203 sts. Fasten off.
The two long sides have the same count, so they match exactly. There’s nothing to ease in and no extra stitches at the seam. If you place a marker every 20 sts on both strips, you can confirm they stay aligned.
Tension: Work the slip stitches slightly looser than usual. If they’re tight, the seam shortens and the curtain puckers when it hangs. A seam should lie flat and measure 50.75 in (128.9 cm), like the strips.
Join all 10 seams in the same way.
Checkpoint: The joined panel measures 30.25 in × 50.75 in (76.8 cm × 128.9 cm). The top and bottom edges each have 121 sts (11 strips × 11 sts).
Border
The border uses the same edge gauge: 4 sc = 1 in (2.5 cm), and each round adds 0.25 in (0.6 cm) on every side.
Starting counts:
– Top and bottom edges: 121 sts each. Each strip’s 11 already includes its own corners, so nothing is added at the seams.
– Long sides: 203 sts each.
Border Round 1: With RS facing, join lavender in any st. Sc in each st around, working 3 sc in each of the 4 outer corner sts. Join.
– Top and bottom: 123 sts each
– Sides: 205 sts each
– Total: 652 sts (2 × 123 + 2 × 205 − 4)
Border Round 2: Ch 1. Sc in each st around, working 3 sc in each corner st. Join.
– Top and bottom: 125 sts each
– Sides: 207 sts each
– Total: 660 sts
Fasten off.
Loop Row (top edge only): With RS facing, join lavender in the top-right corner st.
– Sc in the first 3 sts.
– Ch 16, sc in the same st as the last sc, which forms a loop. Sc in the next 10 sts.
– Repeat from * to * 11 more times.
– Ch 16, sc in the same st, then sc in the last 2 sts.
Fasten off.
Count: 3 + (12 × 10) + 2 = 125 sc, plus 13 loops spaced every 10 sts, which is 2.5 in (6.4 cm). The first loop is 3 sts in from one corner and the last loop is 3 sts in from the other, so the loops are symmetrical.
Why the math works: Border Round 1 adds exactly 2 sts per side, both at the corners. The 121 top sts at 4 per inch give 30.25 in. With two rounds, the top becomes 125 sts = 31.25 in (79.4 cm) and the sides become 207 sts = 51.75 in (131.4 cm). These numbers match the physical growth of 0.25 in (0.6 cm) per round on each side, so the border doesn’t ruffle or pull.
Final Blocking
- Weave in all ends along the edging rounds. Avoid weaving through the open triangles, where ends would show.
- Soak the curtain in cool water for 15 minutes, then press the water out without wringing.
- Lay it flat on towels or blocking mats with RS up.
- Pin the outer border to 31.25 in × 51.75 in (79.4 cm × 131.4 cm).
- Pin along each seam so it runs straight and perpendicular to the top edge.
- Open each triangle gently with your fingertips, and lift the bobbles so they stand out.
- Pin the loops flat and evenly spaced.
- Leave it to dry completely, which takes 24–48 hours. Then hang it.
Final Quality-Control Checklist
- [ ] All 11 cores have 50 diamonds and 201 rows.
- [ ] All the bobbles face the RS.
- [ ] Each strip has 203 sts per long side and 11 sts per end.
- [ ] Each strip measures 2.75 in × 50.75 in (7.0 cm × 128.9 cm).
- [ ] The layout alternates B–A–B, with lavender strips at both outer edges.
- [ ] All 10 seams are flat, with matching corners.
- [ ] Border Round 2 has 125 sts on the top and bottom and 207 sts on each side.
- [ ] There are 13 loops, evenly spaced.
- [ ] The blocked size is 31.25 in × 51.75 in (79.4 cm × 131.4 cm).
Troubleshooting
The bobbles sink to the back. You worked them on an RS row. Row 1 must be a WS row so that every widest row (Rows 3, 7, 11 and so on) is also a WS row.
The edge is wavy after Round 2. Your tr may be too short or your sc too tall. Try a looser tr, or use a slightly taller yarn-over technique.
The strips are different lengths. Count the diamonds; one strip probably has 49 or 51. Recount Round 3: each long side should have 203 sts.
A seam puckers. Undo it and rework the seam more loosely, or use a hook 0.5 mm larger just for joining.
The border ruffles. You probably worked extra sts at the seams. The top edge must have exactly 121 sts before Border Round 1.
The curtain hangs crooked. Re-block it, and pin the seams perfectly vertical.
Care
Hand wash in cool water with a mild detergent, then dry flat. Re-block if needed. Rinse out any soap thoroughly, because residue can yellow cotton in strong sunlight.
Final Notes
The measurement chain is:
– A diamond core of 50 diamonds is 50.25 in (127.6 cm).
– The edged strip is 203 × 11 sts, or 2.75 in × 50.75 in (7.0 cm × 128.9 cm).
– Eleven joined strips are 121 sts wide, or 30.25 in × 50.75 in (76.8 cm × 128.9 cm).
– The two-round border brings it to 125 × 207 sts, or 31.25 in × 51.75 in (79.4 cm × 131.4 cm).
– The 13 rod loops add a drop of about 2 in (5.1 cm).
If you check the counts at each stage, the curtain will hang straight and even. Happy crocheting!