

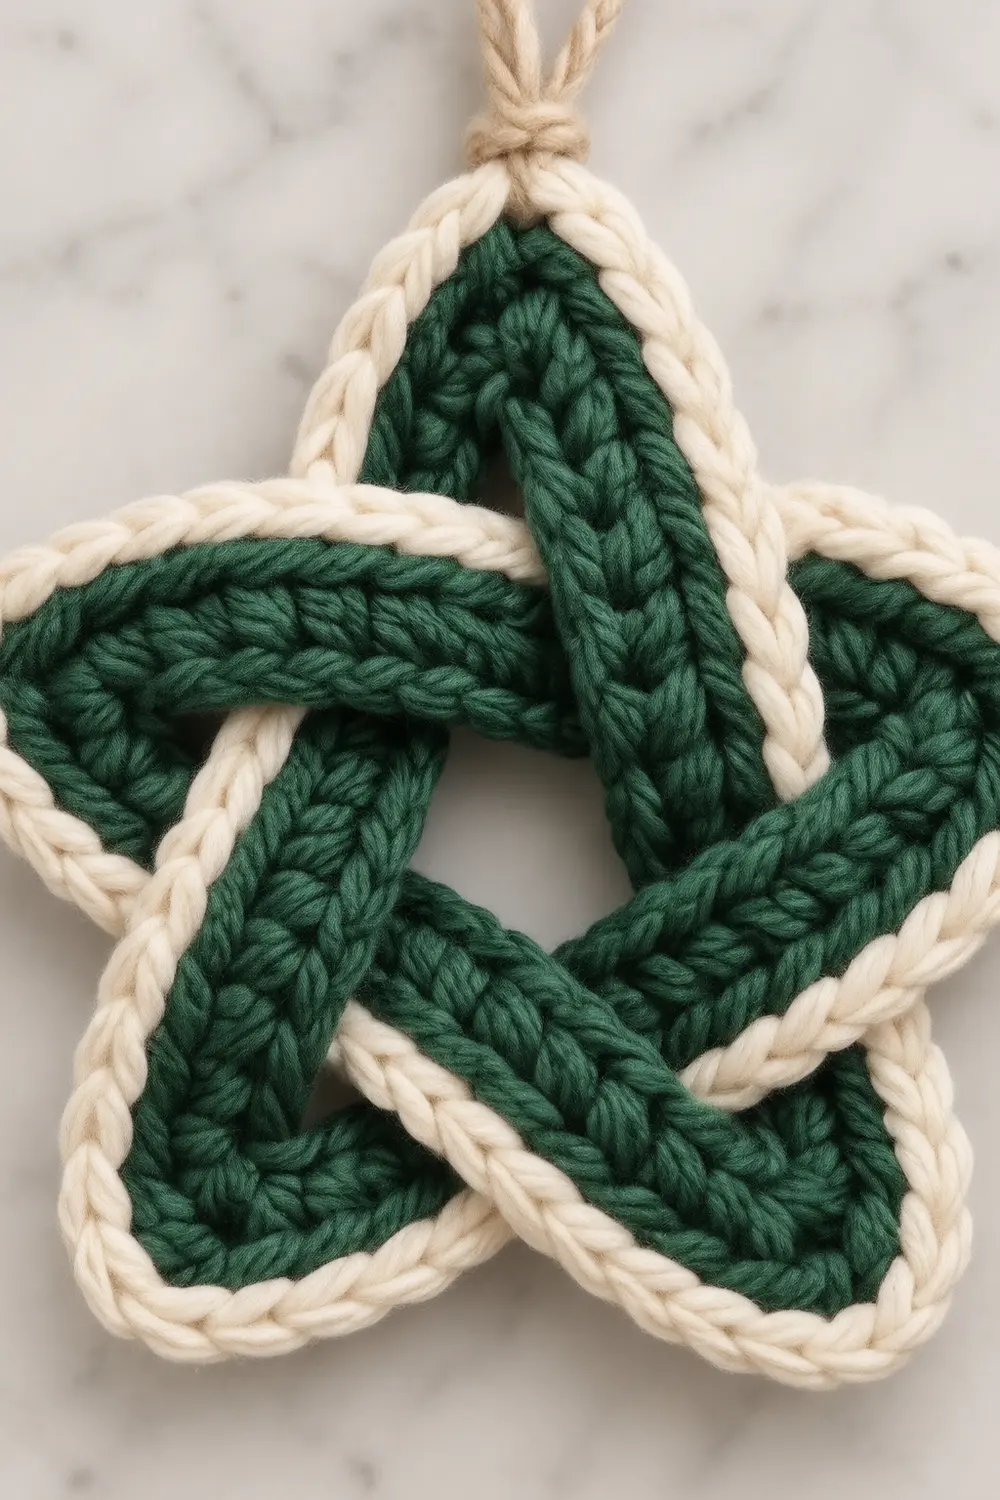
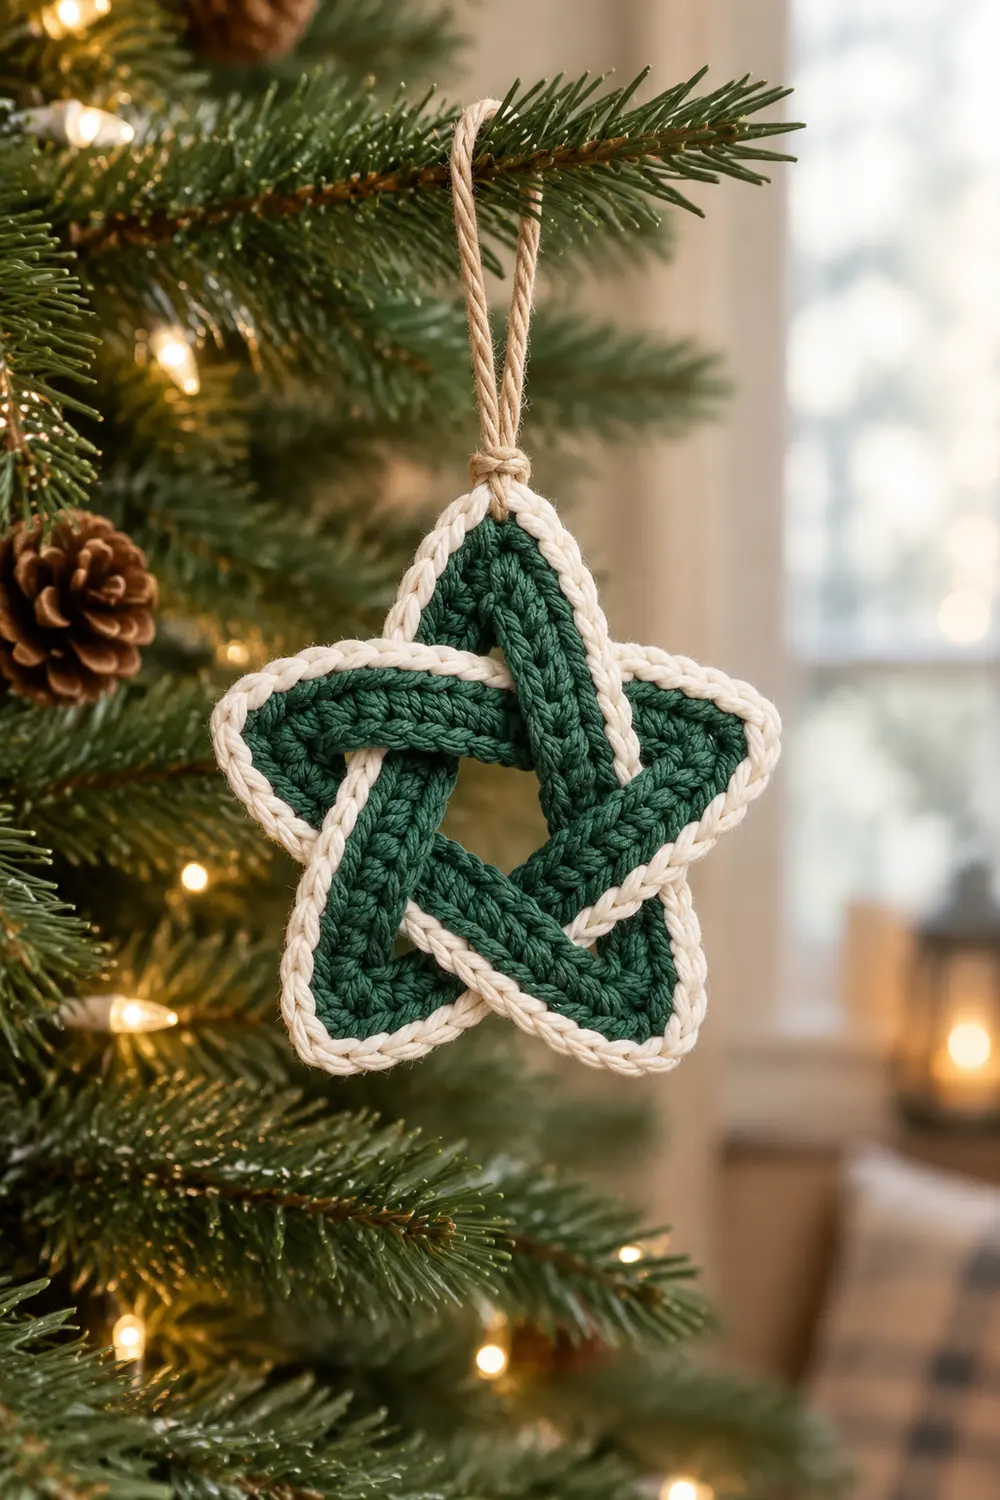
This little star looks like a knot. Five rounded points are formed by one dark forest green band that weaves over and under itself, so the center reads as a layered, interlocking design. A smooth cream outline runs along the outer edge of the band. It traces the perimeter of every point and travels through the center, where the overlaps stand out most.
The finish is simple: green for the textured body and cream for the crisp edge and the twisted hanging loop at the top point. The green rows are worked in the back loop only. This creates the braided ridge texture you see in the photo. The border is plain single crochet, so it stays smooth.
The pattern uses US crochet terms. The finished star measures about 4 in (10.2 cm) wide from point to point and about 3.8 in (9.7 cm) tall, not counting the loop.
Construction is clever but simple. You crochet one narrow green strip with short-row wedges at five spots, and those wedges curve the strip into rounded points. You then weave the strip into a star, seam the ends into a closed loop, and work two rounds of cream border along the outer edge. A twisted cream cord finishes the top.
Finished Size and Construction
- Finished size: about 4 in (10.2 cm) wide × 3.8 in (9.7 cm) tall, plus loop
- Skill level: Intermediate (short rows, weaving, seaming)
- Terminology: US crochet terms
- Yarn weight: DK (light worsted, weight 3) cotton
- Hook: 3.25 mm (US D-3)
- Number of pieces: 1 crocheted strip, closed into one continuous loop, plus 1 twisted cord for hanging
- Layout: single woven five-point star, with 5 crossings and alternating over-under
- Strip width: 0.5 in (1.3 cm) green, about 0.8 in (2.0 cm) with border
- Size before border: about 3.3 in (8.4 cm) wide × 3.1 in (7.9 cm) tall
- Border depth: 2 rounds of sc, about 0.33 in (0.8 cm)
Materials
Choose a smooth, firm DK cotton or cotton blend. Cotton holds the woven shape and keeps the points crisp. Avoid fuzzy or very stretchy yarns, because they blur the over-under effect.
- Dark forest green (Color A): 8 g / 16 m
- Cream or off-white (Color B): 6 g / 12 m, for the border and hanging cord
These quantities include a safety margin of roughly 50% for swatching, seaming tails, and the cord.
Tools:
- 3.25 mm (US D-3) crochet hook
- Tapestry needle
- Scissors
- Stitch markers (at least 5)
- Rust-proof pins and a foam blocking mat
- Spray bottle with water
Abbreviations (US Terms)
- ch – chain
- sc – single crochet
- sl st – slip stitch
- blo – back loop only
- st(s) – stitch(es)
- rep – repeat
- sc2 – work 2 sc in the same stitch or row-end
Special technique: short row. Turn your work before you reach the end of the row. The stitches you skip stay unworked until a later full row picks them up. In this pattern, short rows are always worked over the 2 stitches nearest the outer edge. They add height on that edge only, which makes the strip curve.
Edge naming: The strip is 3 sts wide. The outer edge is the side where the cream border will go. The inner edge stays green.
Gauge and Checkpoints
Gauge: 6 sc and 6 rows = 1 in (2.5 cm) in sc blo.
Because the border uses 1 sc per row-end, matching stitch gauge and row gauge is what keeps the edge flat. Test before you begin.
Swatch / test strip: Ch 4. Work Rows 1–12 exactly as in the pattern below, with no corners.
- Checkpoint 1 (swatch): 12 rows = 2 in (5.1 cm) long, and 3 sts = 0.5 in (1.3 cm) wide.
- If your swatch is longer than 2.2 in (5.6 cm) or wider than 0.6 in (1.5 cm), go down to a 3.0 mm hook.
- If it is shorter than 1.8 in (4.6 cm), go up to a 3.5 mm (US E-4) hook.
You can unravel the swatch and reuse the yarn.
Further checkpoints:
- Checkpoint 2: After Row 17, the strip measures about 2.8 in (7.1 cm).
- Checkpoint 3: After Corner 1, the strip bends so the next segment heads back at a sharp angle of roughly 144° of turn. The outer edge should look rounded, not pleated.
- Checkpoint 4: Before the border, the woven star measures about 3.3 in (8.4 cm) wide.
- Checkpoint 5: After the border and blocking, the star measures 4 in (10.2 cm) wide.
Green Strip
Use Color A. Rows 2 onward are worked in sc blo.
Row 1: Ch 4. Sc in 2nd ch from hook and in next 2 ch. (3 sc)
The last stitch sits at the outer edge. Odd rows end at the outer edge, and even rows end at the inner edge.
Row 2: Ch 1, turn. Sc blo in each st across. (3 sc)
Rows 3–17: Rep Row 2. (3 sc per row)
Row 17 ends at the outer edge. Rows 1–17 form the first part of Segment 1.
Corner (Work Exactly the Same Each Time)
Start the corner after a row that ends at the outer edge.
Short row 1: Ch 1, turn. Sc blo in next 2 sts, toward the inner edge. Leave the last st unworked. (2 sc)
Short row 2: Ch 1, turn. Sc blo in next 2 sts, back to the outer edge. (2 sc)
Short rows 3–6: Rep Short rows 1–2 twice more.
That gives 6 short rows, or 3 pairs. Each short row adds 1 row-end to the outer edge, so each corner adds 6 outer row-ends and 0 inner row-ends. Place a marker on the outer edge at the corner.
Corner 1: Work the Corner.
Row 18: Ch 1, turn. Sc blo in next 2 sts. Then sc through both loops of the waiting inner-edge st left from Row 17. (3 sc)
Working through both loops here closes the small gap left by the short rows.
Rows 19–35: Rep Row 2. (3 sc)
Rows 18–35 make Segment 2, which is 18 rows.
Corner 2: Work the Corner.
Rows 36–53: Work Row 36 like Row 18, then work Rows 37–53 like Row 2. (Segment 3, 18 rows)
Corner 3: Work the Corner.
Rows 54–71: Work Row 54 like Row 18, then work Rows 55–71 like Row 2. (Segment 4, 18 rows)
Corner 4: Work the Corner.
Rows 72–89: Work Row 72 like Row 18, then work Rows 73–89 like Row 2. (Segment 5, 18 rows)
Corner 5: Work the Corner.
Row 90: Work like Row 18. (3 sc)
Fasten off, leaving a 12 in (30.5 cm) tail.
Strip totals:
- 90 full rows of 3 sc = 270 sc
- 30 short rows of 2 sc = 60 sc
- 330 sc in total
- Inner edge: 90 row-ends
- Outer edge: 90 + 30 = 120 row-ends
Row 90 joins Rows 1–17 once the strip is closed. That makes Segment 1 the same 18 rows as the others: 5 segments × 18 rows = 90 rows.
Each straight segment is 18 rows = 3 in (7.6 cm) long. The inner-edge length is 90 rows = 15 in (38.1 cm).
Weave and Close the Star
- Lay the strip flat with the outer edge (the marked side) facing outward at every corner. The strip naturally curls the same way at all 5 corners.
- Arrange it into a five-point star, so each straight segment runs from one point to the point two places away.
- Weave so every segment goes over the first strand it meets and under the second. Thread the free Row 90 end through as needed. When you finish, all 5 crossings should alternate.
- Bring Row 90 to the foundation edge of Row 1. Whipstitch the 3 sts of Row 90 to the 3 loops of the foundation chain using the green tail. Keep the outer edges aligned.
- Use the remaining tail to tack each crossing with 2 small hidden stitches on the back. This keeps the overlaps flat. Weave in the tail.
Checkpoint 4: The star should measure about 3.3 in (8.4 cm) wide and 3.1 in (7.9 cm) tall.
Border
Border gauge: 6 sc per 1 in (2.5 cm) along the edge, which equals 1 sc per row-end.
The border follows the strip’s outer edge as one continuous loop. It passes through the crossings, so lift the top strand slightly when you reach one. Count each “side” as one straight segment plus its corner.
Round 1 (conversion round):
- With Color B, join with a sl st to an outer-edge row-end in the middle of any straight segment.
- Ch 1. Sc in the same row-end. Then work 1 sc in each row-end along the straight segment.
- At each corner, work into the 6 short-row ends as follows: sc in ends 1 and 2, sc2 in ends 3 and 4, sc in ends 5 and 6.
- Continue around and join with a sl st to the first sc.
Count per side: 18 (straight row-ends) + 6 (corner row-ends) + 2 (extra at the tip) = 26 sc.
Round total: 120 (1 per existing row-end) + 10 (2 extra × 5 tips) = 130 sc.
Round 2 (trim round):
- Ch 1. Sc in each st around.
- At each tip, you’ll find 4 sts made from the sc2 pairs. Work sc2 in the 2nd and 3rd of those 4 sts.
- Join with a sl st and fasten off. Weave in the tail.
Count per side: 26 (1 per existing st) + 2 (extra at the tip) = 28 sc.
Round total: 130 + 10 = 140 sc.
Why the math works: The straight parts get exactly 1 sc per row-end. Because row gauge equals stitch gauge (6 per inch), the border lies flat without stretching or ruffling. The rounded tips are convex, so the outer edge of each round is slightly longer there. Adding 2 sc per tip in each round, spread over the center of the curve, keeps the points smooth and rounded instead of cupped.
The two rounds add about 0.33 in (0.8 cm) to the outside of each point. Adding that to both sides of the 3.3 in (8.4 cm) star gives roughly 4 in (10.2 cm).
Hanging Loop
- Cut 2 strands of Color B, each 16 in (40.6 cm) long.
- Hold them together and twist firmly in one direction until they kink.
- Fold the twisted strands in half and let them twist back on themselves into a cord. Knot the cut ends.
- Pass the cord through the border at the top tip.
- Form a loop 2 in (5.1 cm) tall and wrap the excess around its base 4 times.
- Knot the cord and trim, leaving short tails.
Final Blocking
- Lightly mist the star with water until it is damp but not soaked.
- Lay it face up on the blocking mat.
- Pin the top point first. Then pin the other 4 points evenly spaced, about 4 in (10.2 cm) across at the widest point.
- Nudge each straight segment straight with your fingers, and check that every crossing lies flat.
- Pin the inner pentagon points lightly so the center opening is even.
- Let it dry completely, usually 6–8 hours.
- Unpin and recheck the size against Checkpoint 5.
Final Quality-Control Checklist
- All 5 segments are 18 rows long.
- All 5 corners have 6 short rows.
- Crossings alternate over and under all the way around.
- The seam between Row 90 and Row 1 is flat and hard to spot.
- Border Round 1 has 130 sc, or 26 per side.
- Border Round 2 has 140 sc, or 28 per side.
- The points are rounded and evenly spaced.
- The finished star is about 4 in (10.2 cm) wide and 3.8 in (9.7 cm) tall.
- The loop is secure, centered, and 2 in (5.1 cm) tall.
- All tails are woven in on the back.
Troubleshooting
The points look pleated or pinched.
The short rows are too tight. Loosen your turning chains, or check that you made exactly 6 short rows.
The corners don’t turn far enough.
Your stitches may be wider than your rows. Check your gauge, or add 1 extra short-row pair to every corner. Then adjust the border count by 2 sc per corner.
There are holes at the corners.
Make sure the first full row after each corner works through both loops of the waiting stitch.
The border ruffles.
Your border gauge is looser than the strip. Use a hook one size smaller for the cream.
The border pulls the star into a cup.
Check that you added the 2 tip increases in each round.
The weave won’t alternate.
Lay the star flat again and re-thread the free end before seaming.
The star is floppy.
Re-block it with a light spray starch.
Care
Spot clean with cool water and mild soap, then reshape and dry flat. Store flat or hanging so the points keep their shape.
Final Notes
The measurement chain is simple:
- 6 sc and 6 rows per inch gives a 0.5 in (1.3 cm) strip with 3 in (7.6 cm) segments.
- Five 18-row segments and five 6-row corners give 120 outer row-ends.
- The woven star measures about 3.3 in (8.4 cm) before the border.
- Border Round 1 has 130 sc and Round 2 has 140 sc, adding about 0.33 in (0.8 cm) all around.
- The finished ornament is about 4 in (10.2 cm) wide.
Check each stage as you go, and the star will come out even and crisp. Optional: a few stars in different colors make a lovely set of tree ornaments, but one star is a complete project on its own.
Happy crocheting!