

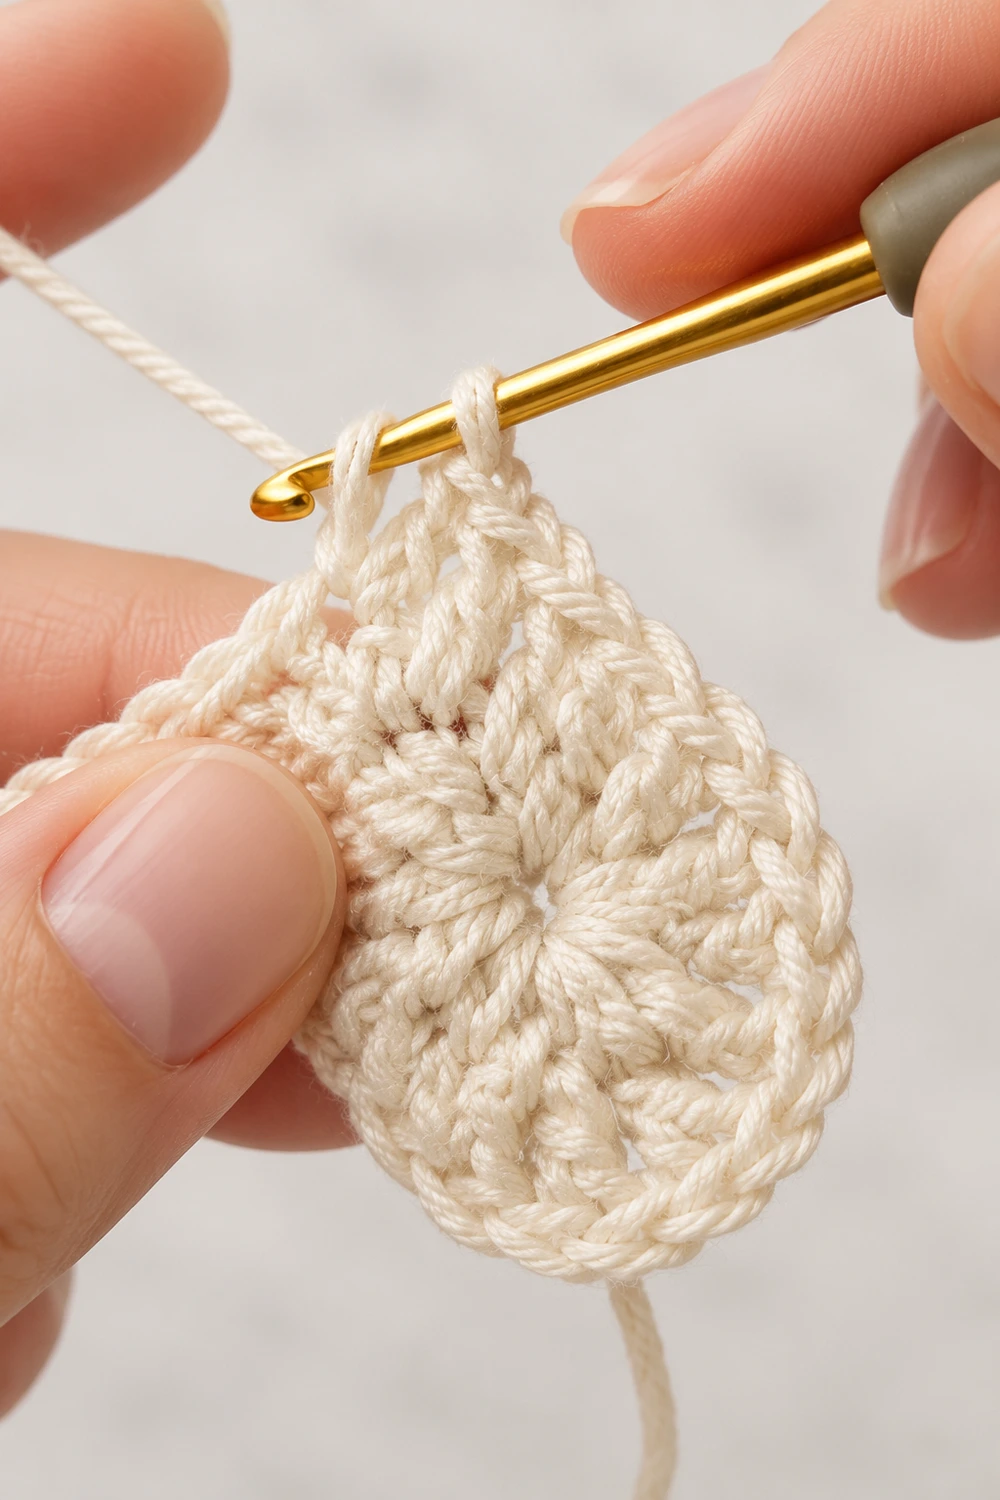
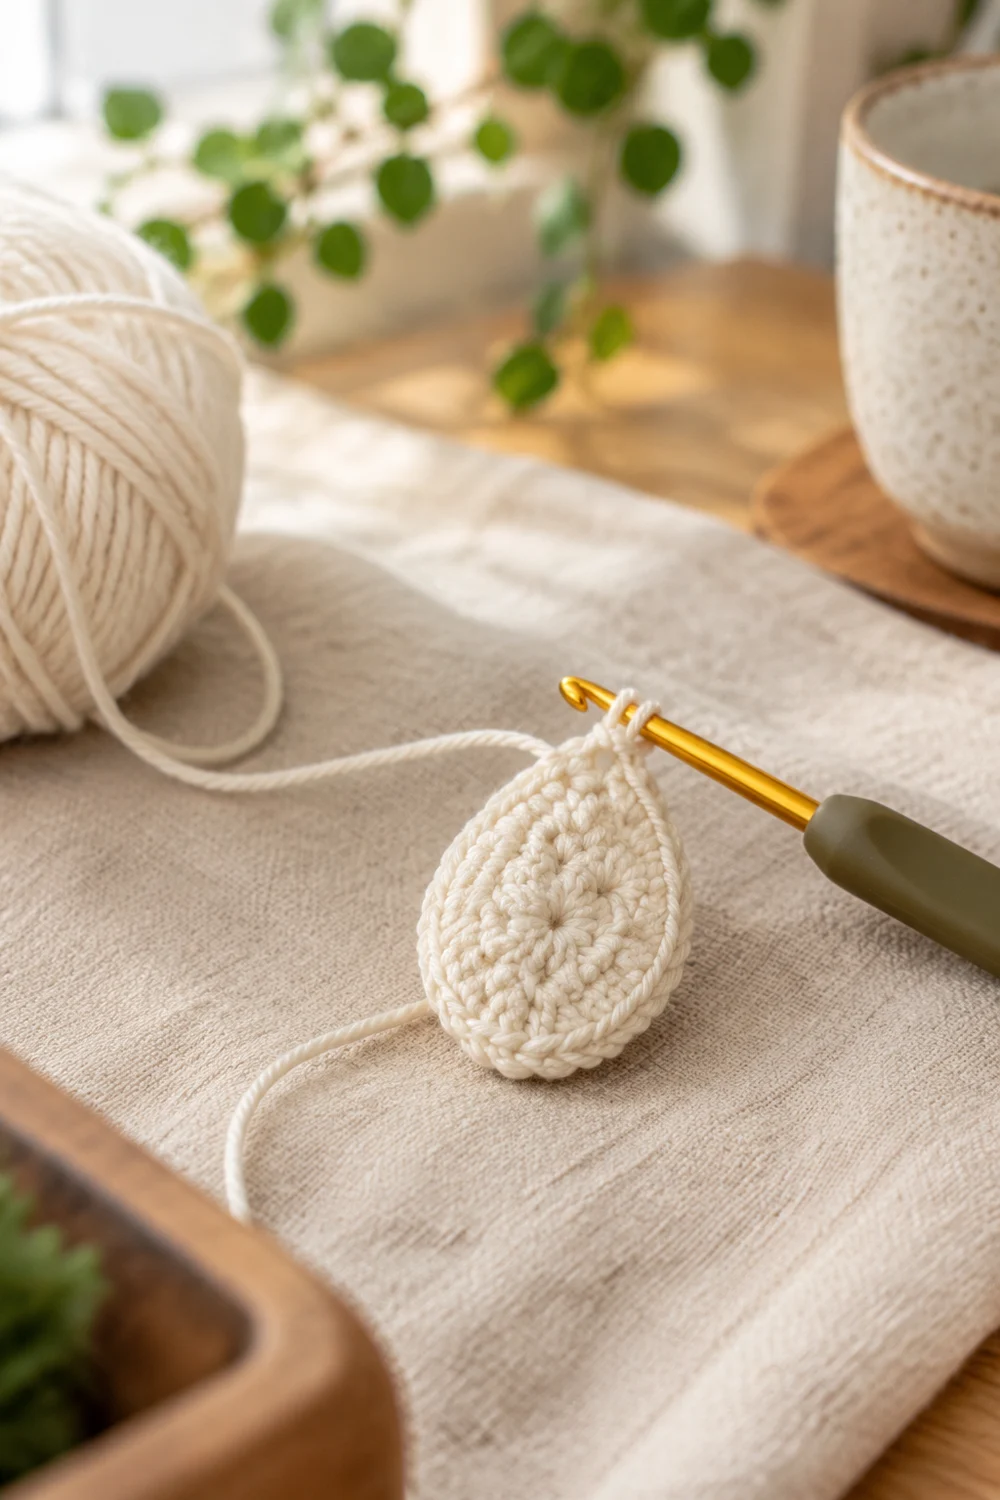
The Cream Pebble Drop is a tiny, three-dimensional teardrop about the size of a grape or a large marble. It is worked in cream cotton with tight stitches, so the surface is dense, nubby, and bumpy from the rounded base to the narrow point. The reel shows it mid-round, still on a gold hook with the working yarn attached. This pattern takes you from that stage to a finished piece.
The look is soft and natural: one cream or off-white shade, no color changes, and a pebbly texture that catches the light. It reads as calm and minimal, and the dense fabric gives it a satisfying weight in the hand.
This pattern uses US crochet terms throughout. The finished motif measures about 1.25 in (3.2 cm) tall and 0.9 in (2.3 cm) wide at its widest point after light stuffing.
Construction is simple. You work one piece in continuous spiral rounds from a magic ring at the rounded base. Plain single crochet rounds handle the shaping, and alternating “nub rounds” of sc and hdc build the bumpy texture. You stuff the piece lightly, then finish it with a short tapered closing edge that forms the teardrop point.
Finished Size and Construction
- Finished size: 1.25 in (3.2 cm) tall x 0.9 in (2.3 cm) wide
- Skill level: Easy to intermediate (small-scale amigurumi)
- Terminology: US crochet terms
- Yarn weight: Fingering / Super Fine (#1) cotton
- Hook: 2.0 mm
- Number of pieces: 1
- Layout: Single 3D teardrop, worked in spiral rounds from base to point
- Piece size: 1.25 in (3.2 cm) x 0.9 in (2.3 cm)
- Size before border (after Rnd 12): about 1 in (2.5 cm) tall
- Border (closing edge) depth: 3 rounds, about 0.25 in (0.6 cm)
Materials
Yarn advice: Choose a smooth, tightly plied cotton in fingering weight. Matte cotton makes the bumps look soft. Mercerized cotton makes them crisp and slightly shiny. Avoid fuzzy or loosely spun yarn, which blurs the nubby texture.
- Cream / off-white: 5 g, about 20 m (22 yd)
Tools:
- 2.0 mm crochet hook
- 1 stitch marker
- Polyester fiberfill, about 1 g (a small pinch)
- Tapestry needle
- Small scissors
- Ruler or measuring tape
The yarn quantity includes a safety margin for a gauge swatch and tails. The motif itself uses about 3 g.
Abbreviations (US Terms)
- MR – magic ring
- ch – chain
- sc – single crochet
- hdc – half double crochet
- sc2tog – single crochet 2 together (see below)
- st(s) – stitch(es)
- Rnd – round
- rep – repeat
- ( ) – stitch count at the end of the round
Special stitch – Invisible decrease (sc2tog): Insert hook into the front loop only of the next st. Insert hook into the front loop only of the following st (3 loops on hook). Yarn over and pull through both front loops (2 loops on hook). Yarn over and pull through both loops. This decrease sits flat and keeps the surface even.
Special pattern – Nub round: Work sc in next st, hdc in next st around. The slightly taller hdc pushes its neighbors outward, so each sc puckers into a small bump. Nub rounds always have an even stitch count, so the sc/hdc alternation never breaks.
Gauge and Checkpoints
Gauge: 9 sc and 10 rounds = 1 in (2.5 cm) in tight sc worked in the round.
At this scale, the motif itself is your swatch. Work Rnds 1–3 first and measure before you continue.
Checkpoint 1 – after Rnd 3: The flat disc measures about 0.6 in (1.5 cm) across.
Checkpoint 2 – after Rnd 8: The piece is an open cup. Pressed flat and unstuffed, it measures about 1.3 in (3.3 cm) across and 0.8 in (2.0 cm) from the base to the working edge. This flat width is half the circumference of about 2.7 in (6.9 cm).
Checkpoint 3 – after Rnd 12: The piece measures about 1 in (2.5 cm) tall.
Checkpoint 4 – finished: The piece measures 1.25 in (3.2 cm) tall and 0.9 in (2.3 cm) wide.
If your disc is too big at Checkpoint 1, go down to a 1.75 mm hook, or tighten your tension so each sc closes snugly. Loose fabric also lets stuffing show through, which is a sign to go smaller.
If your disc is too small, go up to a 2.25 mm hook. Keep the fabric firm, because the nubs need tight stitches to stand up.
Pattern: Base and Body
Work in continuous spiral rounds. Do not join or turn. Place the stitch marker in the first st of each round and move it up as you go. Keep the right side (outside) facing you so the nubs form on the outside.
Rnd 1: MR, ch 1, 6 sc in ring. Pull the ring tight. (6)
Rnd 2: 2 sc in each st around. (12)
Rnd 3: Sc in next st, 2 sc in next st rep 6 times. (18)
Measure here (Checkpoint 1).
Rnd 4 (nub): Sc in next st, hdc in next st rep 9 times. (18)
This round adds no stitches. Because it is an even round on a flat disc, the edges begin to cup upward and form the rounded base of the teardrop.
Rnd 5: Sc in next 2 sts, 2 sc in next st rep 6 times. (24)
This is the final increase round. The 24 sts form the widest part of the teardrop.
Rnd 6 (nub): Sc in next st, hdc in next st rep 12 times. (24)
Rnd 7: Sc in each st around. (24)
Rnd 8 (nub): Sc in next st, hdc in next st rep 12 times. (24)
Measure here (Checkpoint 2). The sides should rise fairly straight, with clear rows of bumps on Rnds 4, 6, and 8.
Pattern: Taper
The taper starts at Rnd 9. The decreases are placed so the top narrows more gradually than the base widened, which creates the teardrop profile.
Rnd 9: Sc in next 2 sts, sc2tog rep 6 times. (18)
Check: 6 repeats x 4 sts worked = 24 sts used, and 6 repeats x 3 sts made = 18.
Rnd 10 (nub): Sc in next st, hdc in next st rep 9 times. (18)
Rnd 11: Sc in next st, sc2tog rep 6 times. (12)
Check: 6 repeats x 3 sts worked = 18 sts used, and 6 repeats x 2 sts made = 12.
Stuff now. Push in fiberfill a little at a time with the tip of your hook or a chopstick. Fill the base and body firmly enough to hold the oval shape, but not so firmly that stitches gap. The surface should still feel slightly springy.
Rnd 12 (nub): Sc in next st, hdc in next st rep 6 times. (12)
Measure here (Checkpoint 3). The piece should be about 1 in (2.5 cm) tall, with a rounded base and sides beginning to draw in.
Border (Closing Edge)
On a 3D teardrop, the “border” is the closing edge that forms the point. It is worked at the same gauge as the body, 9 sc per in, in plain tight sc. Nub rounds are not used here because the stitch counts drop to odd numbers and the space is too small for clean alternation.
To keep the point centered, think of the round as three equal “sides” (thirds). Each side is decreased evenly.
Border Rnd 1 (Rnd 13): Sc in next 2 sts, sc2tog rep 3 times. (9)
Per side: 4 sts worked become 3 sts. Total: 3 sides x 4 = 12 sts used, and 3 sides x 3 = 9 sts made.
Add a final wisp of stuffing into the narrowing tip.
Border Rnd 2 (Rnd 14): Sc in each st around. (9)
Per side: 3 sts worked, 3 sts made. This even round lengthens the point so it does not flatten into a dome.
Border Rnd 3 (Rnd 15): Sc in next st, sc2tog rep 3 times. (6)
Per side: 3 sts worked become 2 sts. Total: 3 x 3 = 9 sts used, and 3 x 2 = 6 sts made.
Why the math works: Rnd 12 ends with 12 sts, which divides evenly by 3. That gives three sides of 4 sts. Each border round either removes exactly 1 st per side or holds the count steady, so the point narrows symmetrically: 12, then 9, then 9, then 6. No side is left with a partial repeat.
Close: Cut the yarn, leaving a 6 in (15.2 cm) tail. Thread it onto the tapestry needle. Weave it through the front loop of each of the 6 remaining sts and pull gently to cinch the hole closed. Insert the needle down through the point and out the side of the body. Pull slightly to settle the tip, then trim close so the tail disappears inside.
Weave the starting tail from the magic ring into the inside of the base in the same way.
Final Blocking
- Roll the finished piece gently between your palms for 10–15 seconds to even out the stuffing.
- Pinch the point lightly between thumb and forefinger to sharpen the teardrop tip.
- Hold a steam iron about 1 in (2.5 cm) above the piece and give it 2–3 short bursts of steam. Never press the iron onto the piece, because that flattens the nubs.
- While it is still warm, reshape the base into a smooth curve and roll it once more.
- Let it dry and cool completely, about 15 minutes, before handling or measuring.
- Measure: 1.25 in (3.2 cm) tall x 0.9 in (2.3 cm) wide.
Final Quality-Control Checklist
- Final counts match: Rnd 5 (24), Rnd 9 (18), Rnd 11 (12), Rnd 13 (9), Rnd 15 (6).
- Every nub round has an even count and alternates sc/hdc with no doubled stitches.
- The bumps sit on the outside of the piece.
- The magic ring is fully closed, with no hole at the base.
- The point is centered over the base, not leaning to one side.
- No fiberfill shows between stitches.
- Both tails are hidden inside the piece.
- The finished size is about 1.25 in (3.2 cm) x 0.9 in (2.3 cm).
Troubleshooting
Stuffing shows through the stitches. The tension is too loose. Go down a hook size, or stuff slightly less firmly so the stitches are not stretched.
The nubs look flat. Make sure the hdc stitches are fully formed and the sc stitches are pulled snug. Strong contrast between the short sc and taller hdc creates the bump. Also check that you are working with the outside facing you.
The piece is round, not teardrop-shaped. Do not skip Border Rnd 2 (Rnd 14), and check that the decreases in Rnds 9 and 11 are spread evenly. Overstuffing the top can also round off the point.
The point leans sideways. The decreases are probably stacking unevenly. Count each border round by thirds and confirm each third ends with a sc2tog.
The marker lost its place. Count stitches against the round totals. At these small numbers, it is quicker to rip back one round than to guess.
There is a hole at the base. Tighten the magic ring tail, then weave it once more around the inside of Rnd 1.
Care
Hand wash cool with a mild soap, squeeze gently in a towel, and reshape while damp. Air dry fully before storing.
Final Notes
The measurement chain is short and easy to track. Start with a 0.6 in (1.5 cm) disc after Rnd 3. Grow to a 24-st body that lies 1.3 in (3.3 cm) flat after Rnd 8. Reach 1 in (2.5 cm) tall after Rnd 12. Finish with a three-round closing edge that adds about 0.25 in (0.6 cm), for a final 1.25 in (3.2 cm) x 0.9 in (2.3 cm) cream teardrop.
If each checkpoint lands near its target, the finished piece will match. If one drifts, adjust your hook size at that stage rather than at the end.
Optional: once you are comfortable with the shape, you can make extras the same way. The pattern above, however, is complete as a single motif.
Happy crocheting!