

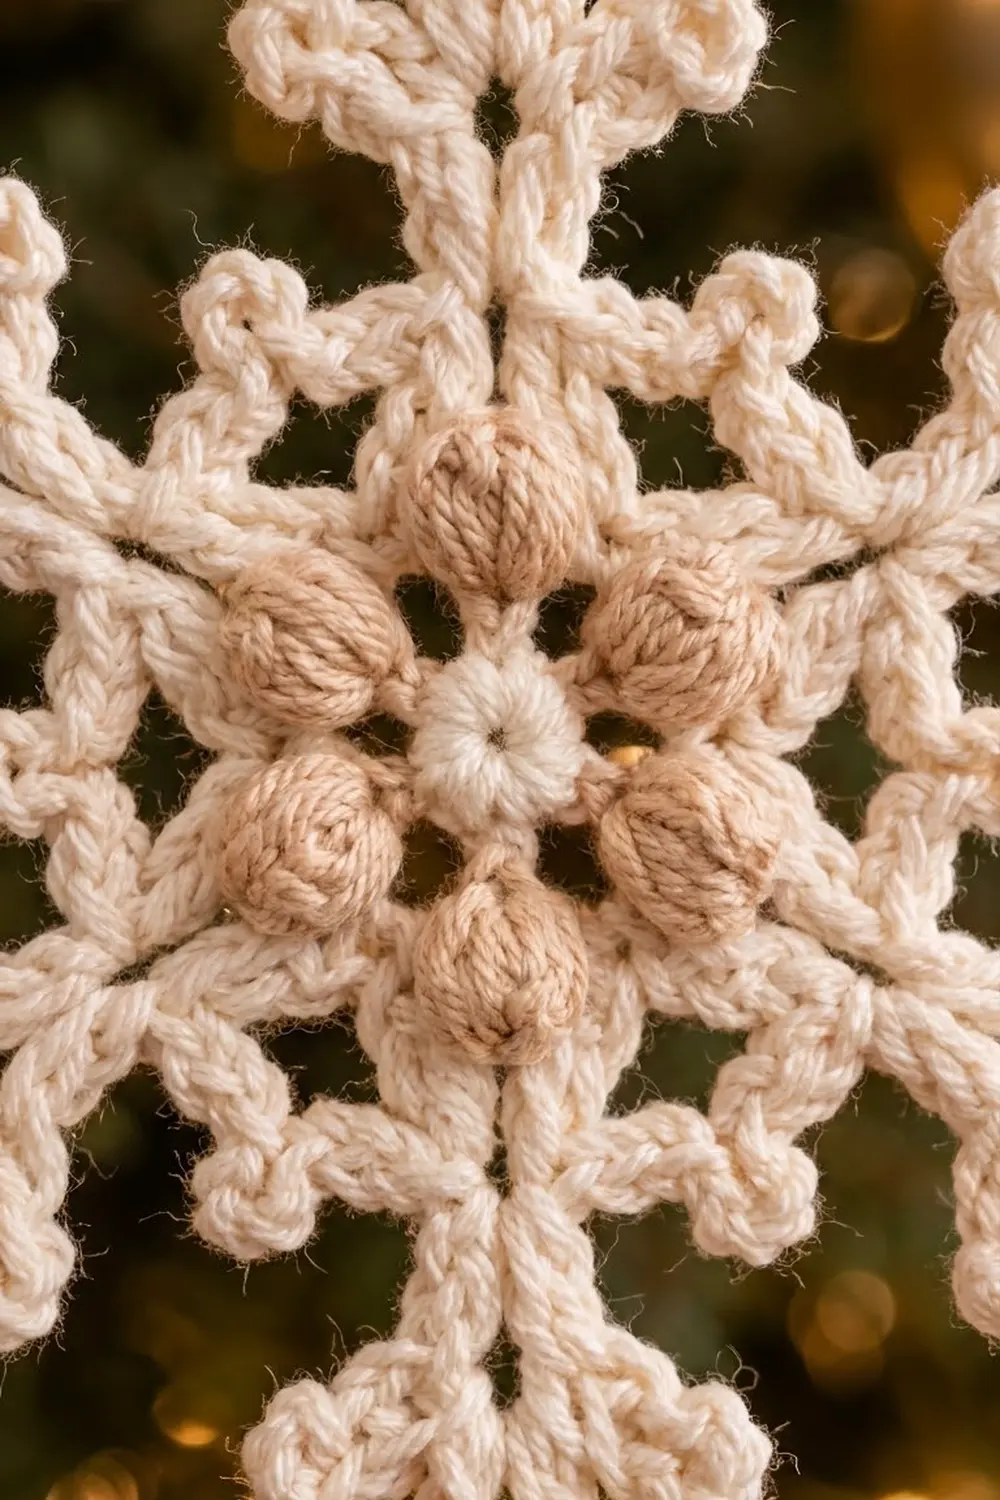
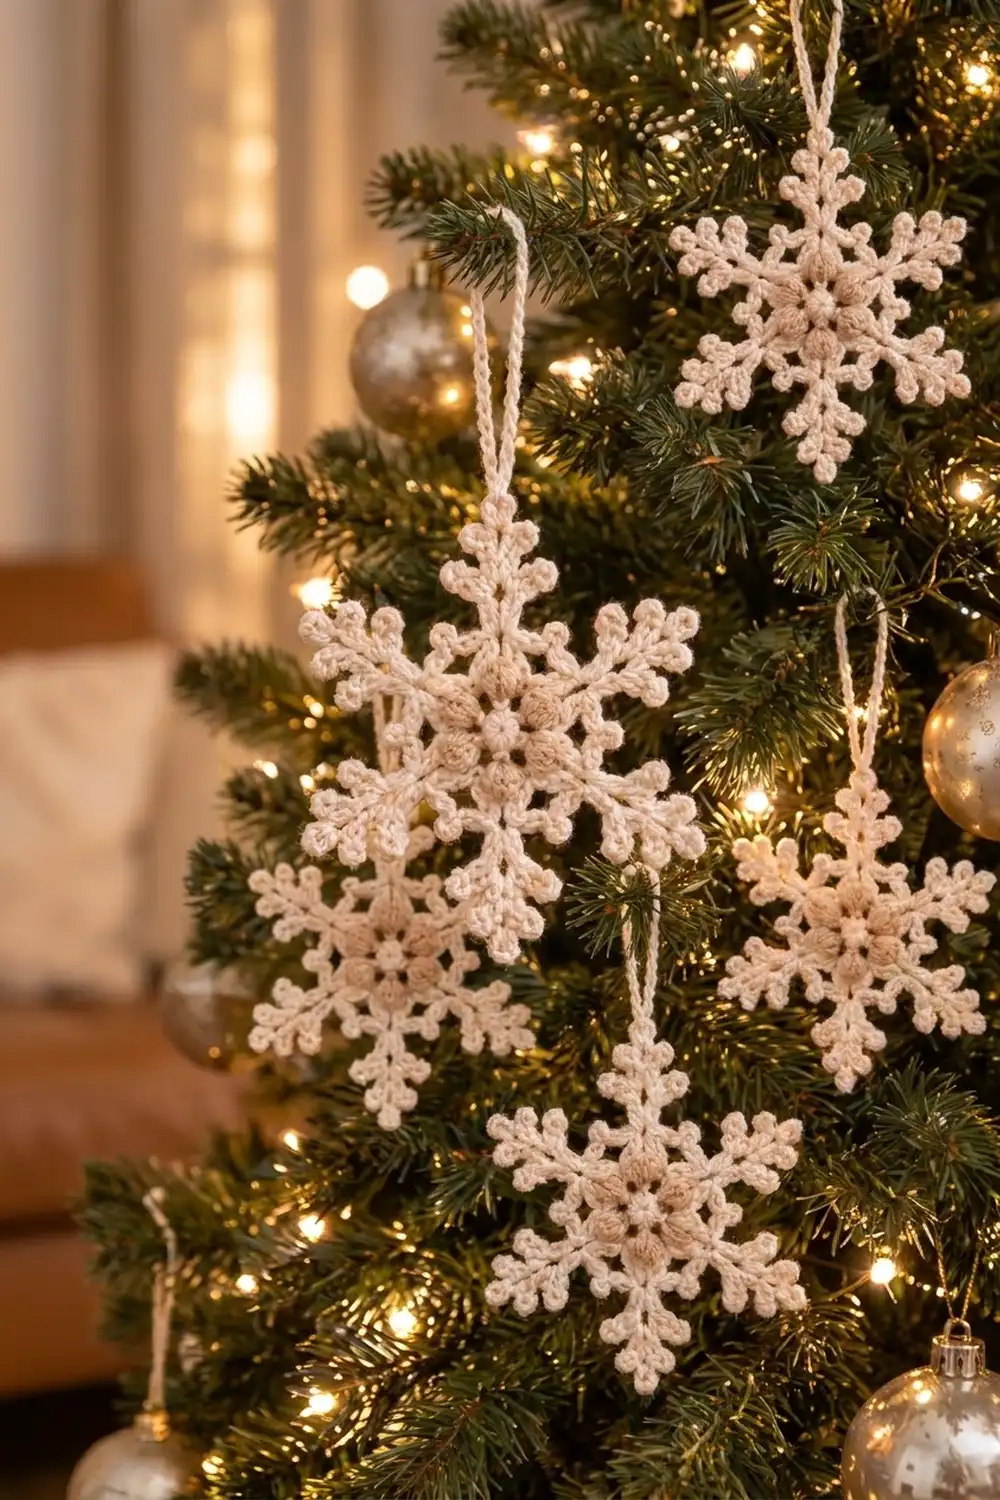
This six-armed snowflake ornament has a soft, wintry look. Creamy ivory arms branch out into tiny picot “frost crystals,” and a ring of six light-tan puff stitches at the center adds warmth and texture. It looks delicate on a tree but holds up well because it is worked in smooth cotton and lightly stiffened.
The palette uses two colors. Cream makes up the center, arms and hanging loop, and light tan is used only for the six puffs. The overall style is rustic-Scandinavian: neutral, tactile and calm, so it suits gold baubles, natural greenery and warm white lights.
The pattern uses US crochet terms. The finished ornament measures 5 in (12.7 cm) across from arm tip to arm tip after blocking, plus a hanging loop about 2 in (5.1 cm) tall.
The snowflake is one piece worked in the round. You start with a cream ring, then add a round of tan puffs and a cream single crochet round. Each of the six arms is then built in one final round by chaining out and working back toward the center with slip stitches and picot branches. A short chain loop finishes the top arm.
Finished Size and Construction
- Finished size: 5 in (12.7 cm) tip to tip, blocked
- Skill level: Intermediate (puff stitches, picots, working back along a chain)
- Terminology: US crochet terms
- Yarn weight: DK (3), cotton or cotton blend
- Hook: 3.25 mm (US D/3)
- Number of pieces: 1
- Layout: Single motif, no joining
- Piece size: 5 in (12.7 cm) blocked
- Size before border: No border is added. The unblocked snowflake measures about 4.5 in (11.4 cm), and blocking opens it to 5 in (12.7 cm).
- Border depth: 0 in (0 cm). The picot arms form the finished edge.
Materials
Choose a smooth, mercerized or combed DK cotton. Cotton gives crisp stitch definition, holds starch well and won’t fuzz on the tree. Avoid fluffy acrylics and mohair, which blur the picots.
- Color A (Cream): 8 g, about 18 m (20 yd)
- Color B (Light Tan/Beige): 2 g, about 5 m (5.5 yd)
These quantities include a safety margin of roughly 30%, so a single 50 g ball of each color will make several ornaments.
Tools:
- 3.25 mm (US D/3) crochet hook
- Tapestry needle
- Scissors
- Foam blocking mat or thick cardboard covered in plastic wrap
- Rust-proof pins (about 30)
- Spray starch, or a 1:1 mix of white craft glue and water
- Ruler or tape measure
Abbreviations (US Terms)
- ch – chain
- sl st – slip stitch
- sc – single crochet
- st(s) – stitch(es)
- sp – space
- yo – yarn over
- puff – puff stitch (see below)
- picot – the specified chains plus a sl st into the stated chain, forming a small loop
Special stitch – Puff stitch (puff): [Yo, insert hook in the indicated st, yo, pull up a loop to about 1/2 in (1.3 cm)] 4 times; you now have 9 loops on the hook. Yo and pull through all 9 loops, then ch 1 to lock the puff. The locking ch 1 does not count as a stitch.
Gauge and Checkpoints
Gauge is not critical for an ornament, but it controls the final size. The best check is to make one full snowflake before starting a batch.
Chain gauge: 10 ch = 1.25 in (3.2 cm), lying relaxed and unstretched.
Checkpoints:
- After Round 1: the center measures 0.75 in (1.9 cm) across.
- After Round 2: the puff ring measures 1.25 in (3.2 cm) across.
- After Round 3: the solid center measures 1.75 in (4.4 cm) across.
- After Round 4: each arm measures about 1.6 in (4.1 cm) from the edge of Round 3 to the tip picot, giving 1.75 + 1.6 + 1.6 = about 5 in (12.7 cm) tip to tip once blocked.
If the snowflake is too big (over 5.25 in / 13.3 cm blocked), go down to a 3.0 mm hook, or chain more tightly on the arm stems.
If the snowflake is too small (under 4.75 in / 12.1 cm blocked), go up to a 3.5 mm (US E/4) hook. Check that your arm chains aren’t cinched tight.
Pattern
Round 1 – Center (Color A, Cream)
Make a magic ring with Color A.
Ch 1 (does not count as a st), work 12 sc into the ring. Pull the tail to close the ring firmly. Sl st to the first sc to join.
Stitch count: 12 sc.
Fasten off Color A and weave in the tail on the back.
Round 2 – Puff Ring (Color B, Light Tan)
Join Color B with a sl st in any sc.
Ch 2 (does not count as a st). Work a puff in the same sc, then ch 2 and skip the next sc. Puff in the next sc, ch 2, skip the next sc. Repeat from * to * 4 more times. Sl st to the top of the first puff to join.
Stitch count: 6 puffs and 6 ch-2 spaces.
Fasten off Color B. Gently push each puff toward the right side so the puffs stand up and round out. They should sit close together in a ring with no gaps, like a small flower.
Round 3 – Cream Frame (Color A)
Join Color A with a sl st in the top (the locking ch) of any puff.
Ch 1 (does not count as a st). Sc in the top of the puff, work 3 sc in the next ch-2 sp. Repeat from * to * 5 more times. Sl st to the first sc to join.
Stitch count: 24 sc, worked as 6 repeats of 4 sts: 1 puff-top sc and 3 sc in the ch-2 space.
The puff-top sc stitches mark where the arms will grow. Each arm lines up with a puff, matching the finished look.
Check that the piece measures 1.75 in (4.4 cm) across. Don’t fasten off.
Round 4 – Arms (Color A)
Each arm starts and ends in the same puff-top sc. Between arms, you work a small “valley” across the 3 sc that sit above the ch-2 space.
When working back down the chain, the chains are numbered from the hook. Ch 1 is the chain closest to the hook (the arm tip), and ch 12 is the chain closest to the center.
Sl st into the first sc of the round (a puff-top sc) if you aren’t already there.
Arm:
- Sc in the puff-top sc.
- Stem: Ch 12.
- Tip trefoil: Sl st in the 4th ch from the hook (the first tip picot). [Ch 3, sl st in the same ch] 2 times. This makes 3 tip picots.
- Sl st in each of the next 2 ch (ch 5 and ch 6).
- Upper branch pair (worked at ch 6): [Ch 4, sl st in the 3rd ch from the hook (picot), ch 1, sl st in the same stem ch] 2 times. This makes 2 small branches, 1 picot each.
- Sl st in each of the next 3 ch (ch 7, ch 8 and ch 9).
- Lower branch pair (worked at ch 9): [Ch 5, sl st in the 3rd ch from the hook (picot), ch 3, sl st in the same ch (second picot), ch 2, sl st in the same stem ch] 2 times. This makes 2 larger branches, 2 picots each.
- Sl st in each of the last 3 ch (ch 10, ch 11 and ch 12).
- Sc in the same puff-top sc as step 1.
Valley: Ch 1, skip the next sc, sc in the next sc (the middle of the 3), ch 1, skip the next sc.
Repeat the Arm and Valley 5 more times, working each arm into the next puff-top sc. After the sixth valley, sl st to the first sc of the round to join.
Stitch counts for Round 4:
- Per arm: 12 stem ch, 9 sl sts along the stem (ch 4 through ch 12), and 9 picots (3 tip, 2 upper, 4 lower).
- Base of round: 3 sc per repeat (2 at the arm base and 1 at the valley center) and 2 ch-1 spaces. This gives 18 sc and 12 ch-1 spaces in total.
- Whole snowflake: 6 arms and 54 picots.
Check the base count against Round 3. Each repeat covers exactly 4 sts of Round 3: the puff-top sc (used twice), a skipped sc, the middle sc and another skipped sc. 6 × 4 = 24, which matches Round 3.
Fasten off, leaving a 6 in (15.2 cm) tail, and weave it in along the back of the center.
Branch direction: Each pair of branches is worked into the same stem chain. While you crochet, both branches may lean to one side. That’s expected; you’ll pin one branch to each side of the stem when blocking.
Hanging Loop (Color A)
Choose one arm as the top. Join Color A with a sl st into the middle tip picot of that arm.
Ch 30. Sl st into the same tip picot, which makes a loop about 2 in (5.1 cm) tall. Fasten off and weave both tails down into the stem.
For a stronger loop, work 1 sl st into each ch of the loop before fastening off.
Border
This design has no separate border. The picot branches are the finished edge, and adding a border round would hide the frosty outline.
The edge still follows exact math:
- Edge gauge: Each arm’s outline is defined by 9 picots placed within about 1.6 in (4.1 cm) of stem.
- Per arm: 3 tip picots, 2 upper-branch picots and 4 lower-branch picots, for 9 picots.
- Per side (one side of one arm): 1 upper picot and 2 lower picots, for 3 picots per side, plus the 3 shared tip picots. That gives 3 + 3 + 3 = 9.
- Total: 6 arms × 9 picots = 54 picots.
Why the math works: Every arm starts and ends in one Round 3 stitch and uses the same 12-chain stem. That keeps all six arms the same length, so the picot outline stays symmetrical and the tip-to-tip measurement is even in every direction.
Final Blocking
- Weave in all ends before you block. Starch locks tails in place.
- Wet the ornament in cool water and press out the excess in a towel. Don’t wring it.
- Draw a guide. On paper under clear plastic, draw a 5 in (12.7 cm) circle and mark six spokes 60° apart.
- Pin the center flat, with the puffs facing up and each puff lined up with a spoke.
- Pin each arm tip at the 5 in (12.7 cm) circle, with the middle tip picot on the spoke line.
- Separate the branches. For each pair, pin one branch to each side of the stem at matching angles. Then pin open the picots of the trefoil and the larger branches.
- Puff the puffs. Before starching, use a fingertip to lift each tan puff so it stays rounded.
- Stiffen. Spray starch generously, or dab on the glue-water mix with a brush. Blot off any drips at the picots.
- Dry completely for 12–24 hours before unpinning.
Final Quality-Control Checklist
- Round 1 has 12 sc, and the magic ring is pulled fully closed.
- There are 6 tan puffs with no cream showing through them.
- Round 3 has 24 sc, with one puff-top sc above each puff.
- There are 6 arms, each lined up with a puff.
- Each arm has 3 tip picots, 2 upper picots and 4 lower picots (9 in total).
- All arms measure the same, about 1.6 in (4.1 cm).
- The blocked ornament is 5 in (12.7 cm) tip to tip, within 0.25 in (0.6 cm).
- The hanging loop is secure, centered on the top arm and about 2 in (5.1 cm) tall.
- All tails are woven in on the back and invisible from the front.
- The ornament is stiff and flat with no curling arms.
Troubleshooting
Puffs look flat or loose. Pull each loop up to a full 1/2 in (1.3 cm) and lock every puff with ch 1. Push the puffs to the front before Round 3.
The center ruffles or cups. Your Round 3 tension may be too loose, or you may have worked more than 3 sc in a ch-2 space. Recount: you should have exactly 24 sc.
The arms are different lengths. Count the stem chains (12 each) and the sl sts between branches (2, then 3, then 3). Tight sl sts on one arm also shorten it, so keep them relaxed.
The branches twist to one side. This is normal before blocking. Pin each branch firmly to its own side and starch.
The snowflake curls after drying. It needs more stiffener. Re-wet it, re-pin and re-starch it more heavily.
Picots disappear. Your hook may be too large or your yarn too fuzzy. Switch to a smooth cotton, or go down 0.25 mm in hook size.
Care
Spot clean with a damp cloth. If the snowflake softens over time, rinse it, reshape it and starch it again. Store it flat between tissue paper so the arms don’t bend.
Final Notes
Each stage of the snowflake builds on the last. The 12-sc center measures 0.75 in (1.9 cm), the puff ring 1.25 in (3.2 cm) and the 24-sc frame 1.75 in (4.4 cm). Six 12-chain arms, each about 1.6 in (4.1 cm), bring the blocked ornament to 5 in (12.7 cm) tip to tip, with 54 picots and a 2 in (5.1 cm) hanging loop. If your checkpoints match at each stage, the finished snowflake will come out at the right size.
Happy crocheting!