

The Lilac Frost Ice Skate is a small, lacy ornament for the tree. The boot is lavender shell lace that opens into soft starbursts, and the crisp cream trim gives it a vintage, frosty look. A scalloped cuff sits at the top, a ridged sole band runs along the bottom, and a curled blade finishes the classic skate shape.
The palette is two colors: lavender for the boot and cream for the cuff, sole, blade, laces and hanging loop. The style is delicate and traditional, much like a lace snowflake but in the shape of a skate.
This pattern uses US crochet terms. The finished ornament measures about 4.2 in wide x 4.5 in tall (10.7 x 11.4 cm), not counting the hanging loop.
Construction is simple. You crochet the boot flat in 8 rows of shell lace, shaping the toe step as you go. Next you work one lavender outline round, and then add the cream sole band and cuff directly onto that outline. You make the blade separately and sew it on. To finish, you lace a cream cord up the front and tie a bow.
Finished Size and Construction
- Finished size: 4.2 in wide x 4.5 in tall (10.7 x 11.4 cm), plus a 2.3 in (5.8 cm) hanging loop
- Skill level: Intermediate (shell lace, working into row-ends)
- Terminology: US
- Yarn weight: Sport-weight cotton (#2 fine)
- Hook: 3.0 mm
- Number of pieces: 1 ornament. The boot is worked as one piece with the cuff and sole added directly to it. The blade is made separately and sewn on.
- Layout: One single skate, toe facing right with the right side facing you
- Boot before border: 3.4 in (8.6 cm) wide at the foot, 2.4 in (6.1 cm) wide at the leg, 2.7 in (6.9 cm) tall
- Border depth: 0.2 in (0.5 cm) for the lavender outline. The cuff adds 0.5 in (1.3 cm) and the sole band adds 0.3 in (0.8 cm).
- Blade: 3.7 in (9.4 cm) long, before the curl
Materials
Use a smooth, mercerized sport-weight cotton. Cotton gives the shells clear definition and blocks crisply. Avoid fuzzy or very stretchy yarns, because the openings in the lace will close up.
- Lavender: 8 g, about 25 m (boot and outline)
- Cream: 7 g, about 22 m (sole band, cuff, blade, struts, laces and loop)
These quantities include a margin for your gauge swatch and tails.
Tools:
– 3.0 mm crochet hook
– Tapestry needle
– Scissors
– Stitch markers (2–4)
– Rustproof pins and a blocking surface
– Spray bottle or light fabric stiffener (optional)
Abbreviations (US Terms)
- ch: chain
- sl st: slip stitch
- sc: single crochet
- dc: double crochet
- tr: treble crochet
- BLO: back loop only
- st(s): stitch(es)
- tch: turning chain
- RS / WS: right side / wrong side
Special stitches:
– Shell: 5 dc in the same stitch.
– Half shell: 3 dc in the same stitch. At the start of a row, this is ch 3 (counts as dc) plus 2 dc in the same stitch.
– Standing sc: With a slip knot on your hook, insert the hook into the stitch and complete a sc as usual.
Gauge and Checkpoints
Gauge: 22 dc and 12 rows = 4 in (10.2 cm). In sc, 24 sc = 4 in (10.2 cm).
Make the boot first and check it before you add any cream. One finished boot is a better gauge test than a swatch, because shell lace often works up taller than plain dc.
Checkpoints:
1. After Row 1, the boot is 3.4 in (8.6 cm) wide.
2. After Row 5, the leg is 2.4 in (6.1 cm) wide.
3. After Row 8, the boot is 2.7 in (6.9 cm) tall.
4. After the lavender outline, the boot is 3.8 in (9.7 cm) wide x 3.1 in (7.9 cm) tall.
5. After the blade’s Round 1, the blade is 3.7 in (9.4 cm) long.
If your boot is too big, go down to a 2.75 mm hook. If it is too small, go up to a 3.25 mm hook. Change hooks if you are off by more than 0.2 in (0.5 cm) at Checkpoint 1, because small errors grow once the outline and trim are added.
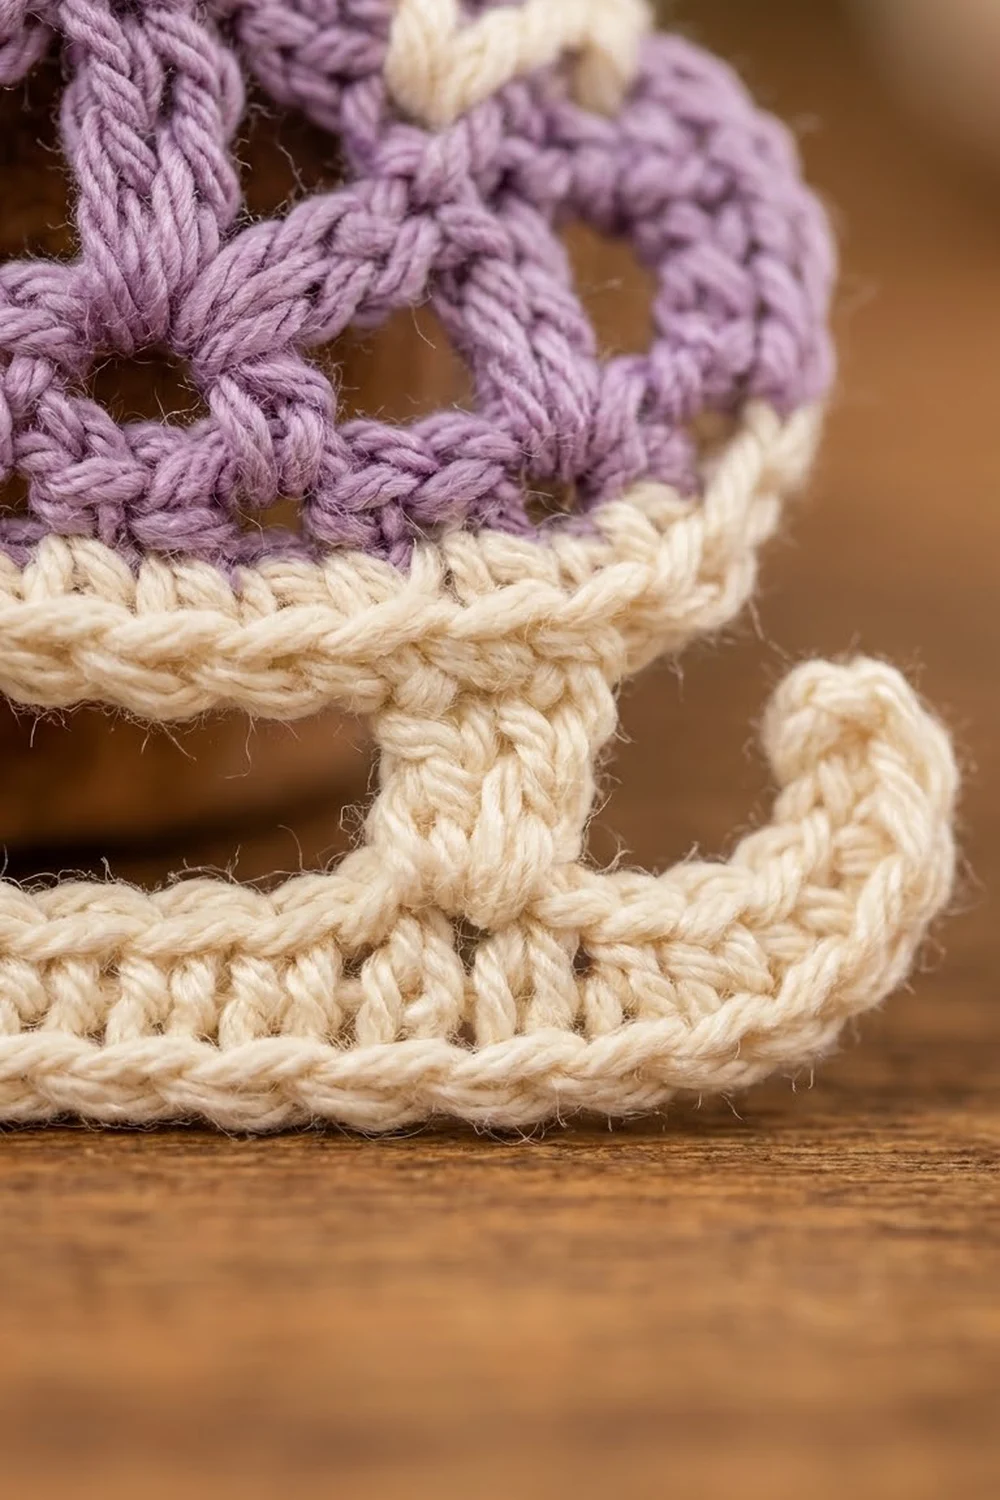
Boot (Lavender)
Odd rows are RS rows. Each odd row starts at the toe edge, so the toe points right when the RS faces you.
Foundation: Ch 21.
Row 1 (RS): Dc in the 4th ch from hook and in each ch across. Turn. (19 sts; the skipped ch-3 counts as 1 dc.)
Row 2 (WS): Ch 1, sc in the first st. Skip 2 sts, shell in the next st, skip 2 sts, sc in the next st. Repeat from * 2 more times, working the last sc in the top of the tch. Turn. (3 shells + 4 sc = 19 sts)
Row 3 (RS): Ch 3 (counts as dc), 2 dc in the first sc. Sc in the center dc of the next shell, shell in the next sc. Repeat from * once more. Sc in the center dc of the last shell, then 3 dc in the last sc. Turn. (3 + 1 + 5 + 1 + 5 + 1 + 3 = 19 sts)
The shells now sit offset from those in Row 2. This is what creates the fan and starburst openings.
Row 4 (WS, toe shaping): Ch 1, sc in the first dc. Shell in the next sc, sc in the center dc of the next shell. Repeat from * once more. Work 3 dc in the next sc. Leave the last 3 sts of Row 3 unworked. Turn. (1 + 6 + 6 + 3 = 16 sts)
Row 5 (RS, toe shaping): Ch 1, sl st in each of the first 3 dc and in the next sc. Ch 3 (counts as dc), 2 dc in the same sc. Sc in the center dc of the next shell, shell in the next sc, sc in the center dc of the next shell, 3 dc in the last sc. Turn. (3 + 1 + 5 + 1 + 3 = 13 sts; the sl sts are not counted)
This completes the step from the foot into the narrower leg.
Row 6 (WS): Ch 1, sc in the first dc, shell in the next sc, sc in the center dc of the next shell, shell in the next sc, sc in the top of the tch. Turn. (13 sts)
Row 7 (RS): Ch 3 (counts as dc), 2 dc in the first sc, sc in the center dc of the next shell, shell in the next sc, sc in the center dc of the next shell, 3 dc in the last sc. Turn. (13 sts)
Row 8 (WS, leveling row): Ch 3 (counts as dc), dc in the next 2 dc, tr in the next sc, dc in the next 5 dc, tr in the next sc, dc in the next 2 dc and in the top of the tch. (3 + 1 + 5 + 1 + 3 = 13 sts)
The two tr fill the dips between the shells, which gives you a straight top edge for the cuff. Don’t fasten off yet. Check the size against Checkpoints 2 and 3.
Border
The border has three parts: one lavender outline round, the cream sole band, and the cream cuff.
Border gauge: 24 sc = 4 in (10.2 cm), so each sc is 1/6 in wide. One dc row is 0.33 in tall, and 2 sc per row-end also measure 0.33 in. This is why 2 sc per row-end lies flat on the side edges. Along the top and bottom edges, you work 1 sc into each stitch.
Round 1: Lavender Outline
Fasten off the boot. With the RS facing, join lavender with a standing sc in the last st of Row 8. This is the front-top corner.
- Top edge: 2 more sc in the same corner st, sc in the next 11 sts, 3 sc in the last st (heel-top corner). 17 sc (3 + 11 + 3)
- Heel edge: 2 sc in each of the 8 row-ends. 16 sc
- Bottom edge: Work into the free loops of the foundation ch. Work 3 sc in the first ch, sc in the next 17 ch, 3 sc in the last ch (toe-bottom corner). 23 sc (3 + 17 + 3)
- Front edge: 2 sc in each row-end of Rows 1–3 (6 sc). Sc in each of the 3 unworked sts of Row 3 (3 sc). 2 sc in the Row 4 row-end (2 sc). Sc in each of the 3 sl sts from Row 5 (3 sc). 2 sc in each row-end of Rows 5–8 (8 sc). 22 sc
Sl st to the first sc and fasten off. (17 + 16 + 23 + 22 = 78 sc)
Each corner’s 3 sc are counted only once, inside its own side. The inner corner at the toe step needs no extra stitches.
Sole Band (Cream)
Row 1 (RS): Join cream in the center sc of the heel-bottom corner. Ch 1, sc in the same st and in each sc across to the center sc of the toe-bottom corner. Turn. (1 + 1 + 17 + 1 + 1 = 21 sc)
Row 2: Ch 1, sc in the BLO of each st across. (21 sc) Fasten off.
The back-loop row gives the band its ridged look.
Cuff (Cream)
Row 1 (RS): Join cream in the center sc of the front-top corner. Ch 1, 2 sc in the same st, sc in the next 13 sc, 2 sc in the center sc of the heel-top corner. Turn. (15 sts worked 1-per-stitch + 2 extra sc = 17 sc)
Row 2: Ch 1, sc in the first st. Skip 1 st, shell in the next st, skip 1 st, sc in the next st. Repeat from * 3 more times. (4 shells + 5 sc = 25 sts)
The 4 scallops use exactly 1 + (4 x 4) = 17 stitches. The 2 extra sc from Row 1 give the cuff its slight flare.
Hanging loop: Don’t fasten off. Sl st across to the 3rd sc of Row 2, the center valley. Ch 28, sl st in the same sc. Fasten off.
Blade (Cream)
Round 1: Ch 23. Sc in the 2nd ch from hook and in the next 20 ch (21 sc). Work 3 sc in the last ch; this is the toe end. Working into the opposite side of the chain, sc in the next 20 ch, then 2 sc in the same ch as the first sc. Sl st to the first sc. (21 + 3 + 20 + 2 = 46 sc)
Check the length against Checkpoint 5. The second side, with 20 sc, becomes the top edge.
Struts: Count the top edge from the toe end and place markers in sts 3 and 16.
– Row 1: Join cream in the marked st 3. Ch 1, sc in the same st and the next 2 sts. Turn. (3 sc)
– Row 2: Ch 1, sc in each st. (3 sc) Fasten off, leaving an 8 in (20.3 cm) tail.
Repeat on sts 16–18 for the back strut. The struts are 0.3 in (0.8 cm) tall and have a 1.7 in (4.3 cm) gap between them.
Toe curl: Join cream in the center sc of the 3-sc toe group. Ch 7, sc in the 2nd ch from hook and in the next 5 ch, sl st in the same blade st. (6 sc) Bend the arm up and back on itself, and tack the tip to the top of the blade’s toe end.
Heel tip: Join cream in the last sc of Round 1. Ch 4, sc in the 2nd ch from hook and in the next 2 ch, sl st in the same st. (3 sc) Tack it so it tilts slightly upward.
Attaching the blade: Line up the blade’s heel end with the boot’s heel edge. Whipstitch the top of each strut to the BLO ridge of the sole band, placing the front strut under sole sts 4–6 counted from the toe. The toe curl should extend about 0.4 in (1.0 cm) past the boot’s toe. This brings the overall width to 4.2 in (10.7 cm).
Laces (Cream)
Cut a 24 in (61.0 cm) strand of cream and thread it on a tapestry needle. Start just above the toe step and center the strand. Bring each end up through the lace about 0.25 in (0.6 cm) in from the front outline, crossing the ends to form 4 X’s up to the front-top corner. Tie a bow just below the cuff with loops about 0.75 in (1.9 cm) long, and trim the ends evenly.
Final Blocking
- Weave in all ends except the lace bow. Weave lavender into lavender and cream into cream so no color shows through the lace.
- Spritz the ornament until it is damp, but not soaked.
- Pin it flat to 4.2 in x 4.5 in (10.7 x 11.4 cm), with the toe facing right.
- Pin each cuff scallop at its tip to round it out.
- Open the shell lace by pinning into the starburst openings, keeping the heel edge straight.
- Pin the toe curl into a round hook shape.
- If you want a firmer ornament, brush on a light stiffener.
- Let it dry completely before removing the pins (6–12 hours).
Final Quality-Control Checklist
- The boot has 13 sts at the top and 19 along the foundation.
- The outline totals 78 sc with no puckering at the corners.
- The sole band is 21 sc with a visible ridge.
- The cuff has 4 even scallops with the loop centered.
- The blade is 46 sc around, with both struts securely sewn.
- The laces form 4 even X’s, and the bow is tight.
- The finished size is 4.2 x 4.5 in (10.7 x 11.4 cm).
Troubleshooting
- Boot is cupping: The shells are too tight. Go up a hook size, or make sure you skip 2 sts on each side of every shell.
- Outline ruffles on the sides: Work 3 sc per 2 row-ends instead of 2 sc per row-end.
- Toe step looks bulky: Make the Row 5 slip stitches loose, and check that you left exactly 3 sts unworked in Row 4.
- Scallops are uneven: Recount Cuff Row 1. It must have 17 sc.
- Blade droops: Use stiffener, or add a second line of whipstitching through the struts.
Care
Hand wash in cool water, press out the water in a towel, and lay flat to dry. If you used stiffener, reshape and re-stiffen as needed.
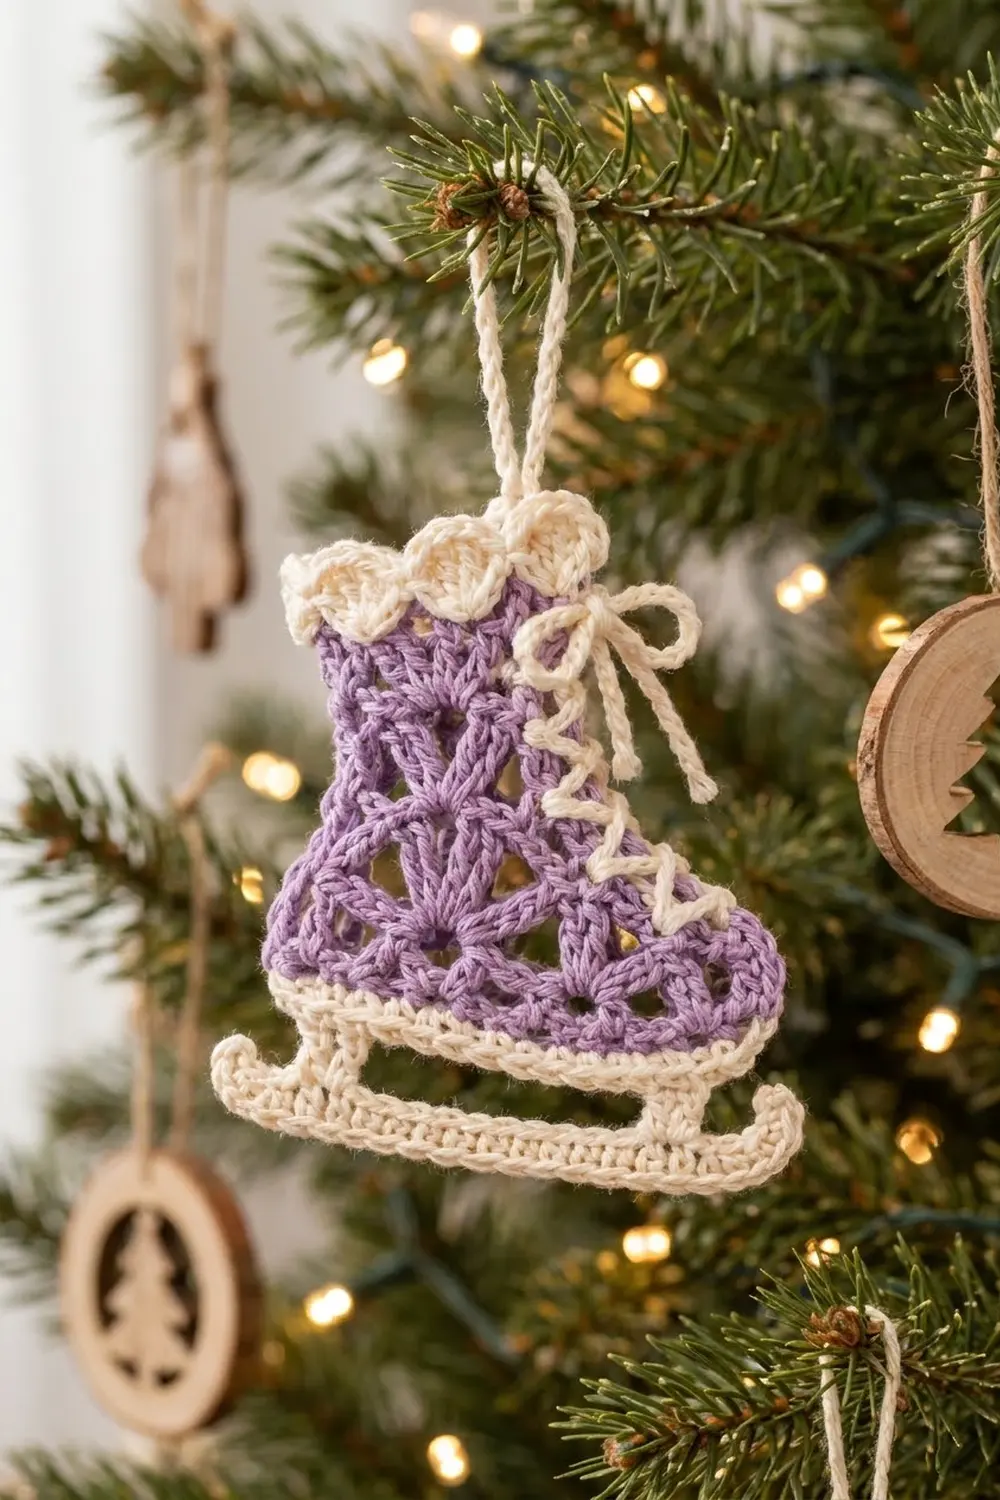
Final Notes
The measurements build in a chain:
– Row 1 sets the foot at 3.4 in (8.6 cm) wide.
– The toe step narrows the leg to 2.4 in (6.1 cm).
– Eight rows make the boot 2.7 in (6.9 cm) tall.
– The 78-stitch outline brings the boot to 3.8 x 3.1 in (9.7 x 7.9 cm).
– The cuff, sole band, struts and blade build the height up to 4.5 in (11.4 cm).
– The toe curl brings the width to 4.2 in (10.7 cm).
If you check each stage as you go, your skate will come out at the right size.
Happy crocheting!