

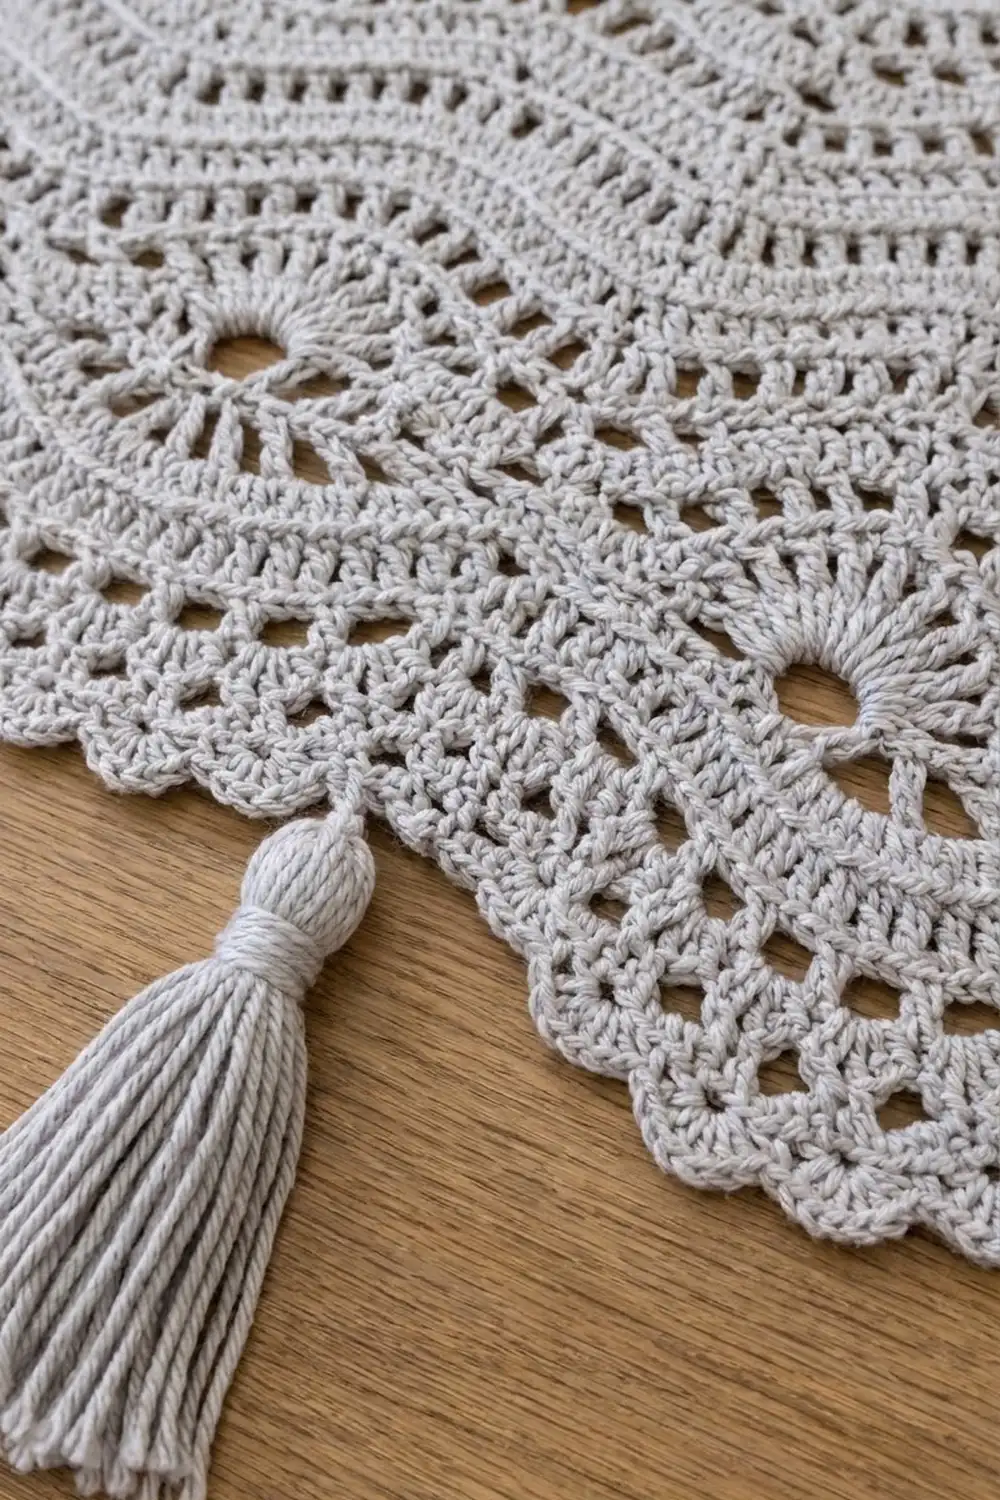
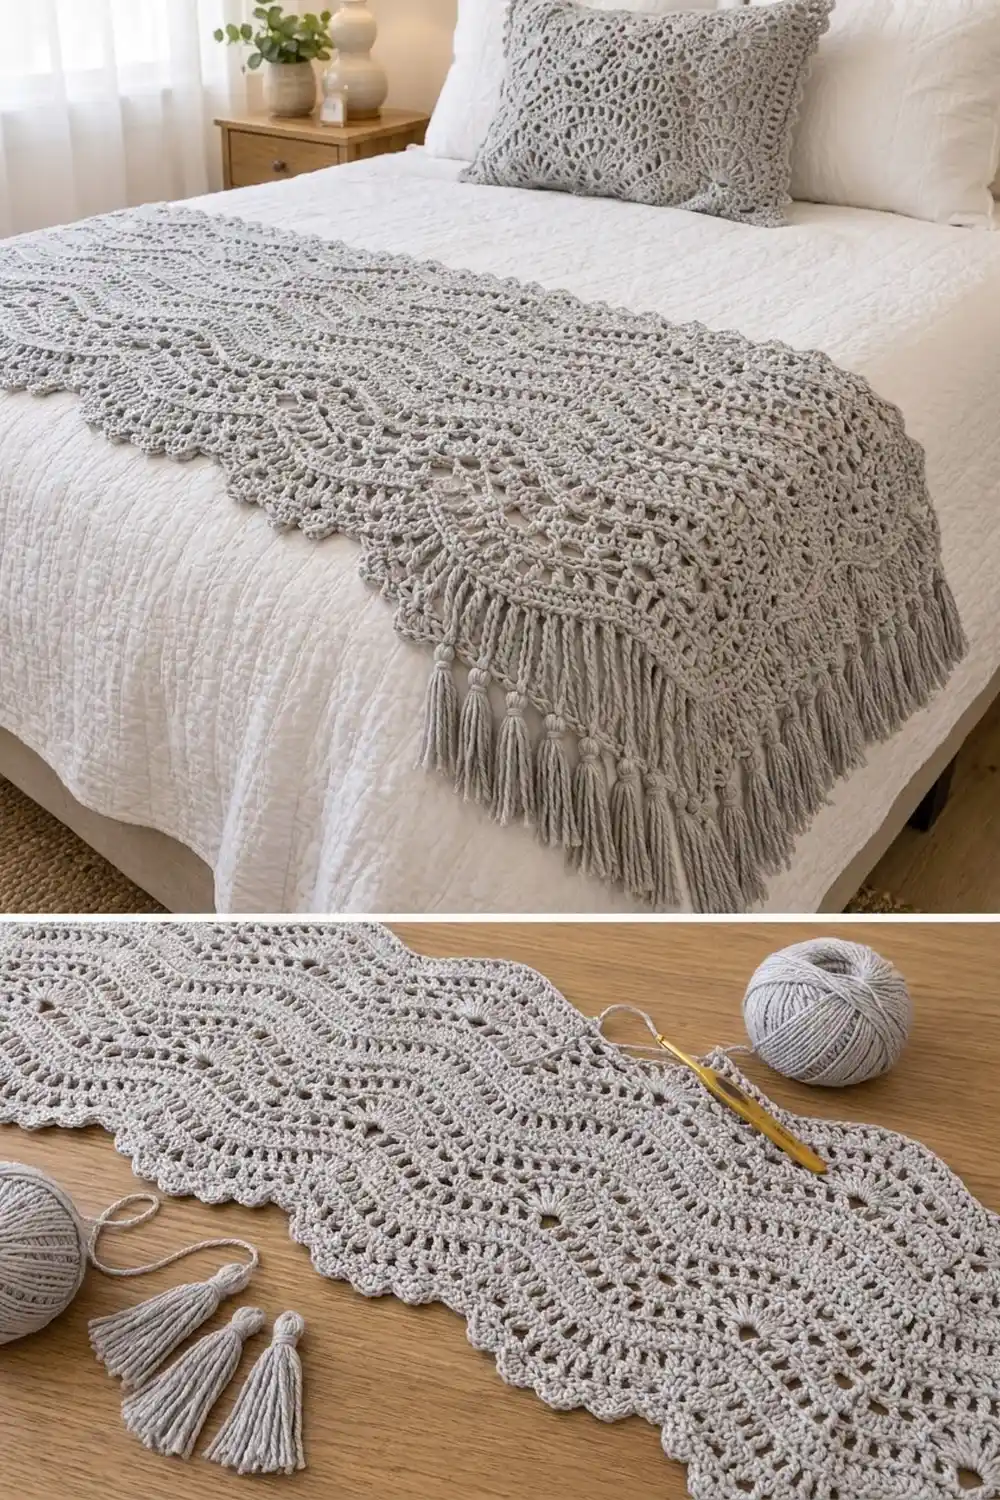
The Silver Tide Bed Runner is a calm, textured accent for the foot of a bed. Soft ripple waves run along its full length. Solid wave rows alternate with airy eyelet rows, so the fabric has rhythm without feeling heavy.
It is worked in one light silver-gray yarn for a quiet, hotel-style look that suits white or neutral bedding. A small shell-scallop edge goes all the way around, and a row of chunky gray tassels hangs from one long edge.
This pattern uses US crochet terms. The finished runner measures 61.75 in (156.8 cm) long by 18 in (45.7 cm) wide. The tassels add another 4 in (10.2 cm) below the bottom edge.
Construction is simple. You work one piece in rows along the length, starting with a long foundation chain. Then you add a two-round border and attach the tassels. Nothing needs to be joined.
Finished Size and Construction
- Finished size: 61.75 in x 18 in (156.8 cm x 45.7 cm), not counting tassels
- Tassel drop: 4 in (10.2 cm)
- Skill level: Intermediate
- Terminology: US crochet terms
- Yarn weight: Worsted (#4)
- Hook: 5.0 mm (H-8)
- Number of pieces: 1
- Layout: One long rectangle worked in rows that run along its length
- Body size before border: 60.25 in x 16.5 in (153.0 cm x 41.9 cm)
- Border depth: 0.75 in (1.9 cm) on each side
Materials
Yarn: Choose a smooth worsted-weight yarn with good stitch definition. A cotton-acrylic blend or a soft acrylic works well. Avoid fuzzy or very loosely plied yarn, which hides the eyelets and splits when you work decreases.
- Light silver-gray: about 550 g / 1,100 m (1,203 yd)
- Body: about 850 m
- Border: about 60 m
- Tassels: about 71 m
- The rest is your margin
Tools:
– 5.0 mm (H-8) crochet hook
– Tapestry needle
– Scissors
– Stitch markers (at least 4)
– Measuring tape
– A piece of stiff card 4.5 in (11.4 cm) tall, for winding tassels
– Blocking mats and rust-proof pins
– Spray bottle
All quantities include a margin of about 10–15%. Buy all of your yarn from the same dye lot.
Abbreviations (US Terms)
- ch – chain
- sc – single crochet
- dc – double crochet
- sk – skip
- st(s) – stitch(es)
- sp – space
- rep – repeat
- RS / WS – right side / wrong side
Special stitch – dc3tog (double crochet three together): Yarn over, insert the hook in the next stitch, yarn over and pull up a loop, yarn over and pull through 2 loops. Rep from * in each of the next 2 stitches (4 loops on hook). Yarn over and pull through all 4 loops. This uses 3 stitches and makes 1.
Counting note: In this pattern, every ch-1 space counts as 1 stitch.
Gauge and Checkpoints
Gauge: 16 sts and 8 rows = 4 in (10.2 cm) in ripple pattern after blocking. Measure stitches along the row, following the wave, and measure rows straight up between two peaks.
Test first: Chain 34 and work Rows 1–8 of the pattern using 31 sts (3 wave repeats + 1). Block the swatch. It should measure 7.75 in (19.7 cm) wide and 4 in (10.2 cm) tall.
- Swatch too big: Go down 0.5 mm in hook size.
- Swatch too small: Go up 0.5 mm in hook size.
- Stitches match but rows don’t: Change how high you pull up your yarn-overs rather than changing hook size.
Checkpoints (lightly stretched flat):
– After Row 1: 60.25 in (153.0 cm) long
– After Row 10: 5 in (12.7 cm) wide
– After Row 20: 10 in (25.4 cm) wide
– After Row 33: 16.5 in (41.9 cm) wide
– After the border: 61.75 in x 18 in (156.8 cm x 45.7 cm)
Body
Each wave repeat uses 10 sts. The stitch count stays at 241 sts on every row: 24 valleys and 23 inside peaks, plus a half-peak at each end. Odd rows are solid and even rows are openwork. The wave depth is about 1.5 in (3.8 cm).
Foundation: Ch 244.
Row 1 (RS, solid): Dc in the 4th ch from the hook. The skipped ch-3 and this dc count as 2 dc in the first ch. Dc in next 3 ch, dc3tog over next 3 ch, dc in next 3 ch. 3 dc in next ch, dc in next 3 ch, dc3tog over next 3 ch, dc in next 3 ch. Rep from * 22 more times. Work 2 dc in last ch. Turn.
(241 sts: 24 valleys, 23 peaks)*
Row 2 (WS, open): Ch 3 (counts as dc), dc in first st. Dc in next st, ch 1, sk next st, dc in next st, dc3tog over next 3 sts, dc in next st, ch 1, sk next st, dc in next st, 3 dc in next st. Rep from * 23 more times, ending the last rep at . Work 2 dc in top of turning ch. Turn.
(241 sts, including 48 ch-1 sps)*
Each 9-st valley section uses 9 sts and makes 7 (5 dc, 2 ch-1 sps, with the dc3tog counting as 1). Each peak uses 1 st and makes 3. That is why the count stays the same.
Row 3 (RS, solid): Ch 3 (counts as dc), dc in first st. Dc in next 3 sts, dc3tog over next 3 sts, dc in next 3 sts, 3 dc in next st. Rep from * 23 more times, ending the last rep at . Work 2 dc in top of turning ch. Turn. Work into each ch-1 sp as if it were a stitch.
(241 sts)*
Make sure every dc3tog sits on top of the dc3tog below it, and every 3-dc peak sits in the center dc of the peak below it.
Rows 4–33: Repeat Rows 2 and 3 in turn. Rows 4, 6, …, 32 follow Row 2 (open), and Rows 5, 7, …, 33 follow Row 3 (solid). After Row 33 you have 17 solid rows and 16 open rows. Do not fasten off.
Body check: 60.25 in x 16.5 in (153.0 cm x 41.9 cm), with 241 sts on the last row.
Border
Border gauge: 4 sc = 1 in (2.5 cm), which matches the body gauge.
Round 1 (sc): Ch 1. Work 3 sc in the first st of Row 33 (corner). Along the top long edge, sc in each of the next 239 sts, then work 3 sc in the last st (corner). Along the short edge, work 2 sc in each row end except the final row end, where you work 1 sc. That makes 65 sc. Work 3 sc in the first free loop of the foundation ch (corner). Along the foundation edge, sc in each of the next 239 free loops, then work 3 sc in the last loop (corner). Along the second short edge, work 65 sc the same way. Join with a sl st to the first sc.
Place a marker in the center sc of each 3-sc corner.
- Total: (239 + 6) x 2 + 65 x 2 = 490 + 130 = 620 sts
- Per long side, including both corner sts: 243
- Per short side, including both corner sts: 69
Round 2 (scallops): Sl st into the next corner center sc.
- Corner: Ch 3 (counts as dc), 6 dc in the same st (7-dc corner shell).
- Long side: Sc in next st. *Sk 2 sts, 5 dc in next st, sk 2 sts, sc in next st. Rep from * 39 more times. This uses all 241 sts between the corner centers (1 + 40 x 6).
- Next corner: Work 7 dc in the corner center st.
- Short side: Sc in next st. *Sk 2 sts, 5 dc in next st, sk 2 sts, sc in next st. Rep from * 10 more times. This uses all 67 sts between the corner centers (1 + 11 x 6).
- Work 7 dc in the next corner, then repeat steps 2–4 around.
- Join with a sl st to the top of the beginning ch-3. Fasten off.
Round 2 totals:
– 80 long-side shells, 22 short-side shells and 4 corner shells
– 538 dc and 106 sc, for 644 sts
– Each long side has 41 sc between scallops
Why the math works: Each long side has 241 stitches, the same as the body. Each short side has 67 stitches between corners, and 67 is 1 more than a multiple of 6, so the scallops fit with no leftovers. At 4 sts per inch, 65 sc across 16.5 in (41.9 cm) sits flat without ruffling or pulling in. The border adds 0.75 in (1.9 cm) on each side: about 0.25 in (0.6 cm) from the sc round and 0.5 in (1.3 cm) from the scallops.
Tassels
Make 21 tassels.
- Wind yarn 12 times around the 4.5 in (11.4 cm) card.
- Slide a 12 in (30.5 cm) tie strand under the top loops and knot it tightly.
- Cut the bottom loops.
- Wrap a second 12 in (30.5 cm) strand tightly around the bundle, 0.75 in (1.9 cm) below the top. Knot it and bury the ends inside the tassel.
- Trim the tassel to 4 in (10.2 cm).
Attaching: On the foundation-side long edge, find the 41 sc between scallops. Tie one tassel to the 1st sc, the 3rd sc, the 5th sc, and so on to the 41st sc. That gives 21 tassels spaced 3 in (7.6 cm) apart. Weave the tie ends into the scallops.
Final Blocking
- Weave in all remaining ends along solid rows, not through eyelets.
- Lay the runner on blocking mats, right side up.
- Pin it to 61.75 in x 18 in (156.8 cm x 45.7 cm).
- Pin each scallop tip so the edge forms even curves.
- Gently shape each wave so the peaks line up straight across the width.
- Mist evenly with water until damp, but not soaked. Keep the tassels dry for now.
- Let it dry completely, usually 24 hours.
- Unpin. Steam the tassels lightly, comb them straight and trim them even at 4 in (10.2 cm).
Final Quality-Control Checklist
- [ ] Every row has 241 sts with 24 valleys
- [ ] The dc3tog valleys and 3-dc peaks stack straight from row to row
- [ ] Odd rows are solid and even rows are open
- [ ] Border Round 1 has 620 sts with 4 marked corners
- [ ] There are 40 scallops per long side and 11 per short side, plus 4 corner shells
- [ ] The finished size is 61.75 in x 18 in (156.8 cm x 45.7 cm)
- [ ] There are 21 tassels spaced evenly, each 4 in (10.2 cm) long
- [ ] No ends show on the right side
Troubleshooting
- The waves drift sideways: You probably missed a peak or a decrease. Count to 241 at the end of each row, and check that the peaks stack.
- The edges slant or curl: Make sure you work 2 dc into the top of the turning ch at the end of each row, not into the stitch before it.
- The eyelets close up: Your ch-1 is too tight. Pull it up to the height of a stitch.
- The short sides ruffle: You have too many sc. Keep to 65 between corners.
- The short sides pull in: You have too few sc, or your sc tension is tight. Loosen up, or block firmly.
- The scallops don’t fit: Recount Round 1. Each long side needs 241 sts between corner centers, and each short side needs 67.
- The tassels look uneven: Wind them on the same card with even tension, and trim them all at once after blocking.
Care
Hand wash cold or machine wash gently in a mesh bag, depending on the fiber content. Dry flat and reshape the scallops while damp; never hang the runner by its tassels.
Final Notes
The measurement chain is straightforward:
- Gauge is 16 sts and 8 rows to 4 in (10.2 cm).
- 241 sts make the 60.25 in (153.0 cm) length.
- 33 rows make the 16.5 in (41.9 cm) width.
- The 0.75 in (1.9 cm) border brings the runner to 61.75 in x 18 in (156.8 cm x 45.7 cm).
- 21 tassels add a 4 in (10.2 cm) drop.
If you hit each checkpoint, the finished runner will lie flat, even and straight across the bed.
Happy crocheting!