

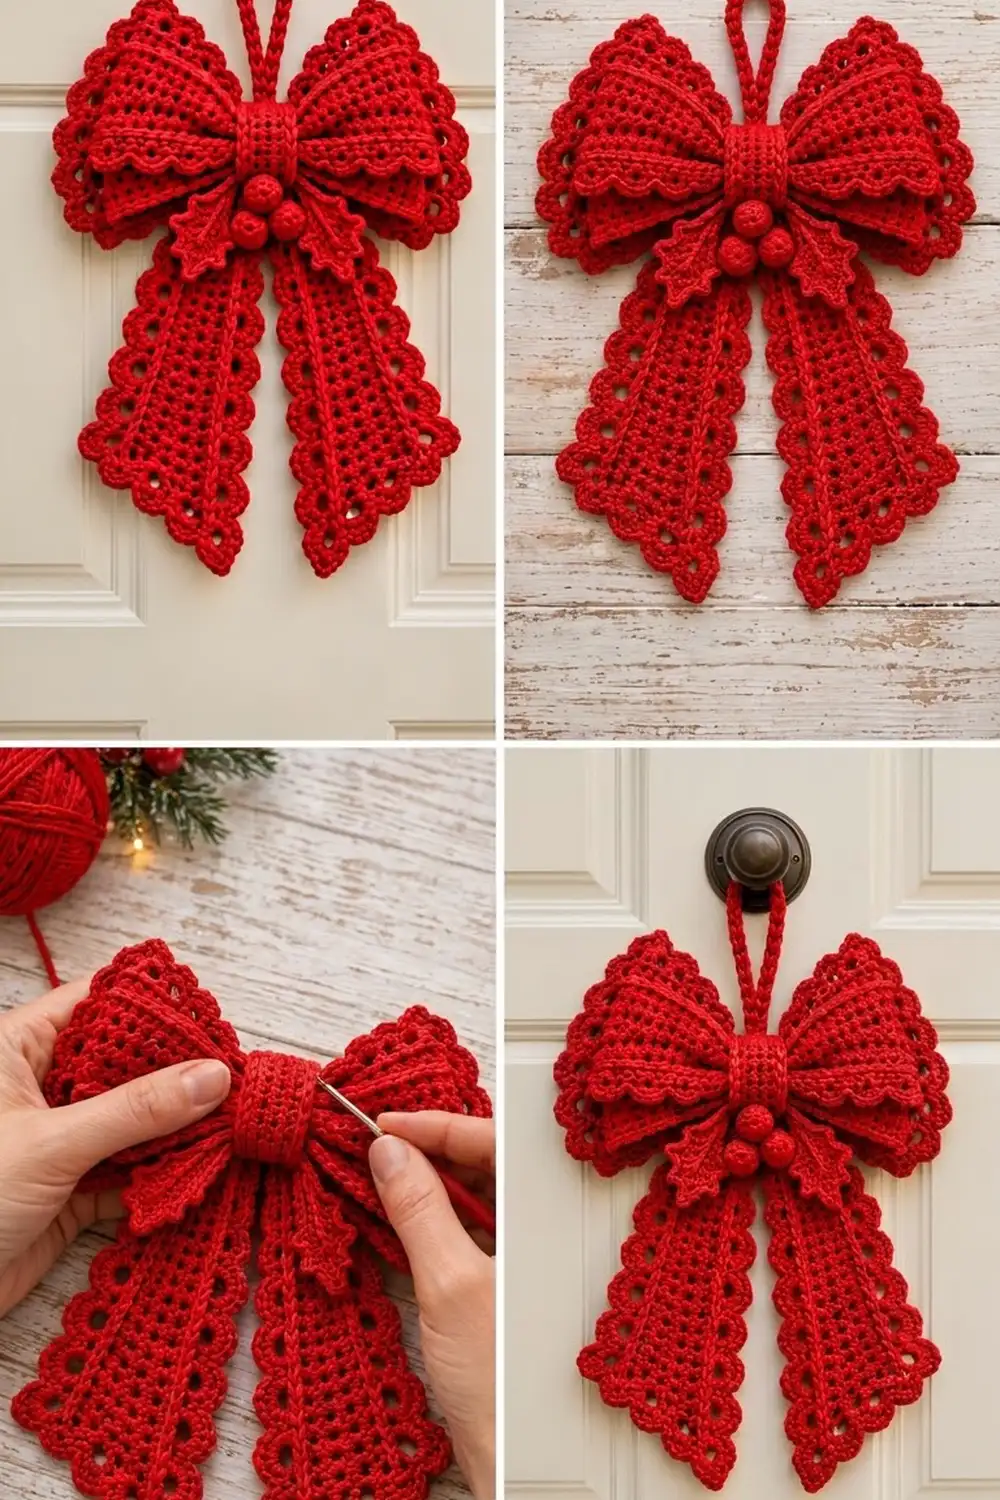
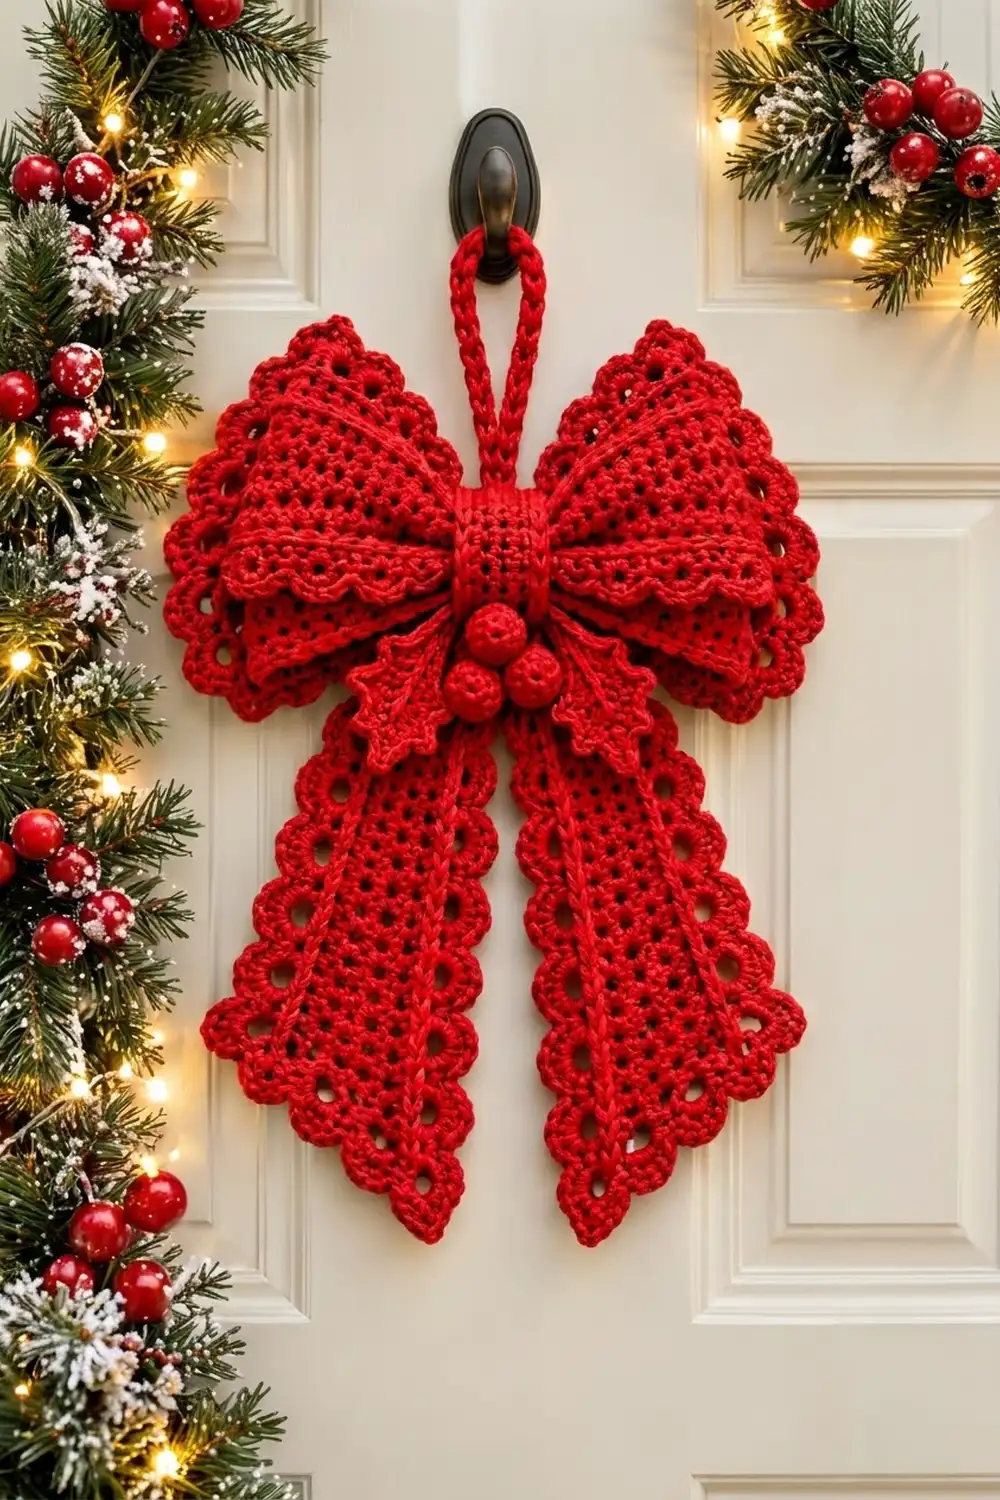
This bow is a bold, solid-red door decoration that looks like dressmaker’s lace. It has two stacked loop layers, two long angled tails, a ribbed center knot, two holly leaves, and three round berries. A scalloped eyelet edge runs around every layer and both tails.
The whole piece uses one color, a bright Christmas red, so the texture does the work: eyelet rows, raised slip-stitch lines, and scallops. It’s a classic, cozy style that suits a front door, a wreath, or an interior door.
The pattern uses US crochet terms. The finished bow measures about 11.5 in (29.2 cm) wide and 13.5 in (34.3 cm) tall, not counting the hanging loop, which adds about 3.5 in (8.9 cm).
You’ll crochet each part flat and give the layers and tails the same three-round scalloped border. Then you stack the layers, pinch them at the center, add the tails, wrap the band around everything, and sew on the leaves, berries, and cord.
Finished Size and Construction
- Finished size: about 11.5 in x 13.5 in (29.2 cm x 34.3 cm), plus a 3.5 in (8.9 cm) hanging loop
- Skill level: Intermediate
- Terminology: US
- Yarn weight: Worsted (#4)
- Hook: 5.0 mm (H-8)
- Number of pieces: 11 parts that make one bow (1 back layer, 1 front layer, 2 tails, 1 band, 2 leaves, 3 berries, 1 cord)
- Layout: front layer stacked on back layer, tails in a V behind, band around the center
- Back layer: 10.25 in x 5.5 in (26.0 cm x 14.0 cm) before border, 12.25 in x 7.5 in (31.1 cm x 19.1 cm) after
- Front layer: 8.25 in x 3.5 in (21.0 cm x 8.9 cm) before border, 10.25 in x 5.5 in (26.0 cm x 14.0 cm) after
- Tail: 4.25 in x 8.5 in (10.8 cm x 21.6 cm) before border, 6.25 in x 10.5 in (15.9 cm x 26.7 cm) after
- Border depth: 1 in (2.5 cm) on every edge
Materials
Use a smooth worsted-weight cotton or cotton blend. Cotton shows off the eyelets and scallops and keeps its shape on a door. Choose a true red that won’t fade quickly in sunlight.
- Christmas Red: 165 g, about 315 m (based on a yarn with about 190 m per 100 g)
These amounts include a margin of about 20% for your gauge swatch and small differences in tension.
Tools:
– 5.0 mm (H-8) crochet hook
– Tapestry needle
– Small handful of fiberfill for the berries
– Stitch markers
– Rust-proof pins and a blocking mat
– Scissors and a measuring tape
Abbreviations (US Terms)
- ch – chain
- sl st – slip stitch
- sc – single crochet
- hdc – half double crochet
- dc – double crochet
- dc2tog – double crochet 2 together
- sc2tog – single crochet 2 together
- BLO – back loop only
- sk – skip
- sp – space
- st(s) – stitch(es)
- MR – magic ring
- RS – right side
Picot: ch 3, sl st in the 3rd ch from the hook.
Shell: 5 dc in the same space.
Corner shell: 7 dc in the same corner space.
Surface slip stitch: Hold the yarn behind the fabric. Insert the hook from front to back, pull up a loop, and draw it through the loop on your hook.
Gauge and Checkpoints
Gauge: 16 sts and 8 rows = 4 in (10.2 cm) in the dc/eyelet pattern. That works out to 4 sts and 2 rows per inch.
Make the Front Layer first and use it as your test piece. Check it at each stage:
- After Row 1: 8.25 in (21.0 cm) wide
- After Row 7: 3.5 in (8.9 cm) tall
- After the border: 10.25 in x 5.5 in (26.0 cm x 14.0 cm)
If the piece is too big, go down half a hook size. If it’s too small, go up half a size. Don’t add or remove stitches, because every border count depends on the stitch counts below.
Front Layer (make 1)
Ch 35.
Row 1 (RS): Dc in the 4th ch from the hook (the skipped 3 ch count as a dc) and in each ch across. Turn. (33 sts)
Row 2 (eyelet): Ch 3 (counts as a dc). Ch 1, sk next st, dc in next st. Repeat from * 16 times. Turn. (17 dc + 16 ch-1 sps = 33 sts)
Row 3: Ch 3 (counts as a dc). Dc in each dc and each ch-1 sp across. Turn. (33 sts)
Rows 4–7: Repeat Rows 2 and 3 twice. Don’t fasten off; you’ll work the border next. (33 sts)
Back Layer (make 1)
Ch 43.
Row 1 (RS): Dc in the 4th ch from the hook and in each ch across. (41 sts)
Row 2: Ch 3. Ch 1, sk 1, dc in next st. Repeat from * 20 times. (21 dc + 20 ch-1 sps = 41 sts)
Row 3: Ch 3. Dc in each st and sp across. (41 sts)
Rows 4–11: Repeat Rows 2 and 3 four times. (41 sts)
Checkpoint: 10.25 in x 5.5 in (26.0 cm x 14.0 cm).
Tails (make 2)
Ch 19.
Row 1 (RS): Dc in the 4th ch from the hook and in each ch across. (17 sts)
Row 2: Ch 3. Ch 1, sk 1, dc in next st. Repeat from * 8 times. (9 dc + 8 ch-1 sps = 17 sts)
Row 3: Ch 3. Dc in each st and sp across. (17 sts)
Rows 4–9: Repeat Rows 2 and 3 three times. (17 sts)
Rows 10–17 shape the angled point. Every decrease falls on the same edge, which becomes the angled edge. The other edge is the straight edge.
Row 10: Ch 2 (doesn’t count as a st). Dc2tog over the first 2 sts, then dc in each st across. (16 sts)
Row 11: Ch 3 (counts as a dc). Dc in each st to the last 2 sts, then dc2tog. (15 sts)
Rows 12–17: Repeat Rows 10 and 11 three times. Stitch counts: 14, 13, 12, 11, 10, 9.
Checkpoint: 4.25 in (10.8 cm) wide at the top, 2.25 in (5.7 cm) at the bottom, and 8.5 in (21.6 cm) long.
Make the second tail exactly the same way. Before you add the surface lines, flip it over so the two tails mirror each other. The mesh fabric looks the same on both sides.
Center Band (make 1)
Ch 21.
Row 1: Sc in the 2nd ch from the hook and in each ch across. Turn. (20 sc)
Rows 2–7: Ch 1. Sc BLO in each st. Turn. (20 sc)
The ridges run along the length of the band. Checkpoint: 5 in x 1.75 in (12.7 cm x 4.4 cm). Leave a 12 in (30.5 cm) tail for sewing.
Holly Leaves (make 2)
Ch 13.
Side 1: Working in the 2nd ch from the hook and moving toward the first ch you made, work: sl st, sc, hdc, dc, picot, dc, dc, picot, dc, dc, picot, hdc, sc, sc. That’s 11 sts and 3 picots in chs 2–12.
Tip: In the last ch, work (sc, picot, sc).
Side 2: Rotate the piece and work along the other side of the foundation chain: sc, sc, hdc, picot, dc, dc, picot, dc, dc, picot, dc, hdc, sc, sl st. Sl st into the first sl st to join. (11 sts and 3 picots per side)
Vein: Work surface slip stitches along the foundation chain from the base to the tip.
Checkpoint: about 3 in (7.6 cm) long.
Berries (make 3)
Rnd 1: 6 sc in a MR. (6)
Rnd 2: 2 sc in each st. (12)
Rnd 3: Sc in each st. (12)
Stuff the berry firmly.
Rnd 4: Sc2tog 6 times. (6)
Close the hole and leave a tail for sewing. Checkpoint: 1 in (2.5 cm) across.
Hanging Cord (make 1)
Ch 36. Sl st in the back bump of the 2nd ch from the hook and of each ch across. (35 sl sts)
Checkpoint: 9 in (22.9 cm) long.
Make All Pieces
Everything uses Christmas Red:
- Back Layer: 1 (about 40 g)
- Front Layer: 1 (about 25 g)
- Tails: 2 (about 30 g each)
- Band: 1 (about 6 g)
- Leaves: 2 (about 3 g each)
- Berries: 3 (about 2 g each)
- Cord: 1 (about 3 g)
Assembly layout (front view):
            [ cord loop ]
 [ back layer ][ BAND ][ back layer ]
   [ front layer ][BAND][ front layer ]
       [leaf][berries][leaf]
        [ tail ]   [ tail ]
       /straight   straight\
Raised Ridge Lines
Do these after the border and before you assemble the bow. Number the stitch columns from the edge where Row 1 starts. The eyelet columns (the dc posts) are the odd numbers.
- Back Layer: Work surface sl sts up columns 7, 13, 29, and 35, from Row 1 to Row 11, with 2 sl sts per row. (22 sl sts per line)
- Front Layer: Work up columns 7, 13, 21, and 27, with 2 sl sts per row. (14 sl sts per line)
- Tails: Count columns from the straight edge. Work column 5 from Row 1 to Row 17 (34 sl sts). Work column 11 from Row 1 until it meets the angled edge at Row 15 (30 sl sts).
Once the layers are pinched, the straight lines fan out across the loops.
Assembly
Pinch the layers. Center the Front Layer on the Back Layer with RS up and the short edges lined up. Fold both layers together, accordion-style, through the center (column 21 of the Back Layer and column 17 of the Front Layer), making 3 folds. Wrap a strand of yarn tightly around the fold 6 times and knot it at the back. The pinched center should be about 1.5 in (3.8 cm) wide.
Add the tails. Place the tails behind the pinch with the straight edges facing out. Overlap their top 1 in (2.5 cm) and angle them about 15 degrees apart. Sew through all layers with a tight running stitch.
Wrap the band. Wrap the Center Band snugly around the front, the pinch, and the tail tops. Whipstitch the short ends together at the back, stitch to stitch, so all 7 rows line up. Keep the tension firm so the band doesn’t slide, but don’t pull it so tight that the band ripples.
Add the leaves and berries. Tuck the bases of the leaves under the lower edge of the band, angled down and outward. Sew them on along the vein. Sew the berries in a triangle at the bottom of the band.
Add the cord. Fold the cord in half and sew both ends to the back of the band, 1 in (2.5 cm) deep. This leaves a loop about 3.5 in (8.9 cm) long.
Checkpoint: 11.5 in x 13.5 in (29.2 cm x 34.3 cm).
Border
Border gauge: Rnd 1 has 4 sc per inch. That’s 1 sc per stitch along the top and bottom edges, and 2 sc per row end along the sides, since each dc row is 0.5 in (1.3 cm) tall. Work the same 3 rounds on the Front Layer, the Back Layer, and both tails.
Corner ch-2 spaces don’t count as stitches. All side counts below are the stitches between corner spaces.
Rnd 1 (sc): With RS facing, join in the first st of the last row. Ch 1 and sc in each st across the top. Ch 2 for the corner. Sc down the side, working 2 sc in each row end except 1 sc in the last row end. Ch 2. Sc in each foundation ch across the bottom. Ch 2. Sc up the second side the same way. Ch 2 and sl st to the first sc to join.
- Back Layer: 41 / 21 / 41 / 21 = 124 sc
- Front Layer: 33 / 13 / 33 / 13 = 92 sc
- Tail: top 17, straight side 33, bottom 9, angled side 33 = 92 sc
Rnd 2 (eyelet): Sl st in the next sc. Ch 4 (counts as a dc and ch 1) and sk the next sc. Dc in the next sc, ch 1, sk the next sc. Repeat from * to the corner. You’ll end with ch 1 after skipping the last sc of the side. In the corner sp, work (dc, ch 2, dc). Then ch 1, sk the first sc of the next side, dc in the next sc, and keep the pattern going all the way around. Sl st to the 3rd ch of the starting ch-4 to join.
Each side with n sc ends up with (n − 1)/2 dc and (n + 1)/2 ch-1 sps:
- Back Layer: long sides 20 dc / 21 sps, short sides 10 dc / 11 sps, plus 8 corner dc = 68 dc total
- Front Layer: long sides 16 dc / 17 sps, short sides 6 dc / 7 sps
- Tail: top 8 dc / 9 sps, sides 16 dc / 17 sps each, bottom 4 dc / 5 sps
Rnd 3 (scallop): Sl st into the next ch-1 sp. Ch 3 (counts as a dc) and work 4 dc in the same sp. Sc in the next ch-1 sp, then 5 dc in the next ch-1 sp. Repeat from * along the side, ending with sc in the last ch-1 sp before the corner. Work 7 dc in the corner sp, then sc in the first ch-1 sp of the next side, and continue the pattern around. Finish with sc in the first ch-1 sp of the starting side. Sl st to the top of the ch-3 to join and fasten off.
- Back Layer: 11 sc + 10 shells on the long sides and 6 sc + 5 shells on the short sides, plus 4 corner shells. That’s 34 sc and 34 scallops in total.
- Front Layer: 9 sc + 8 shells and 4 sc + 3 shells per side, for 26 sc and 26 scallops.
- Tail: 5 sc + 4 shells on the top, 9 sc + 8 shells on each side, and 3 sc + 2 shells on the bottom, for 26 sc and 26 scallops.
Why the math works: Every Rnd 1 side count is a multiple of 4 plus 1 (13, 17, 21, 33, 41, or 9). That always gives an odd number of ch-1 spaces in Rnd 2, so each side of Rnd 3 begins and ends with a sc and the scallops come out evenly spaced. The total number of sc always equals the total number of scallops, which makes a quick check.
Final Blocking
- Before assembly, soak the layers and tails in cool water for 10 minutes.
- Press out the water with a towel. Don’t wring them.
- Pin each piece to its post-border size: the Back Layer to 12.25 in x 7.5 in (31.1 cm x 19.1 cm), the Front Layer to 10.25 in x 5.5 in (26.0 cm x 14.0 cm), and each tail to 6.25 in x 10.5 in (15.9 cm x 26.7 cm).
- Pin every scallop into a rounded point and open up each eyelet.
- Let everything dry completely, then assemble.
- After assembly, lightly steam the loops from above and shape them by hand.
Final Quality-Control Checklist
- Gauge matches the pattern: 16 sts and 8 rows = 4 in (10.2 cm)
- Every edge of each layer and tail has the correct number of scallops
- The tails mirror each other, with the straight edges facing out
- The ridge lines are straight and fan out evenly
- The band is snug and its seam is hidden at the back
- The leaves are symmetrical and the berries are firm
- The cord is sewn securely and holds the bow’s weight
- The finished bow measures 11.5 in x 13.5 in (29.2 cm x 34.3 cm)
Troubleshooting
- Scallops ruffle: Rnd 1 has too many sc. Recount each side against the counts above.
- Edges cup: Rnd 1 has too few sc, or your hook is too small. Redo the round with the counts above.
- Shells don’t line up at the corners: One side has an even number of spaces. Check that the Rnd 1 count is a multiple of 4 plus 1.
- Point on the tail looks stepped: Keep the dc2tog stitches tight, then block the angled edge straight.
- Band slips: Add 2 tacking stitches through the band and the pinched center.
- Bow droops on the door: Use starch spray on the loops when blocking.
Care
Hand wash in cool water, press out the water, and dry flat, reshaping the scallops. Store the bow flat with tissue tucked inside the loops.
Final Notes
Every measurement builds on the one before. With 16 sts per 4 in (10.2 cm), the Back Layer comes out at 10.25 in x 5.5 in (26.0 cm x 14.0 cm), the Front Layer at 8.25 in x 3.5 in (21.0 cm x 8.9 cm), and each tail at 4.25 in x 8.5 in (10.8 cm x 21.6 cm). The 1 in (2.5 cm) border brings those to 12.25 in x 7.5 in (31.1 cm x 19.1 cm), 10.25 in x 5.5 in (26.0 cm x 14.0 cm), and 6.25 in x 10.5 in (15.9 cm x 26.7 cm). Pinching and assembly give a finished bow of 11.5 in x 13.5 in (29.2 cm x 34.3 cm). Check each stage and the bow will come out right.
Happy crocheting!