

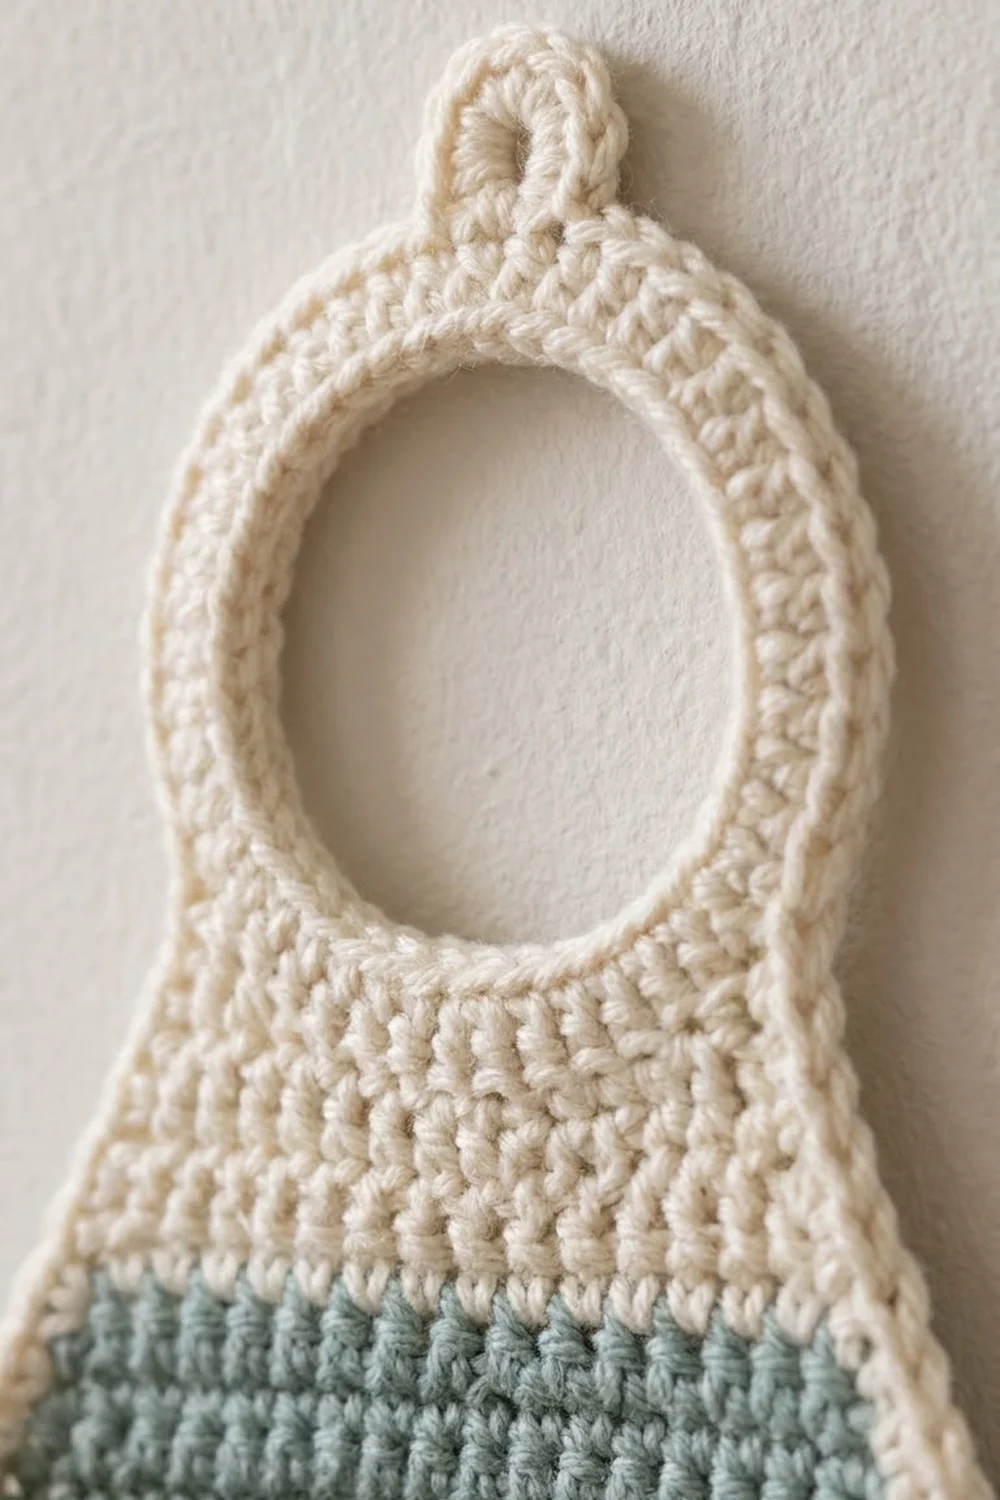
This holder gives your phone a tidy place to sit while it charges. A soft sage scallop shell makes the pocket, and the cream ring at the top slips over your plug-in charger. The phone stands in the shell, and the cable runs straight down into it.
The palette is two calm colors. The shell and the lower panel are sage green. The neck, the ring, the ribs, the scallops and the outline are warm cream. The finished look is coastal and simple, and it sits nicely in a living room, bedroom or entryway.
The pattern uses US crochet terms. The finished holder measures about 7.25 in (18.4 cm) wide at the shell and about 13.5 in (34.3 cm) tall from the tab to the shell foot.
Construction is simple:
1. Work the back panel bottom-up in rows, splitting it around the outlet opening.
2. Work the shell front bottom-up in rows and finish its top with cream scallops.
3. Add cream surface slip-stitch ribs and sew on a small fan appliqué.
4. Tack the shell to the panel.
5. Work one cream border round that closes the pocket sides and outlines everything.
Finished Size and Construction
- Finished size: about 7.25 in (18.4 cm) wide × 13.5 in (34.3 cm) tall
- Skill level: Intermediate
- Terminology: US crochet terms
- Yarn weight: worsted / medium (#4) cotton
- Hook: 4.0 mm (US G-6)
- Number of pieces: 3 (back panel, shell front, hinge fan)
- Layout: the shell sits over the lower back panel and the fan sits at the shell base
- Piece sizes before border: back panel 6 in × 11.75 in (15.2 cm × 29.8 cm); shell 6.75 in × 5.75 in (17.1 cm × 14.6 cm) including its scallop trim
- Border depth: 1 round of sc, about 0.25 in (0.6 cm)
Materials
Choose a smooth, firm 100% cotton or cotton blend. Cotton holds its shape when a phone is in the pocket, and it shows the ribs clearly. The amounts below assume a typical worsted cotton of about 92 m per 50 g.
- Sage green: 50 g (about 92 m) for the panel body and the shell
- Cream: 35 g (about 64 m) for the neck, ring, tab, ribs, trim, fan and border
These amounts include a margin of roughly 30%, so you won’t run short.
Tools:
– 4.0 mm (US G-6) crochet hook
– Yarn needle
– 6–8 locking stitch markers
– A scrap of contrasting yarn for rib guide lines
– Measuring tape
– Rust-proof pins and a blocking mat
– A piece of cardboard about 5.75 in × 4.5 in (14.6 cm × 11.4 cm) for blocking the pocket
Abbreviations (US Terms)
- ch: chain
- sc: single crochet
- hdc: half double crochet
- dc: double crochet
- sl st: slip stitch
- sc2tog: single crochet 2 together
- st(s): stitch(es)
- sk: skip
- sp: space
- RS / WS: right side / wrong side
- rep: repeat
Special stitch – surface slip stitch: Hold the yarn behind the fabric. Insert the hook from front to back through a gap between stitches, then yarn over and pull up a loop. Insert the hook into the next gap one row up, yarn over at the back, and pull the loop through the fabric and through the loop on your hook. Rep from * to *. This makes a raised chain line on the RS.
Gauge and Checkpoints
Gauge: 16 sc × 18 rows = 4 in (10.2 cm) in sage cotton with a 4.0 mm hook.
Test one piece first. Work the shell front through Row 9 and measure before you go on. Its widest row should be 6.75 in (17.1 cm).
Checkpoints:
– Panel after Row 24: 6 in (15.2 cm) wide, 5.3 in (13.5 cm) tall
– Panel after Row 32: 7.1 in (18.0 cm) tall, with the neck 4.5 in (11.4 cm) wide
– Panel opening after Row 43: 2.5 in (6.4 cm) wide × 2.2 in (5.6 cm) tall
– Panel finished: 11.75 in (29.8 cm) tall
– Shell after Row 22: 6.75 in (17.1 cm) wide, 4.9 in (12.4 cm) tall
If your work is too big, go down 0.5 mm in hook size. If it is too small, go up 0.5 mm. Row gauge matters here because the shell rows line up with the panel rows during assembly.
Back Panel
Work this piece in sage first, then in cream. Each row begins with ch 1, which does not count as a stitch. Turn at the end of every row.
Row 1: With sage, ch 17. Sc in the 2nd ch from the hook and in each ch across. (16 sts)
Row 2: 2 sc in the first st, sc to the last st, 2 sc in the last st. (18 sts)
Rows 3–5: Rep Row 2. (20, 22, 24 sts)
Rows 6–24: Sc in each st across. (24 sts) On the last st of Row 24, change to cream. This rounded sage body is mostly hidden behind the shell.
Row 25: Sc across. (24 sts)
Row 26: Sc2tog, sc 20, sc2tog. (22 sts)
Row 27: Sc across. (22 sts)
Row 28: Sc2tog, sc 18, sc2tog. (20 sts)
Row 29: Sc across. (20 sts)
Row 30: Sc2tog, sc 16, sc2tog. (18 sts)
Rows 31–32: Sc across. (18 sts) This is the neck.
Outlet Opening
Section A, Rows 33–42: Sc in the first 4 sts only and turn. Work 10 rows on these 4 sts in total. You will end at the outer edge. Do not fasten off. Put the loop on a stitch marker.
Section B, Rows 33–42: Leave the center 10 sts of Row 32 unworked. Join a separate length of cream in the 15th st and sc 4 to the outer edge. Work 10 rows on these 4 sts in total, then fasten off.
Row 43 (bridge): Pick up Section A’s loop. Ch 1 and turn. Sc 4 across Section A, ch 10, then sc 4 across the top of Section B. (8 sc + 10 ch = 18 sts)
Row 44: Sc 4, sc in each of the 10 ch, sc 4. (18 sts)
Row 45: Sc2tog, sc 14, sc2tog. (16 sts)
Row 46: Sc2tog, sc 12, sc2tog. (14 sts)
Row 47: [Sc2tog] twice, sc 6, [sc2tog] twice. (10 sts)
Row 48: [Sc2tog] twice, sc 2, [sc2tog] twice. (6 sts) The top of the ring is now rounded.
Hanging Tab
Row 49: Sc2tog, sc 2, sc2tog. (4 sts)
Row 50: Sc across. (4 sts)
Row 51: Sc 1, ch 2, sk 2, sc 1. (2 sc + ch-2 sp)
Row 52: Sc 1, 2 sc in the ch-2 sp, sc 1. (4 sts)
Row 53: [Sc2tog] twice. (2 sts) Fasten off and weave in the ends.
Checkpoint: The panel should be 6 in (15.2 cm) wide and 11.75 in (29.8 cm) tall.
Shell Front
Work this piece in sage. Each row begins with ch 1, which does not count as a stitch. Turn at the end of every row.
Row 1 (foot): Ch 10. Sc in the 2nd ch from the hook and in each ch across. (9 sts)
Rows 2–3: Sc across. (9 sts)
Row 4: 2 sc in each of the first 2 sts, sc 5, 2 sc in each of the last 2 sts. (13 sts)
Row 5: 2 sc in each of the first 2 sts, sc 9, 2 sc in each of the last 2 sts. (17 sts)
Row 6: 2 sc in each of the first 2 sts, sc 13, 2 sc in each of the last 2 sts. (21 sts)
Row 7: 2 sc in each of the first 2 sts, sc 17, 2 sc in each of the last 2 sts. (25 sts)
Row 8: 2 sc in the first st, sc 23, 2 sc in the last st. (27 sts)
Rows 9–22: Sc across. (27 sts) Change to cream on the last st of Row 22.
Row 23 (trim row): 2 sc in the first st, sc 25, 2 sc in the last st. (27 sts worked 1-per-stitch + 2 extra = 29 sts)
Row 24 (scallops): Sc in the first st. Sk 1, 5 dc in the next st, sk 1, sc in the next st. Rep from * to * 6 more times. (7 scallops; 35 dc + 8 sc = 43 sts) Fasten off.
Why the math works: Each scallop uses 4 sts, plus the first sc: 1 + (7 × 4) = 29. The valley sc fall on Row 23 sts 5, 9, 13, 17, 21 and 25, which sit evenly around the center stitch, st 15.
Ribs
Using contrasting scrap yarn, baste six guide lines on the RS. Start them between Row 5 sts 4, 6, 8, 10, 12 and 14. End them at Row 22 sts 4, 8, 12, 16, 20 and 24, directly under the six inner scallop valleys.
With cream, work a surface slip-stitch rib along each guide. Pull up the starting loop at Row 5, then work 1 sl st per row through Row 22 (17 sl sts). Shift sideways one column whenever the guide line does, and keep the tension even. Remove the guides and weave in the ends on the WS.
Hinge Fan Appliqué
Row 1: With cream, make a magic ring. Ch 2 (does not count), then work 7 hdc into the ring. Pull the ring tight and turn. (7 sts)
Row 2: Ch 1, then 2 sc in each st across. (14 sts)
Row 3: Ch 1. [Sc in the next st, hdc in the next st] 7 times. (14 sts) This gives a softly ridged edge.
Fasten off, leaving a 12 in (30.5 cm) tail. The fan should measure about 2 in (5.1 cm) wide and 1 in (2.5 cm) tall.
Center the fan’s straight edge along the top of shell Row 3. Its curve covers the rib starts. Whipstitch it in place all around.
Make All Pieces
- Back panel: 1 (sage Rows 1–24, cream Rows 25–53)
- Shell front: 1 (sage Rows 1–22, cream Rows 23–24, plus 6 cream ribs)
- Hinge fan: 1 (cream)
Layout (front view):
          [ tab ]            cream
        (  ring  )           cream, opening 2 in
         | neck |            cream
       |  body   |           sage band shows above pocket
     [ SHELL POCKET ]        sage + 6 cream ribs, scalloped top
          (fan)              cream
          [foot]             sage
Joining
Method: whipstitch the lower part first. Border Round 1 then closes the pocket sides.
Alignment: Lay the panel RS up and place the shell on top, also RS up. Line up shell Row 6 with panel Row 1. With this offset, shell Row 6 + n matches panel Row 1 + n, so shell Row 23 matches panel Row 18. Both pieces share the same row gauge, so every row lines up 1:1.
Step 1: Turn the pair over. With cream on a yarn needle, whipstitch the panel’s 16 foundation sts to the WS of shell Row 6, one stitch to one stitch. Center them so that 2–3 shell stitches extend past each end.
Step 2: Whipstitch the panel’s side row ends of Rows 2–5 to the WS of shell Rows 7–10. Work 4 stitches on each side, one per row.
Step 3: Clip the side edges of shell Rows 11–23 to panel Rows 6–18 at the outer edges. The shell is 27 sts wide and the panel is 24 sts. Those 3 extra stitches let the shell bow forward about 0.4 in (1.0 cm), which gives the pocket its depth.
Tension: Keep the whipstitches snug but not tight. The RS of the shell should not dimple.
Checkpoint: The pocket opening should measure 6.75 in (17.1 cm) across, and the inside should be about 4 in (10.2 cm) deep.
Border
Border gauge: Work 1 sc in each stitch along stitch edges and 1 sc in each sc row end. Both match the fabric’s 16 sts and 18 rows per 4 in (10.2 cm), so the edge lies flat.
Round 1 (outer outline)
With cream, join at the right side of panel Row 19, just above the shell’s corner.
- Panel right side: 1 sc in each row end of Rows 19–52. (34 sts)
- Tab top: 3 sc in each of the 2 sts of Row 53. (6 sts)
- Panel left side: 1 sc in each row end of Rows 52–19. (34 sts)
- Shell left side: Work Rows 23–11 through both the shell and the panel edges together, closing the pocket. Then work Rows 10–2 through the shell only. Work 2 sc in each row end of Rows 7–4, and 1 sc in every other row end. (16 + 8 + 2 = 26 sts)
- Shell bottom: 3 sc in the first foundation st, sc 7, 3 sc in the last foundation st. (13 sts)
- Shell right side: Work up the shell to Row 23 the same way, through both layers from Row 11 up. (26 sts)
Join with a sl st to the first sc. (34 + 6 + 34 + 26 + 13 + 26 = 139 sts)
Why it works: The panel’s sides follow the row count exactly. The steep flare of shell Rows 4–7 gains 2 sts of width per side on every row, so those row ends need 2 sc each. If they get only 1, the edge cups. The scallop row stays free at each corner.
Opening Round
With cream, join at the bottom of the opening. Work around the opening as follows:
– Sc 8 into the skipped Row 32 sts, then sc2tog across the corner.
– Sc 8 into the side row ends, then sc2tog across the corner.
– Sc 8 into the bottom loops of the Row 43 chain, then sc2tog across the corner.
– Sc 8 into the other side’s row ends, then sc2tog across the last corner.
Join with a sl st. (4 × 8 + 4 = 36 sts)
The opening started as 10 sts and 10 rows on each side. Each side gives 8 sc plus a shared sc2tog at every corner, which rounds the square into a ring. The clear opening is about 2 in (5.1 cm). Fasten off and weave in all ends.
Final Blocking
- Mist the whole holder lightly with water until it is damp, not soaked.
- Slide the cardboard into the pocket to set its depth and width.
- Pin the panel flat at 6.5 in (16.5 cm) wide.
- Pin each scallop into a round fan shape.
- Shape the opening into a circle around a 2 in (5.1 cm) jar lid or a similar round object.
- Don’t press the ribs or the fan. Pat them so they stay raised.
- Let everything dry completely before removing the pins and the cardboard.
Final Quality-Control Checklist
- The holder is 7.25 in (18.4 cm) wide and about 13.5 in (34.3 cm) tall.
- There are 7 scallops, and all of them are even and open.
- All 6 ribs end exactly under a scallop valley.
- The fan covers every rib start.
- The pocket sides are closed up to shell Row 23 and the top stays open.
- The opening clears your charger head with a little room to spare.
- All ends are woven in on the WS.
Troubleshooting
- The shell cups at the bottom: You probably worked 1 sc in the row ends of Rows 4–7. Rework those with 2 sc each.
- The pocket is too flat: Your sewing lines sit inside the shell edge. Join edge to edge so the 3 extra stitches can bow forward.
- The ribs pucker: Use a hook one size larger for the slip stitches only.
- The opening is too small for your charger: Leave 12 center sts unworked instead of 10 and ch 12 in Row 43, then add 1 sc per side in the opening round.
- The scallops ruffle: Work 4 dc per scallop instead of 5.
Care
Hand-wash in cool water with mild soap, press out the water in a towel, and dry flat. Unplug the charger before you remove or wash the holder.

Final Notes
The measurements build on each other. A gauge of 16 sc × 18 rows = 4 in (10.2 cm) gives a panel of 6 in × 11.75 in (15.2 cm × 29.8 cm) and a shell 6.75 in (17.1 cm) wide. The 1:1 row alignment joins them, and one 139-stitch border brings the holder to 7.25 in × 13.5 in (18.4 cm × 34.3 cm). Check each stage as you go and the pocket will fit well and hang straight.
Happy crocheting!