

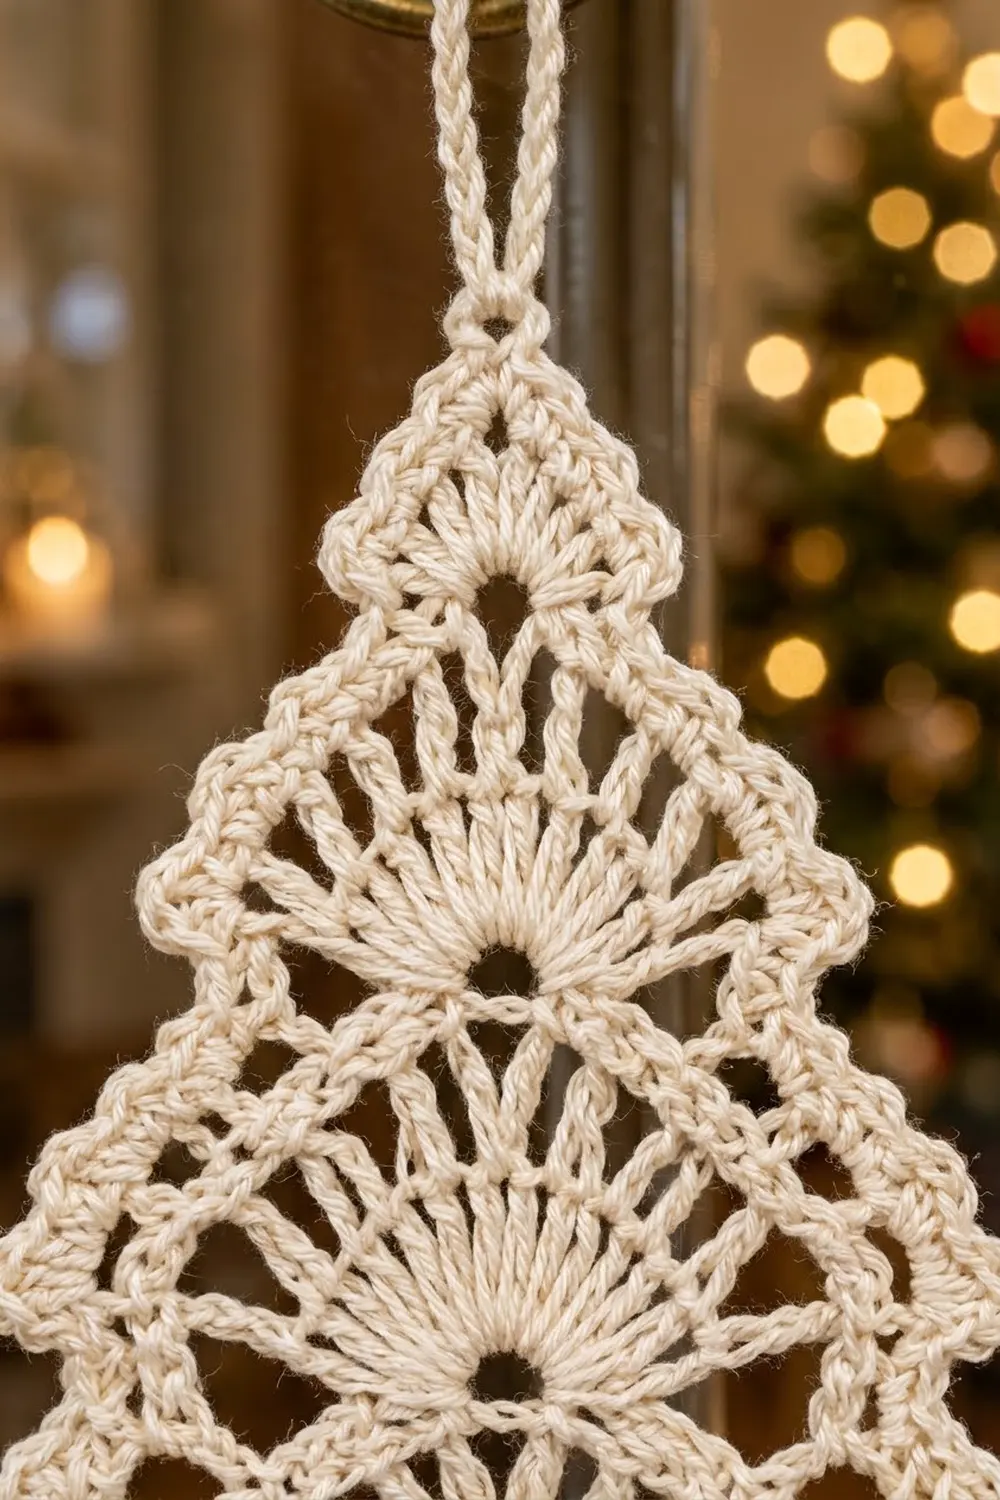
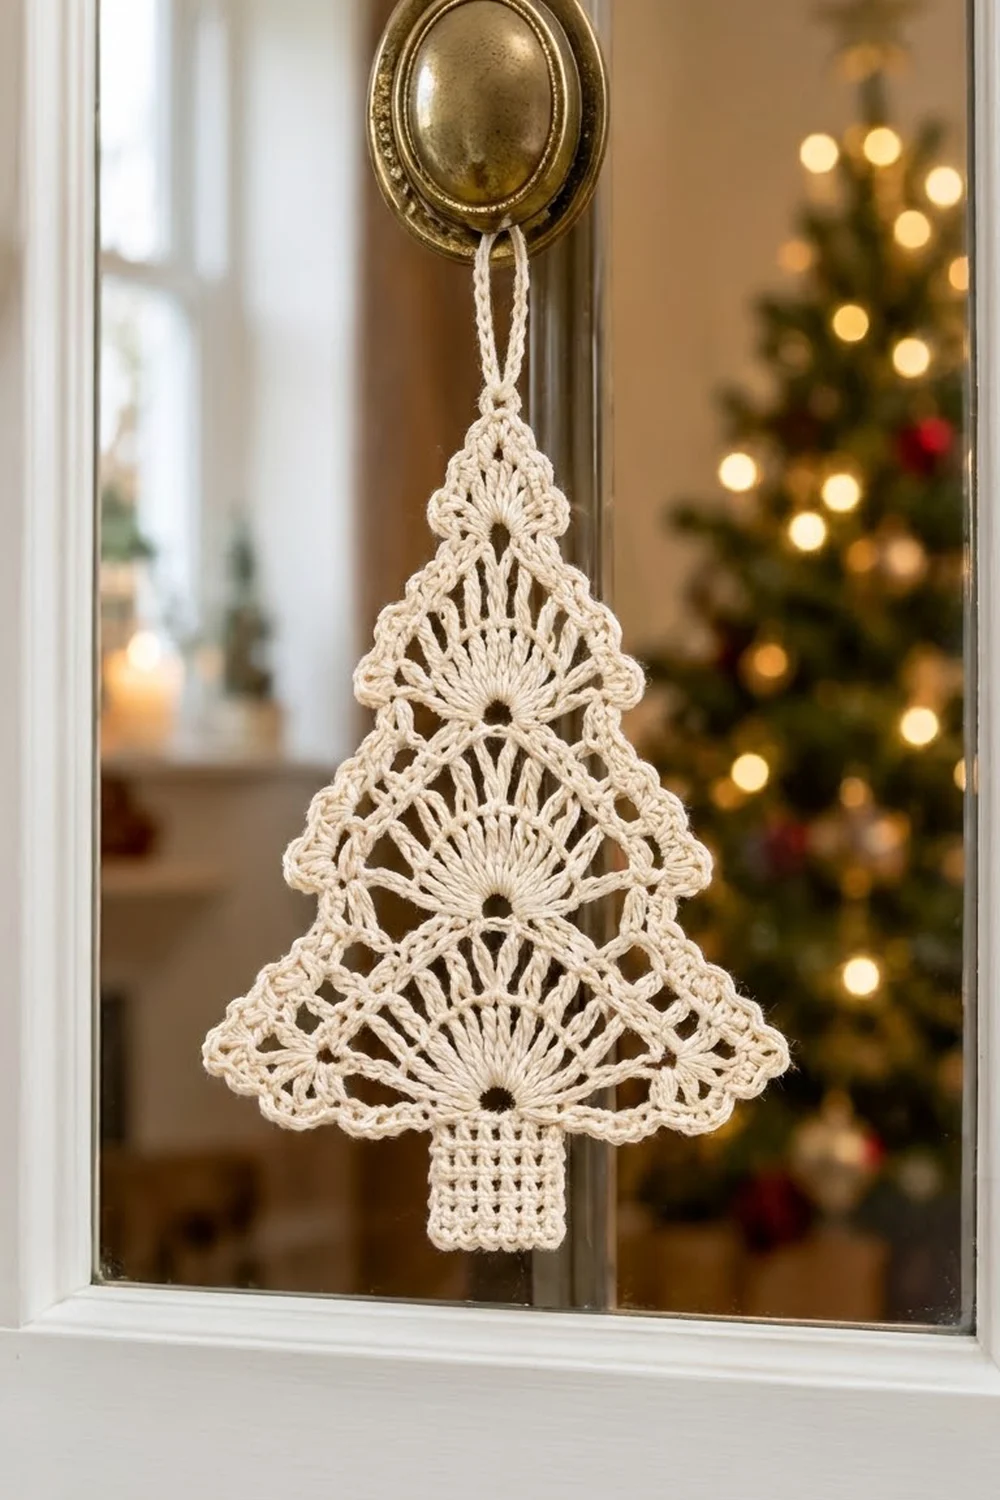
This lace Christmas tree ornament is made of three stacked fans. Each tier is a half-circle of open rays that spread up and out from a small hole at the bottom of that tier. A picot edge outlines every tier, and a short solid trunk and a crocheted hanging loop finish the tree.
The sample is worked in one color, a soft ivory cotton thread. The single color keeps attention on the openwork. On a door knob, a window latch, or a tree branch, the light shows through the rays and the ornament looks almost like snow lace.
The pattern uses US crochet terms. The finished ornament is about 4 in (10.2 cm) wide and 5.75 in (14.6 cm) tall, not counting the hanging loop. The loop adds about 1.5 in (3.8 cm).
You work each tier in short rows from its own small ring, starting with the top tier. As you crochet the edge row of each lower tier, you join it to the base of the tier above with joining picots. The three tiers, trunk, and loop are therefore connected as you go, and you finish with one single piece and no sewing.
Finished Size and Construction
- Finished size: 4 in (10.2 cm) wide x 5.75 in (14.6 cm) tall, plus a 1.5 in (3.8 cm) loop
- Skill level: Intermediate
- Terminology: US crochet terms
- Yarn weight: Size 3 cotton crochet thread (Lace, weight 0)
- Hook: 2.25 mm (US B-1)
- Number of pieces: 1 (three tiers joined as you go, plus trunk and loop)
- Layout: Three tiers stacked vertically and centered, with the trunk centered under the bottom tier
- Piece size: Top tier 2.3 in (5.8 cm), middle tier 3.1 in (7.9 cm), bottom tier 4 in (10.2 cm) wide
- Size before border: 4 in (10.2 cm) x 5.6 in (14.2 cm)
- Border depth: 0.15 in (0.4 cm), around the trunk only
Materials
Choose a mercerized cotton crochet thread in size 3. Mercerized cotton gives crisp stitch definition, holds starch well, and stays bright. Thinner thread such as size 10 will also work, but it makes a smaller ornament.
- Ivory (Color A): about 12 g, 55 m
Tools:
- 2.25 mm (US B-1) crochet hook
- Fine tapestry needle
- Scissors
- Stitch markers (3)
- Blocking mat or foam board with rustproof pins
- Fabric stiffener or spray starch
- Ruler or tape measure
The thread amount already includes a margin of about 20% for a test piece and weaving in ends.
Abbreviations (US Terms)
- ch – chain
- sl st – slip stitch
- sc – single crochet
- dc – double crochet
- tr – treble crochet
- sp – space
- st(s) – stitch(es)
- tch – turning chain
- RS – right side
Special stitches:
- Picot: Ch 3, sl st in the 3rd ch from hook.
- Joining picot (jp): Ch 1, sl st in the indicated sc on the base of the tier above, ch 1, sl st in the last sc made on the current tier.
Gauge and Checkpoints
Gauge: 15 sc = 2 in (5.1 cm). Nine rows of sc = 1 in (2.5 cm). One dc row adds about 0.3 in (0.8 cm) to a fan’s radius, and one tr row adds about 0.4 in (1.0 cm).
Test piece first: Use Tier A (the top tier) as your gauge swatch. It is small, and it becomes part of the ornament.
Checkpoints:
- Tier A after Row 3: 2.1 in (5.3 cm) across the flat base
- Tier A after the base row: 2.3 in (5.8 cm) wide
- Tier B after Row 4: 2.9 in (7.4 cm) across
- Tier B after the base row: 3.1 in (7.9 cm) wide
- Tier C after Row 5: 3.7 in (9.4 cm) across
- Tier C after the base row: 4 in (10.2 cm) wide
- Trunk before border: 1 in (2.5 cm) wide x 0.9 in (2.3 cm) tall
If your piece is too big: go down a hook size, to 2.0 mm, or pull the ray stitches up a little less. If it is too small: go up to 2.5 mm. Fix the size on Tier A. The joining picots line up by stitch count, so as long as every tier is worked at the same tension, all three tiers stay in proportion.
Tier A (Top Tier)
Ch 5, sl st in the first ch to form a ring.
Row 1 (RS): Ch 3 (counts as dc), 8 dc in ring, turn. (9 dc)
Row 2: Ch 4 (counts as dc + ch 1), [dc in next dc, ch 1] 7 times, dc in top of tch, turn. (9 dc, 8 ch-1 sps)
Row 3: Ch 5 (counts as dc + ch 2), [dc in next dc, ch 2] 7 times, dc in 3rd ch of tch, turn. (9 dc, 8 ch-2 sps)
The rays now fan out from the ring, which forms the small hole at the bottom center of the tier.
Row 4 (picot edge and tip): Ch 1, sc in first dc, [3 sc in next ch-2 sp, sc in next dc, picot] 3 times, 3 sc in next ch-2 sp, (sc, ch 4, sc) in next dc (the center dc), [3 sc in next ch-2 sp, sc in next dc, picot] 3 times, 3 sc in next ch-2 sp, sc in 3rd ch of tch. (34 sc, 6 picots, 1 ch-4 tip loop)
The ch-4 in the center dc makes the point of the tree. You will attach the hanging loop there later.
Base row: Do not turn. Ch 1 and rotate to work along the flat edge. Sc in the end of Row 4, 2 sc in the end of each of Rows 3, 2, and 1, 3 sc into the ring, 2 sc in the end of each of Rows 1, 2, and 3, sc in the end of Row 4. (17 sc: 7 + 3 + 7)
Fasten off. Sc #9 sits at the center, right under the ring.
Tier B (Middle Tier)
Ch 6, sl st in the first ch to form a ring.
Row 1 (RS): Ch 3, 10 dc in ring, turn. (11 dc)
Row 2: Ch 4, [dc in next dc, ch 1] 9 times, dc in top of tch, turn. (11 dc, 10 ch-1 sps)
Row 3: Ch 5, [dc in next dc, ch 2] 9 times, dc in 3rd ch of tch, turn. (11 dc, 10 ch-2 sps)
Row 4: Ch 6 (counts as tr + ch 2), [tr in next dc, ch 2] 9 times, tr in 3rd ch of tch, turn. (11 tr, 10 ch-2 sps)
Row 5 (edge and join): Hold Tier A above Tier B with the RS of both facing you and the base of Tier A along the top of the fan. Mark sc #6, #9, and #12 on Tier A’s base, counting from the corner nearest your working end.
Ch 1, sc in first tr, [3 sc in next ch-2 sp, sc in next tr, picot] 3 times, [3 sc in next ch-2 sp, sc in next tr, jp] 3 times, joining to the marked sc #6, #9, and #12 in order, [3 sc in next ch-2 sp, sc in next tr, picot] 3 times, 3 sc in next ch-2 sp, sc in last tr. (41 sc, 6 picots, 3 jp)
The three center rays now touch Tier A right beneath its ring. The corners of Tier A stay free and overhang Tier B like branch tips.
Base row: Ch 1, rotate. Sc in the end of Row 5, 3 sc in the end of Row 4, 2 sc in the end of each of Rows 3, 2, and 1, 3 sc into the ring, 2 sc in the end of each of Rows 1, 2, and 3, 3 sc in the end of Row 4, sc in the end of Row 5. (23 sc: 10 + 3 + 10)
Fasten off. The center is sc #12.
Tier C (Bottom Tier)
Ch 7, sl st in the first ch to form a ring.
Row 1 (RS): Ch 3, 12 dc in ring, turn. (13 dc)
Row 2: Ch 4, [dc in next dc, ch 1] 11 times, dc in top of tch, turn. (13 dc, 12 ch-1 sps)
Row 3: Ch 5, [dc in next dc, ch 2] 11 times, dc in 3rd ch of tch, turn. (13 dc, 12 ch-2 sps)
Row 4: Ch 6, [tr in next dc, ch 2] 11 times, tr in 3rd ch of tch, turn. (13 tr, 12 ch-2 sps)
Row 5: Ch 7 (counts as tr + ch 3), [tr in next tr, ch 3] 11 times, tr in 4th ch of tch, turn. (13 tr, 12 ch-3 sps)
Row 6 (edge and join): Mark sc #9, #12, and #15 on Tier B’s base. Hold the joined top section above Tier C with the RS facing you.
Ch 1, sc in first tr, [4 sc in next ch-3 sp, sc in next tr, picot] 4 times, [4 sc in next ch-3 sp, sc in next tr, jp] 3 times, joining to the marked sc #9, #12, and #15 in order, [4 sc in next ch-3 sp, sc in next tr, picot] 4 times, 4 sc in next ch-3 sp, sc in last tr. (61 sc, 8 picots, 3 jp)
Base row: Ch 1, rotate. Sc in the end of Row 6, 3 sc in the end of each of Rows 5 and 4, 2 sc in the end of each of Rows 3, 2, and 1, 4 sc into the ring, 2 sc in the end of each of Rows 1, 2, and 3, 3 sc in the end of each of Rows 4 and 5, sc in the end of Row 6. (30 sc: 13 + 4 + 13)
Fasten off. Checkpoint: the tree now measures 4 in (10.2 cm) across the bottom.
Trunk
The trunk is a small, solid rectangle of sc rows. Its dense grid texture contrasts with the lace above. The center of Tier C’s 30-st base falls between sc #15 and #16, so the trunk uses sc #12 through #19, with 4 sts on each side of center.
Row 1: With the RS facing you, join the thread with a sl st in sc #12 of Tier C’s base. Ch 1, sc in the same st and in each of the next 7 sts, turn. (8 sc)
Rows 2–8: Ch 1, sc in each sc across, turn. (8 sc)
Fasten off. The trunk now measures 1 in (2.5 cm) wide x 0.9 in (2.3 cm) tall.
Border
Border gauge: One sc per sc row-end, and one sc per stitch across the bottom. This keeps the border at the same 15 sc = 2 in (5.1 cm) and 9 rows = 1 in (2.5 cm) as the trunk.
Border round: With the RS facing you, join with a sl st in sc #11 of Tier C’s base, just left of the trunk.
- Left side: Ch 1, sc in the end of each of Rows 1–8. (8 sc)
- Corner: 3 sc in the first st of Row 8.
- Bottom: Sc in each of the next 6 sts. (6 sc)
- Corner: 3 sc in the last st of Row 8.
- Right side: Sc in the end of each of Rows 8–1. (8 sc)
Sl st in sc #20 of Tier C’s base. Fasten off. (28 sc: 8 + 3 + 6 + 3 + 8)
Why the math works: Each side has 8 sc rows, so 8 sc (one per row-end) keep the side straight without ruffling or pulling. Along the bottom, the 2 corner groups and the 6 middle sc cover exactly the 8 sts of Row 8, so nothing is added or skipped. The 3-sc corners turn each 90° angle cleanly. The finished trunk is 1.3 in (3.3 cm) wide, and the full height grows from 5.6 in (14.2 cm) to 5.75 in (14.6 cm).
Hanging loop: Join the thread with a sl st in the ch-4 tip loop of Tier A. Ch 30, sl st in the same tip loop. Ch 1, work 40 sc over the ch-30 loop, then sl st in the tip loop. Fasten off. The loop stands about 1.5 in (3.8 cm) tall.
Final Blocking
- Weave in all ends along the base rows or the trunk. Do not weave them into the open rays.
- Soak the ornament in fabric stiffener, or dampen it and spray it generously with starch.
- Gently press out the excess. Do not wring.
- Pin it to the mat, RS up. Pin the base corners of Tier C 4 in (10.2 cm) apart, then the corners of Tier B 3.1 in (7.9 cm) apart and Tier A 2.3 in (5.8 cm) apart.
- Pin each ray so it runs straight out from its ring, and keep the spaces between rays even.
- Pin open every picot and the tip loop.
- Square the trunk to 1.3 in (3.3 cm) wide.
- Check that the total height is 5.75 in (14.6 cm) and that the tiers are centered on one vertical line.
- Let it dry completely, at least 12 hours, before unpinning.
Final Quality-Control Checklist
- Tier A has 9 rays, Tier B has 11, and Tier C has 13.
- Each ring is open and sits at the bottom center of its tier.
- The picots are evenly spaced, and none are twisted.
- The three joining picots on each lower tier land on the marked center stitches above.
- The corners of each upper tier overhang freely.
- The trunk is centered and has 8 sts and 8 rows.
- The border lies flat, with sharp corners.
- The hanging loop is centered on the tip.
- The finished size is 4 in (10.2 cm) x 5.75 in (14.6 cm).
Troubleshooting
Fan cups or curls: The ring is too tight, or there are too few chains between rays. Make the ring loosely and work the full chain counts.
Fan ruffles: The chain spaces are too loose. Tighten the chains slightly, or go down a hook size.
Tiers are not centered: You probably counted the marked base stitches from the wrong corner. Recount, and check that the middle joining picot lands on the center stitch.
Joining picots look stretched: The lower tier is too short. Match the gauge checkpoints before you join instead of adding stitches.
Trunk leans: It must use sc #12–#19 so that it straddles the center.
Ornament goes limp after a season: Re-starch and pin it again.
Care
Hand wash in cool water with a mild soap, press dry in a towel, and re-block with starch. Store flat in tissue paper so the rays and picots don’t crush.
Final Notes
The whole ornament comes from one measurement chain. Tier A sets your gauge at 2.3 in (5.8 cm). Tier B grows to 3.1 in (7.9 cm) and Tier C to 4 in (10.2 cm), and each lower tier is joined to the one above with 3 joining picots. The 8-stitch trunk sits on the center of the 30-stitch base, and its 28-stitch border brings the height to 5.75 in (14.6 cm). If your top tier measures right and your counts match, the rest of the tree will measure right too.
Happy crocheting!