

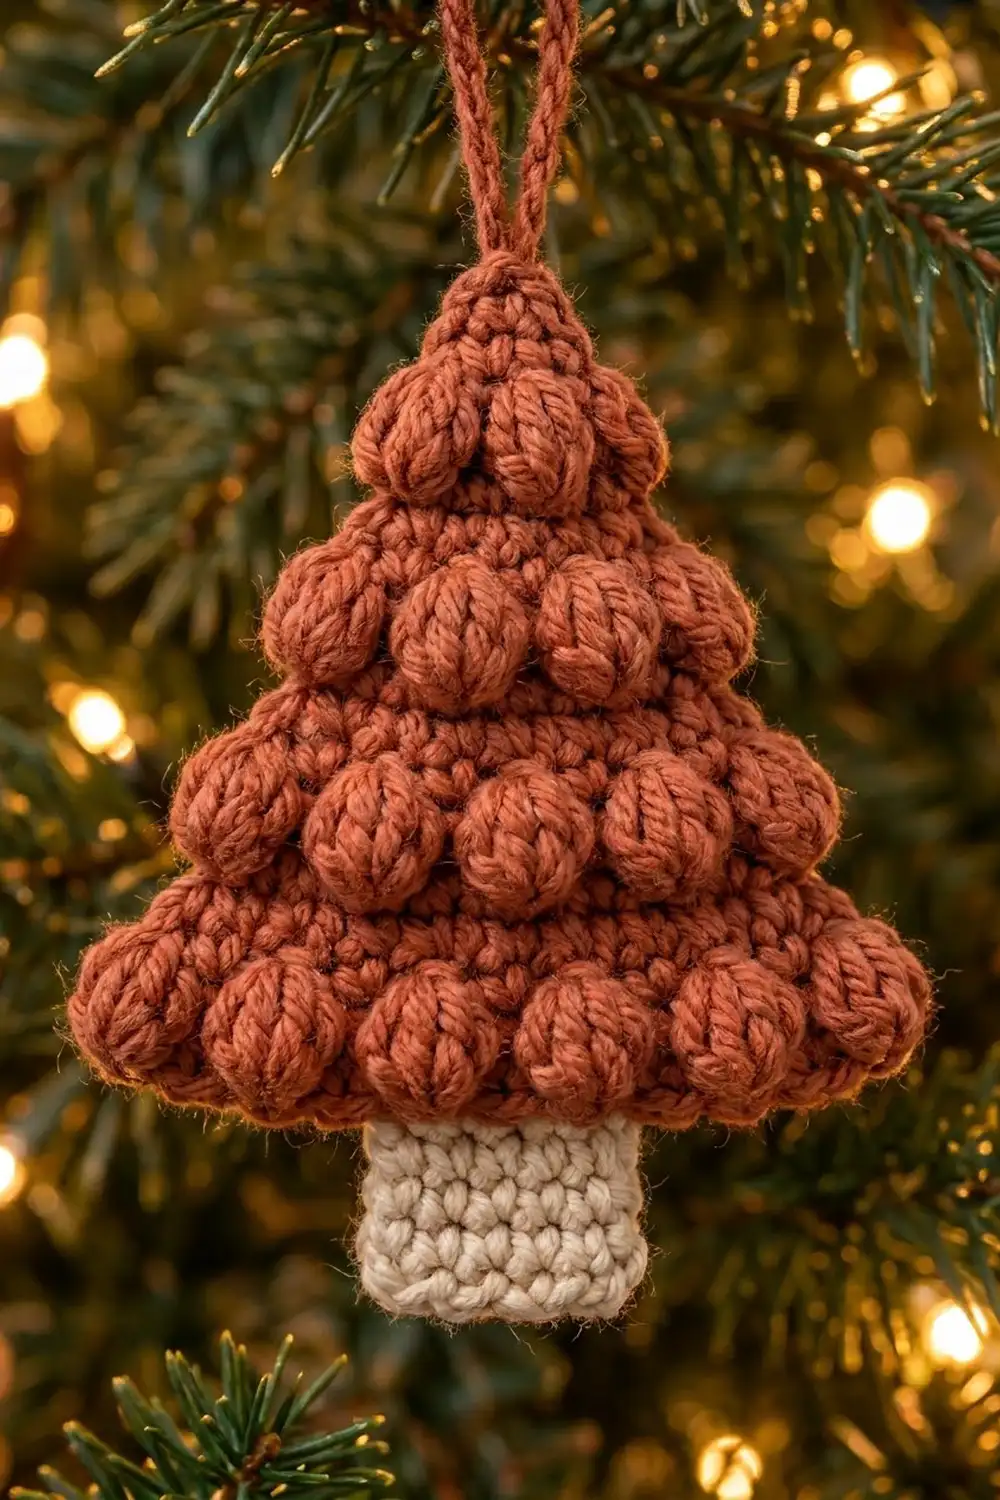
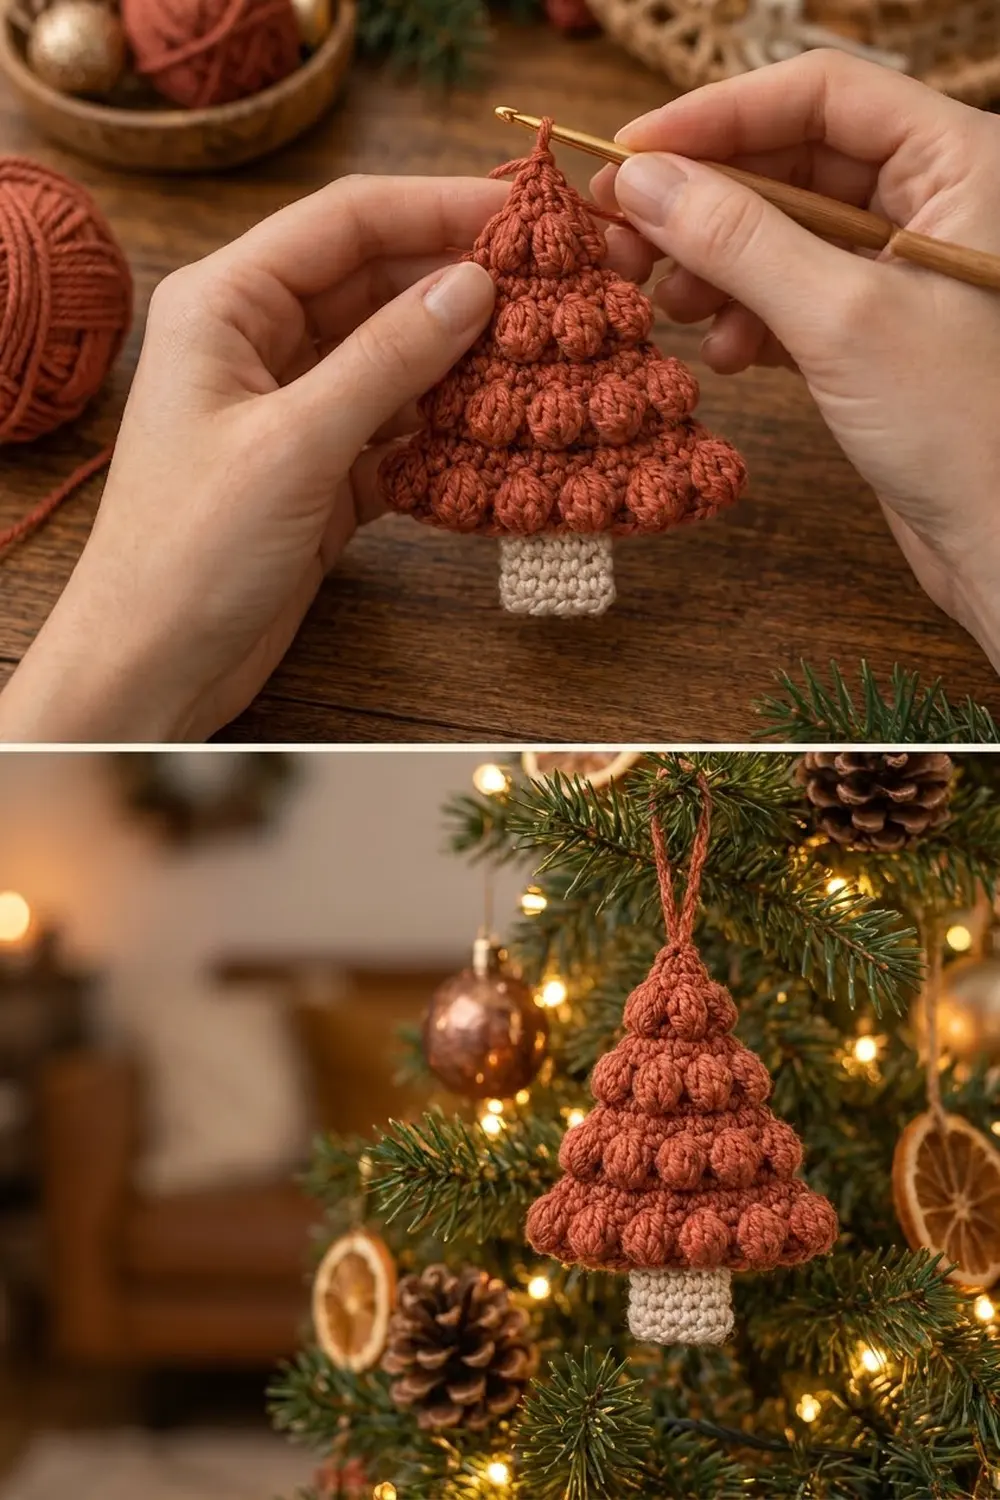
This little ornament is a flat triangle tree covered in stacked rows of plump bobbles. It’s worked in a warm rust “cinnamon” shade and has a short cream trunk and a matching rust hanging loop. Each tier of bobbles is one bobble shorter than the tier below it, so the tree narrows to a single bobble under the peak.
The style is cozy and rustic. Rust and cream go well with natural decor like dried orange slices, pinecones, copper baubles and warm fairy lights. The bobbles give it a soft, three-dimensional look, and the back stays flat so the ornament hangs neatly against the branches.
The pattern uses US crochet terms. The finished ornament measures 3.5 in (8.9 cm) wide at the base of the canopy and 5.25 in (13.3 cm) tall from peak to trunk bottom. With the hanging loop it is 6.75 in (17.1 cm) tall.
You work the canopy flat in rows from the bottom up, putting bobbles on wrong-side rows and decreasing on right-side rows. One round of single crochet goes around the canopy as a border. The trunk is then worked straight down from the center of the bottom edge, and you finish by chaining the hanging loop at the peak.
Finished Size and Construction
- Finished size: 3.5 in (8.9 cm) wide x 5.25 in (13.3 cm) tall, not counting the loop
- Skill level: Easy / advanced beginner
- Terminology: US crochet terms
- Yarn weight: Worsted (weight 4)
- Hook: 4.0 mm (US G-6)
- Number of pieces: 1 (single flat piece, no sewing)
- Layout: Triangle canopy with 6 bobble tiers (6, 5, 4, 3, 2, 1 bobbles), a trunk centered at the bottom and a loop at the peak
- Canopy size before border: 3.25 in (8.3 cm) wide x 4.0 in (10.2 cm) tall
- Border depth: 1/8 in (0.3 cm) on each edge
- Canopy size after border: 3.5 in (8.9 cm) wide x 4.25 in (10.8 cm) tall
- Trunk: 1.25 in (3.2 cm) wide x 1 in (2.5 cm) tall
- Hanging loop: 1.5 in (3.8 cm) long
Materials
Smooth worsted-weight yarn shows the bobbles most clearly. Good choices are a cotton-acrylic blend or a soft acrylic. Avoid fuzzy or very loosely plied yarns, which blur the bobbles and tend to split when you work several yarn overs.
- Color A, rust / cinnamon (canopy, border, loop): 12 g, about 22 m
- Color B, cream / oatmeal (trunk): 3 g, about 6 m
These amounts are for one ornament and already include a small margin for the gauge swatch and weaving in ends.
Tools:
- 4.0 mm (US G-6) crochet hook
- Tapestry needle
- Scissors
- 2 locking stitch markers
- Ruler or tape measure
- Blocking mat and rust-proof pins
- Spray bottle with water
Abbreviations (US Terms)
- ch: chain
- sc: single crochet
- sc2tog: single crochet 2 together
- sc3tog: single crochet 3 together
- dc: double crochet
- sl st: slip stitch
- st(s): stitch(es)
- sp: space
- RS / WS: right side / wrong side
- bob: bobble (see below)
Special stitch – Bobble (bob): Yarn over, insert hook in the indicated stitch, yarn over and pull up a loop, yarn over and pull through 2 loops. Repeat from * to * 3 more times in the same stitch (5 loops on hook). Yarn over and pull through all 5 loops. That makes one 4-dc bobble, which counts as 1 stitch. Bobbles are only worked on WS rows, so they pop out toward the RS.
Gauge and Checkpoints
Gauge: 16 sc and 16 sc rows = 4 in (10.2 cm). This means 4 sc = 1 in (2.5 cm) and one sc row is 1/4 in (0.6 cm) tall. A bobble row is 3/8 in (1.0 cm) tall, so each pair of one bobble row plus one sc row adds 5/8 in (1.6 cm).
Treat your first ornament as the gauge swatch and check these measurements as you go:
- After Row 1: 3.25 in (8.3 cm) wide
- After Row 4: 1.25 in (3.2 cm) tall
- After Row 8: 2.5 in (6.4 cm) tall
- After Row 13: 4.0 in (10.2 cm) tall
- After the border: 3.5 in (8.9 cm) x 4.25 in (10.8 cm)
If your tree is too big, go down to a 3.75 mm (US F-5) hook. If it is too small, go up to a 4.5 mm (US 7) hook. Check against Row 1 first. If the width is right but bobble rows are taller than 3/8 in (1.0 cm), pull each bobble loop up to just the height of the sc around it.
Canopy
Using Color A. Each row starts with ch 1, which does not count as a stitch. Bobble rows are WS rows and decrease rows are RS rows. Put a marker in Row 1 to mark the RS.
Row 1 (RS): Ch 14, sc in 2nd ch from hook and in each ch across, turn. (13 sc)
Row 2 (WS, bobble row): Ch 1, sc in first st, bob in next st, sc in next st. Repeat from * to * 5 more times, turn. (13 sts: 6 bob, 7 sc)
Row 3 (RS, decrease row): Ch 1, sc2tog over the first 2 sts, sc in each of the next 9 sts, sc2tog over the last 2 sts, turn. (11 sc)
Row 4 (WS): Ch 1, sc in first st, bob in next st, sc in next st. Repeat from * to * 4 more times, turn. (11 sts: 5 bob, 6 sc)
Row 5 (RS): Ch 1, sc2tog, sc in each of the next 7 sts, sc2tog, turn. (9 sc)
Row 6 (WS): Ch 1, sc in first st, bob in next st, sc in next st. Repeat from * to * 3 more times, turn. (9 sts: 4 bob, 5 sc)
Row 7 (RS): Ch 1, sc2tog, sc in each of the next 5 sts, sc2tog, turn. (7 sc)
Row 8 (WS): Ch 1, sc in first st, bob in next st, sc in next st. Repeat from * to * 2 more times, turn. (7 sts: 3 bob, 4 sc)
Row 9 (RS): Ch 1, sc2tog, sc in each of the next 3 sts, sc2tog, turn. (5 sc)
Row 10 (WS): Ch 1, sc in first st, bob in next st, sc in next st. Repeat from * to * once more, turn. (5 sts: 2 bob, 3 sc)
Row 11 (RS): Ch 1, sc2tog, sc in next st, sc2tog, turn. (3 sc)
Row 12 (WS): Ch 1, sc in first st, bob in next st, sc in last st, turn. (3 sts: 1 bob, 2 sc)
Row 13 (RS): Ch 1, sc3tog over all 3 sts. (1 st) Do not fasten off.
The canopy has 13 rows: 7 sc rows (Rows 1, 3, 5, 7, 9, 11, 13) and 6 bobble rows. The sc rows add 7 x 1/4 in = 1.75 in (4.4 cm), and the bobble rows add 6 x 3/8 in = 2.25 in (5.7 cm). That makes 4.0 in (10.2 cm) in total.
Each bobble tier sits over the gaps of the tier below it. The tiers are staggered because the sc2tog at each edge moves the stitch pattern in by one stitch.
Border
Continue with Color A. Work this round with the RS facing.
Border gauge: 4 sc = 1 in (2.5 cm), the same as the canopy.
Round 1 (RS): Ch 1. Work (sc, ch 1, sc) in the top of the Row 13 sc3tog. This is the peak.
Left slanted side: Work down the row ends from Row 12 to Row 1. Put 1 sc in each row end, but work 2 sc into the ends of Rows 10, 8, 4 and 2. (16 sc along the row ends)
Bottom-left corner: Ch 1.
Bottom edge: Work 1 sc in the free loop of each foundation chain across. (13 sc)
Bottom-right corner: Ch 1.
Right slanted side: Work up the row ends from Row 1 to Row 12. Put 1 sc in each row end, but work 2 sc into the ends of Rows 2, 4, 8 and 10. (16 sc)
Join with a sl st to the first sc of the round.
Counts per side: Each slanted side has 17 sc, which is 1 peak sc plus 16 row-end sc. The bottom has 13 sc. The three ch-1 sps are the corners and are not counted in any side. Round total: 17 + 17 + 13 = 47 sc and 3 ch-1 sps.
Why the math works: Rows 1–12 make a slanted edge about 4 in (10.2 cm) long, and at 4 sc per inch it needs about 16 sts. The 12 row ends give 12 sc. The 4 extra sc go into the taller bobble-row ends, spaced apart so the edge neither ruffles nor pulls in. The bottom edge is worked 1 to 1 in the 13 foundation chains, so it keeps the 3.25 in (8.3 cm) width of Row 1. The ch-1 corners stop the points from rounding off. One sc round adds 1/8 in (0.3 cm) on each side, so the canopy grows to 3.5 in (8.9 cm) wide and 4.25 in (10.8 cm) tall.
Hanging Loop
Still with Color A, after the joining sl st: ch 12, then sl st into the peak ch-1 sp. Fasten off, leaving a 4 in (10.2 cm) tail. The loop hangs about 1.5 in (3.8 cm) long. Weave the tail back through the loop chains to make it sturdier.
Trunk
Turn the canopy upside down with the RS facing, so the bottom edge is on top. The bottom edge has 13 sc. Skip the first 4 sc after a corner and join Color B with a sl st in the 5th sc.
Row 1 (RS): Ch 1, sc in the same st and in each of the next 4 sc, turn. (5 sc) This leaves 4 sc unworked on each side, which centers the trunk.
Rows 2–4: Ch 1, sc in each st across, turn. (5 sc each row)
Fasten off after Row 4. The trunk is 5 sc wide, 1.25 in (3.2 cm), and 4 rows tall, 1 in (2.5 cm).
Weave in all ends on the WS. Weave each color into its own section so the cream doesn’t show through the rust or the rust through the cream.
Final Blocking
- Lay the ornament RS up on a blocking mat.
- Pin the 3 canopy corners first so the base is 3.5 in (8.9 cm) wide and the peak is 4.25 in (10.8 cm) above it.
- Pin each slanted side straight between its corners. Put the pins in the border, not in the bobbles.
- Pin the trunk square at 1.25 in (3.2 cm) x 1 in (2.5 cm).
- Mist with water until damp but not soaked.
- Pinch each bobble gently from the back to round it out.
- Leave it to dry completely, at least 6 hours, before unpinning.
- Check the total height again: 5.25 in (13.3 cm) without the loop and 6.75 in (17.1 cm) with it.
Final Quality-Control Checklist
- 6 bobble tiers with 6, 5, 4, 3, 2 and 1 bobbles, all popping to the RS
- Each tier staggered over the gaps of the tier below
- Canopy measures 3.5 in (8.9 cm) x 4.25 in (10.8 cm)
- Border: 17 sc on each slanted side, 13 sc on the bottom, 3 ch-1 corners
- Trunk centered, with 4 border sc showing on each side
- Trunk is 5 sc x 4 rows, 1.25 in (3.2 cm) x 1 in (2.5 cm)
- Loop is secure and about 1.5 in (3.8 cm) long
- All ends woven in, none showing on the RS
- Ornament hangs straight from the loop
Troubleshooting
Bobbles pop to the back. Bobbles were worked on a RS row. Check your RS marker. Bobble rows must be even-numbered WS rows.
Bobbles look flat or thin. Pull every loop up to full dc height. You can also use a 5-dc bobble, but expect the rows to get slightly taller.
Wrong stitch count after a decrease row. Each decrease row loses exactly 2 sts, one at each edge. Count both sc2tog stitches as single stitches.
Edges look jagged. Work the first and last sc of every row firmly. The border will smooth out small bumps.
Border ruffles along the sides. Work only 2 extra sc along each side instead of 4.
Border pulls the sides inward. On each side, also work 2 sc into the Row 6 row end.
Trunk is off-center. Count the bottom sc again from the corner. You should skip exactly 4.
Ornament tilts when hung. Make sure the loop is attached in the peak ch-1 sp, not to one side of it.
Care
Hand wash in cool water with mild soap, press out the water in a towel, and dry flat, reshaping the bobbles while damp. Store flat or hanging, away from heavy objects that could crush the bobbles.
Final Notes
Here is the measurement chain. Row 1 starts at 13 sc, 3.25 in (8.3 cm) wide. Six bobble tiers and decrease rows bring the canopy up to 4.0 in (10.2 cm). The border round of 47 sc adds 1/8 in (0.3 cm) on each edge, for a 3.5 in (8.9 cm) x 4.25 in (10.8 cm) canopy. A 5-sc trunk adds 1 in (2.5 cm), so the tree is 5.25 in (13.3 cm) tall, and the 1.5 in (3.8 cm) loop brings it to 6.75 in (17.1 cm).
If your Row 1 width and bobble-row height match the checkpoints, everything after that will come out to size. Make one, check it against these numbers, and then make as many as you need for your tree.
Happy crocheting!