

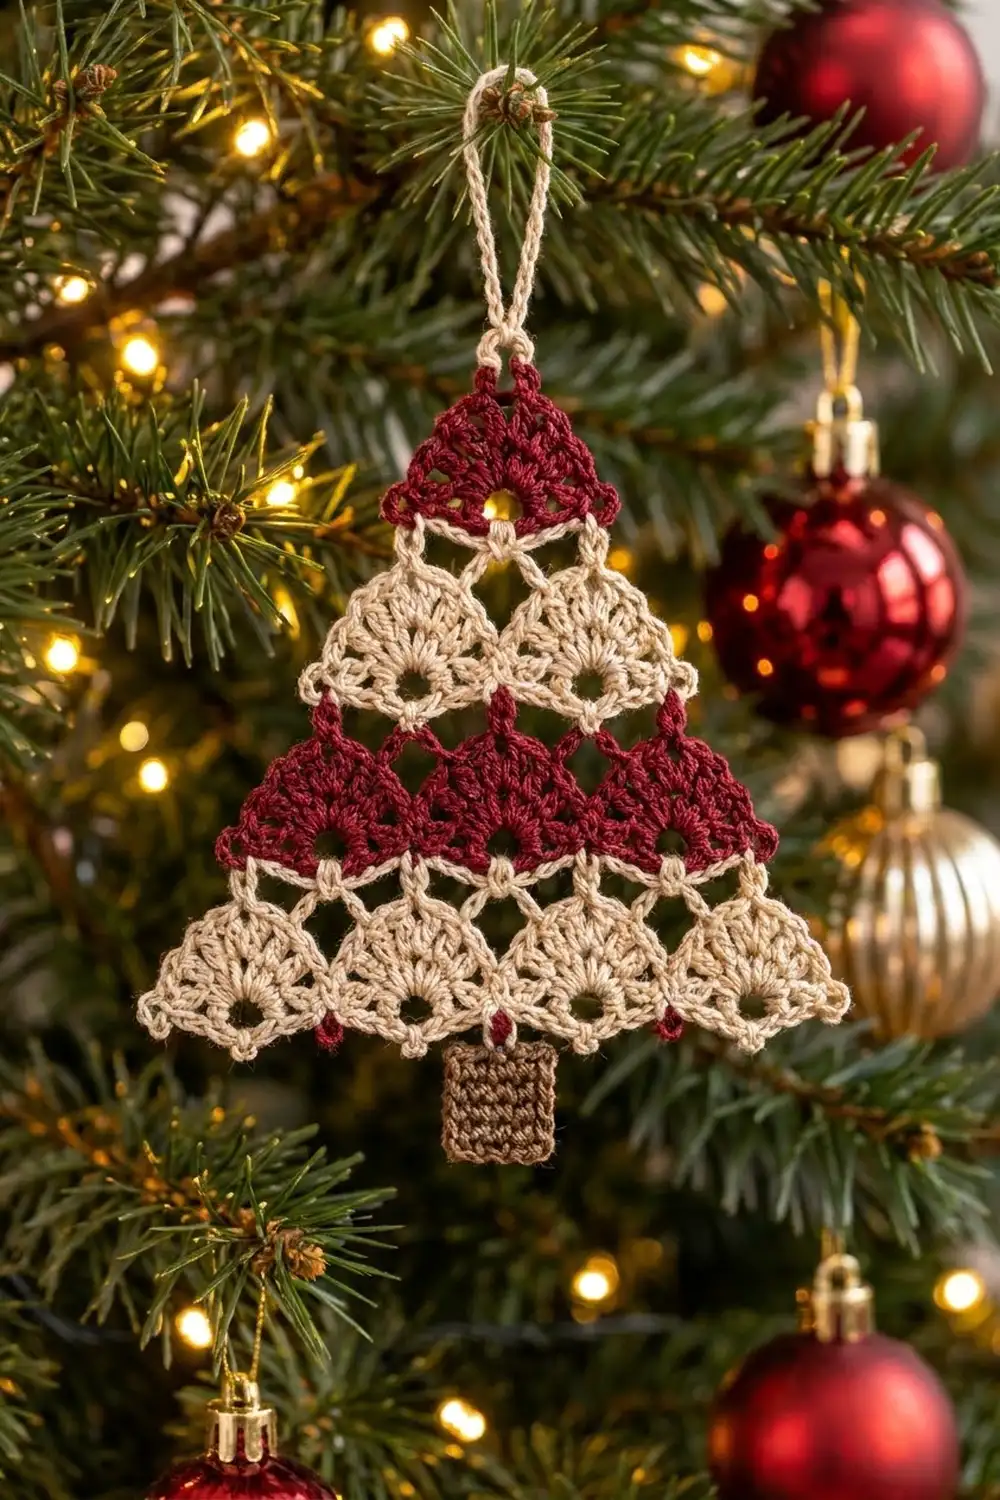
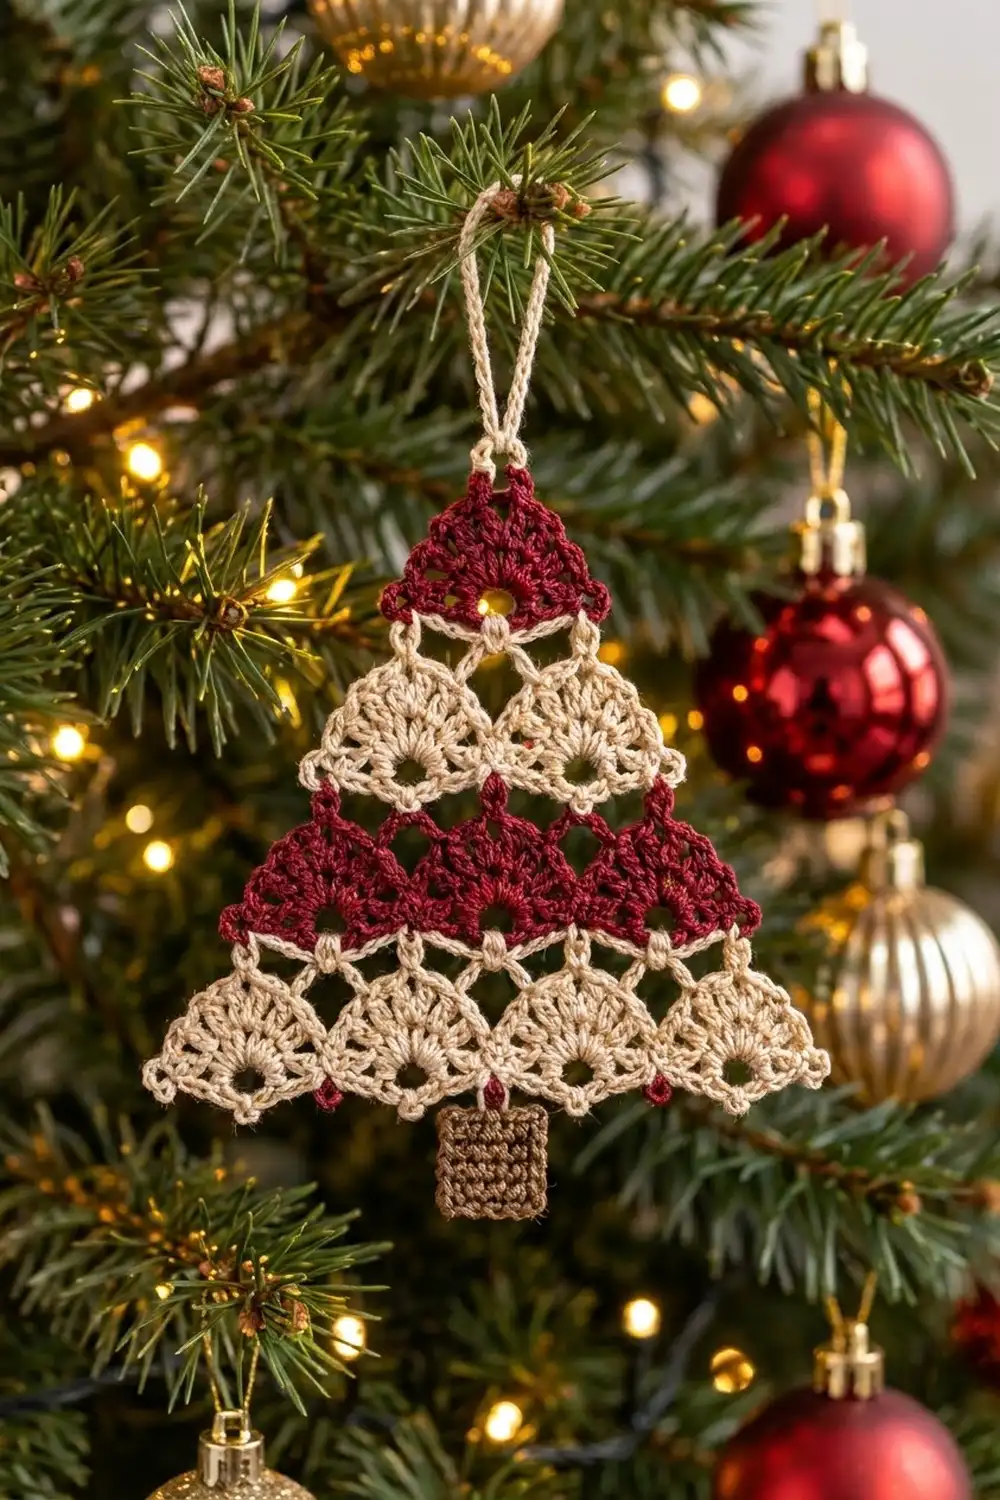
This little Christmas tree ornament is made from ten small lacy triangles joined into four stepped tiers. Each triangle has a small open ring at the base, a fan of double crochets spreading up from it, and a picot at every corner. Joined point to corner, the triangles give the tree a light, scalloped look that catches the light on a branch.
The colors are classic and warm. Deep burgundy is used for the top triangle and the third tier, soft cream for the second and fourth tiers, and brown for the small trunk. A cream hanging loop finishes the top. The striped tiers are easy to see even from across the room.
The pattern uses US crochet terms. The tree body measures 5 in (12.7 cm) wide and 4 in (10.2 cm) tall. With the trunk it is 4.75 in (12.1 cm) tall, and with the hanging loop about 6 in (15.2 cm) overall.
Construction is simple. You make one complete triangle, then join each new triangle to the earlier ones through its picots as you crochet it. The tiers have 1, 2, 3 and 4 triangles. Last, you crochet a small trunk, sew it to the bottom center, and add a chain loop to the top point.
Finished Size and Construction
- Finished size (tree body): 5 in (12.7 cm) wide x 4 in (10.2 cm) tall
- Height with trunk: 4.75 in (12.1 cm); about 6 in (15.2 cm) with loop
- Skill level: Easy-intermediate
- Terminology: US crochet terms
- Yarn weight: Fingering / size 3 cotton thread (#1 super fine)
- Hook: 2.25 mm (B-1)
- Number of pieces: 10 triangle motifs, 1 trunk, 1 hanging loop
- Layout: 4 tiers of 1, 2, 3 and 4 triangles, stacked point-up
- Piece size: each triangle is 1.25 in (3.2 cm) across the base x 1 in (2.5 cm) tall, picots included
- Size before border: 5 in (12.7 cm) x 4 in (10.2 cm); no outline border is added
- Border depth: 0 in (0 cm); the picot edges of the motifs are the finished edge
Materials
Choose a smooth mercerized cotton in fingering weight or size 3 thread. Mercerized cotton shows each stitch clearly and keeps the fans and picots sharp. Avoid fuzzy or very stretchy yarns, because the triangles need clean points.
- Burgundy: 5 g, about 14 m (4 triangles)
- Cream: 8 g, about 22 m (6 triangles and the hanging loop)
- Brown: 2 g, about 5 m (trunk)
These amounts include about 30% extra for a test triangle and weaving in ends.
Tools:
- 2.25 mm (B-1) crochet hook
- Tapestry needle
- Scissors
- Rustproof pins and a foam blocking mat
- Spray bottle with water
- Ruler or tape measure
Abbreviations (US Terms)
- ch – chain
- sl st – slip stitch
- sc – single crochet
- hdc – half double crochet
- dc – double crochet
- tr – treble crochet
- st(s) – stitch(es)
- sp – space
- RS – right side
Special stitches:
- Picot (ch-3 picot): Ch 3 at the point given. At a corner it sits between two sc worked in the same stitch. At the top point (apex) it sits between two tr.
- Joining picot: Ch 1, take the hook out of the loop, and insert it from the front through the matching picot of the finished motif. Pick up the dropped loop and pull it through (sl st join), then ch 1. This replaces the middle chain of a ch-3 picot, so a joined picot stays the same size.
Gauge and Checkpoints
Gauge: 8 sc and 9 rows = 1 in (2.5 cm) in brown sc. More importantly, one finished triangle should measure 1.25 in (3.2 cm) across the base and 1 in (2.5 cm) tall, picots included.
Make one complete triangle first and block it lightly before you go on. Check it at each stage:
- After Row 2: the half-circle fan measures 1 in (2.5 cm) across the straight edge.
- After Row 3: the triangle measures 1.25 in (3.2 cm) from corner picot to corner picot.
- After Row 4: the base edge lies straight, and the height from base to apex picot is 1 in (2.5 cm).
If your triangle is too big (base over 1.375 in / 3.5 cm), go down to a 2 mm hook. A 1.375 in (3.5 cm) base would make the tree 5.5 in (14.0 cm) wide.
If your triangle is too small (base under 1.125 in / 2.9 cm), go up to a 2.5 mm hook.
A difference of up to 1/8 in (0.3 cm) per triangle is fine for an ornament.
Triangle Motif
Make 4 in burgundy and 6 in cream. Make Motif 1 on its own. Join all the others as you go (see Joining).
Leave a 4 in (10.2 cm) tail at the start.
Ring: Ch 4, sl st in first ch to form a ring.
Row 1 (RS): Ch 3 (counts as dc), 6 dc in ring. Turn. (7 dc)
The dc sit on the top half of the ring only and form a half-circle fan. The bottom half of the ring stays open and becomes the small hole at the base.
Row 2: Ch 3 (counts as dc), dc in same st, 2 dc in each of next 5 dc, 2 dc in top of turning ch. Turn. (14 dc)
This is a growth row. You double every stitch, so the fan widens into a fuller half circle with spokes spreading out from the ring.
Row 3 (shaping row): Ch 1, (sc, ch 3, sc) in first dc (first base corner picot made), hdc in each of next 2 dc, dc in each of next 2 dc, tr in each of next 2 dc, ch 3 (apex picot made), tr in each of next 2 dc, dc in each of next 2 dc, hdc in each of next 2 dc, (sc, ch 3, sc) in top of turning ch (second base corner picot made). Do not turn.
Count for Row 3: 14 sts worked 1 per existing st + 2 extra sc (one at each corner) = 16 sts and 3 ch-3 picots.
The changing stitch heights shape the triangle. The short sc and hdc stay low near the base corners. The tall tr in the middle push the curve up into a point. The result is a triangle with two straight sloping sides.
Row 4 (base edge): Turn the piece so you can work along the straight bottom edge. Working into the row ends, 2 sc in end of Row 2, 2 sc in end of Row 1, 3 sc in the open bottom half of the ring, 2 sc in end of Row 1, 2 sc in end of Row 2. Sl st in first sc of Row 3. Fasten off, leaving a 4 in (10.2 cm) tail. (11 sc)
Don’t pull the stitches under the ring too tight. Three sc spread across the ring leave a small round hole just above the base, as in the finished tree.
Weave in the starting tail now. Keep the ending tail until the tree is joined, so you can use it to tidy any loose joins.
Make All Pieces
- Burgundy triangles: 4 (tier 1: 1 triangle; tier 3: 3 triangles)
- Cream triangles: 6 (tier 2: 2 triangles; tier 4: 4 triangles)
- Brown trunk: 1
- Cream hanging loop: 1 (worked directly onto the tree)
Layout, top to bottom (B = burgundy, C = cream):
            [B]                 tier 1
         [C]   [C]              tier 2
      [B]   [B]   [B]           tier 3
   [C]   [C]   [C]   [C]        tier 4
           |trunk|
Each tier is 1.25 in (3.2 cm) wider than the one above it. The tiers measure 1.25 in (3.2 cm), 2.5 in (6.4 cm), 3.75 in (9.5 cm) and 5 in (12.7 cm).
Joining
Method: join as you go through the picots while working Row 3 of each new triangle. Row 3 makes the three picots in this order: first base corner, apex, second base corner. That means each new triangle can join at all three points with no sewing.
How the joins work:
- Triangles in the same tier meet base corner to base corner. Join the second corner picot of the left triangle to the first corner picot of the triangle on its right.
- Each triangle’s apex picot joins up to a base-corner point of the tier above.
- Where two corners already meet, always sl st into the first picot made at that point. This keeps each joining point as one neat cluster.
Work in this order:
- Tier 1: Make one complete burgundy triangle.
- Tier 2 (cream): For the left triangle, work Row 3 with a joining picot in place of the apex picot, joining it to the left base corner of tier 1. For the right triangle, use a joining picot for the first base corner and join it to the second corner of the left triangle. Then use a joining picot for the apex and join it to the right base corner of tier 1.
- Tier 3 (burgundy): Tier 2 now has three base points: the left outer corner, the center joining point and the right outer corner. Join the three apexes to these three points, from left to right. Join neighboring base corners in the tier as you did in tier 2.
- Tier 4 (cream): Tier 3 has four base points. Join the four apexes to them, from left to right, and join neighboring corners in the tier.
Total joins: 6 corner-to-corner joins inside the tiers (0 + 1 + 2 + 3) and 9 apex joins (2 + 3 + 4). The top apex and the 5 base points of tier 4 stay free.
Tension: Keep the ch 1 on each side of a joining sl st at the same tension as your normal chains. Tight joins pull the tree into a curve. Loose joins let the triangles droop apart.
Size checkpoint: After tier 2, the tree measures 2.5 in (6.4 cm) wide x 2 in (5.1 cm) tall. After tier 3, it measures 3.75 in (9.5 cm) x 3 in (7.6 cm). After tier 4, it measures 5 in (12.7 cm) x 4 in (10.2 cm).
Border
This tree has no border round around the outside. The corner picots and fan edges are already the finished edge, and an extra round would hide the scalloped outline. In this pattern, the border stage is the trunk and the hanging loop.
Border gauge: 8 sc and 9 rows = 1 in (2.5 cm), using the same 2.25 mm hook.
Trunk (brown):
- Ch 5.
- Row 1: Sc in 2nd ch from hook and in each ch across. Ch 1, turn. (4 sc)
- Rows 2–7: Sc in each sc across. Ch 1, turn. (4 sc in each row)
- Fasten off, leaving a 6 in (15.2 cm) tail for sewing.
Counts per side: the top edge has 4 sc, the bottom edge has 4 ch, and each long side has 7 row ends. At 8 sc per inch, 4 sc make 0.5 in (1.3 cm) of width. At 9 rows per inch, 7 rows make about 0.75 in (1.9 cm) of height. The rows form the fine horizontal ridges on the trunk.
Attaching the trunk: Center the top edge of the trunk under the middle joining point of tier 4, where the second and third cream triangles meet. Whipstitch the 4 top sc to the base edges on either side of that point, 2 sc on each side. The trunk hangs straight down and adds 0.75 in (1.9 cm) to the height.
Hanging loop (cream): Join cream with a sl st in the apex picot of tier 1. Ch 24, then sl st in the same apex picot. Fasten off and weave in. The loop folds to about 1.25 in (3.2 cm) tall.
Why the math works: Each apex meets the base line of the tier above, so the tree body is 4 tiers x 1 in (2.5 cm) = 4 in (10.2 cm) tall. The width is 4 triangles x 1.25 in (3.2 cm) = 5 in (12.7 cm). The trunk adds 0.75 in (1.9 cm), for 4.75 in (12.1 cm), and the loop brings the hanging length to about 6 in (15.2 cm).
Final Blocking
- Weave in all remaining tails along the base edges, never through the open rings.
- Mist the ornament with water until it is damp but not soaked.
- Lay it face up on the blocking mat.
- Pin the top apex and the two outer corners of tier 4 first, forming a triangle 5 in (12.7 cm) wide and 4 in (10.2 cm) tall.
- Pin each inside joining point so the base line of every tier is level.
- Pin each corner picot open and each apex picot pointing up.
- Pin the trunk straight down from the center joining point.
- Let it dry completely, at least 6 hours, before you unpin it.
- For extra stiffness, spray it lightly with starch before it dries.
Final Quality-Control Checklist
- 10 triangles: 4 burgundy and 6 cream, in the correct tier order.
- Each triangle has 16 sts and 3 picots in Row 3, and 11 sc in Row 4.
- Every triangle shows a small open hole just above its base.
- All 6 corner joins and 9 apex joins are made, each as a single neat cluster.
- Tier widths are 1.25 in (3.2 cm), 2.5 in (6.4 cm), 3.75 in (9.5 cm) and 5 in (12.7 cm).
- The tree body measures 5 in (12.7 cm) x 4 in (10.2 cm).
- The trunk is 4 sc x 7 rows, centered under tier 4.
- The hanging loop is firmly attached at the top apex.
- All ends are woven in and trimmed.
Troubleshooting
Triangles look round, not pointed. Your tr stitches may be too short. Pull each tr up to full height, and check that you have 2 tr on each side of the apex.
The base edge cups or puckers. Row 4 is too tight. Work the 3 sc in the ring loosely, or go up one hook size for Row 4 only. Keep 11 sc.
Tiers sit unevenly. This is usually caused by an apex joined to the wrong point. Count the base points of the tier above before you join.
The tree curls after joining. The joins are too tight. Loosen the ch 1 on each side of each join, then block flat again.
The trunk leans. Center it again under the middle joining point and sew 2 sc on each side.
Joining points look messy. Use the tail from Row 4 to make one small stitch through the cluster on the wrong side.
Care
Hand wash in cool water with mild soap. Press out the water in a towel and dry flat, pinning the points again if needed. Store flat in tissue paper between seasons.
Final Notes
The measurements build step by step. One triangle measures 1.25 in (3.2 cm) by 1 in (2.5 cm). Four tiers of 1, 2, 3 and 4 triangles make a tree body 5 in (12.7 cm) wide and 4 in (10.2 cm) tall. The 0.75 in (1.9 cm) trunk brings the height to 4.75 in (12.1 cm), and the loop adds enough for about 6 in (15.2 cm) of hanging length. If the first triangle is the right size, the rest of the tree will be too.
Make one in burgundy and cream, or use your own colors for the tiers.
Happy crocheting!