

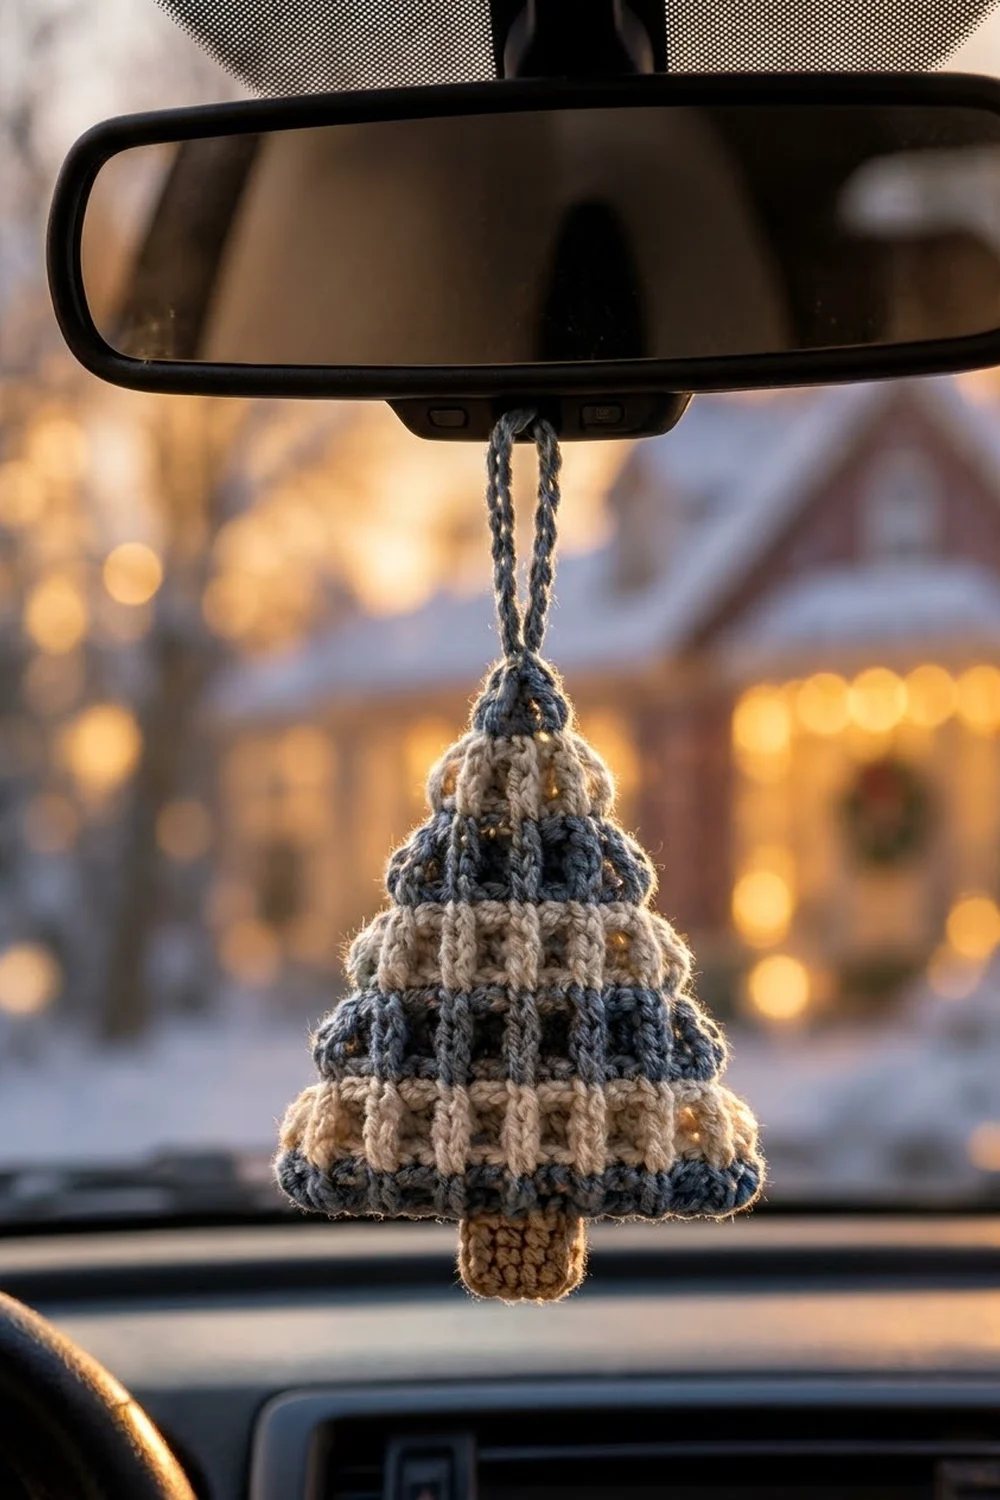
This little tree is a flat crochet ornament made to hang from a rearview mirror, a tree branch, or a gift tag. Bands of dusty denim blue and soft oatmeal cream stack into a stepped triangle. A small tan trunk sits underneath, and a blue cord loop rises from the tip.
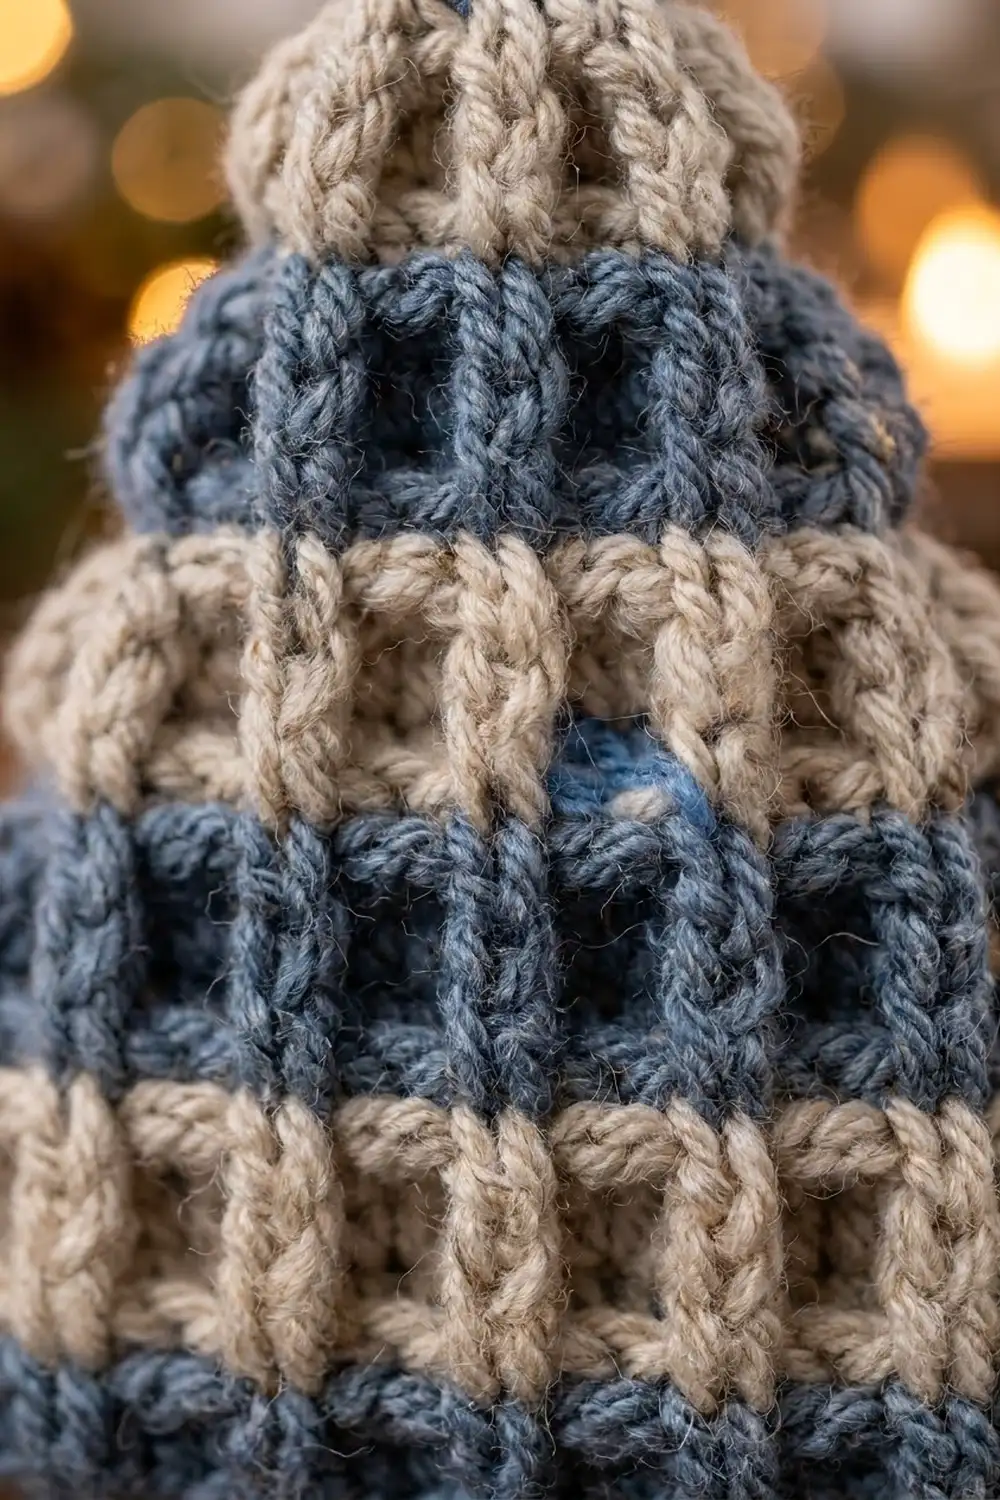
The texture looks like a woven plaid, but it uses only basic stitches. Each band has one row of double crochet, which forms the vertical columns and the small open gaps. A row of single crochet worked through the front loop only follows it. Working the front loop on a wrong-side row pushes a raised horizontal ridge to the front, so the band reads as a grid.
The pattern uses US crochet terms. The finished tree measures 4″ (10.2 cm) wide and 4.8″ (12.2 cm) tall. With the trunk it is 5.8″ (14.7 cm) long, and with the loop it hangs about 7.8″ (19.8 cm).
The tree is worked flat in rows from the bottom edge up, with even decreases that shape the tiers. You then add one row of single crochet along the base and work the trunk down from the center of that edge. Last, you make the hanging loop from the tip. Everything is one piece.
Finished Size and Construction
- Finished tree size: 4″ (10.2 cm) wide × 4.8″ (12.2 cm) tall
- Trunk: 1″ (2.5 cm) wide × 1″ (2.5 cm) long
- Hanging loop: about 2″ (5.1 cm) above the tip
- Total hanging length: about 7.8″ (19.8 cm)
- Skill level: Easy
- Terminology: US crochet terms
- Yarn weight: Worsted (#4)
- Hook: 4.5 mm (US 7)
- Number of pieces: 1, with the trunk and loop worked directly onto the tree
- Layout: a single standing triangle with 7 striped bands plus a 2-row tip
- Tree size before the base edge: 4″ (10.2 cm) wide × 4.6″ (11.7 cm) tall
- Base edge depth: 0.2″ (0.5 cm), one row of sc
Materials
Yarn: Use a smooth worsted-weight yarn in cotton, a cotton blend, or acrylic. Smooth yarn shows the grid texture best. Fuzzy or very loosely plied yarn fills the gaps between the double crochets and blurs the plaid look.
- Color A, Dusty Denim Blue: 10 g / 20 m (bands 1, 3, 5, 7, the tip, the base edge, and the loop)
- Color B, Oatmeal Cream: 6 g / 12 m (bands 2, 4, and 6)
- Color C, Light Tan: 3 g / 6 m (trunk)
These quantities include about a 25% margin for swatching and weaving in ends.
Tools:
- 4.5 mm (US 7) crochet hook
- Tapestry needle
- Scissors
- Stitch markers (2)
- Ruler or tape measure
- Blocking mat and rust-proof pins
- Spray bottle with water
Abbreviations (US Terms)
- ch: chain
- sl st: slip stitch
- sc: single crochet
- dc: double crochet
- FLO: front loop only
- st(s): stitch(es)
- RS / WS: right side / wrong side
- sc2tog: single crochet 2 together (insert hook in next st, pull up a loop; insert hook in following st, pull up a loop; yarn over, pull through all 3 loops)
- dc2tog: double crochet 2 together (yarn over, insert in next st, pull up a loop, yarn over, pull through 2; yarn over, insert in following st, pull up a loop, yarn over, pull through 2; yarn over, pull through all 3 loops)
Special stitch: Grid Band. One grid band is 2 rows in the same color: an RS row of dc, followed by a WS row of sc worked in FLO. On a WS row, the front loop is the one closer to you. Working only that loop leaves the back loop sitting on the RS as a horizontal ridge.
Turning chains: The ch 2 at the start of a dc row and the ch 1 at the start of an sc row do not count as stitches.
Gauge and Checkpoints
Gauge: 16 dc = 4″ (10.2 cm) and 16 sc = 4″ (10.2 cm). One grid band (1 dc row + 1 sc row) = 0.6″ (1.5 cm) tall. The dc row is about 0.4″ (1.0 cm) tall and the sc row about 0.2″ (0.5 cm).
Test first: Rows 1–2 of the pattern work as your swatch. When Row 2 is done, measure before you go on. The strip should be 4″ (10.2 cm) wide and 0.6″ (1.5 cm) tall.
Checkpoints:
- After Row 2 (1 band): 4″ (10.2 cm) wide × 0.6″ (1.5 cm) tall
- After Row 4 (2 bands): 1.2″ (3.0 cm) tall
- After Row 8 (4 bands): 2.4″ (6.1 cm) tall
- After Row 12 (6 bands): 3.6″ (9.1 cm) tall
- After Row 14 (7 bands): 4.2″ (10.7 cm) tall
- After Row 16 (tip): 4.6″ (11.7 cm) tall
- After the base edge: 4.8″ (12.2 cm) tall
If it is too big: Go down one hook size to 4 mm (US 6) and start again.
If it is too small: Go up one hook size to 5 mm (US 8).
If the width is right but the bands are too tall: You are probably pulling up long loops on the dc. Keep the first loop of each dc level with the working row.
Tree Body
Change colors on the last yarn over of the final sc of each even-numbered row. All color changes happen at the same side edge. Cut the old color, leaving a 4″ (10.2 cm) tail. Don’t carry it up the side, because the edge is left unbordered and a carried strand would show across the cream bands.
Band 1 (Color A)
Foundation: With Color A, ch 18.
Row 1 (RS): Dc in 3rd ch from hook and in each ch across. Turn. (16 dc)
The 2 skipped chains act as the turning chain and do not count. The row measures 4″ (10.2 cm).
Row 2 (WS): Ch 1, sc in FLO of each st across. Turn. (16 sc)
Change to Color B on the last yarn over.
Band 2 (Color B)
Row 3 (RS): Ch 2, dc2tog over first 2 sts, dc in next 12 sts, dc2tog over last 2 sts. Turn. (14 sts)
Check: 2 + 12 + 2 = 16 sts used, 1 + 12 + 1 = 14 sts made. Width is 3.5″ (8.9 cm).
Row 4 (WS): Ch 1, sc in FLO of each st across. Turn. (14 sc)
Change to Color A.
Band 3 (Color A)
Row 5: Ch 2, dc2tog, dc in next 10 sts, dc2tog. Turn. (12 sts)
Width is 3″ (7.6 cm).
Row 6: Ch 1, sc in FLO of each st across. Turn. (12 sc)
Change to Color B.
Band 4 (Color B)
Row 7: Ch 2, dc2tog, dc in next 8 sts, dc2tog. Turn. (10 sts)
Width is 2.5″ (6.4 cm).
Row 8: Ch 1, sc in FLO of each st across. Turn. (10 sc)
Change to Color A. Checkpoint: 2.4″ (6.1 cm) tall.
Band 5 (Color A)
Row 9: Ch 2, dc2tog, dc in next 6 sts, dc2tog. Turn. (8 sts)
Width is 2″ (5.1 cm).
Row 10: Ch 1, sc in FLO of each st across. Turn. (8 sc)
Change to Color B.
Band 6 (Color B)
Row 11: Ch 2, dc2tog, dc in next 4 sts, dc2tog. Turn. (6 sts)
Width is 1.5″ (3.8 cm).
Row 12: Ch 1, sc in FLO of each st across. Turn. (6 sc)
Change to Color A.
Band 7 (Color A)
Row 13: Ch 2, dc2tog, dc in next 2 sts, dc2tog. Turn. (4 sts)
Width is 1″ (2.5 cm).
Row 14: Ch 1, sc in FLO of each st across. Turn. (4 sc)
Do not change color. Checkpoint: 4.2″ (10.7 cm) tall.
Tip (Color A)
Row 15 (RS): Ch 1, sc2tog twice. Turn. (2 sts)
Row 16 (WS): Ch 1, sc2tog. (1 st)
Do not fasten off. Keep the loop on your hook for the hanging loop.
Why the tiers step: Each dc row starts and ends with a dc2tog, and the sc row above it is worked straight. That pulls the edge in by one stitch on each side, once per band. The sc rows stay level, so the outline steps instead of slanting smoothly. The taller dc row ends also bulge a little, which gives the soft scalloped look.
Hanging Loop (Color A)
From the tip stitch, ch 22. Sl st into the tip stitch to close the loop. Then sl st into each of the 22 ch around the loop, working into the back bump, and sl st into the tip stitch again. Fasten off.
The slip stitches turn the chain into a firm cord about 2″ (5.1 cm) tall when the loop hangs folded. Weave the tail down into the tip rows to strengthen the base of the loop.
Border: Base Edge
The sides are left as plain row ends so that each band keeps its own color right to the edge. Only the bottom gets an edge row. It firms up the foundation chain and gives the trunk a solid row to work from.
Border gauge: 1 sc per foundation chain, so 16 sc = 4″ (10.2 cm), the same as the body.
Base Row (RS): With RS facing and the foundation chain at the top, join Color A with a sl st in the first foundation ch at the right-hand corner. Ch 1. Sc in the same ch and in each remaining foundation ch, working into the free bottom loops. (16 sc) Fasten off.
Stitch count per side: The bottom side has exactly 16 sc, including both corner stitches. No extra stitches are added at the corners because the tree has no side border to turn into.
Why the math works: Row 1 was made from 16 chains (18 chains minus the 2 skipped), so there are exactly 16 foundation loops. Working 1 sc into each keeps the base at 4″ (10.2 cm). It won’t flare or pull in. The row adds 0.2″ (0.5 cm) of depth, bringing the tree to 4.8″ (12.2 cm) tall.
Trunk (Color C)
Row 1: With RS facing and the base edge now at the top, count 6 sc in from the right edge. Join Color C with a sl st in the 7th sc. Ch 1, sc in the same st and in the next 3 sts. Turn. (4 sc)
Check: 6 skipped + 4 worked + 6 left = 16. The trunk sits exactly in the center.
Rows 2–5: Ch 1, sc in each st across. Turn. (4 sc)
Fasten off. The trunk measures 1″ (2.5 cm) wide × 1″ (2.5 cm) long.
Final Blocking
- Weave in all ends along the color they belong to. Bury blue tails in blue bands and cream tails in cream bands so nothing shows through.
- Lightly mist the ornament with water until it is damp but not wet.
- Lay it RS up on the blocking mat.
- Pin the two bottom corners 4″ (10.2 cm) apart.
- Pin the tip so the tree measures 4.8″ (12.2 cm) from the base edge to the tip, centered over the base.
- Gently push each band’s side edge outward with your fingertips so every tier step stands out evenly on both sides.
- Pin the trunk straight, 1″ (2.5 cm) long and centered.
- Lay the loop flat above the tip, pointing straight up.
- Leave it to dry completely before unpinning, usually 4–6 hours.
Final Quality-Control Checklist
- 7 bands alternate A, B, A, B, A, B, A, followed by a 2-row blue tip.
- Each dc row is 2 sts shorter than the band below it: 16, 14, 12, 10, 8, 6, 4.
- Each sc row matches the dc row directly below it.
- A raised horizontal ridge shows on the RS at the top of every band.
- The base row has 16 sc.
- The trunk is centered, with 6 sts on each side.
- The tree is 4″ (10.2 cm) wide and 4.8″ (12.2 cm) tall.
- The trunk is 1″ (2.5 cm) square.
- The loop is firm and about 2″ (5.1 cm) tall.
- No color tails show on the RS.
Troubleshooting
The horizontal ridges are on the back. You worked the sc rows in the back loop. On WS rows, use the loop closest to you.
The tree leans to one side. You probably skipped a dc2tog at one end of a dc row. Count each dc row against the list above.
The edges are slanted instead of stepped. Make sure the sc rows are worked straight, with no decreases, from Row 2 through Row 14.
There’s a gap where the colors change. Change color on the last yarn over of the previous stitch, not after the turning chain.
The trunk is off-center. Recount the base row and join in the 7th sc from the edge.
The loop stretches. Tighten your slip stitches around the loop, or use a 4 mm (US 6) hook for the loop only.
The ornament curls. Re-block it damp and let it dry fully while pinned.
Care
Spot clean with cool water and mild soap, then lay flat to dry. Keep it away from long periods of direct sun on the dashboard so the blue doesn’t fade.
Final Notes
Each measurement depends on the one before it, so it’s worth checking at every stage. Sixteen stitches give the 4″ (10.2 cm) base. Seven grid bands at 0.6″ (1.5 cm) each give 4.2″ (10.7 cm). The 2-row tip brings the tree to 4.6″ (11.7 cm), and the base edge finishes it at 4.8″ (12.2 cm). A 1″ (2.5 cm) trunk and a 2″ (5.1 cm) loop complete the ornament at 7.8″ (19.8 cm) hanging length. If you match the first band, the rest of the tree will follow.
Happy crocheting!