

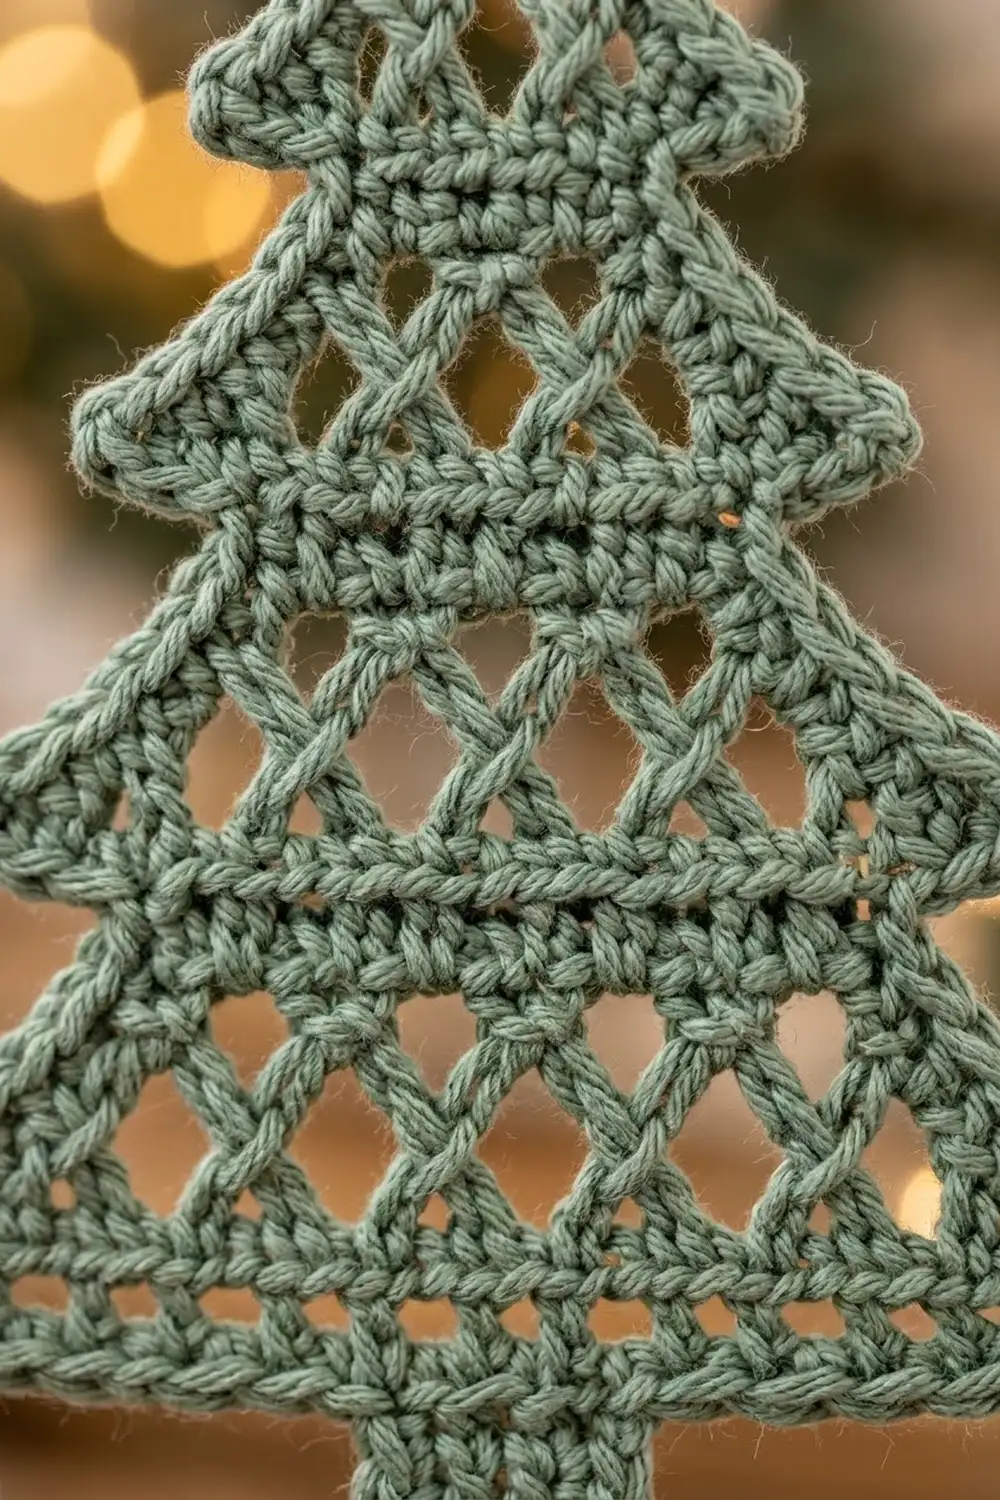
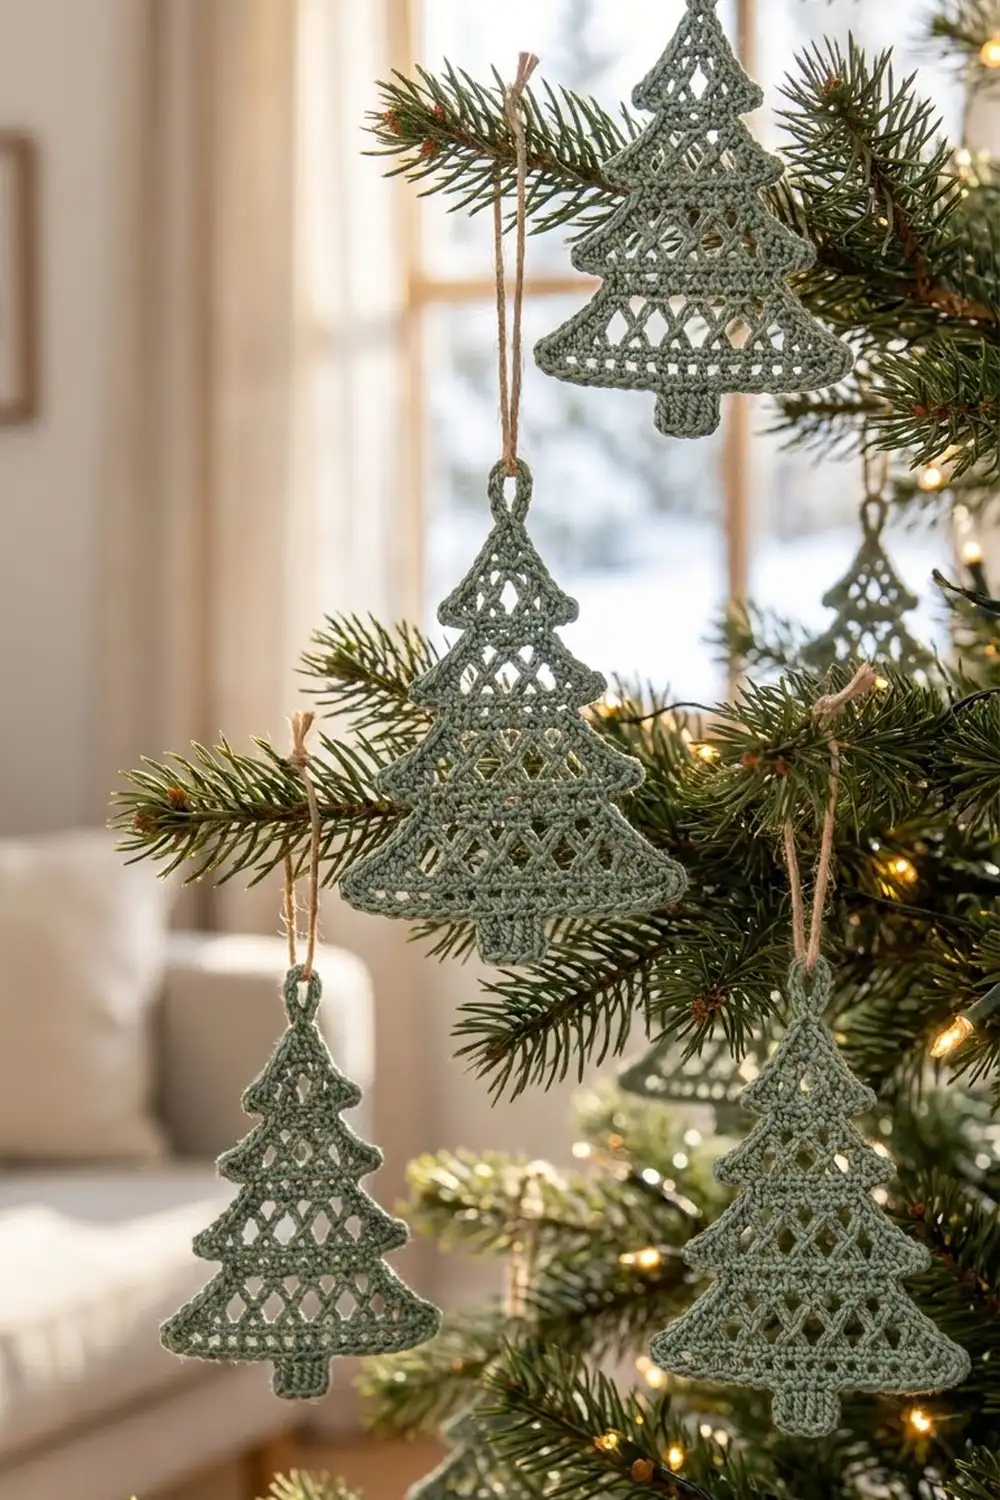
This little tree is a flat lace ornament with a clean, Scandinavian feel. It has three tiers that step outward and an open lattice of crossed stitches that lets light through when it hangs in a window. A neat single-crochet outline makes every edge look crisp.
The sample is worked in one soft sage-green cotton, so the stitch texture does the decorating. Each tier alternates solid single-crochet bands with rows of crossed double crochet, which form the X-and-diamond pattern. A short solid trunk finishes the bottom, and a chain loop at the tip lets you hang it right away.
The pattern uses US crochet terms. The finished ornament measures 4.4 in (11.2 cm) wide by 5.3 in (13.5 cm) tall without the loop, or about 6.3 in (16.0 cm) tall including it.
The tree is worked flat in one piece from the tip down. Each tier grows by increasing at both ends of every row. Each new tier begins with a narrower “neck” row, so the corners of the tier above hang over and make the stepped silhouette. The trunk is worked into the center of the last row. One border round then goes around the whole outline and adds the hanging loop.
Finished Size and Construction
- Finished size: 4.4 in (11.2 cm) wide x 5.3 in (13.5 cm) tall, plus a loop of about 1.0 in (2.5 cm)
- Skill level: Easy-intermediate
- Terminology: US crochet terms
- Yarn weight: Sport (2), cotton or cotton blend
- Hook: 2.75 mm (US C-2)
- Number of pieces: 1
- Layout: Single standalone motif, no joining
- Piece size before border: 4.0 in (10.2 cm) wide x 4.9 in (12.4 cm) tall
- Border depth: 1 round of sc, about 0.2 in (0.5 cm) on every edge
Materials
Choose a smooth, mercerized or combed cotton in sport weight, around 240–260 m per 100 g. Cotton shows the crossed stitches clearly and blocks flat and firm, which suits a hanging ornament. Avoid fuzzy or very stretchy yarns because they blur the lattice.
- Sage green: 6 g, about 15 m (16.4 yd) per ornament
Tools:
- 2.75 mm (US C-2) crochet hook
- Tapestry needle
- Scissors
- Stitch markers (2)
- Blocking mat and rust-proof pins
- Spray bottle with water
- Optional: 12 in (30.5 cm) of jute twine or ribbon for hanging
The quantity includes a small safety margin for the gauge swatch and weaving in ends.
Abbreviations (US Terms)
- ch – chain
- sl st – slip stitch
- sc – single crochet
- dc – double crochet
- st(s) – stitch(es)
- rnd – round
Special stitch – X-st (crossed double crochet): Skip the next st and dc in the following st. Then, working in front of the dc you just made, dc in the skipped st. One X-st uses 2 sts and makes 2 sts.
Gauge and Checkpoints
Gauge: 6 sts = 1 in (2.5 cm) across. Each sc row is 0.2 in (0.5 cm) tall and each X-st row is 0.3 in (0.8 cm) tall, so one sc row plus one X-st row = 0.5 in (1.3 cm).
Test one piece first. Work Tier 1 (Rows 1–6) as your gauge test. It should measure 2.0 in (5.1 cm) across Row 6 and 1.4 in (3.6 cm) from the tip to the bottom edge of Row 6. If it matches, keep going in the same piece.
Measurement checkpoints:
- After Row 6 (Tier 1): 2.0 in (5.1 cm) wide, 1.4 in (3.6 cm) tall
- After Row 11 (Tier 2): 2.7 in (6.9 cm) wide, 2.6 in (6.6 cm) total height
- After Row 18 (Tier 3): 4.0 in (10.2 cm) wide, 4.3 in (10.9 cm) total height
- After Row 21 (trunk): 4.9 in (12.4 cm) total height
- After the border: 4.4 in (11.2 cm) x 5.3 in (13.5 cm)
If Tier 1 is too big, switch to a hook 0.25 mm smaller. If it is too small, switch to a hook 0.25 mm larger. If only the height is off, check your X-sts: pulling the first loop up taller or shorter changes row height more than anything else.
Pattern: Tree Body
Increase rules used throughout:
- Sc increase row: Ch 1, 2 sc in first st, sc in each st to the last st, 2 sc in last st. (Adds 2 sts.)
- X-st increase row: Ch 3 (counts as dc), dc in first st, X-st across to the last st, 2 dc in last st. (Adds 2 sts.) When a sc row follows an X-st row, work the last sc into the top of the turning ch-3.
Tier 1 (Top)
Row 1: Ch 2, 2 sc in 2nd ch from hook, turn. (2 sts)
Row 2: Ch 1, 2 sc in each st, turn. (4 sts)
Row 3 (X-st): Ch 3 (counts as dc), dc in first st, X-st over next 2 sts, 2 dc in last st, turn. (6 sts: 1 X-st)
Row 4 (sc): Sc increase row. (8 sts)
Row 5 (X-st): Ch 3, dc in first st, X-st 3 times, 2 dc in last st, turn. (10 sts: 3 X-sts)
Row 6 (sc): Sc increase row. (12 sts)
Checkpoint: 2.0 in (5.1 cm) wide.
Tier 2 (Middle)
Row 7 (neck): Turn. Sl st in first 3 sts, ch 1, sc in the same st as the last sl st and in next 7 sts. Leave the last 2 sts unworked, turn. (8 sts)
The 2 sts left at each end of Row 6 are the overhanging corner shelves of Tier 1.
Row 8 (X-st): Ch 3, dc in first st, X-st 3 times, 2 dc in last st, turn. (10 sts)
Row 9 (sc): Sc increase row. (12 sts)
Row 10 (X-st): Ch 3, dc in first st, X-st 5 times, 2 dc in last st, turn. (14 sts)
Row 11 (sc): Sc increase row. (16 sts)
Checkpoint: 2.7 in (6.9 cm) wide, 2.6 in (6.6 cm) total height.
Tier 3 (Bottom)
Row 12 (neck): Turn. Sl st in first 3 sts, ch 1, sc in the same st and in next 11 sts. Leave the last 2 sts unworked, turn. (12 sts)
Row 13 (X-st): Ch 3, dc in first st, X-st 5 times, 2 dc in last st, turn. (14 sts)
Row 14 (sc): Sc increase row. (16 sts)
Row 15 (X-st): Ch 3, dc in first st, X-st 7 times, 2 dc in last st, turn. (18 sts)
Row 16 (sc): Sc increase row. (20 sts)
Row 17 (X-st): Ch 3, dc in first st, X-st 9 times, 2 dc in last st, turn. (22 sts)
Row 18 (sc): Sc increase row. (24 sts)
Checkpoint: 4.0 in (10.2 cm) wide, 4.3 in (10.9 cm) total height.
Tier heights: Tier 1 = 1.4 in (3.6 cm), Tier 2 = 1.2 in (3.0 cm), Tier 3 = 1.7 in (4.3 cm).
Trunk
Row 19: Turn. Sl st in first 10 sts, ch 1, sc in the same st and in next 5 sts. Leave the last 9 sts unworked, turn. (6 sts)
This centers the trunk: 9 sts are skipped on each side and 6 are worked, for a total of 24.
Rows 20–21: Ch 1, sc in each st, turn. (6 sts)
Fasten off and weave in the ends. The trunk is 1.0 in (2.5 cm) wide and 0.6 in (1.5 cm) tall. Total height is now 4.9 in (12.4 cm).
Border and Hanging Loop
Border gauge: Work 1 sc into the end of each sc row, 2 sc into the end of each X-st row, and 1 sc into each st along the shelves and the trunk bottom. On the shelves, work into the sl sts on one side and the unworked sts on the other.
With the right side facing, join yarn with a sl st at the tip (the base chain of Row 1).
Rnd 1: Ch 1, sc in the tip, ch 12 for the loop, sc in the tip again (2 sc + loop). Then work down the first side as follows.
- Tier 1 edge (Rows 1–6): 1+1+2+1+2+1 = 8 sc
- Tier 1 shelf: 3 sc in the outer corner st, 1 sc in the next st = 4 sc
- Tier 2 edge (Rows 7–11): 1+2+1+2+1 = 7 sc
- Tier 2 shelf: 3 sc in the corner st, 1 sc in the next st = 4 sc
- Tier 3 edge (Rows 12–18): 1+2+1+2+1+2+1 = 10 sc
- Bottom shelf to trunk (9 sts): 3 sc in the corner st, 1 sc in each of the next 8 sts = 11 sc
- Trunk side (Rows 19–21): 3 sc
First side total: 47 sc
- Trunk bottom (6 sts): 3 sc in the first st, 1 sc in each of the next 4 sts, 3 sc in the last st = 10 sc
Work up the second side as a mirror image: trunk side 3, bottom shelf 11, Tier 3 edge 10, shelf 4, Tier 2 edge 7, shelf 4, Tier 1 edge 8. That is another 47 sc.
Sl st to the first sc. Round total: 2 + 47 + 10 + 47 = 106 sc, plus the ch-12 loop. Fasten off and weave in the ends.
Why the math works: A sc row is 0.2 in (0.5 cm) tall, and one sc is about the same width, so 1 sc per sc row-end lies flat. An X-st row is 0.3 in (0.8 cm) tall, and 2 sc cover it without gaps or ruffling. Each 3-sc corner turns the yarn sharply around the outer points. The shelf counts match the sts left unworked in Rows 6, 11, and 18 exactly (2, 2, and 9), so the step outline stays crisp. The border adds 0.2 in (0.5 cm) on each edge: 4.0 + 0.4 = 4.4 in (11.2 cm) wide, and 4.9 + 0.4 = 5.3 in (13.5 cm) tall.
Final Blocking
- Spray the ornament until it is evenly damp, but not dripping.
- Lay it right side up on the blocking mat.
- Pin the tip, then the trunk’s two bottom corners, so the height is 5.3 in (13.5 cm).
- Pin the three pairs of outer tier corners so they are level and symmetric. The bottom tier should span 4.4 in (11.2 cm).
- Gently open each diamond in the lattice with a fingertip so the X-sts sit straight.
- Pin the loop flat in a neat teardrop shape.
- Let it dry completely, at least 6 hours, before unpinning.
Final Quality-Control Checklist
- [ ] Stitch counts match: Rows 6, 11, and 18 end with 12, 16, and 24 sts
- [ ] Every X-st crosses in the same direction
- [ ] The corners of each tier hang over the next tier by the same amount on both sides
- [ ] The trunk is centered, with 9 unworked sts on each side of Row 18
- [ ] The border round has 106 sc and lies flat with no ruffles
- [ ] The finished size is 4.4 in (11.2 cm) x 5.3 in (13.5 cm)
- [ ] The loop is firmly anchored at the tip
- [ ] All ends are woven in invisibly
Troubleshooting
Tree leans or is lopsided: Your increases are probably uneven. Make sure each increase row has 2 sts in both the first and the last st.
Edges ruffle after the border: You are working too many sc into the X-st row-ends. Use exactly 2 per X-st row and keep the border tension moderate.
Edges cup or pull in: The border is too tight. Go up 0.25 mm for the border round only.
X-sts look like plain double crochet: Make sure the second dc goes in front of the first so the legs cross visibly.
Steps are hard to see: Count the neck rows again. Each one must skip exactly 2 sts at each end.
Loop twists: Make sure the chain isn’t twisted before you work the second sc into the tip, then pin the loop flat while blocking.
Care
Hand wash in cool water, press out the water in a towel, and dry flat. Reshape and re-pin if the tiers lose their crisp points.
Final Notes
Here is the full measurement chain. Tier 1 ends at 12 sts, 2.0 in (5.1 cm) wide. Tier 2 ends at 16 sts, 2.7 in (6.9 cm) wide. Tier 3 ends at 24 sts, 4.0 in (10.2 cm) wide. The trunk brings the height to 4.9 in (12.4 cm). The 106-stitch border adds 0.2 in (0.5 cm) all around, so the finished ornament is 4.4 in (11.2 cm) x 5.3 in (13.5 cm), plus its hanging loop. Check your size at each tier and the finished tree will come out symmetric and lie flat, ready for a window, the tree, or a gift tag.
Happy crocheting!