

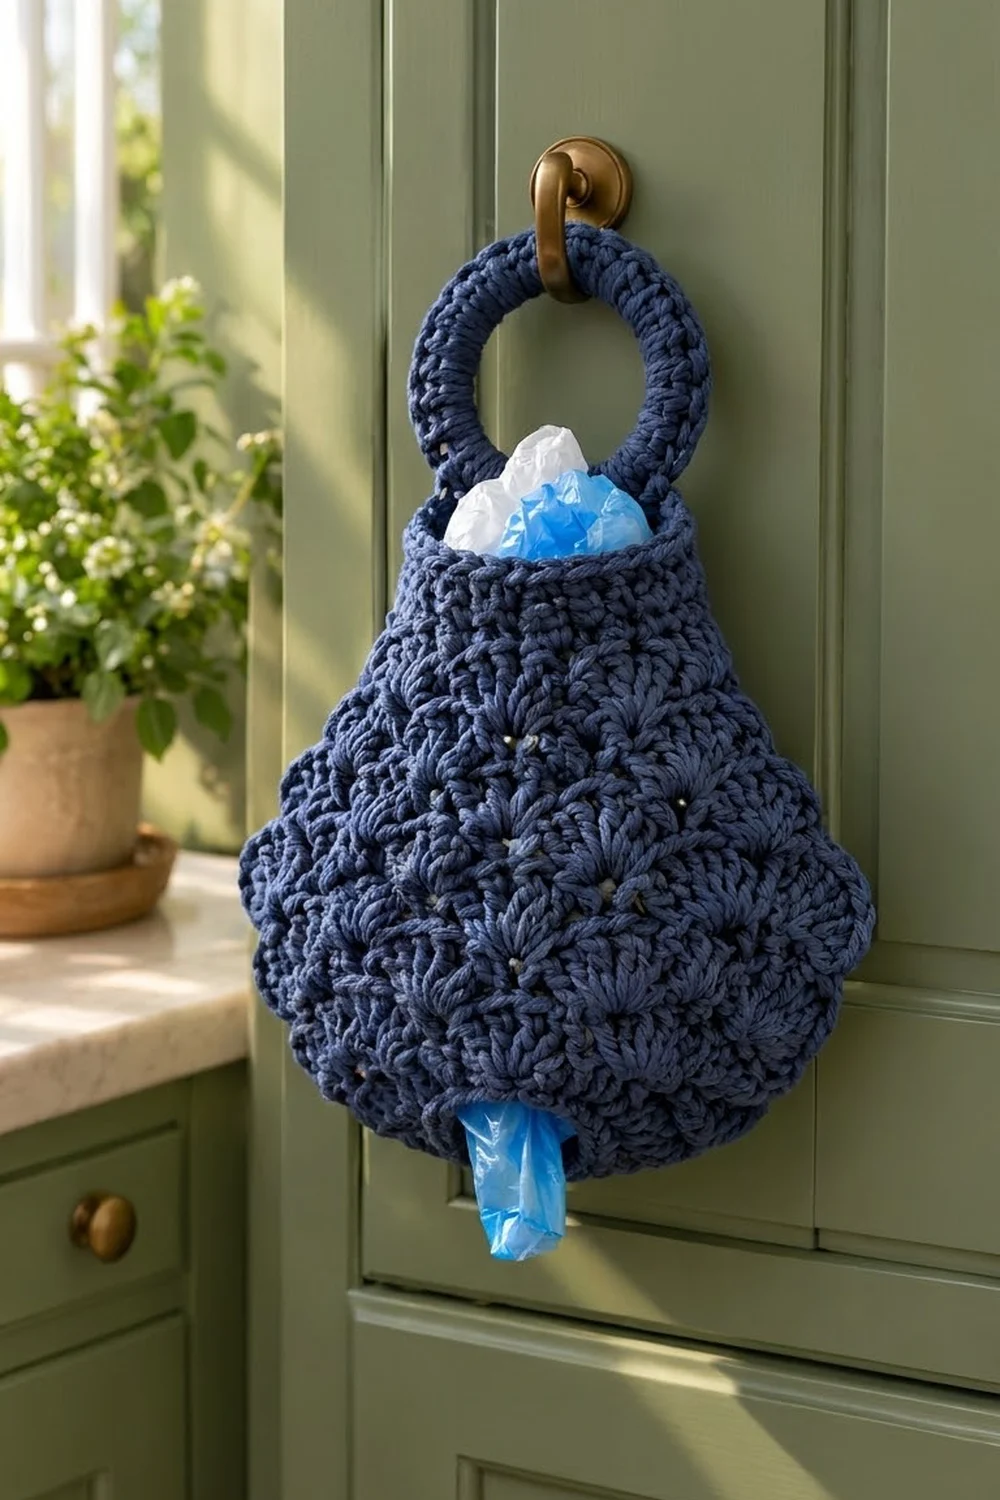
The Navy Seashell Bag Keeper is a pretty way to tame the pile of plastic grocery bags under the sink. You stuff bags in through the open top and pull them out one at a time from the small opening at the bottom. A crochet-covered ring at the top lets it hang from a cabinet hook, door knob, or pantry peg.
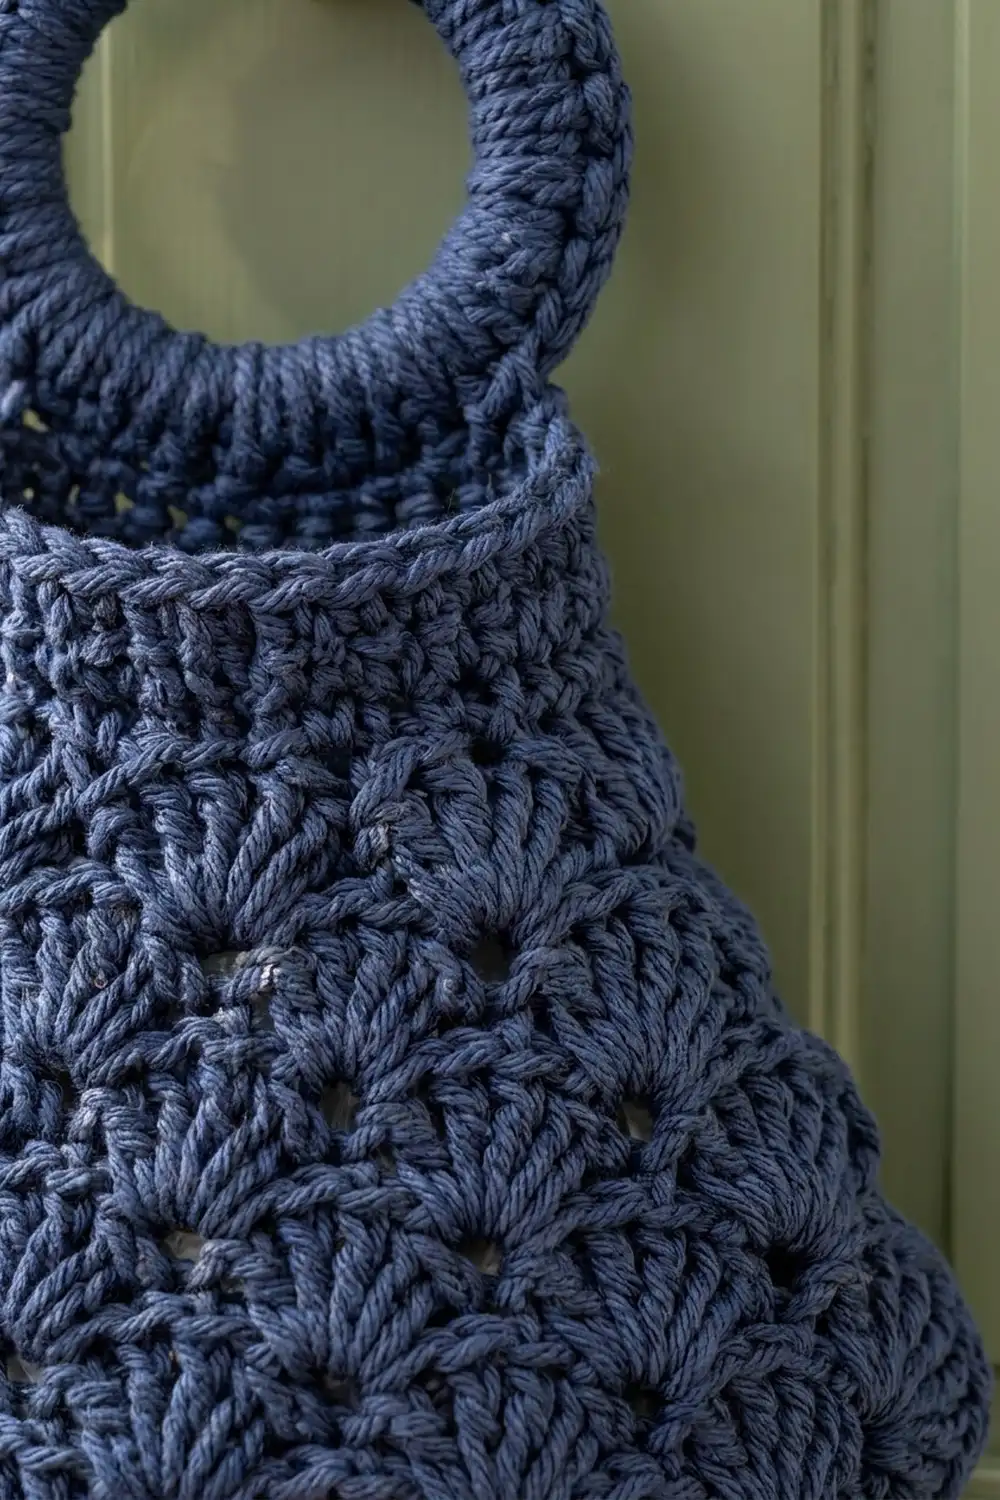
The whole holder is worked in one color, a deep navy blue, so the texture does the talking. Rows of staggered fan shells flare out into soft scallops at the sides and then curve back in. That bell shape makes it feel more like home decor than a utility bag.
This pattern uses US crochet terms. The finished body measures about 10 in (25.4 cm) wide and 13 in (33.0 cm) tall. The ring adds about 3 in (7.6 cm), so the total hanging length is about 16 in (40.6 cm).
You start with a chain joined into a circle for the top and work a solid single crochet band. Then you work joined shell rounds without turning. The shells get bigger to widen the body and smaller to narrow it, and decrease rounds close the bottom. Last, you cover a ring and sew it to the back of the band.
Finished Size and Construction
- Finished size: 10 in (25.4 cm) wide x 13 in (33.0 cm) tall, laid flat; 16 in (40.6 cm) long including the ring
- Skill level: Easy-intermediate
- Terminology: US crochet terms
- Yarn weight: Worsted weight (#4 medium)
- Hook: 5.0 mm (H-8)
- Number of pieces: 1 seamless body + 1 covered ring, sewn together
- Layout: Body worked top-down in joined rounds; ring sewn to the back of the top band
- Piece size: body 10 in (25.4 cm) x 13 in (33.0 cm)
- Size before border: 10 in (25.4 cm) x 12.5 in (31.8 cm)
- Border depth: 2 rounds, about 0.25 in (0.6 cm) at the top and at the bottom
Materials
Choose a worsted weight cotton or cotton blend. Cotton keeps the shells crisp, holds the bell shape when the holder is half empty, and stands up to daily tugging.
Yarn:
- Navy blue: about 200 g, approximately 340 m (372 yd), based on a cotton with about 170 m per 100 g
These amounts include a margin of about 25 percent to cover your gauge swatch and small tension differences.
Tools:
- 5.0 mm (H-8) crochet hook
- One metal or plastic ring, 3 in (7.6 cm) outer diameter
- Stitch markers
- Tapestry needle
- Scissors and tape measure
- Rust-proof pins and a spray bottle
Abbreviations (US Terms)
- ch – chain
- sl st – slip stitch
- sc – single crochet
- sc2tog – single crochet 2 together
- dc – double crochet
- rnd(s) – round(s)
- st(s) – stitch(es)
- sk – skip
- rev sc – reverse single crochet (crab stitch)
Special stitches:
- 5-dc shell: 5 dc in the same stitch. The center is the 3rd dc.
- 7-dc shell: 7 dc in the same stitch. The center is the 4th dc.
- 3-dc shell: 3 dc in the same stitch. The center is the 2nd dc.
- Half shell (split shell): Ch 3 (counts as dc), then work half of the remaining dc into the same stitch. Work the other half into that same stitch at the end of the round. The ch-3 becomes the center of the split shell.
- Rev sc: Work from left to right (if you crochet right-handed). Insert the hook in the next stitch to the right, pull up a loop, yarn over, and pull through both loops.
Gauge and Checkpoints
Gauge matters here because the shape comes from the shell size, not from added stitches.
- Sc gauge: 16 sc x 18 rows = 4 in (10.2 cm)
- 5-dc shells: 1 repeat = 1.5 in (3.8 cm) wide; each shell round = 0.75 in (1.9 cm) tall
- 7-dc shells: 1 repeat = 2 in (5.1 cm) wide
- 3-dc shells: 1 repeat = 1 in (2.5 cm) wide
Before starting the body, make a flat swatch. Ch 25, then work 3 rows of sc and 4 rows of 5-dc shells (sc, sk 2, shell, sk 2, sc). Steam it lightly, then measure: 4 shell repeats should measure 6 in (15.2 cm) wide.
Checkpoints (laid flat):
- After Rnd 6: 6 in (15.2 cm) wide
- After Rnd 11: 7.5 in (19.1 cm) wide, 4.5 in (11.4 cm) tall
- After Rnd 17: 10 in (25.4 cm) wide, 9 in (22.9 cm) tall
- After Rnd 21: 5 in (12.7 cm) wide at the lower edge, 12 in (30.5 cm) tall
- After Rnd 23: 12.5 in (31.8 cm) tall, with the bottom opening about 1.6 in (4.1 cm) across
If your work is too big, go down to a 4.5 mm (7) hook. If it is too small, go up to a 5.5 mm (I-9) hook. Change the hook, not the stitch counts.
Body
Work in joined rounds without turning, with the right side facing you throughout.
Top Band
Ch 48 loosely and join to the first ch with a sl st, taking care not to twist the chain.
Rnd 1: Ch 1, sc in each ch around, join with a sl st to the first sc. (48 sts)
Rnds 2–6: Ch 1, sc in each st around, join. (48 sts)
The band measures 12 in (30.5 cm) around, or 6 in (15.2 cm) wide laid flat.
Rnd 7 (increase): Ch 1, sc in next 3 sts, 2 sc in next st; repeat from * 12 times in total, join. (48 sts worked + 12 added = 60 sts)
Shell Section 1: 5-dc Shells
Rnd 8: Ch 1, sc in first st, sk 2 sts, 5-dc shell in next st, sk 2 sts, sc in next st; repeat from * around. On the last repeat, end after the second sk 2 sts and join to the first sc. (10 shells + 10 sc = 60 sts)
Rnd 9: Ch 3, 2 dc in same sc (half shell), sc in center dc of next shell, 5-dc shell in next sc, sc in center dc of next shell; repeat from * around. Finish with 2 dc in the first sc and join to the top of the ch-3. (10 shells + 10 sc = 60 sts)
Rnd 10: Ch 1, sc in top of ch-3 (center of the split shell), 5-dc shell in next sc, sc in center dc of next shell; repeat from * around. End with a 5-dc shell in the last sc and join to the first sc. (60 sts)
Rnd 11: Repeat Rnd 9. (60 sts)
The shells now sit in staggered rows, with each fan nesting between two fans below it.
Shell Section 2: 7-dc Shells (Widest Part)
Rnd 12: Ch 1, sc in top of ch-3, 7-dc shell in next sc, sc in center dc of next shell; repeat from * around. End with a 7-dc shell in the last sc and join to the first sc. (10 shells of 7 + 10 sc = 80 sts)
Rnd 13: Ch 3, 3 dc in same sc (half shell), sc in center (4th) dc of next shell, 7-dc shell in next sc, sc in center dc of next shell; repeat from * around. Finish with 3 dc in the first sc and join to the top of the ch-3. (80 sts)
Rnd 14: Ch 1, sc in top of ch-3, 7-dc shell in next sc, sc in center dc of next shell; repeat from * around. End with a 7-dc shell in the last sc and join. (80 sts)
Rnds 15–17: Repeat Rnd 13, then Rnd 14, then Rnd 13. (80 sts each)
The larger shells push outward to form the scalloped sides.
Shell Section 3: Narrowing
Rnd 18: Ch 1, sc in top of ch-3, 5-dc shell in next sc, sc in center (4th) dc of next 7-dc shell; repeat from * around. End with a 5-dc shell in the last sc and join. (60 sts)
Rnd 19: Repeat Rnd 9. (60 sts)
Rnd 20: Ch 1, sc in top of ch-3, 3-dc shell in next sc, sc in center (3rd) dc of next 5-dc shell; repeat from * around. End with a 3-dc shell in the last sc and join. (10 shells of 3 + 10 sc = 40 sts)
Rnd 21: Ch 3, 1 dc in same sc (half shell), sc in center (2nd) dc of next shell, 3-dc shell in next sc, sc in center dc of next shell; repeat from * around. Finish with 1 dc in the first sc and join to the top of the ch-3. (40 sts; the ch-3 counts as a st)
Bottom Closing
Rnd 22: Ch 1, sc2tog; repeat from * 20 times, join. (20 sts)
Rnd 23: Ch 1, sc in each st around, join. (20 sts)
The opening measures 5 in (12.7 cm) around, or about 1.6 in (4.1 cm) across. That is snug enough to hold the bags in and wide enough to pull one through. Do not fasten off.
Hanging Ring
Join the yarn to the ring with a sl st. Work tight sc around the ring, pushing the stitches together as you go. A 3 in (7.6 cm) ring takes about 60 sc. Add or remove a few so that none of the ring shows. Join to the first sc.
Ridge round: Ch 1, sl st in the back loop of each sc around, join. This adds the neat outer ridge.
Fasten off, leaving a 16 in (40.6 cm) tail for sewing. The covered ring measures about 4 in (10.2 cm) across.
Border
Each opening gets a 2-round border. The border gauge matches the sc gauge: 16 sts = 4 in (10.2 cm). Every border stitch goes into one existing stitch, so the borders add height but not width.
Bottom Border
Rnd 24: Ch 1, sc in each st around, join. (20 sts)
Rnd 25: Ch 1, rev sc in each st around, join. (20 sts) Fasten off.
Why the math works: At 4 sts per inch, 20 sts give 5 in (12.7 cm) around. Rev sc firms the edge without stretching it, so the opening stays about 1.6 in (4.1 cm) across.
Top Border
Turn the body upside down. Join the yarn in a free loop of the foundation chain at the center back.
Rnd 1: Ch 1, sc in each foundation ch around, join. (48 sts)
Rnd 2: Ch 1, rev sc in each st around, join. (48 sts) Fasten off.
Why the math works: The top border uses the same 48 sts as the band, so the top stays 12 in (30.5 cm) around and 6 in (15.2 cm) wide laid flat. Each border adds about 0.25 in (0.6 cm), which takes the body from 12.5 in (31.8 cm) to 13 in (33.0 cm) tall.
Attaching the Ring
Lay the body flat with the joins at the center back. Mark the 12 back stitches centered there, which span 3 in (7.6 cm). Slide the lower 1 in (2.5 cm) of the ring inside the back of the band so the rest of the ring stands up above the rim. Use the tail to whipstitch the ring through all 12 marked stitches, making two passes. Leave the front rim free so you can stuff bags in easily.
Final Blocking
- Weave in all ends on the inside for at least 2 in (5.1 cm).
- Fill the body loosely with a towel to form the bell shape.
- Mist it until damp, not soaked.
- Open each fan with your fingers, easing the widest scallops outward.
- Lay it flat and check the widths: 10 in (25.4 cm) at Rnds 14–15 and 6 in (15.2 cm) at the band.
- Shape the bottom opening round, about 1.6 in (4.1 cm) across.
- Let it dry completely, then remove the towel and hang.
Final Quality-Control Checklist
- Widest point is 10 in (25.4 cm)
- Body is 13 in (33.0 cm) tall
- Top band is 6 in (15.2 cm) wide flat
- Every shell round has 10 shells, staggered, with none missing or doubled
- Bottom opening has 20 sts and measures about 1.6 in (4.1 cm) across
- Ring is fully covered and measures 4 in (10.2 cm) across
- Ring is centered at the back and sewn through 12 sts
- All ends are secure
Troubleshooting
Shells look crowded or curl. Your dc are too tight. Go up a hook size.
Body flares too much at the 7-dc rounds. If a repeat measures well over 2 in (5.1 cm), work Rnds 12–17 with a hook one size smaller.
Stitch counts drift. The ch-3 counts as a stitch, and every split shell needs its final dc at the end of the round.
Bags fall out of the bottom. Before the border, work sc in next 2 sts, sc2tog 5 times (15 sts), then work the border on 15 sts.
Ring tilts forward. Sew it lower inside the band.
Care
Hand wash in cool water with mild soap, roll it in a towel to press out the water, and dry it flat over a rolled towel. Remove a metal ring first unless it is rust-proof.
Final Notes
Here is how the measurements build. The 48-stitch band gives a 6 in (15.2 cm) top. Rnd 7 increases to 60 stitches, and the 5-dc shells widen the body to 7.5 in (19.1 cm). The 7-dc shells reach 10 in (25.4 cm), and the 5-dc and 3-dc shells narrow it to 5 in (12.7 cm). Decreases close the bottom to 20 stitches. The borders bring the body to 13 in (33.0 cm), and the ring makes the total hanging length 16 in (40.6 cm).
Happy crocheting!