

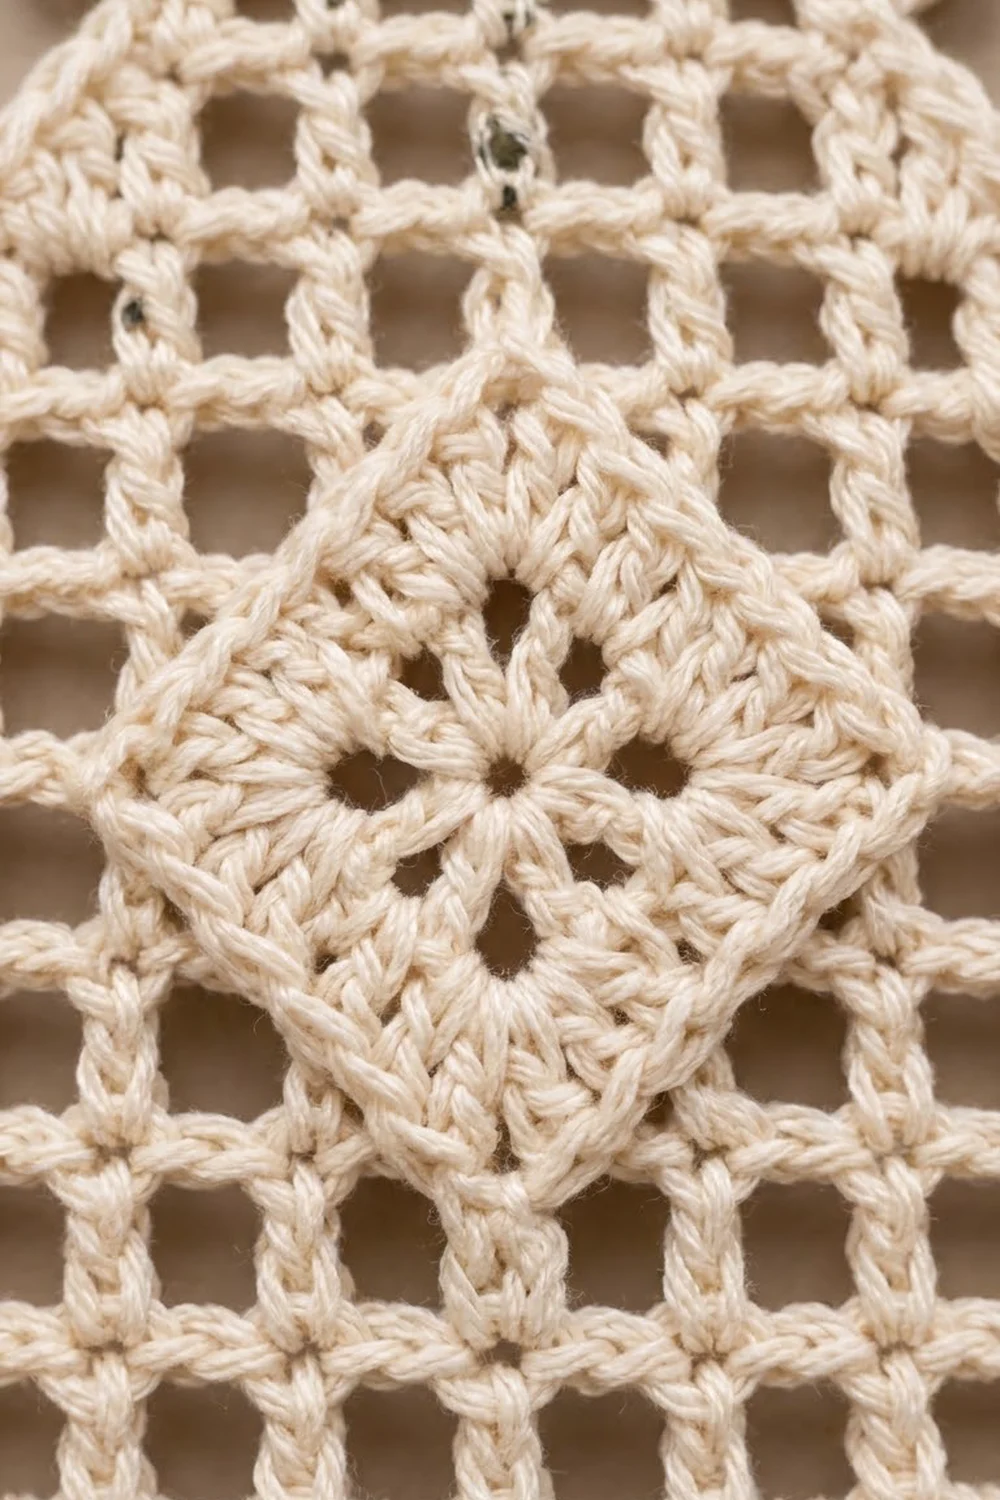
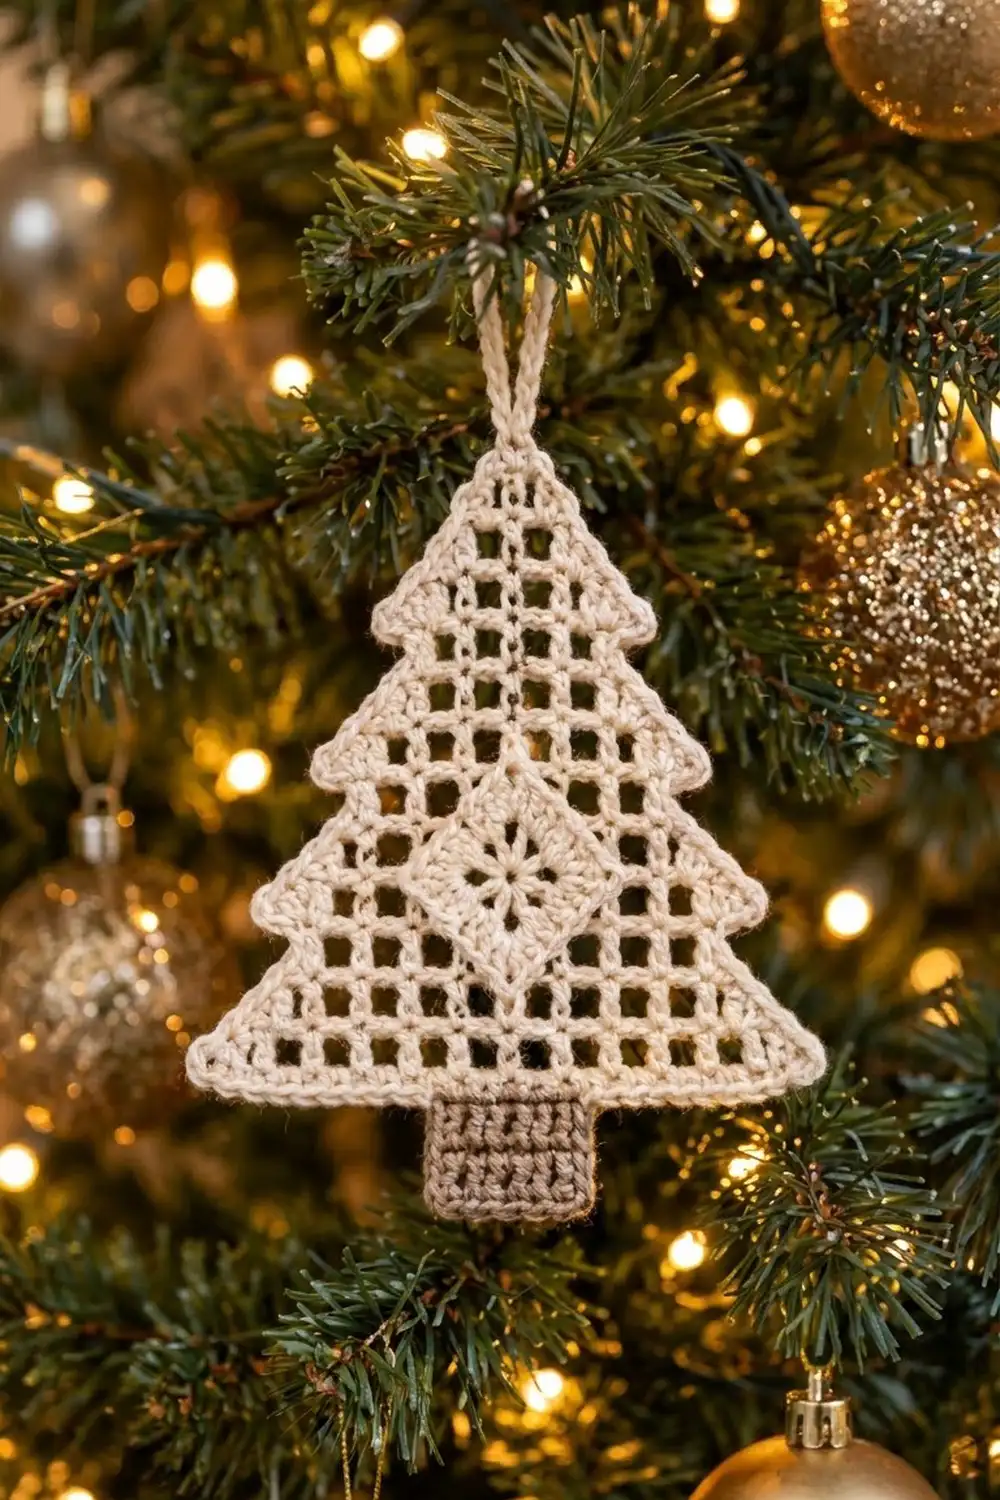
The Frosted Lattice Tree is a light, airy ornament made in classic filet mesh. Its square open windows let tree lights shine through. A solid diamond sits in the middle like a snowflake caught in the branches, and the three stepped tiers give it a clear tree outline even from across the room.
The palette is quiet on purpose: cream for the tree and a soft tan for the trunk. It suits rustic, Scandinavian, or neutral holiday decor, and it also works as a gift tag or package topper.
This pattern uses US crochet terms. The finished ornament measures about 5.5 in (14.0 cm) wide and 5.75 in (14.6 cm) tall, not counting the hanging loop.
You work the tree from the tip down in filet rows, adding one mesh on each side of every shaping row. At the bottom of each tier, you skip one mesh on each side to create the step. Next you work the trunk in single crochet directly onto the bottom edge. Finally, a two-round border (single crochet, then reverse single crochet) neatens the outline and gives it a corded rim. The ornament is one piece from start to finish.
Finished Size and Construction
- Finished size: 5.5 in (14.0 cm) wide × 5.75 in (14.6 cm) tall; the loop adds about 1.5 in (3.8 cm)
- Skill level: Intermediate (easy shaping, careful counting)
- Terminology: US crochet terms
- Yarn weight: Fingering / Super Fine (1) cotton
- Hook: 2.5 mm
- Number of pieces: 1
- Layout: A single standalone ornament
- Piece size: 5.5 in × 5.75 in (14.0 cm × 14.6 cm)
- Size before border: tree body 5 in (12.7 cm) wide × 4.5 in (11.4 cm) tall, plus a trunk 1 in × 1 in (2.5 cm × 2.5 cm)
- Border depth: 0.25 in (0.6 cm)
Materials
Yarn: Use a smooth mercerized cotton in fingering weight. Mercerized cotton shows crisp mesh and blocks well. Avoid fuzzy or very soft cotton, because the windows will blur.
- Cream (tree, border, loop): 10 g, about 34 m
- Tan / light taupe (trunk): 3 g, about 10 m
These quantities include a small safety margin.
Tools:
– 2.5 mm crochet hook
– Tapestry needle
– Scissors
– 1 stitch marker
– Blocking mat and rust-proof pins
– Spray bottle with water
Abbreviations (US Terms)
- ch – chain
- sl st – slip stitch
- sc – single crochet
- dc – double crochet
- rev sc – reverse single crochet (crab stitch)
- BLO / FLO – back loop only / front loop only
- sp – space
- st(s) – stitch(es)
- tch – turning chain
Special terms:
– Post: each vertical dc of the mesh, including a tch that counts as dc.
– Open mesh: ch 1, skip 1, dc in the next post.
– Block: dc in the next ch-1 sp (or in the center dc of a block below), then dc in the next post.
– Increase (inc) at row start: ch 4 (counts as dc + ch 1), dc in the first post (the stitch at the base of the ch-4). This makes one new open mesh.
– Increase (inc) at row end: after the last mesh, ch 1, dc again in the same post (the top of the tch). This makes one new open mesh.
– Reverse sc: work sc from left to right (right-handers), inserting the hook into the next stitch to the right.
Stitch count convention: a row of M meshes has M + 1 posts and 2M + 1 stitches.
Gauge and Checkpoints
- Filet mesh: 3 meshes = 1 in (2.5 cm) wide; 8 rows = 3 in (7.6 cm) tall
- Single crochet: 7 sts and 8 rows = 1 in (2.5 cm)
Test first: Work Rows 1–4 (the top tier) as your gauge swatch. It should measure 2.3 in (5.8 cm) wide at Row 4 and 1.5 in (3.8 cm) tall. If it matches, keep going, because the swatch becomes the top of your tree.
Checkpoints:
– After Row 4: 2.3 in (5.8 cm) wide × 1.5 in (3.8 cm) tall
– After Row 8: 3.7 in (9.4 cm) wide × 3 in (7.6 cm) tall
– After Row 12: 5 in (12.7 cm) wide × 4.5 in (11.4 cm) tall
– Trunk: 1 in × 1 in (2.5 cm × 2.5 cm)
– After the border: 5.5 in (14.0 cm) wide × 5.75 in (14.6 cm) tall
If your tier is too big: go down to a 2.25 mm hook, or make your chain-1 spaces snugger. If it is too small: go up to a 2.75 mm hook. Measure lightly pinned, not stretched.
Tree Body (Cream)
Work from the tip down in turned rows. On every row, “next dc” means the next post. When working over a block, skip its center dc for open mesh, or work into it for another block.
Row 1: Ch 6, dc in the 6th ch from hook. The skipped chains count as dc, ch 1, and one base ch. Turn. (1 mesh; 2 posts; 3 sts)
Row 2: Inc, dc in the top of the tch, ch 1, dc in the same st. Turn. (3 meshes; 7 sts)
Row 3: Inc, [ch 1, dc in next dc] 2 times (the last dc goes into the top of the tch), ch 1, dc in the same st. Turn. (5 meshes; 11 sts)
Row 4: Inc, [ch 1, dc in next dc] 4 times, ch 1, dc in the same st. Turn. (7 meshes; 15 sts)
From here on, rows are written as mesh sequences. “Inc” at the start and end means the increases defined above.
Row 5 (tier step): Sl st in the first ch-1 sp and in the next dc. Ch 4 (counts as dc + ch 1), dc in next dc, [ch 1, dc in next dc] 4 times. Leave the last mesh unworked. Turn. (5 meshes; 11 sts)
Skipping one mesh at each end creates the first tier notch on both sides.
Row 6: Inc, 2 open, 1 block, 2 open, inc. Turn. (7 meshes; 15 sts)
Row 7: Inc, 2 open, 3 blocks, 2 open, inc. Turn. (9 meshes; 19 sts)
Row 8: Inc, 2 open, 2 blocks, 1 open, 2 blocks, 2 open, inc. Turn. (11 meshes; 23 sts)
The single open mesh in Row 8 is the window at the center of the diamond.
Row 9 (tier step): Sl st in the first ch-1 sp and in the next dc. Ch 4 (counts as dc + ch 1), dc in next dc, then 2 open, 3 blocks, 3 open. Leave the last mesh unworked. Turn. (9 meshes; 19 sts)
Row 10: Inc, 4 open, 1 block, 4 open, inc. Turn. (11 meshes; 23 sts)
Row 11: Inc, 11 open, inc. Turn. (13 meshes; 27 sts)
Row 12: Inc, 13 open, inc. (15 meshes; 16 posts; 31 sts) Fasten off.
The diamond spans Rows 6–10 with 1, 3, 5, 3, and 1 meshes wide. It is always centered because both edges grow by the same amount. Check your measurements: 5 in (12.7 cm) × 4.5 in (11.4 cm).
Trunk (Tan)
The tops of the Row 12 stitches form the bottom edge of the tree. Count to the center 7 sts, which are sts 13–19 of 31, and place a marker in st 13.
Row 1: With the front of the tree facing you, join tan with a standing sc in the BLO of st 13. Sc in the BLO of the next 6 sts. Turn. (7 sc)
Rows 2–8: Ch 1, sc in each st across. Turn. (7 sc)
Fasten off and weave in the ends. The trunk measures 1 in × 1 in (2.5 cm × 2.5 cm). The front loops of sts 13–19 stay free for the border.
Border (Cream)
Border gauge: 7 sc = 1 in (2.5 cm). Each sloped row end is about 0.5 in (1.3 cm) along the diagonal, so 3 sc per row end keeps the edge flat.
Round 1: Join cream at the tip. Ch 1 and work as follows:
– Tip: 3 sc around the base of Row 1. (3)
– First side, working down: 3 sc around each row-end post, for 36 sc over 12 rows. At each tier point (the ends of Rows 4 and 8), work 3 sc in the corner st, then 1 sc in the skipped ch-1 sp before moving to the row end below. That is 4 sc per ledge, so 8 total. (44 for the side)
– Bottom corner: 3 sc in the last st of Row 12. (3)
– Bottom edge: 1 sc in each of the next 29 sts. Work into the FLO of the 7 trunk sts, so the cream sits in front of the trunk join. (29)
– Second bottom corner: 3 sc in the corner st. (3)
– Second side, working up: this mirrors the first side, with 3 sc per row end and 4 sc per ledge. (44)
Sl st to the first sc. Total: 3 + 44 + 3 + 29 + 3 + 44 = 126 sc.
Round 2: Ch 1, rev sc in each sc around. Sl st to the first st. (126 rev sc)
Why the math works: The bottom edge of Row 12 has 31 sts. Two of them are corner sts with 3 sc each, and the other 29 get 1 sc each, so nothing is counted twice. Each side has 12 rows × 3 sc plus 2 ledges × 4 sc, which is 44. The 3-sc groups at the corners give enough fullness that the rev sc round keeps every point sharp without extra increases.
Hanging loop: At the center st of the tip, sl st to attach. Ch 20, sl st in the same st. Work 26 sc over the ch-20 loop and sl st at the base. Fasten off. The loop stands about 1.5 in (3.8 cm) tall.
Weave all ends into the border or the blocks, never across open mesh.
Final Blocking
- Weave in all ends before blocking, then trim the tails.
- Mist the ornament with water until it is evenly damp, or soak it briefly and roll it in a towel.
- Lay it face up on the mat.
- Pin the tip and the two bottom corners first, so the body is 5.5 in (14.0 cm) wide.
- Pin the four tier points outward so each step reads clearly.
- Square the trunk and pin it to 1 in (2.5 cm) wide.
- Use your fingertips to nudge the windows square and straighten the diamond edges.
- Let it dry completely, then unpin it.
For a crisper ornament, spray it lightly with starch before it dries.
Final Quality-Control Checklist
- Row 12 has 15 meshes (31 sts)
- The diamond is centered and 5 meshes wide at Row 8, with one open center window
- Each tier step is exactly 1 mesh inward on both sides
- The trunk is 7 sc wide and centered on sts 13–19
- Border Round 1 has 126 sc, and Round 2 has 126 rev sc
- The ornament measures 5.5 in (14.0 cm) × 5.75 in (14.6 cm)
- The loop is secure and the ornament hangs straight
- No ends show through the mesh
Troubleshooting
- Tree leans or is lopsided: an increase was missed on one side. Count the meshes per row against the stitch counts above.
- Diamond is off-center: check that Rows 5 and 9 skip exactly one mesh at each end.
- Windows look slanted: your tension is uneven on the chain-1 spaces. Keep every ch 1 the same size, and block firmly.
- Border ruffles: use 2 sc on the step-row ends (Rows 5 and 9), and adjust your count to suit.
- Border cups or pulls in: go up half a hook size for the border only.
- Trunk is off-center: pull it out and recount from both corners to sts 13–19.
- Points look rounded: pin the tier points harder during blocking.
Care
Hand wash in cool water with mild soap and lay flat to dry. Reshape and re-starch if needed, and store flat between seasons.
Final Notes
Here is the measurement chain to keep in mind. The top tier swatch measures 2.3 in × 1.5 in (5.8 cm × 3.8 cm). Row 8 reaches 3.7 in × 3 in (9.4 cm × 7.6 cm), and Row 12 reaches 5 in × 4.5 in (12.7 cm × 11.4 cm). Add a 1 in (2.5 cm) trunk and a 0.25 in (0.6 cm) border, and you finish at 5.5 in × 5.75 in (14.0 cm × 14.6 cm). If you match each checkpoint, the tiers, diamond, and trunk will all line up on their own. Make one for your tree, or a few to give as gifts.
Happy crocheting!