

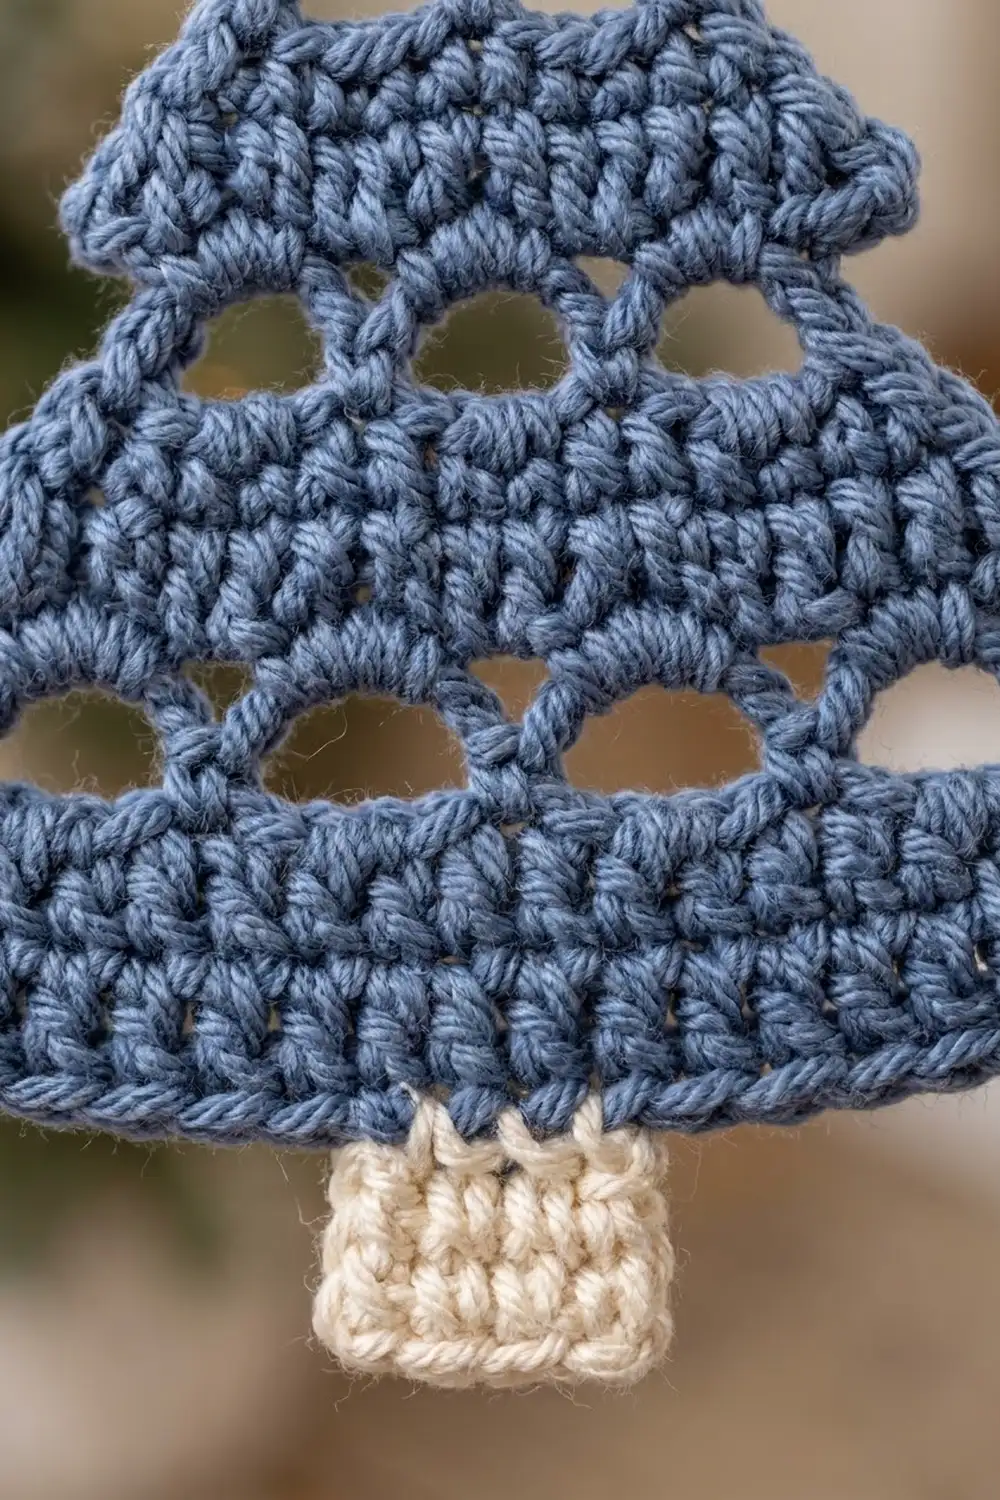
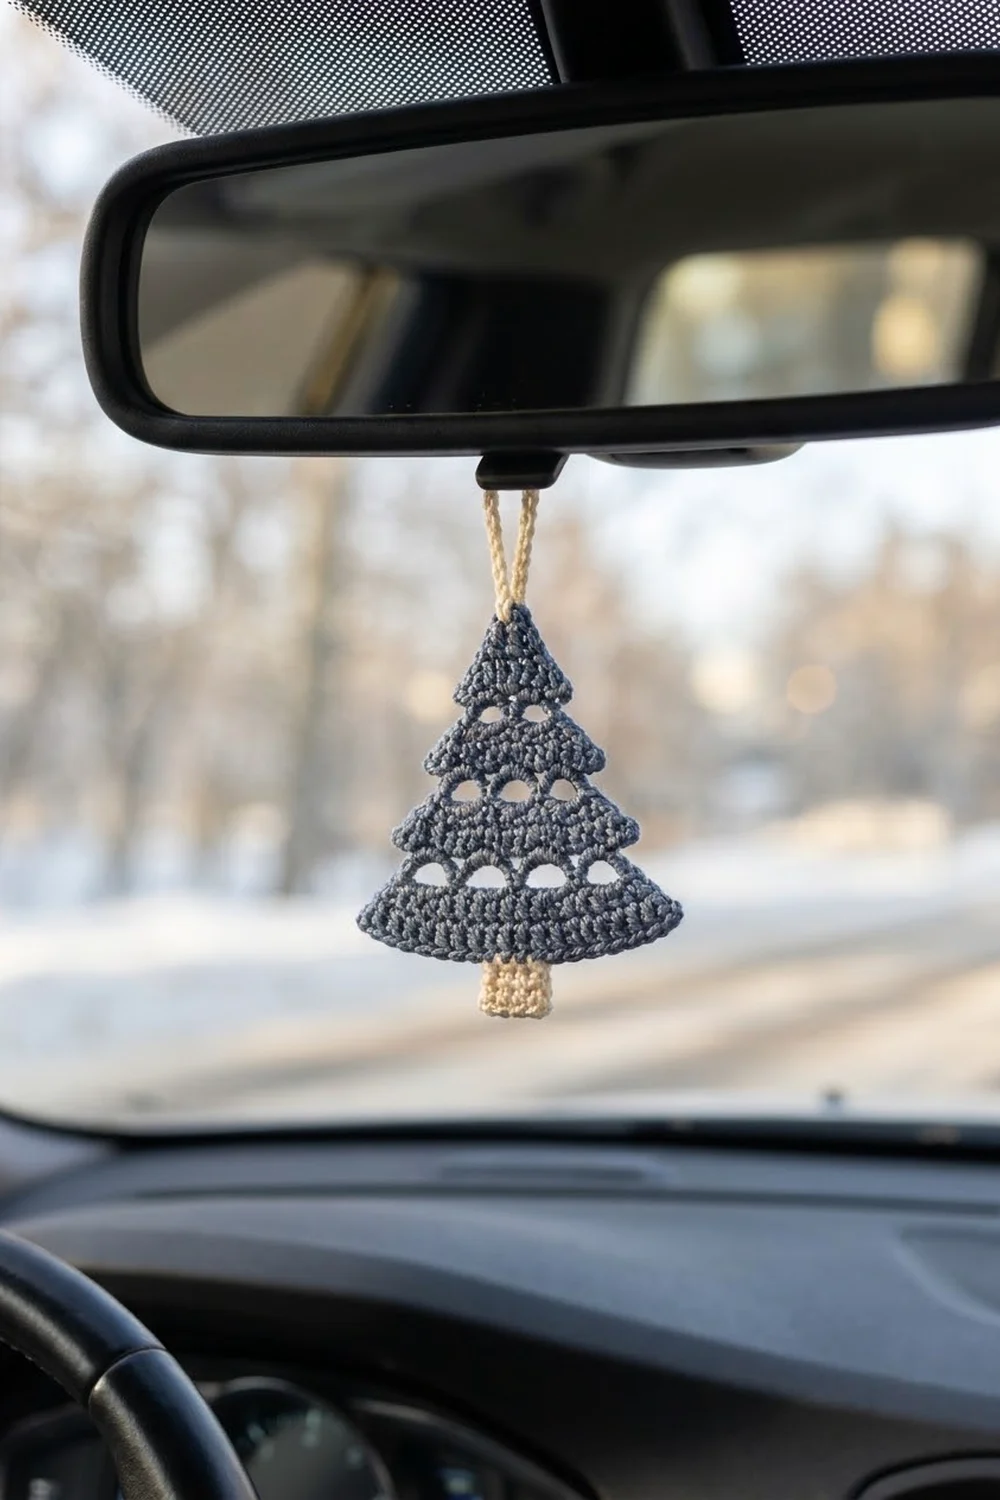
This little tree is a flat, single-piece Christmas ornament in soft denim blue, with a cream trunk and a cream hanging loop. Three bands of rounded eyelets divide the tree into four gentle tiers. The solid single crochet between them keeps the shape crisp enough to hang from a branch, a gift tag, or a car mirror.
The style is quiet and Scandinavian: one muted blue and one warm cream, with the texture doing all the decorating. The number of eyelets goes from 2 to 4 to 6 as the tree widens, so the lace looks balanced from tip to base.
The pattern uses US crochet terms. After the border, the tree body measures about 4.1 in (10.4 cm) wide and 4.2 in (10.7 cm) tall. With the trunk it is 4.9 in (12.4 cm) tall, and the hanging loop adds about 1.25 in (3.2 cm) on top.
You work the tree top-down in rows of single crochet, starting at the tip and increasing at the edges. Each tier starts with an eyelet row that pulls in by one stitch on each side, and this creates the small stepped notches. One sc border round neatens the edges. Then you work the trunk directly off the bottom edge and add the loop at the tip.
Finished Size and Construction
- Finished size: 4.1 in (10.4 cm) wide x 4.2 in (10.7 cm) tall for the body; 4.9 in (12.4 cm) tall with trunk
- Skill level: Easy / advanced beginner
- Terminology: US crochet terms
- Yarn weight: Sport weight (#2), cotton or cotton blend
- Hook: 2.75 mm (US C-2)
- Number of pieces: 1 (the trunk and loop are worked directly onto the tree)
- Layout: Single flat motif, no joining
- Piece size before border: 3.8 in (9.7 cm) wide x 3.9 in (9.9 cm) tall
- Border depth: about 0.15 in (0.4 cm) on every edge
- Trunk: 0.8 in (2.0 cm) wide x 0.7 in (1.8 cm) tall
Materials
Choose a smooth, tightly plied sport weight cotton. Mercerized cotton gives the cleanest eyelets and the firmest shape, which matters for a hanging ornament. Avoid fuzzy or splitty yarns, because the arches lose their definition.
- Color A, denim blue: 8 g, about 25 m (27 yd)
- Color B, cream: 2 g, about 6 m (7 yd)
These amounts are for one ornament and include a margin for tails and a little frogging. They assume a yarn of about 155 m per 50 g.
Tools:
- 2.75 mm (US C-2) crochet hook
- Tapestry needle
- Scissors
- 1 locking stitch marker
- Ruler or tape measure
- Blocking mat and rust-proof pins
- Spray bottle (optional: light spray starch)
Abbreviations (US Terms)
- ch – chain
- sc – single crochet
- sc2tog – single crochet 2 together
- sk – skip
- sl st – slip stitch
- sp – space
- st(s) – stitch(es)
- inc – 2 sc in the same st
- RS / WS – right side / wrong side
Special stitch – Eyelet (ch-3 sp): Ch 3, sk 2 sts, sc in next st. On the following row, work 2 sc into the ch-3 sp. For counting, each ch-3 sp counts as 2 sts, because it replaces 2 skipped sts and gets 2 sc on the next row. The extra chain gives the opening its rounded, arched top.
Turning chain: Ch 1 at the start of every row. It does not count as a stitch.
Gauge and Checkpoints
Gauge: 24 sc x 28 rows = 4 in (10.2 cm). That is 6 sts and 7 rows per 1 in (2.5 cm).
The piece is small, so the tree itself works as your swatch. Make one complete tree first and check it at each stage below before you make a batch.
| After | Width | Height |
|---|---|---|
| Row 7 (11 sts) | 1.8 in (4.6 cm) | 1.0 in (2.5 cm) |
| Row 14 (17 sts) | 2.8 in (7.1 cm) | 2.0 in (5.1 cm) |
| Row 21 (23 sts) | 3.8 in (9.7 cm) | 3.0 in (7.6 cm) |
| Row 27 (23 sts) | 3.8 in (9.7 cm) | 3.9 in (9.9 cm) |
| Border | 4.1 in (10.4 cm) | 4.2 in (10.7 cm) |
If the tree is too big at the Row 7 checkpoint by more than 0.2 in (0.5 cm), switch to a 2.5 mm hook. If it is too small, switch to a 3.0 mm hook. Check width first, since height usually follows. Tight gauge is better than loose here, because loose fabric lets the eyelets sag.
Pattern: Tree Body
Work with Color A in rows, back and forth. Row 1 is the tip of the tree.
Tier 1 (Tip)
Row 1: Ch 2, 3 sc in 2nd ch from hook, turn. (3 sts)
Row 2: Ch 1, inc in first st, sc in next st, inc in last st, turn. (5 sts)
Row 3: Ch 1, sc in each st across, turn. (5 sts)
Row 4: Ch 1, inc in first st, sc in next 3 sts, inc in last st, turn. (7 sts)
Row 5: Ch 1, sc in each st across, turn. (7 sts)
Row 6: Ch 1, inc in first st, sc in next 5 sts, inc in last st, turn. (9 sts)
Row 7: Ch 1, inc in first st, sc in next 7 sts, inc in last st, turn. (11 sts)
Checkpoint: 1.8 in (4.6 cm) wide, 1.0 in (2.5 cm) tall.
Tier 2
Row 8 (eyelet row): Ch 1, sc2tog over first 2 sts, sc in next st, [ch 3, sk 2 sts, sc in next st] 2 times, sc2tog over last 2 sts, turn. (9 sts: 2 sc2tog + 3 sc + 2 ch-3 sps counted as 2 each)
Stitch check: sts 1–2 are the sc2tog, st 3 is an sc, sk 4–5, sc in st 6, sk 7–8, sc in st 9, sts 10–11 are the sc2tog. All 11 sts are used.
Row 9 (conversion row): Ch 1, inc in first st, sc in next sc, [2 sc in ch-3 sp, sc in next sc] 2 times, inc in last st, turn. (9 sts worked 1-per-existing-stitch + 2 extra = 11 sts)
Row 10: Ch 1, sc in each st across, turn. (11 sts)
Row 11: Ch 1, inc in first st, sc in next 9 sts, inc in last st, turn. (13 sts)
Row 12: Ch 1, sc in each st across, turn. (13 sts)
Row 13: Ch 1, inc in first st, sc in next 11 sts, inc in last st, turn. (15 sts)
Row 14: Ch 1, inc in first st, sc in next 13 sts, inc in last st, turn. (17 sts)
Checkpoint: 2.8 in (7.1 cm) wide, 2.0 in (5.1 cm) tall.
Tier 3
Row 15 (eyelet row): Ch 1, sc2tog, sc in next st, [ch 3, sk 2 sts, sc in next st] 4 times, sc2tog, turn. (15 sts: 2 sc2tog + 5 sc + 4 ch-3 sps counted as 2 each)
Stitch check: 2 + 1 + (4 x 3) + 2 = 17 sts used.
Row 16 (conversion row): Ch 1, inc in first st, sc in next sc, [2 sc in ch-3 sp, sc in next sc] 4 times, inc in last st, turn. (15 sts worked 1-per-existing-stitch + 2 extra = 17 sts)
Row 17: Ch 1, sc in each st across, turn. (17 sts)
Row 18: Ch 1, inc in first st, sc in next 15 sts, inc in last st, turn. (19 sts)
Row 19: Ch 1, sc in each st across, turn. (19 sts)
Row 20: Ch 1, inc in first st, sc in next 17 sts, inc in last st, turn. (21 sts)
Row 21: Ch 1, inc in first st, sc in next 19 sts, inc in last st, turn. (23 sts)
Checkpoint: 3.8 in (9.7 cm) wide, 3.0 in (7.6 cm) tall.
Tier 4 (Base)
Row 22 (eyelet row): Ch 1, sc2tog, sc in next st, [ch 3, sk 2 sts, sc in next st] 6 times, sc2tog, turn. (21 sts: 2 sc2tog + 7 sc + 6 ch-3 sps counted as 2 each)
Stitch check: 2 + 1 + (6 x 3) + 2 = 23 sts used.
Row 23 (conversion row): Ch 1, sc in first st, sc in next sc, [2 sc in ch-3 sp, sc in next sc] 6 times, sc in last st, turn. (21 sts worked 1-per-existing-stitch + 0 extra = 21 sts)
Row 24: Ch 1, sc in each st across, turn. (21 sts)
Row 25: Ch 1, inc in first st, sc in next 19 sts, inc in last st, turn. (23 sts)
Rows 26–27: Ch 1, sc in each st across, turn. (23 sts)
Do not fasten off. The base tier is a little deeper and straighter than the others, which gives the tree a solid bottom edge.
Checkpoint: 3.8 in (9.7 cm) wide, 3.9 in (9.9 cm) tall.
Border
Border gauge: The same as the body: 6 sc per 1 in (2.5 cm) along a straight edge, and 1 sc per row-end along the sides.
Keep working with Color A. You are at the end of Row 27, ready to work along the bottom edge.
Border Round:
- Bottom edge: Ch 1, 3 sc in first st (corner), sc in next 21 sts, 3 sc in last st (corner). (27 sc, including both 3-sc corner groups)
- First side: Work 1 sc in each row-end from Row 26 up to Row 1. (26 sc)
- Tip: Work 3 sc into the tip point at the foundation chain of Row 1. Place a marker in the center sc. (3 sc)
- Second side: Work 1 sc in each row-end from Row 1 down to Row 26. (26 sc)
- Sl st to the first sc to join. (82 sc total: 27 + 26 + 3 + 26)
Fasten off and weave in the ends.
Why the math works: The body is 3.9 in (9.9 cm) tall and narrows from 3.8 in (9.7 cm) to a point, so each slanted side is about 4.2 in (10.7 cm) long. At 6 sc per inch, 26 sc cover about 4.3 in (10.9 cm). That leaves just enough ease to go around the tier notches without cupping. The bottom edge has 1 sc per st (23) plus 2 extra sc in each corner group, so 23 + 4 = 27, which lets the corners lie flat. The sides start at Row 26 because Row 27’s row-end sits inside each corner group.
Trunk
Lay the tree RS up with the bottom edge facing you. Count the 27 border sc along the bottom, starting with the first sc of the first corner group. The center sc is number 14.
Row 1: Join Color B with a sl st in sc 12, ch 1, sc in the same st and in the next 4 sts, turn. (5 sts: sts 12–16, centered on sc 14)
Rows 2–5: Ch 1, sc in each st across, turn. (5 sts)
Fasten off and weave in the ends. Trunk checkpoint: 0.8 in (2.0 cm) wide x 0.7 in (1.8 cm) tall.
Hanging Loop
Step 1: Join Color B with a sl st in the marked center sc at the tip. Ch 22, then sl st in the same st to form a loop.
Step 2: Work 28 sc over the chain loop (around the chain, not into it). Pack them snugly so the loop becomes a firm cord. Sl st in the same tip st.
Fasten off and weave the tail into the border on the WS. Loop height: about 1.25 in (3.2 cm).
Final Blocking
- Weave in every end on the WS, following the stitch lines so nothing shows through the eyelets.
- Lay the tree RS up on a blocking mat.
- Pin the two bottom corners first, 4.1 in (10.4 cm) apart.
- Pin the tip so the body measures 4.2 in (10.7 cm) from the bottom border to the tip.
- Lightly pin each tier notch so the sides follow a smooth, stepped slope.
- Open each eyelet with a pin so the arches round out evenly.
- Pin the trunk straight down and the loop straight up.
- Mist with water until damp, or use light spray starch for a stiffer ornament.
- Let it dry completely (4–6 hours) before you unpin it.
Final Quality-Control Checklist
- Body measures 4.1 in (10.4 cm) wide x 4.2 in (10.7 cm) tall.
- Eyelet rows have 2, 4, and 6 openings, from top to bottom.
- Each eyelet row steps in slightly at both side edges.
- Border has 82 sc and lies flat.
- Trunk is centered, with 11 border sc on each side.
- Loop is firm, centered, and hangs straight.
- All ends are hidden and secure.
- Both faces look tidy, since the ornament turns as it hangs.
Troubleshooting
Eyelets look like slits instead of arches. You probably chained only 2, or your chains are too tight. Keep it at ch 3 and chain a little looser than your sc.
Sides ruffle after the border. Your sc are shorter than gauge. Skip 1 row-end on each side near the tip, or go down a hook size for the border.
Sides pull in or cup. Add 1 extra sc in each eyelet-row row-end (3 extra per side), or use a hook 0.25 mm larger for the border.
Count is off after a conversion row. Recount the eyelet row with each ch-3 sp as 2 sts and each sc2tog as 1 st.
Trunk is off-center. Recount the bottom border from the first sc of the corner group. The trunk must start in sc 12.
Care
Hand wash in cool water with mild soap, press the water out in a towel, and dry flat, reshaping as you did when blocking. Re-starch if the ornament softens after a season of handling.
Final Notes
Here is the measurement chain: 6 sts and 7 rows per inch give 1.8 in (4.6 cm) of width at Row 7, 2.8 in (7.1 cm) at Row 14, and 3.8 in (9.7 cm) from Row 21 on. After 27 rows the body is 3.9 in (9.9 cm) tall. The border adds 0.15 in (0.4 cm) per edge, for 4.1 in (10.4 cm) x 4.2 in (10.7 cm). The 0.7 in (1.8 cm) trunk brings the total height to 4.9 in (12.4 cm).
When your first tree matches these numbers, the rest of your batch will match too.
Happy crocheting!