

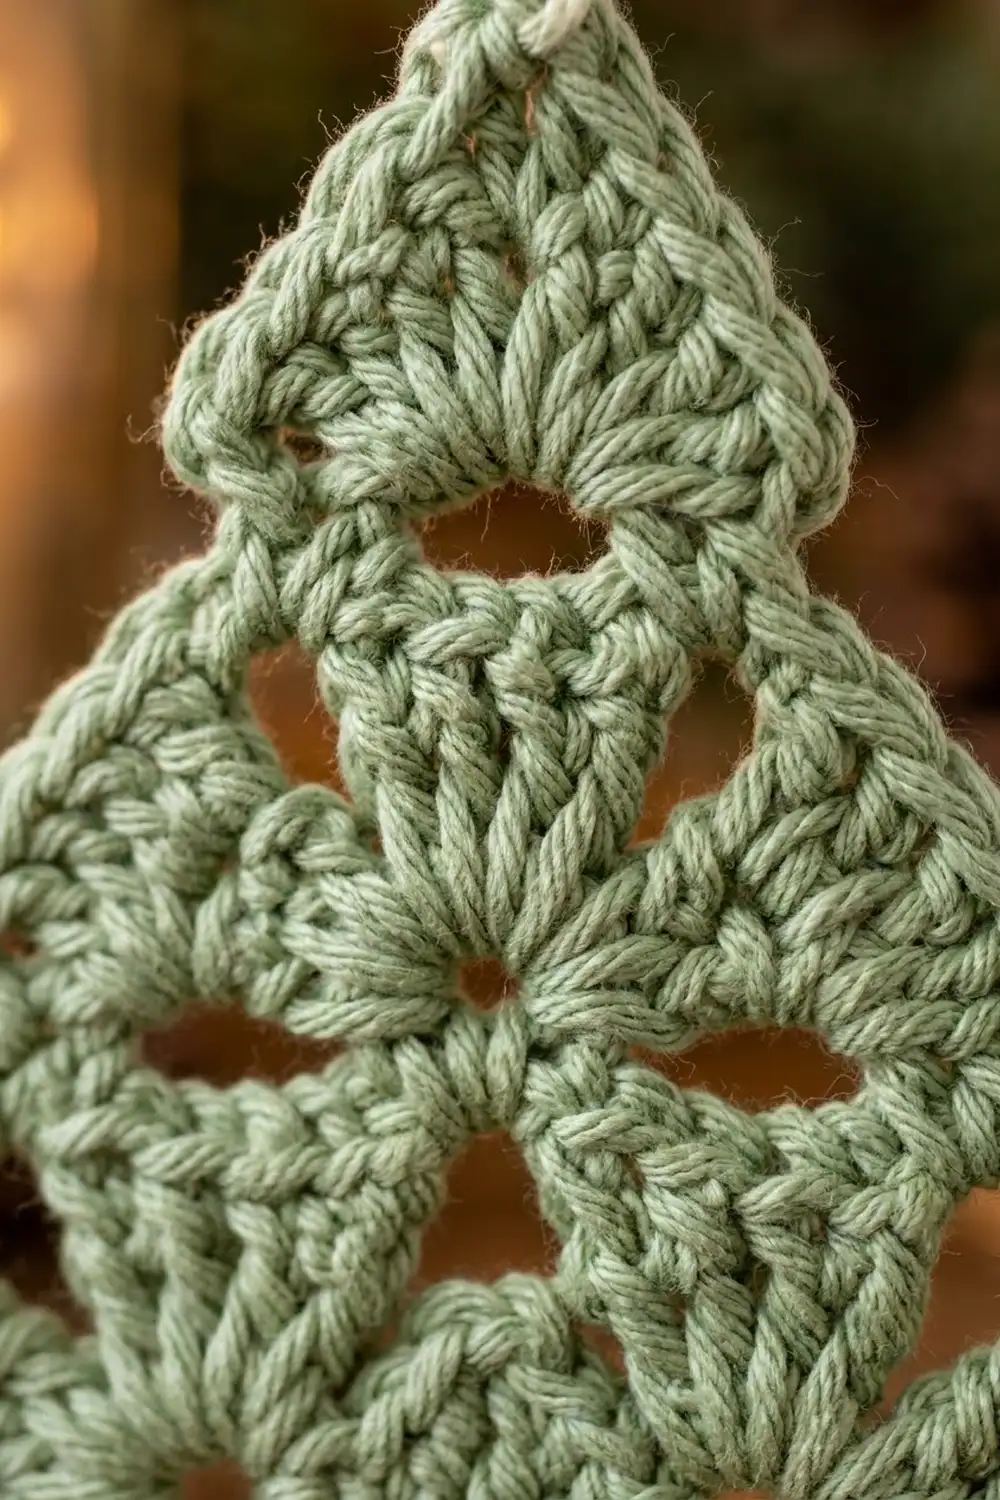
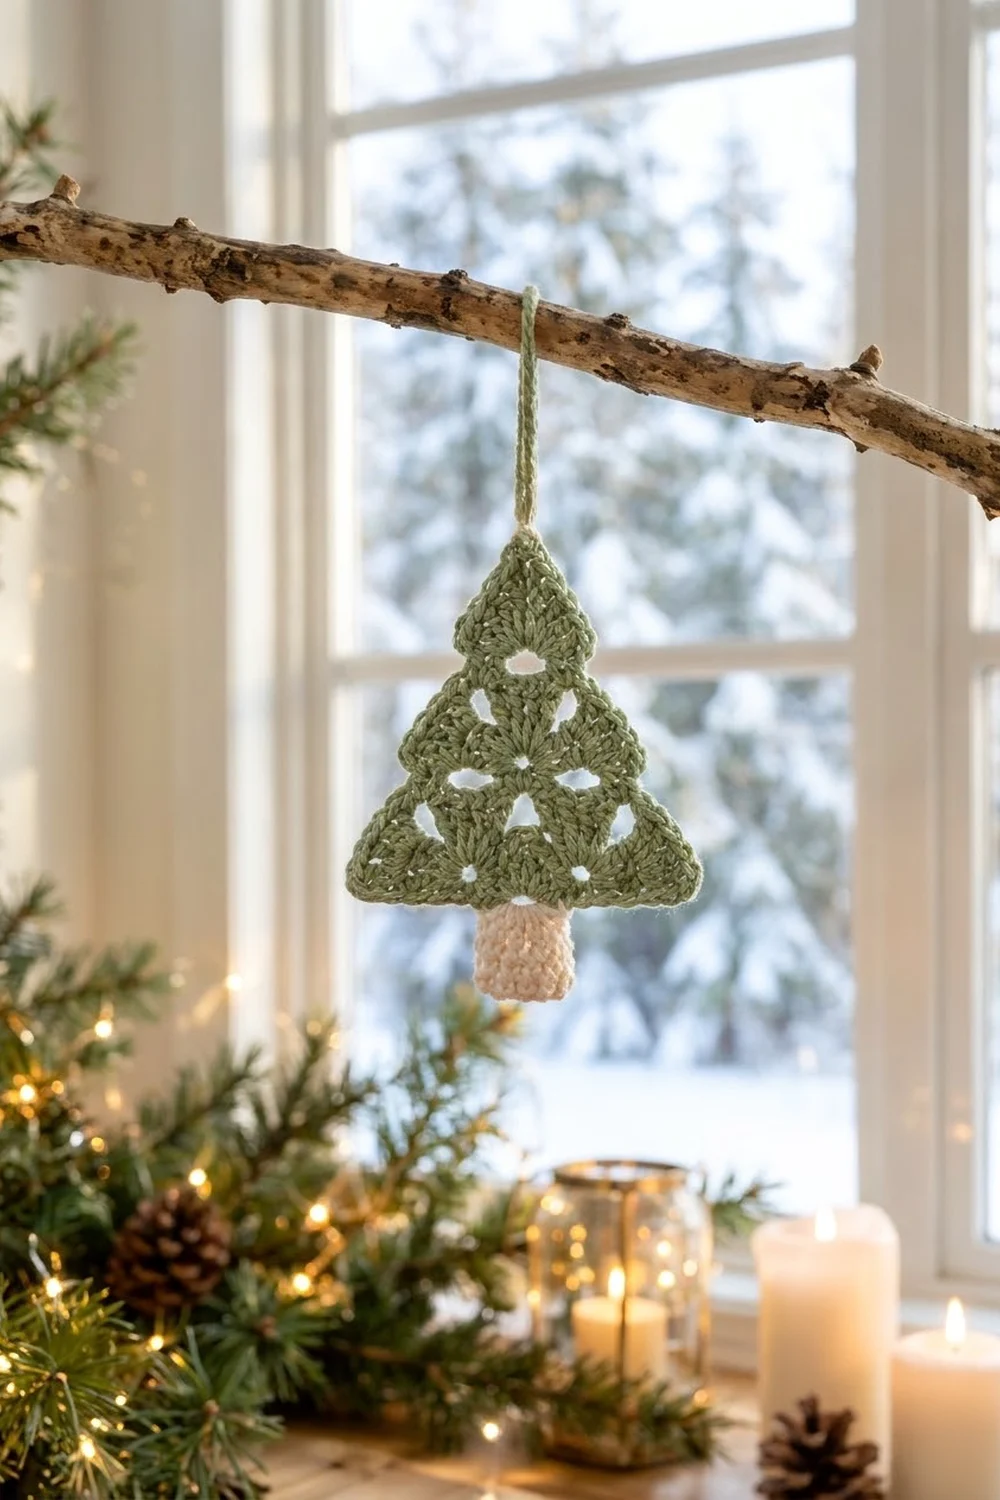
This little tree ornament is made of tiers of soft fans with open eyelets between them. The sage green body narrows from three fans at the base to one at the top. A smooth single crochet border keeps the edges straight and the corners sharp, and a small cream trunk finishes the tree.
The colors are calm and natural: muted sage green for the tree and warm cream for the trunk. It suits a Scandinavian-style tree, a gift tag or a branch garland. The pattern uses US crochet terms throughout.
The finished tree measures about 4.75 in (12.1 cm) wide and 4.5 in (11.4 cm) tall. With the trunk it is about 5.25 in (13.3 cm) tall, and the hanging loop adds 1.5 in (3.8 cm).
The tree body is worked flat in rows from the base up. Fan rows and eyelet rows alternate, and each new fan row starts and ends half a fan further in, which shapes the triangle. Three single crochet rows form the tip, two border rounds frame the whole triangle, and a chain loop is added at the top. The trunk is a short tube worked in the round, flattened, closed and sewn to the back.
Finished Size and Construction
- Finished size: about 4.75 in (12.1 cm) wide x 4.5 in (11.4 cm) tall (tree only)
- Total height with trunk: about 5.25 in (13.3 cm), plus a 1.5 in (3.8 cm) loop
- Skill level: Easy / advanced beginner
- Terminology: US crochet terms
- Yarn weight: DK (light worsted, #3) cotton or cotton blend
- Hook: 3.5 mm (E-4)
- Number of pieces: 1 tree body + 1 trunk (one finished ornament)
- Layout: a single triangle with three fan tiers (3, 2, 1) from the base up
- Tree size before border: about 3.8 in (9.7 cm) wide x 3.4 in (8.6 cm) tall
- Border depth: 2 rounds of single crochet, about 0.4 in (1.0 cm)
Materials
Choose a smooth, mercerized or matte cotton in DK weight. Cotton shows the fans clearly and keeps the shape after blocking. Avoid fuzzy yarns, which fill in the eyelets.
- Color A, sage green: 12 g / 27 m (29.5 yd) for the tree body, border and loop
- Color B, cream: 3 g / 7 m (7.7 yd) for the trunk
These quantities include a margin of about 20 percent for your gauge swatch and tails.
Tools:
– 3.5 mm (E-4) crochet hook
– Tapestry needle
– Scissors
– 2 locking stitch markers
– A small pinch of fiberfill (optional, for a rounder trunk)
– Blocking mat and rust-proof pins
– Spray bottle with water
Abbreviations (US Terms)
- ch – chain
- sl st – slip stitch
- sc – single crochet
- dc – double crochet
- sp – space
- sk – skip
- st(s) – stitch(es)
- rep – repeat
- RS – right side
- sc2tog – single crochet 2 together: (insert hook in next st, yarn over, pull up a loop) twice, yarn over, pull through all 3 loops on hook
- sc3tog – single crochet 3 together: (insert hook in next st, yarn over, pull up a loop) 3 times, yarn over, pull through all 4 loops on hook
Special stitch:
– Fan: 5 dc worked into the same stitch.
Gauge and Checkpoints
Gauge: 20 sc and 22 rows = 4 in (10.2 cm) with a 3.5 mm hook. One dc row is about 0.45 in (1.1 cm) tall.
Make one tree body as your test piece. Check it at each stage before you add the border:
- After Row 1: the strip is 3.8 in (9.7 cm) wide.
- After Row 3: the piece is about 1.1 in (2.8 cm) tall.
- After Row 6: the piece is about 2.4 in (6.1 cm) tall.
- After Row 10: the piece is about 3.4 in (8.6 cm) tall at the center and 3.8 in (9.7 cm) wide at the base.
If your piece is too big: go down to a 3.25 mm hook, or check that your fans aren’t loose. Tug each dc snug as you finish it.
If your piece is too small: go up to a 3.75 mm or 4.0 mm hook.
A difference of 0.25 in (0.6 cm) at the Row 1 checkpoint is fine for an ornament. A larger difference will show in the border.
Tree Body
Use Color A. Leave a 6 in (15.2 cm) starting tail.
Foundation: Ch 20.
Row 1 (RS): Sc in 2nd ch from hook and in each ch across. Turn. [19 sc]
Row 2 (fan row): Ch 1 (does not count as a st), sc in first sc, sk 2 sc, fan in next sc, sk 2 sc, sc in next sc; rep from * 2 more times. Turn. [3 fans, 4 sc = 19 sts]
Check: 1 + (3 x 6) = 19.
Row 3 (eyelet row): Ch 3 (counts as dc), ch 2, sk 2 dc, sc in next dc (center of fan), ch 2, sk 2 dc, dc in next sc; rep from * 2 more times. Turn. [4 dc, 3 sc, 6 ch-2 sps = 19 sts]
The ch-2 spaces on each side of the dc posts make the eyelets between the fans.
Row 4 (fan row, step in): Sl st in first dc, 2 sl st in next ch-2 sp, sl st in next sc. Ch 1, sc in the same sc. Sk ch-2 sp, fan in next dc, sk ch-2 sp, sc in next sc; rep from * once more. Leave the last ch-2 sp and turning ch unworked. Turn. [2 fans, 3 sc = 13 sts]
Check: 1 + (2 x 6) = 13. Each new fan sits directly above an eyelet post, which gives the staggered tier look.
Row 5 (eyelet row): Ch 3 (counts as dc), ch 2, sk 2 dc, sc in center dc, ch 2, sk 2 dc, dc in next sc; rep from * once more. Turn. [3 dc, 2 sc, 4 ch-2 sps = 13 sts]
Row 6 (fan row, step in): Sl st in first dc, 2 sl st in next ch-2 sp, sl st in next sc. Ch 1, sc in the same sc, sk ch-2 sp, fan in next dc, sk ch-2 sp, sc in next sc. Leave the rest unworked. Turn. [1 fan, 2 sc = 7 sts]
Row 7 (narrow eyelet row): Ch 3 (counts as dc), ch 1, sk 2 dc, sc in center dc, ch 1, sk 2 dc, dc in last sc. Turn. [2 dc, 1 sc, 2 ch-1 sps = 5 sts]
Row 8: Ch 1, sc in first dc, sc in ch-1 sp, sc in sc, sc in ch-1 sp, sc in 3rd ch of turning ch. Turn. [5 sc]
Row 9: Ch 1, sc2tog, sc in next sc, sc2tog. Turn. [3 sts]
Row 10: Ch 1, sc3tog. [1 st]
Don’t fasten off. Your hook is now at the tip, ready for the border. Place a marker in the Row 10 stitch.
Border
Use Color A, continuing from the tip.
Border gauge: the border single crochet follows the same 20 sc = 4 in (10.2 cm) gauge. On the stepped side edges, work the counts below exactly. They are set so the edge lies flat, not by guesswork.
Round 1
In this round, the “per side” counts include all sc along that side, including the sc worked into the tip st. Corner ch-2 spaces are counted separately.
Ch 1, sc in the tip st (this is the last st of Side 2), ch 2, sc in the same tip st (this is the first st of Side 1).
Side 1 (work down the edge): You have 1 sc already. Then work:
– 1 sc in the Row 9 edge
– 1 sc in the Row 8 edge
– 2 sc in the Row 7 edge
– 2 sc in the Row 6 edge
– 3 sc across the step (1 in the dc or sl st, 2 in the ch-2 sp or across the sl sts)
– 2 sc in the Row 5 edge
– 2 sc in the Row 4 edge
– 3 sc across the step
– 2 sc in the Row 3 edge
– 2 sc in the Row 2 edge
– 1 sc in the Row 1 edge
Side 1 total: 22 sc
Check: 1 + 1 + 1 + 2 + 2 + 3 + 2 + 2 + 3 + 2 + 2 + 1 = 22.
Corner: Ch 2.
Base: Sc in each of the 19 foundation ch loops. [19 sc]
Corner: Ch 2.
Side 2 (work up the edge): Work the Side 1 sequence in reverse, from the Row 1 edge to the Row 9 edge (21 sc). Join with a sl st to the first sc of the round. The first sc of the round completes Side 2. [22 sc]
Round 1 total: 22 + 19 + 22 = 63 sc, plus 3 ch-2 corner spaces.
Round 2
Sl st into the tip ch-2 sp. Ch 1, (sc, ch 2, sc) in the same sp. Sc in each of the 22 sc of Side 1, (sc, ch 2, sc) in the corner sp. Sc in each of the 19 base sc, (sc, ch 2, sc) in the corner sp. Sc in each of the 22 sc of Side 2. Join with a sl st to the first sc.
Per side:
– Side 1: 1 + 22 + 1 = 24 sc
– Base: 1 + 19 + 1 = 21 sc
– Side 2: 1 + 22 + 1 = 24 sc
Round 2 total: 69 sc, plus 3 ch-2 corner spaces.
Why the math works: each corner adds 1 sc to each of the two sides it joins, so every side grows by exactly 2 per round. At 5 sc per inch, 24 sc is about 4.8 in (12.2 cm). With half of each corner space, that matches the true slanted side length of about 5.1 in (13.0 cm). The 21 base sc plus the corners match the 4.75 in (12.1 cm) base. Because no side has extra stitches, there is no ruffling, and because no side is short, there is no cupping.
Hanging Loop
Sl st into the tip ch-2 sp, ch 16, sl st in the same sp. Fasten off, leaving a 6 in (15.2 cm) tail, and weave it into the loop base to reinforce it. The loop is about 1.5 in (3.8 cm) long. For a cream loop like one version in the photo, make it in Color B instead.
Trunk
Use Color B. Leave an 8 in (20.3 cm) tail.
Foundation: Ch 12, sl st in the first ch to form a ring. Make sure the chain isn’t twisted.
Round 1: Ch 1, sc in each ch around. Join with a sl st to the first sc. [12 sc]
Rounds 2–5: Ch 1, sc in each sc around. Join. [12 sc]
If you want a rounder, padded trunk, add a small pinch of fiberfill now.
Closing row: Flatten the tube with the starting tail at one side. Ch 1, then work 6 sc through both layers to close the bottom. [6 sc]
Fasten off.
Trunk checkpoint: about 1.2 in (3.0 cm) wide x 1.1 in (2.8 cm) tall.
Attaching the Trunk
Find the center of the 21 base stitches (stitch 11) and mark it. Place the open top of the trunk behind the tree, centered on that marker, so it overlaps the back of the border by 0.35 in (0.9 cm). That leaves 0.75 in (1.9 cm) of trunk showing below the tree.
Use the long starting tail to whipstitch the front layer of the trunk opening to the back loops of the border. Then stitch the back layer to the back of Row 1. Keep your stitches from showing on the RS.
Final Blocking
- Weave in all ends along the border stitches on the wrong side, and trim.
- Mist the tree evenly with water until it is damp but not dripping.
- Lay it face up on the blocking mat.
- Pin the three corners first to form a triangle 4.75 in (12.1 cm) wide at the base and 4.5 in (11.4 cm) tall.
- Pin along each side every 0.5 in (1.3 cm) in a straight line from corner to corner.
- Gently open each eyelet with a fingertip, and spread each fan into an even half-circle.
- Shape the trunk with your fingers. Pin it flat, or leave it round if you stuffed it.
- Let it dry completely, at least 6 hours, before unpinning.
Final Quality-Control Checklist
- Base row has 19 sts, and the tiers have 3, 2 and 1 fans.
- Every fan has 5 dc and sits centered above an eyelet post.
- Eyelets are open and even on both sides.
- Border Round 2 has 24 / 21 / 24 sc per side, with sharp ch-2 corners.
- Both sides are the same length, and the tip points straight up.
- The trunk is centered under the base, and 0.75 in (1.9 cm) shows below the tree.
- The loop is secure and about 1.5 in (3.8 cm) long.
- All ends are woven in and invisible from the front.
Troubleshooting
The sides ripple. Your row edges may be tall. Work 1 sc instead of 2 in the Row 2 and Row 4 edges, but do the same on both sides.
The sides pull inward or cup. Your border is tight. Use a hook 0.25 mm larger for the border only.
The tree leans to one side. You probably miscounted a step. Recount Round 1. Both sides must have 22 sc.
The fans look crowded. Check that you skipped 2 sts on each side of every fan.
The tip is blunt. Make sure Row 10 is a true sc3tog and the tip corner has a full ch 2.
The trunk is off-center. Unpick it and re-mark stitch 11 of the base before sewing again.
Care
Hand wash in cool water with mild soap, press out the water in a towel, and dry flat, reshaping as needed. Store flat or hanging so the loop and tips don’t crush.
Final Notes
The measurement chain is simple. A 19-stitch base, 3.8 in (9.7 cm) wide, shrinks by one fan per tier to give a 3.4 in (8.6 cm) tall triangle before the border. Two border rounds with 24 / 21 / 24 sc per side bring it to 4.75 in x 4.5 in (12.1 cm x 11.4 cm). The trunk and loop bring the total height to 5.25 in (13.3 cm) plus a 1.5 in (3.8 cm) loop. Check each stage, and every ornament will match.
Happy crocheting!