

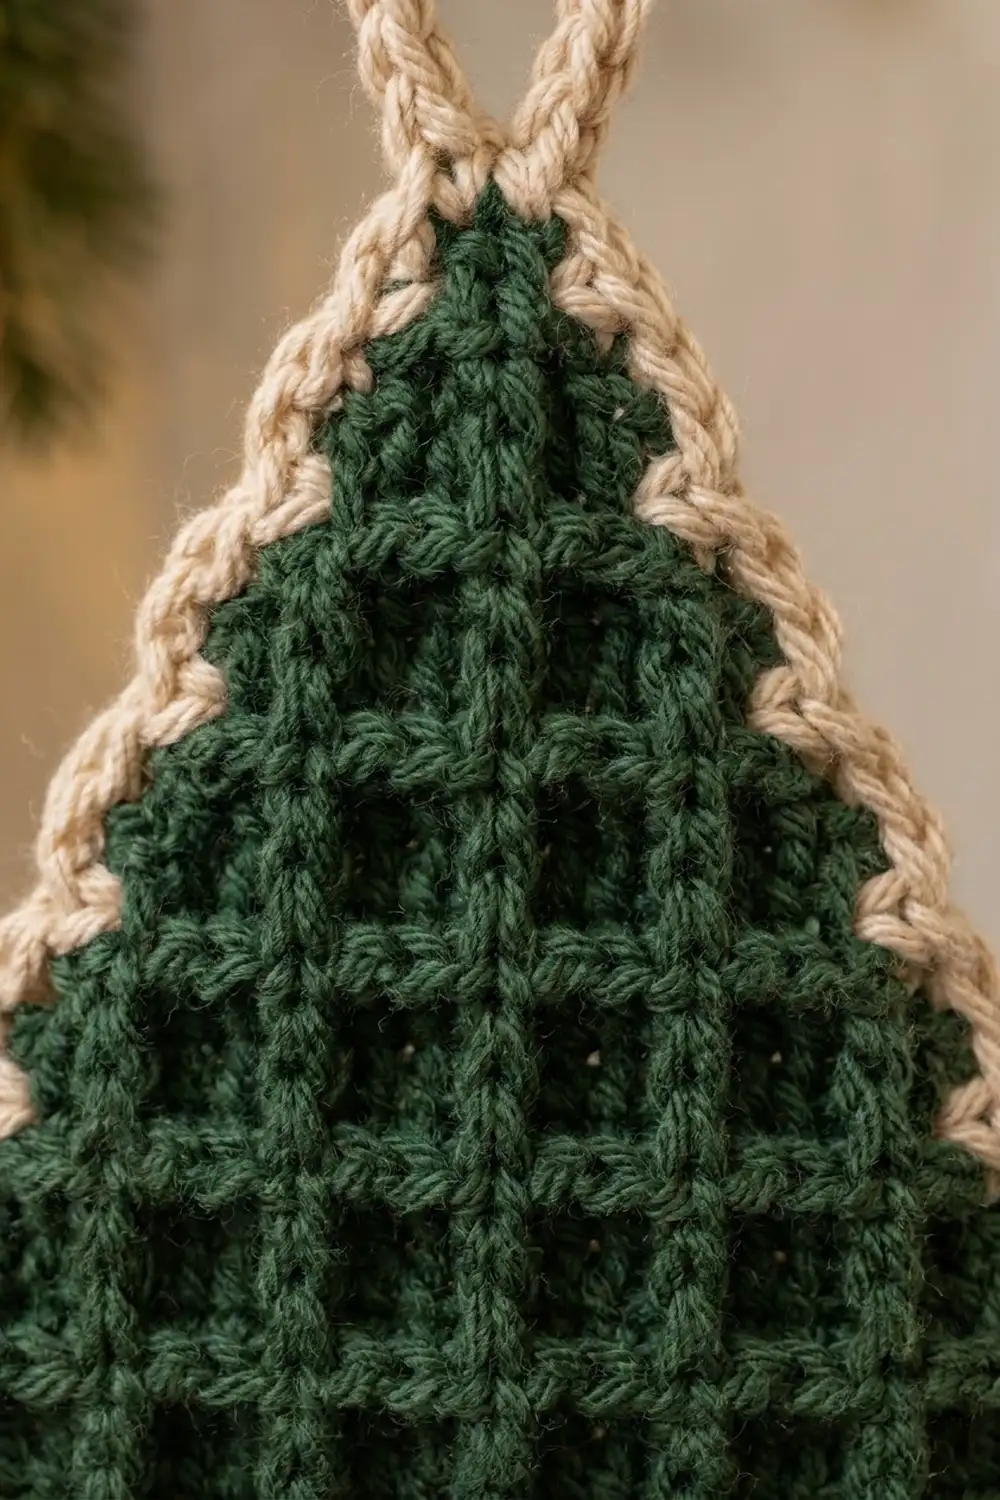
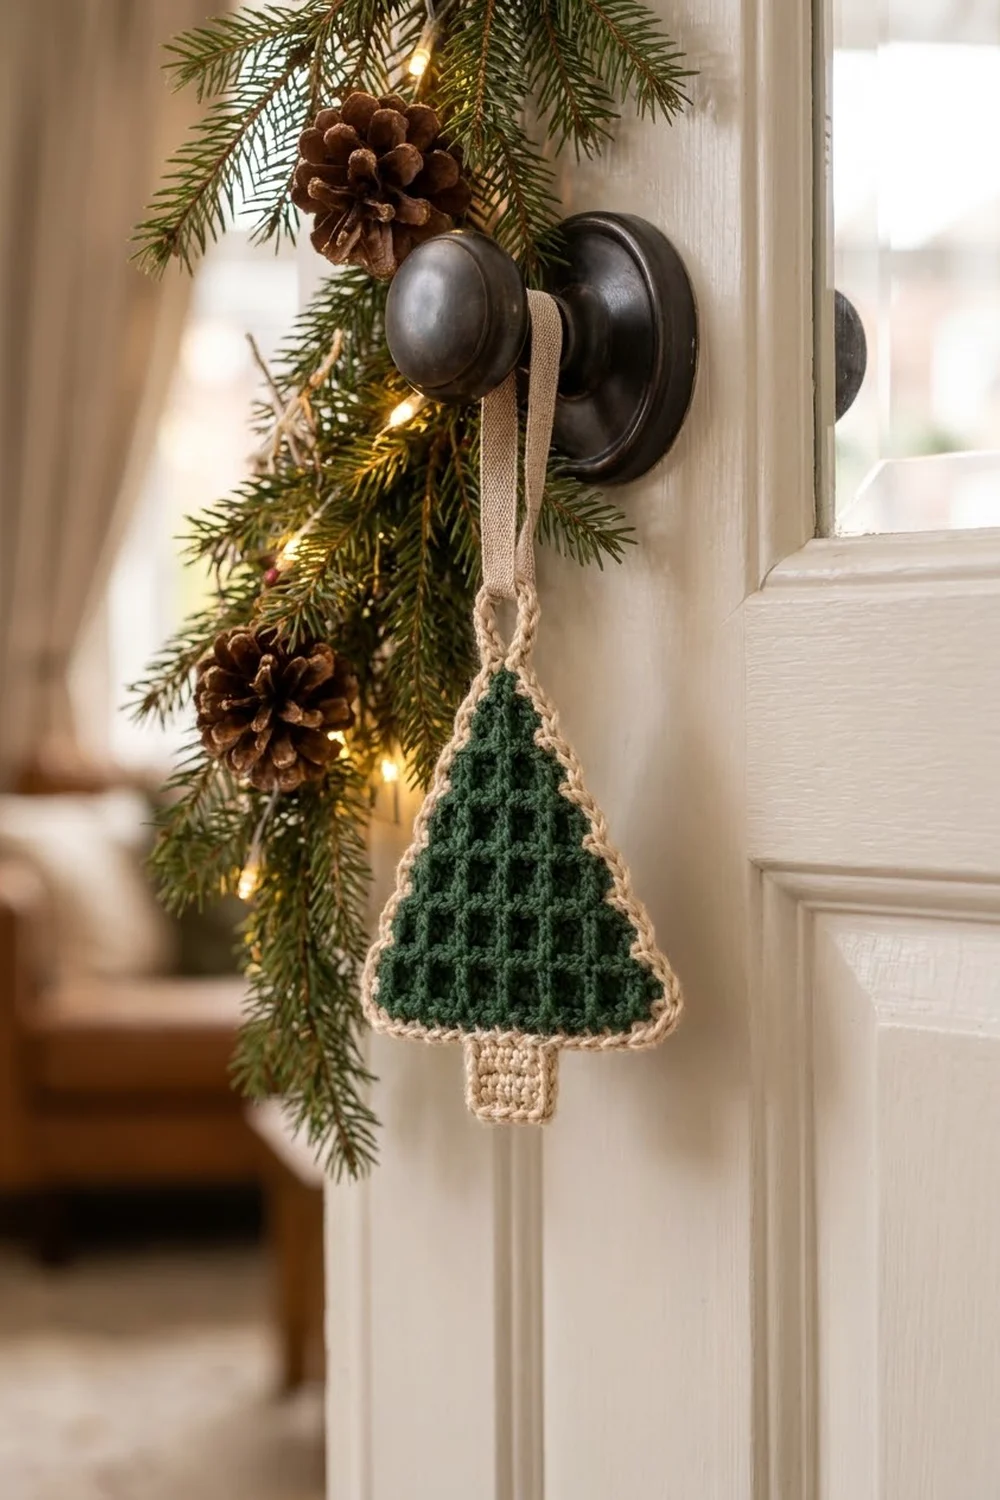
The Lattice Pine is a flat Christmas tree ornament with a raised grid texture. The tree is forest green. Raised vertical ribs and horizontal ridges cross over it to make a neat lattice of small square windows. A cream rope-textured edge runs all the way around the outline, and a short cream trunk and a crocheted hanging loop finish it.
The palette is simple: deep pine green for the tree and warm cream for the trunk, border, and loop. It looks rustic and cozy, the kind of piece you can hang on a door knob, a cabinet handle, a wreath, or a tree branch.
This pattern uses US crochet terms throughout. The finished ornament measures about 6.5 in (16.5 cm) wide at the base and 6.7 in (17.0 cm) tall from the trunk to the tip of the tree. The hanging loop adds about 1 in (2.5 cm) above that.
The tree is one single piece worked in rows from the bottom up. It decreases one stitch at each edge on every row until it reaches a point. Then you work the trunk in cream into the free loops of the foundation chain. Last, you work a two-round border around the whole outline, adding the hanging loop as you go.
Finished Size and Construction
- Finished size: 6.5 in (16.5 cm) wide x 6.7 in (17.0 cm) tall, not counting the loop
- Skill level: Easy-intermediate (front post stitches, decreases, reverse single crochet)
- Terminology: US crochet terms
- Yarn weight: Worsted (#4)
- Hook: 4.5 mm (US 7)
- Number of pieces: 1 (tree, trunk, and border all worked on the same piece)
- Layout: Single triangular tree with a centered rectangular trunk
- Tree panel size: 5.75 in (14.6 cm) wide at the base x 4.8 in (12.2 cm) tall
- Trunk size: 1.75 in (4.4 cm) wide x 1.1 in (2.8 cm) tall
- Size before border: 5.75 in (14.6 cm) wide x 5.9 in (15.0 cm) tall
- Border depth: about 0.4 in (1.0 cm), 2 rounds
Materials
Choose a smooth worsted-weight yarn so the lattice ribs show clearly. Cotton or a cotton blend gives crisp texture and holds its shape well. Soft acrylic also works and is easy to wash. Avoid fuzzy or heathered yarns for the green, because they blur the grid.
- Color A, forest green: 12 g, about 24 m
- Color B, cream: 8 g, about 16 m
These quantities include a small margin for your gauge check and weaving in ends.
Tools:
- 4.5 mm (US 7) crochet hook
- Tapestry needle
- Scissors
- Stitch markers (2 or 3)
- Rust-proof pins and a foam blocking mat
- Optional: 10 in (25.4 cm) of narrow ribbon for hanging
Abbreviations (US Terms)
- ch: chain
- sl st: slip stitch
- sc: single crochet
- hdc: half double crochet
- dc: double crochet
- FPdc: front post double crochet
- hdc2tog: half double crochet 2 together
- dc2tog: double crochet 2 together
- dc3tog: double crochet 3 together
- rsc: reverse single crochet (crab stitch)
- st(s): stitch(es)
- RS / WS: right side / wrong side
Special stitches:
- FPdc: Yarn over, insert the hook from front to back to front around the post of the indicated stitch, yarn over and pull up a loop, (yarn over and pull through 2 loops) twice.
- rsc (crab stitch): Working from left to right (right-handed), insert the hook into the next stitch to the right, yarn over and pull up a loop, yarn over and pull through both loops. This makes the twisted, rope-like edge.
Turning chains: The ch-1 and ch-2 at the start of a row do not count as stitches.
Gauge and Checkpoints
Gauge in tree pattern: 16 sts and 10 rows = 4 in (10.2 cm), alternating 1 dc/FPdc row and 1 hdc row.
Gauge in sc (trunk): 16 sts and 18 rows = 4 in (10.2 cm).
The ornament is small, so the quickest test is to make the tree itself and measure it before you add the trunk or border.
Checkpoint 1, after Row 1: The sc foundation row of 23 sts should measure 5.75 in (14.6 cm).
Checkpoint 2, after Row 6: The tree should be about 2.4 in (6.1 cm) tall, and Row 6 should measure about 3.25 in (8.3 cm) across.
Checkpoint 3, after Row 12: The tree panel should be about 4.8 in (12.2 cm) tall from the bottom edge to the tip.
Checkpoint 4, after the trunk: The trunk should be 1.75 in (4.4 cm) wide and 1.1 in (2.8 cm) tall. The piece should now measure 5.9 in (15.0 cm) tall in total.
If your tree is too big, go down half a hook size (4.0 mm). If it is too small, go up half a size (5.0 mm). If only the height is off, check how tall your dc stitches are. Pull the first loop up to the height of the row, and don’t yank down on each loop. Because the ornament is decorative, a difference of 0.25 in (0.6 cm) is fine, but keep the same hook for the trunk and border.
Tree (Color A)
The tree is worked flat in rows. Every row loses 1 st at each end, so each row is 2 sts shorter than the row before. On RS rows, FPdc stitches make the vertical ribs. On WS rows, hdc stitches make horizontal ridges on the RS. Together they form the grid.
All decreases are symmetrical, so the center stitch stays in the center. The FPdc ribs stack directly on top of each other on every RS row, with 2 dc between ribs.
Row 1 (WS): With Color A, ch 24. Sc in the 2nd ch from the hook and in each ch across. Turn. (23 sts)
Row 2 (RS): Ch 2, dc2tog over the first 2 sts, [FPdc around the next st, dc in the next 2 sts] 6 times, FPdc around the next st, dc2tog over the last 2 sts. Turn. (21 sts: 2 dc2tog, 7 FPdc, 12 dc)
Row 3 (WS): Ch 1, hdc2tog over the first 2 sts, hdc in each st to the last 2 sts, hdc2tog over the last 2 sts. Turn. (19 sts)
Row 4 (RS): Ch 2, dc2tog, dc in the next st, [FPdc around the next st, dc in the next 2 sts] 4 times, FPdc around the next st, dc in the next st, dc2tog. Turn. (17 sts: 2 dc2tog, 5 FPdc, 10 dc)
Row 5 (WS): Repeat Row 3. (15 sts)
Row 6 (RS): Ch 2, dc2tog, dc in the next 2 sts, [FPdc around the next st, dc in the next 2 sts] 3 times, dc2tog. Turn. (13 sts: 2 dc2tog, 3 FPdc, 8 dc)
Row 7 (WS): Repeat Row 3. (11 sts)
Row 8 (RS): Ch 2, dc2tog, [FPdc around the next st, dc in the next 2 sts] twice, FPdc around the next st, dc2tog. Turn. (9 sts: 2 dc2tog, 3 FPdc, 4 dc)
Row 9 (WS): Repeat Row 3. (7 sts)
Row 10 (RS): Ch 2, dc2tog, dc in the next st, FPdc around the next st, dc in the next st, dc2tog. Turn. (5 sts: 2 dc2tog, 1 FPdc, 2 dc)
Row 11 (WS): Repeat Row 3. (3 sts)
Row 12 (RS): Ch 2, dc3tog over all 3 sts. (1 st) Fasten off and weave in the ends.
Rib check: Each FPdc should sit right above a FPdc from 2 rows below. In Row 2 the ribs are at sts 2, 5, 8, 11, 14, 17, and 20. Each row loses 1 st at the edge where it starts, so every following RS row shifts those positions down by 2. That gives sts 3, 6, 9, 12, and 15 in Row 4, and 4, 7, and 10 in Row 6. Ribs that reach the decrease edges simply end there, which is why the grid narrows naturally into the point.
Trunk (Color B)
Row 1 (RS): Turn the tree so the foundation chain is at the top and the RS is facing you. Count 8 free loops in from the right-hand corner. Join Color B with a sl st in the 9th free loop. Ch 1, sc in the same loop and in each of the next 6 free loops. Turn. (7 sts)
You worked into loops 9 to 15, so there are 8 free loops on each side of the trunk and it sits exactly in the center.
Rows 2–5: Ch 1, sc in each st across. Turn. (7 sts)
At the end of Row 5, fasten off and weave in the ends.
Checkpoint: The trunk is 7 sts x 5 rows, about 1.75 in (4.4 cm) wide and 1.1 in (2.8 cm) tall.
Border and Hanging Loop (Color B)
Border gauge: 4 sc per 1 in (2.5 cm) along the edges, the same as the main stitch gauge.
In this border, a “side” count means only the stitches between the corner groups. Corner groups are listed separately and are not counted twice.
Round 1 (RS): Join Color B with a sl st in the top of the Row 12 dc3tog. Ch 1. Work the stitches below in the order given.
- Top point: (2 sc, ch 10, 2 sc) in the same st. (4 sc + ch-10 loop)
- First slanted side: 2 sc in the side of each row-end from Row 11 down to Row 2 (10 rows), then 1 sc in the row-end of Row 1. (21 sc)
- First bottom corner: 3 sc in the first free loop of the foundation chain. (3 sc)
- Bottom edge, first part: Sc in each of the next 7 free loops (loops 2–8). (7 sc)
- Trunk side: 1 sc in each trunk row-end, working down from Row 1 to Row 5. (5 sc)
- Trunk bottom: 3 sc in the first st of trunk Row 5, sc in the next 5 sts, 3 sc in the last st. (11 sc)
- Second trunk side: 1 sc in each trunk row-end, working up from Row 5 to Row 1. (5 sc)
- Bottom edge, second part: Sc in each of the next 7 free loops (loops 16–22). (7 sc)
- Second bottom corner: 3 sc in the last free loop (loop 23). (3 sc)
- Second slanted side: 1 sc in the row-end of Row 1, then 2 sc in each row-end from Row 2 up to Row 11. (21 sc)
Join with a sl st to the first sc. (87 sc + ch-10 loop)
Count check: 4 + 21 + 3 + 7 + 5 + 11 + 5 + 7 + 3 + 21 = 87 sc.
Round 2 (RS): Ch 1. Do not turn. Rsc in each sc around. When you reach the ch-10 loop, work 1 rsc in each of its 10 chains, then carry on around. Join with a sl st to the first rsc. (97 rsc: 87 around the edge + 10 on the loop) Fasten off and weave in the ends.
Why the math works: The tree rows average 0.4 in (1.0 cm) tall. Because each row also steps in by 1 st, every row-end along the slant is a little longer than one row’s height, about 0.47 in (1.2 cm). Two sc per row-end at 0.25 in (0.6 cm) each covers 0.5 in (1.3 cm), which is close enough that the edge lies flat. Row 1 is a short sc row, so it only needs 1 sc. That gives 21 sc for each slanted side and keeps both sides identical.
Along the bottom, 1 sc per free loop matches the 4-sts-per-inch gauge exactly. The 3-sc groups at the outer corners give the crab stitch enough room to turn the corner without pulling. The trunk’s sc rows are 4.5 rows per inch, so 1 sc per row-end comes out at the same density as the rest of the edge.
The ch-10 loop doubles back on itself, so it stands about 1 in (2.5 cm) tall. The rsc worked over it make it thicker and give it the same rope texture as the edge.
Final Blocking
- Weave in all the ends first, hiding green tails in green stitches and cream tails in cream stitches.
- Lay the ornament RS up on a blocking mat.
- Pin the three points of the tree first: the tip and both bottom corners. The base should be about 6.5 in (16.5 cm) wide.
- Pin the two bottom corners of the trunk. The total height from the trunk to the tip should be 6.7 in (17.0 cm).
- Add pins along each slanted side so the edges are straight, not wavy.
- For acrylic, steam lightly from about 1 in (2.5 cm) above without touching the yarn. For cotton or wool, mist with water until damp.
- Don’t press the lattice flat. Let the FPdc ribs stay raised.
- Leave it to dry completely, then remove the pins.
- Pinch the hanging loop into shape and thread a ribbon through it if you like.
Final Quality-Control Checklist
- The tree has 12 rows and comes to a single-stitch point.
- The FPdc ribs line up in straight vertical columns, with 2 dc between them.
- The horizontal hdc ridges show clearly on the RS.
- The trunk is centered, with 8 free loops on each side.
- Border Round 1 has 87 sc, and the two slanted sides have 21 sc each.
- Border Round 2 has 97 rsc, including 10 on the loop.
- The ornament measures about 6.5 in (16.5 cm) x 6.7 in (17.0 cm).
- All the ends are woven in, with no green showing through the cream.
Troubleshooting
The ribs drift sideways. You probably missed a decrease or added an extra dc. Count the stitches at the end of each RS row and compare them with the counts in the pattern.
The tree curls up at the bottom. Your foundation chain is too tight. Chain loosely, or chain with a hook one size larger.
The slanted edges ruffle. Work 3 sc over every 2 row-ends instead of 2 sc per row-end, but keep the same count on both sides.
The slanted edges pull in. Make your border sc slightly taller and looser, or block more firmly along the slant.
The crab stitch looks flat. Leave the loops a little looser. Rsc needs slack to twist.
The trunk is off-center. Re-count the free loops. You should have 8 on each side before the border starts.
Care
Hand wash in cool water with mild soap, press out the water in a towel, and dry flat. Reshape the point and the loop while the ornament is damp.
Final Notes
The measurement chain is short and easy to check. Twenty-three foundation sts give a 5.75 in (14.6 cm) base. Twelve rows of decreases make the tree 4.8 in (12.2 cm) tall. A 7-st, 5-row trunk adds 1.1 in (2.8 cm), so the piece measures 5.9 in (15.0 cm) before the border. Two border rounds add about 0.4 in (1.0 cm) on every side. That brings the ornament to about 6.5 in (16.5 cm) x 6.7 in (17.0 cm), with a 1 in (2.5 cm) loop on top.
If each checkpoint matches, the finished piece will too. Make one for the door, or a few in different greens for the tree.
Happy crocheting!