

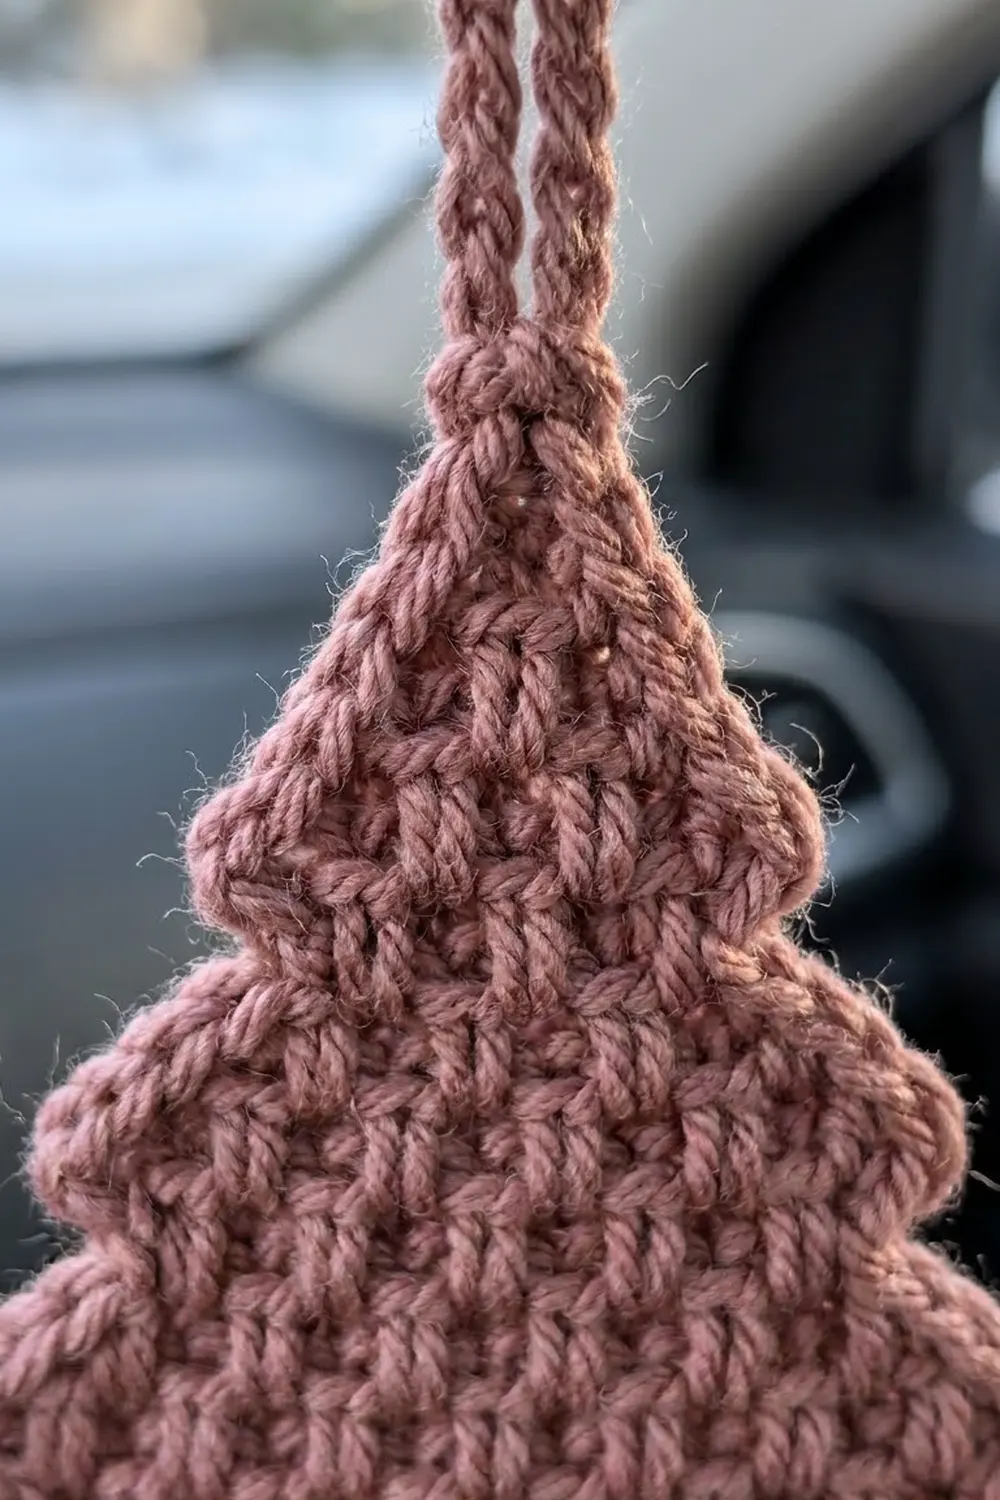
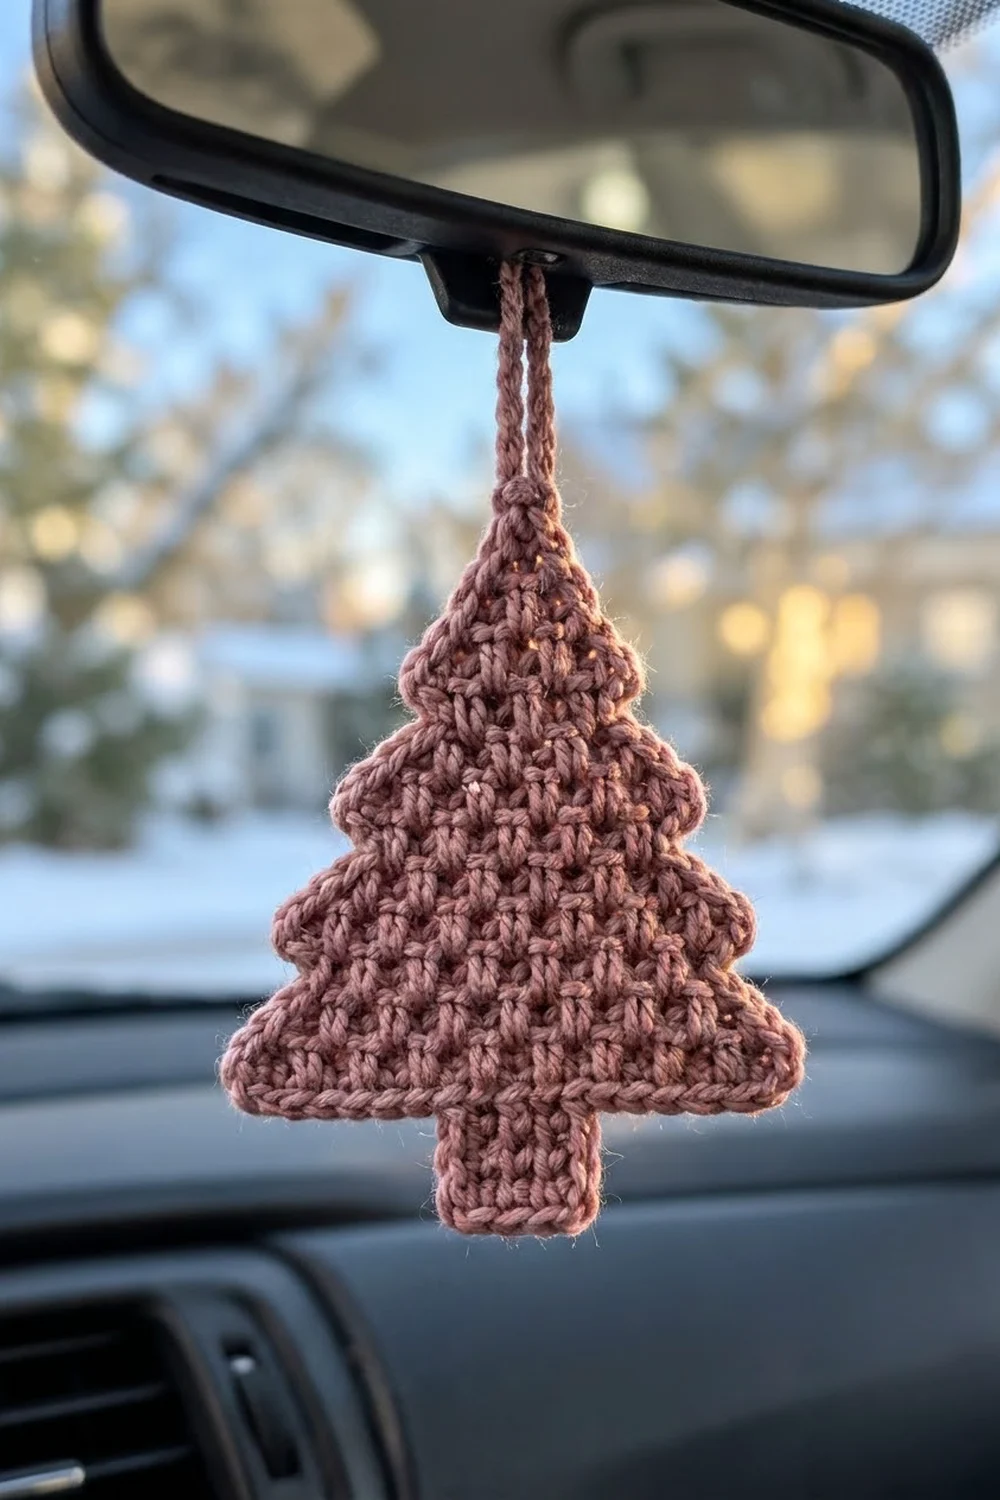
This little tree is made to hang from your rearview mirror and bring some holiday spirit to every drive. It’s a flat, three-tier Christmas tree in a soft dusty rose. The body has a pebbly moss-stitch texture, and a crisp single crochet outline keeps every notch and point sharp.
The style is modern and understated. The texture does the decorating, so you don’t need beads, bobbles or color changes. One color of DK yarn is enough, and a small amount of it at that.
The pattern uses US crochet terms. With the border on, the finished tree measures about 4.0 in (10.2 cm) wide and 5.2 in (13.2 cm) tall, plus a hanging loop of about 2.75 in (7.0 cm).
You work the tree top-down in rows, in one piece. You start at the tip and increase down through each tier. Slip stitches step in at each tier change to form the ledges, and you finish with a plain single crochet trunk. One border round tidies the outline, and a slip-stitched chain at the tip makes the hanging loop.
Finished Size and Construction
- Finished size: 4.0 in (10.2 cm) wide × 5.2 in (13.2 cm) tall, plus a 2.75 in (7.0 cm) loop
- Skill level: Easy+ (advanced beginner)
- Terminology: US terms
- Yarn weight: DK (#3)
- Hook: 3.5 mm (E/4)
- Number of pieces: 1
- Layout: single tree, worked in rows from tip to trunk
- Piece size before border: 3.8 in (9.7 cm) wide × 5.0 in (12.7 cm) tall
- Border depth: 1 round of sc, about 0.1 in (0.3 cm) per side, which adds 0.2 in (0.5 cm) to width and height
Materials
Yarn: Use a smooth, tightly plied DK yarn so the moss texture stays crisp. Cotton or a cotton blend holds its shape best in a sunny car. Acrylic works too, but steam-block it gently.
- Dusty rose / mauve (main color): about 10 g (24 m / 26 yd)
The quantity includes a margin for your gauge swatch, the border and the hanging loop.
Tools:
– 3.5 mm (E/4) crochet hook
– Tapestry needle
– Scissors
– Stitch markers (2)
– Ruler or tape measure
– Blocking mat and rust-proof pins
– Spray bottle or steamer
Abbreviations (US Terms)
- ch – chain
- sc – single crochet
- sl st – slip stitch
- sk – skip
- sp – space
- st(s) – stitch(es)
- RS / WS – right side / wrong side
Stitch counting rule: In the tree body, every sc and every ch-1 counts as 1 st. For example, “sc, ch 1, sc” is 3 sts.
Special stitch – Moss stitch (two row types):
– A-row: sc in the first st, then alternate ch 1 and sc, ending with sc. Edges are single sc.
– B-row: sc in the first sc, sc in the next ch-1 sp, then (ch 1, sk next sc, sc in next ch-1 sp) to the last sc, sc in the last sc. Each edge has 2 sc side by side.
Each sc sits in a ch-1 sp of the row below, and each ch-1 sits over an sc. That offset creates the pebbly grid.
Gauge and Checkpoints
Gauge: 20 sts and 24 rows = 4 in (10.2 cm) in moss stitch, counting ch-1s as sts. That works out to 5 sts and 6 rows per inch.
The first tier is your test piece. Work Rows 1–8 and measure before going on.
Checkpoints (before border):
– After Row 8: 11 sts = 2.2 in (5.6 cm) wide; 8 rows = 1.3 in (3.3 cm) tall
– After Row 16: 15 sts = 3.0 in (7.6 cm) wide; 16 rows = 2.7 in (6.9 cm) tall
– After Row 24: 19 sts = 3.8 in (9.7 cm) wide; 24 rows = 4.0 in (10.2 cm) tall
– After Row 30: total height 5.0 in (12.7 cm); trunk about 1.0 in (2.5 cm) wide
If your tier is too big: go down to a 3.25 mm hook, or tighten your ch-1s. Loose chains are the usual cause of extra width.
If it’s too small: go up to a 3.75 mm hook.
Small differences only change the overall size of the ornament. They don’t affect the stitch counts below.
The Pattern
Tier 1 (Top Tier)
Row 1 (A): Ch 4, sc in 2nd ch from hook, ch 1, sk next ch, sc in last ch. (3 sts)
Row 2 (B): Ch 1, turn, sc in first sc, sc in ch-1 sp, sc in last sc. (3 sts)
Row 3 (Inc A): Ch 1, turn, (sc, ch 1, sc) in first sc, ch 1, sk next sc, (sc, ch 1, sc) in last sc. (7 sts)
Row 4 (B): Ch 1, turn, sc in first sc, sc in next ch-1 sp, ch 1, sk next sc, sc in next ch-1 sp; rep from * to last sc, sc in last sc. (7 sts)*
Row 5 (A): Ch 1, turn, sc in first sc, ch 1, sk next sc, sc in next ch-1 sp, ch 1, sk next sc; rep from * to last sc, sc in last sc. (7 sts)*
Row 6 (B): Work as Row 4. (7 sts)
Row 7 (Inc A): Ch 1, turn, (sc, ch 1, sc) in first sc, ch 1, sk next sc, sc in next ch-1 sp, ch 1, sk next sc; rep from * to last sc, (sc, ch 1, sc) in last sc. (11 sts)*
Row 8 (B): Work as Row 4. (11 sts)
Each Inc A row adds 2 sts at each end (4 total) and keeps the A pattern unbroken. The count works out as 3 + 1 + (repeats × 2) + 3. Check: 3 + 1 + 4 + 3 = 11.
Measure now: 2.2 in (5.6 cm) wide.
Tier 2 (Middle Tier)
Row 9 (Step A): Turn, sl st in first 2 sc, sl st in next ch-1 sp, ch 1, sc in same sp, ch 1, sk next sc, sc in next ch-1 sp; rep from * until 2 sc remain. Leave the last 2 sc unworked. (7 sts)*
You have now stepped in 2 sts on each side. Those 2 sts, about 0.4 in (1.0 cm), form the ledge under Tier 1. The slip stitches don’t count as sts.
Row 10 (B): Work as Row 4. (7 sts)
Row 11 (Inc A): Work as Row 7. (11 sts)
Row 12 (B): Work as Row 4. (11 sts)
Row 13 (A): Work as Row 5. (11 sts)
Row 14 (B): Work as Row 4. (11 sts)
Row 15 (Inc A): Work as Row 7. (15 sts)
Row 16 (B): Work as Row 4. (15 sts)
Measure: 3.0 in (7.6 cm) wide.
Tier 3 (Bottom Tier)
Row 17 (Step A): Work as Row 9. (11 sts)
Row 18 (B): Work as Row 4. (11 sts)
Row 19 (Inc A): Work as Row 7. (15 sts)
Row 20 (B): Work as Row 4. (15 sts)
Row 21 (A): Work as Row 5. (15 sts)
Row 22 (B): Work as Row 4. (15 sts)
Row 23 (Inc A): Work as Row 7. (19 sts)
Row 24 (B): Work as Row 4. (19 sts)
Measure: 3.8 in (9.7 cm) wide, 4.0 in (10.2 cm) tall.
Trunk
Row 24 has 19 sts. You’ll work the trunk over the center 5 (sts 8–12), leaving 7 sts free on each side.
Row 25: Turn, sl st in first 7 sts, ch 1, sc in each of next 5 sts (work into the sc and the ch-1 sps alike). Leave the last 7 sts unworked. (5 sc)
Rows 26–30: Ch 1, turn, sc in each sc across. (5 sc)
The trunk is 6 rows, about 1.0 in (2.5 cm) tall. Don’t fasten off yet.
Checkpoint: the body now measures 3.8 in (9.7 cm) × 5.0 in (12.7 cm).
Border
Border gauge: 1 sc per row-end and 1 sc per exposed st, with 2 sc at each tier corner and 3 sc at the tip and trunk corners.
The border starts at the tip. Fasten off the working yarn and leave a 6 in (15.2 cm) tail. Then, with the RS facing, join the yarn in the center (skipped) ch of the foundation chain at the tip.
Rnd 1:
Tip: 3 sc in the center foundation ch.
Right side, going down:
– Tier 1: 1 sc in each row-end of Rows 1–7 (7 sc), 2 sc in the row-end of Row 8 (outer corner), 1 sc in each of the 2 exposed Row 8 sts (ledge). (11 sc)
– Tier 2: 1 sc in each row-end of Rows 9–15 (7 sc), 2 sc in the row-end of Row 16, 1 sc in each of the 2 exposed Row 16 sts. (11 sc)
– Tier 3: 1 sc in each row-end of Rows 17–23 (7 sc), 2 sc in the row-end of Row 24, 1 sc in each of the 7 exposed Row 24 sts. (16 sc)
– Trunk side: 1 sc in each row-end of Rows 25–29. (5 sc)
Right side total: 11 + 11 + 16 + 5 = 43 sc
Trunk bottom: 3 sc in the first st of Row 30, sc in each of the next 3 sts, 3 sc in the last st. (9 sc)
Left side, going up: Work the right side in reverse: 5 trunk sc; then 7 ledge sc, 2 sc at the corner and 7 row-end sc; then 2, 2, 7; then 2, 2, 7. On the slip-stitch side, work into the sl sts. (43 sc)
Join with sl st to the first sc. Rnd 1 total: 3 + 43 + 9 + 43 = 98 sc
Why the math works: Moss rows are short (6 per inch), so 1 sc per row-end follows the sloped edges without ruffling or cupping. The 2-sc corners turn the outer tier points. The inner corners need no extras, because the ledge stitches already pull the edge inward.
Hanging loop: Sl st into the center sc of the tip. Ch 30, then sl st in the same sc to close the loop. Turn, and sl st in the back bump of each of the 30 chs. This makes a firm cord that won’t stretch. Sl st into the tip sc again and fasten off, leaving an 8 in (20.3 cm) tail.
Weave the tail down through the tip to anchor the loop, then weave in all the ends along the border on the WS.
Final Blocking
- Mist the tree lightly, or steam it from 1 in (2.5 cm) above. Don’t press the iron onto it.
- Lay it RS up on the blocking mat.
- Pin the tip straight up, then pin the six outer tier corners level, matched in pairs.
- Pin the trunk corners square, about 1.0 in (2.5 cm) apart.
- Check the measurements: 4.0 in (10.2 cm) across the bottom tier and 5.2 in (13.2 cm) from tip to trunk.
- Straighten the hanging loop and pin it flat.
- Let it dry completely, at least 4–6 hours, before unpinning.
Final Quality-Control Checklist
- Row counts: 3, 3, 7, 7, 7, 7, 11, 11 / 7, 7, 11, 11, 11, 11, 15, 15 / 11, 11, 15, 15, 15, 15, 19, 19 / trunk 5
- Each ledge is exactly 2 sts deep, and the bottom ledge is 7 sts on each side
- The trunk is centered, with 7 sts free on each side
- The border has 98 sc, with 43 on each side
- The tip is pointed and the trunk corners are square
- The loop is firm and anchored, and the ornament hangs straight without tilting
- Finished size is 4.0 in (10.2 cm) × 5.2 in (13.2 cm)
Troubleshooting
Moss pattern looks like columns instead of a grid: You worked an sc into an sc. Every sc must go into a ch-1 sp, except the edge sc.
Odd stitch count: Recount sc and ch-1s together. Every row should end with an sc.
Ledges look uneven: Make sure you slip-stitched across exactly 2 sc on one side and left exactly 2 sc on the other.
Edges ruffle: Your border is too loose, or you added extra sc. Go down a hook size for the border only.
Edges pull in: You skipped some row-ends. Rework them at 1 sc per row-end.
Tree tilts when hanging: Re-anchor the loop at the exact center sc of the tip.
Trunk off-center: Recount Row 25. Sl st in 7 sts, sc in 5, leave 7.
Care
Hand wash in cool water, press out the water in a towel, and dry it flat in its blocked shape. Keep it out of direct heat. Cotton fades least on a sunny dashboard.
Final Notes
Here is the full measurement chain from start to finish:
- Gauge: 5 sts and 6 rows per inch
- Tier 1: 2.2 in (5.6 cm) wide
- Tier 2: 3.0 in (7.6 cm) wide
- Tier 3: 3.8 in (9.7 cm) wide at 4.0 in (10.2 cm) tall
- Trunk: brings the body to 5.0 in (12.7 cm) tall
- Border: one 98-sc round, adding 0.2 in (0.5 cm) each way, for a finished 4.0 in (10.2 cm) × 5.2 in (13.2 cm) tree
- Loop: 2.75 in (7.0 cm)
If each checkpoint matches, the finished tree will match too. Make one for your own car, and maybe a few more for gift toppers.
Happy crocheting!