

This letter G keychain is a flat, sturdy initial in soft sage green with a small lily-of-the-valley spray on its left stroke. Three cream bell flowers hang from a pale green arching stem, and two olive leaves sit at the base. A gold split ring finishes it, so you can clip it onto a bag, basket, or set of keys.
The pattern uses US crochet terms. The finished letter measures 3¼ in (8.3 cm) tall and 3¼ in (8.3 cm) wide, not counting the hardware.
The letter is worked flat in rows of single crochet as one piece. You make the bottom bar first, then the left column and top bar, then the spur and crossbar. One border round of single crochet and one round of slip stitch neaten the whole outline. Finally, you crochet the small flower pieces and sew them on in layers.
Every step has a measurement checkpoint, so you know your G is on track before you move on.
Finished Size and Construction
- Finished size: 3¼ × 3¼ in (8.3 × 8.3 cm)
- Skill level: Easy–Intermediate
- Terminology: US
- Yarn weight: Sport (2), cotton
- Hook: 2.5 mm (US B/1 or C/2)
- Number of pieces: 1 letter, plus 6 appliqué pieces (3 bells, 2 leaves, 1 stem with 3 short flower stems called pedicels)
- Layout: a single flat letter; the appliqués are layered on the lower left stroke
- Letter grid: 18 stitches wide × 21 rows tall
- Size before border: 3 × 3 in (7.6 × 7.6 cm)
- Border depth: about ⅛ in (0.3 cm) per side
Materials
Use a smooth, mercerized sport-weight cotton. It shows crisp stitches and holds its shape. Avoid fuzzy or very stretchy yarns, because the letter needs to stay flat.
- Sage green (letter): 10 g / 28 m
- Cream (bells): 3 g / 8 m
- Olive green (leaves): 2 g / 6 m
- Light yellow-green (stem): 2 g / 6 m
Quantities include a comfortable margin for gauge swatching and sewing tails.
Tools
– 2.5 mm crochet hook
– Tapestry needle with a sharp point
– Stitch markers (2–3)
– 8 mm gold jump ring and 1 in (2.5 cm) gold split key ring
– Two pairs of flat-nose pliers
– Rustproof pins and a blocking mat
– Scissors and a ruler
Abbreviations (US Terms)
- ch – chain
- sl st – slip stitch
- sc – single crochet
- hdc – half double crochet
- dc – double crochet
- inc – 2 sc in the same stitch
- sc2tog – single crochet 2 together: insert in the first stitch or row end, pull up a loop, insert in the next, pull up a loop, then yarn over and pull through all 3 loops
- st(s) – stitch(es)
- RS / WS – right side / wrong side
Special stitch – picot: ch 2, then sl st in the 2nd ch from the hook.
Column numbering: looking at the RS, the 18 columns are numbered 1 to 18 from left to right. Odd rows run from right to left and even rows run from left to right.
Gauge and Checkpoints
Gauge: 12 sc × 14 rows = 2 in (5.1 cm) in sc worked in rows, which is 6 sts and 7 rows per inch.
Work a swatch, or simply start the letter and check it at Row 5. That is the test piece for this design.
- After Row 5: the bottom bar is 3 in (7.6 cm) wide and about 0.71 in (1.8 cm) tall.
- After Row 16: the left column is about 2.29 in (5.8 cm) tall from the foundation.
- After Row 21: the letter is 3 × 3 in (7.6 × 7.6 cm).
- After the border: the letter is 3¼ × 3¼ in (8.3 × 8.3 cm).
If the letter is too big, go down to a 2.25 mm hook. If it is too small, go up to a 2.75 mm hook. Keep the tension firm so the stitches look dense with no gaps, because the letter should feel stiff.
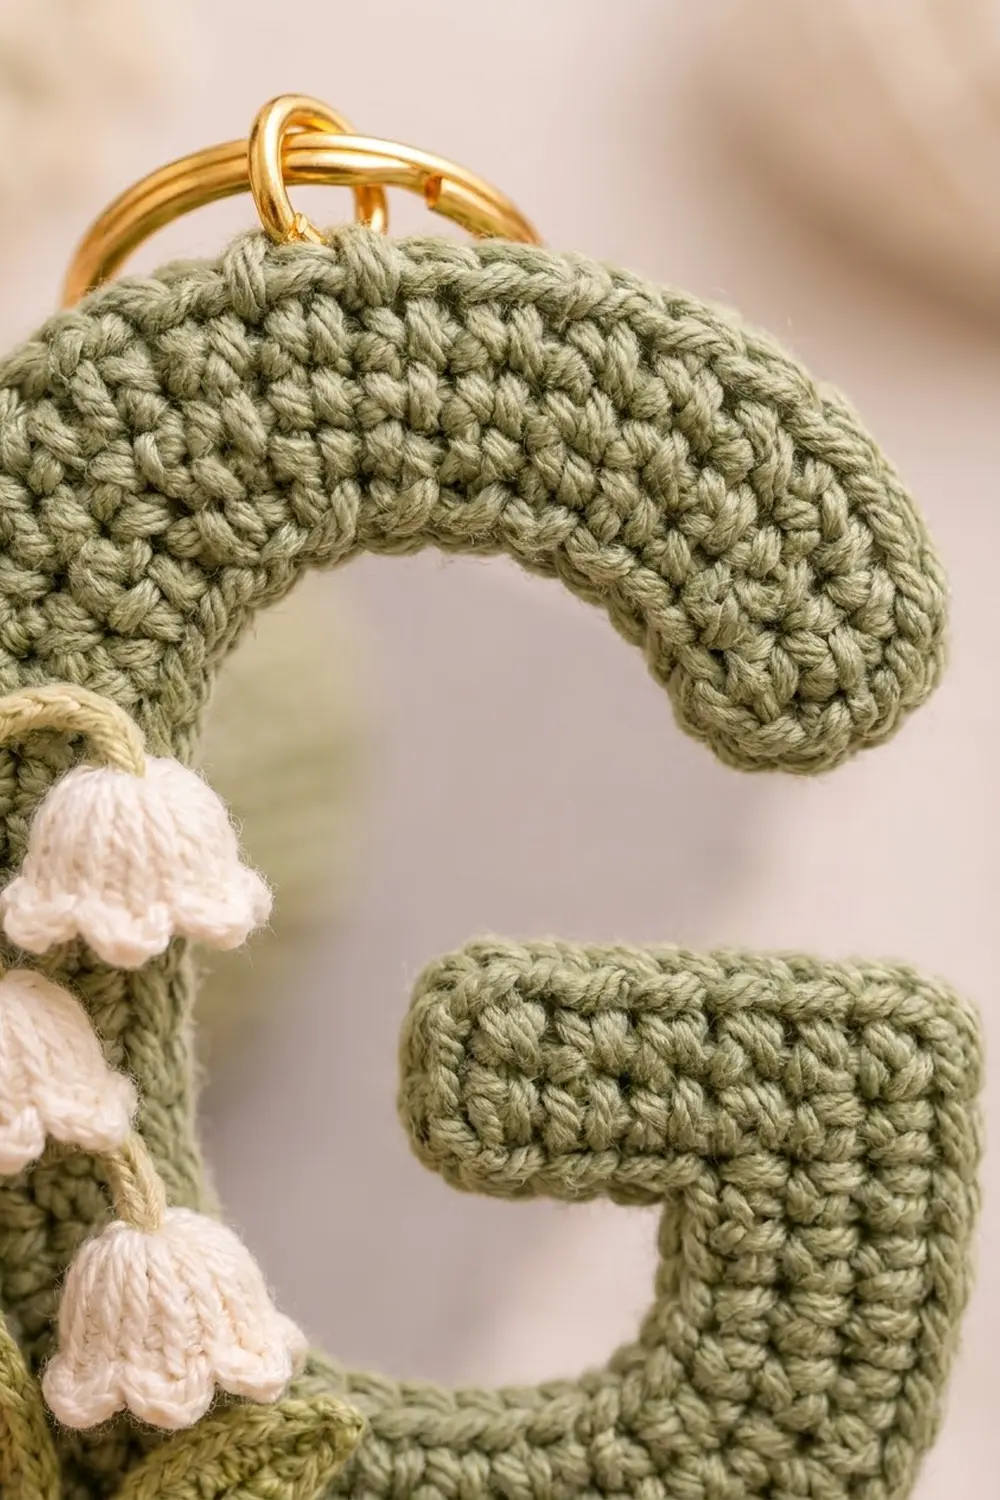
Letter G
Part A – Bottom Bar
Use sage green.
Ch 15.
Row 1 (RS): sc in the 2nd ch from the hook and in each ch across, turn. (14 sts, columns 3–16)
Row 2: ch 1, inc in the first st, sc in the next 12 sts, inc in the last st, turn. (16 sts, columns 2–17)
Row 3: ch 1, inc in the first st, sc in the next 14 sts, inc in the last st, turn. (18 sts, columns 1–18)
Rows 4–5: ch 1, sc in each st across, turn. (18 sts)
Rows 1–3 round off both bottom corners. Check that the piece is 3 in (7.6 cm) wide.
Part B – Left Column and Top Bar
Continue with the same yarn.
Row 6 (WS): ch 1, sc in the first 5 sts, turn. (5 sts; 13 sts of Row 5 stay unworked)
Rows 7–16: ch 1, sc in each of the 5 sts, turn. (5 sts)
At the end of Row 16, do not turn. Ch 13.
Row 17 (RS): sc in the 2nd ch from the hook and in the next 11 ch, then sc in the 5 column sts, turn. (Count: 12 sc into the chain + 5 sc into the column = 17 sts, columns 1–17)
Rows 18–19: ch 1, sc across, turn. (17 sts)
Row 20: ch 1, sc2tog, sc in the next 13 sts, sc2tog, turn. (15 sts)
Row 21: ch 1, sc2tog, sc in the next 11 sts, sc2tog. (13 sts, columns 3–15)
Fasten off. The left column is 5 sts, or 0.83 in (2.1 cm), wide.
Part C – Spur and Crossbar
Row 6 (WS): With the WS facing, skip the 8 unworked sts of Row 5 next to the left column. Join sage green in the next st (column 14). Ch 1, then sc in the same st and the next 4 sts, turn. (5 sts, columns 14–18)
Rows 7–9: ch 1, sc across, turn. (5 sts)
At the end of Row 9, do not turn. Ch 5.
Row 10: sc in the 2nd ch from the hook and in the next 3 ch, then sc in the 5 spur sts, turn. (Count: 4 sc into the chain + 5 sc into the spur = 9 sts, columns 10–18)
Rows 11–13: ch 1, sc across, turn. (9 sts)
Fasten off.
The crossbar is 4 rows, about 0.57 in (1.4 cm), tall. The 3-row opening between the crossbar and the top bar forms the mouth of the G, about 0.43 in (1.1 cm). Weave in all the ends on the WS.
Border
Border gauge: work 1 sc into each stitch top, each foundation chain, and each row end. At the 8 outer corners, work 3 sc into the last stitch of the section. At the 4 inner corners, sc2tog across the corner. This keeps the outer corners flat and stops the inner corners from bunching.
Round 1 (RS): Join sage green in the first st of Row 21 (column 15). Ch 1, then work the 12 sections in order, moving counterclockwise around the letter:
- Top edge (13 sts): sc in 12 sts, 3 sc in the last st. 15 sc
- Outer left side (21 row ends): sc in 20, 3 sc in the last. 23 sc
- Bottom (14 foundation chains): sc in 13, 3 sc in the last. 16 sc
- Outer right side (13 row ends, Rows 1–13): sc in 12, 3 sc in the last. 15 sc
- Crossbar top (9 sts): sc in 8, 3 sc in the last. 11 sc
- Crossbar end (4 row ends): sc in 3, 3 sc in the last. 6 sc
- Crossbar underside (4 chains): sc in 3, then sc2tog over the last chain and the first spur row end. 4 sts
- Inner spur (4 row ends, 1 already used): sc in 2, then sc2tog into Row 5. 3 sts
- Row 5 inner edge (8 sts, 1 already used): sc in 6, then sc2tog into the column. 7 sts
- Inner column (11 row ends, 1 already used): sc in 9, then sc2tog into the top bar chain. 10 sts
- Top bar underside (12 chains, 1 already used): sc in 10, 3 sc in the last. 13 sc
- Top-bar end (5 row ends): sc in 4, 3 sc in the last. 7 sc
Sl st to the first sc. (130 sts)
Why the math works: the outline has 118 edge positions (13 + 21 + 14 + 13 + 9 + 4 + 4 + 4 + 8 + 11 + 12 + 5). The 8 outer corners add 2 sts each, which is +16. The 4 inner sc2togs remove 1 st each, which is −4. That gives 118 + 16 − 4 = 130, which matches the section totals: 15 + 23 + 16 + 15 + 11 + 6 + 4 + 3 + 7 + 10 + 13 + 7 = 130.
Round 2: loosely sl st in each st around, then join. (130 sl st)
This round gives the letter its smooth, slightly raised outline. Fasten off and weave in the ends.
Checkpoint: the letter measures 3¼ × 3¼ in (8.3 × 8.3 cm).
Lily-of-the-Valley Appliqué
Bells (make 3, cream)
Rnd 1: 6 sc in a magic ring. (6 sts)
Rnd 2: (sc, inc) 3 times. (9 sts)
Rnd 3: sc in each st around. (9 sts)
Rnd 4: sl st in the next st, (hdc, dc, hdc) in the next st, sl st in the next st, repeat 2 more times. (15 sts: 3 scallops)
Fasten off. Leave an 8 in (20.3 cm) tail. Push a fingertip into each bell to cup it. Each bell is about ½ in (1.3 cm) long, with a flared, scalloped edge.
Leaves (make 2, olive green)
Ch 8.
First side: sc in the 2nd ch from the hook, then hdc, dc, dc, hdc, sc in the next 5 ch. (6 sts)
Tip: in the last ch, work (sc, picot, sc).
Second side: rotate the piece and work along the free loops of the chain: sc, hdc, dc, dc, hdc, sc. (6 sts)
Sl st to the first sc. (14 sts plus a picot)
Fasten off. Leave an 8 in (20.3 cm) tail. Each leaf is about 1¼ in (3.2 cm) long. If you like, backstitch a center vein with light yellow-green.
Stem (light yellow-green)
Main stem: ch 15, then sl st into the back bump of the 2nd ch from the hook and of each ch to the end. (14 sl st, about 2¼ in / 5.7 cm long)
Fasten off. Leave a 12 in (30.5 cm) tail.
Pedicels (make 3): ch 4, then sl st in the back bump of the 2nd ch from the hook and the next 2 ch. (3 sl st)
Fasten off. Leave a 6 in (15.2 cm) tail.
Assembly (layered)
- Stem: lay the stem on the left column. Its base sits at about Row 4. It rises along the column and arches to the right near Row 17. Whipstitch it down with small stitches.
- Pedicels: sew the 3 pedicels so that they hang from the right side of the stem arch, spaced evenly down its length.
- Bells: sew one bell to the end of each pedicel, mouth facing down. Stagger them, so the top bell is highest and furthest right.
- Leaves: sew the 2 leaves over the base of the stem, angled out to the left and right. They overlap the outline of the bottom bar slightly.
Sew through the front layer of the letter only, so no stitches show on the back.
Hardware
Open the jump ring with two pairs of pliers. Pass it through the top bar between Rounds 1 and 2 of the border, roughly above column 8, slightly left of center. Add the split ring, then close the jump ring fully.
Final Blocking
- Lightly mist the letter with water. Keep the appliqués dry, or block the letter before you sew them on.
- Pin the letter flat to a 3¼ in (8.3 cm) square on the blocking mat.
- Pin all 8 outer corners and both ends of the crossbar.
- Smooth the mouth and the inner corners so they lie flat.
- Let it dry completely, at least 4 hours.
- Unpin it and check that it measures 3¼ × 3¼ in (8.3 × 8.3 cm).
Final Quality-Control Checklist
- The letter measures 3¼ × 3¼ in (8.3 × 8.3 cm).
- Border Round 1 has 130 sts, and the corners lie flat.
- The left column is 5 sts wide and straight.
- The mouth opening is visible and even.
- All 3 bells face down and are firmly attached.
- No sewing stitches show on the back.
- The jump ring is fully closed.
- All ends are woven in and trimmed.
Troubleshooting
- Outer corners curl: pin them more firmly while blocking, or work 2 sc instead of 3 sc in the rounded corners.
- Inner corners pucker: check that you worked the sc2tog at all 4 inner corners.
- The edge ruffles: your row ends are loose. Use a hook one size smaller for the border only.
- The letter feels floppy: tighten your tension, or add a felt backing cut to the same shape.
- Bells collapse: add a dab of fabric stiffener inside each bell.
- The stem twists: pin it in its curve before you sew it down.
Care
Hand-wash the keychain in cool water with mild soap and press out the water in a towel. Lay it flat to dry and reshape the bells while they are damp.
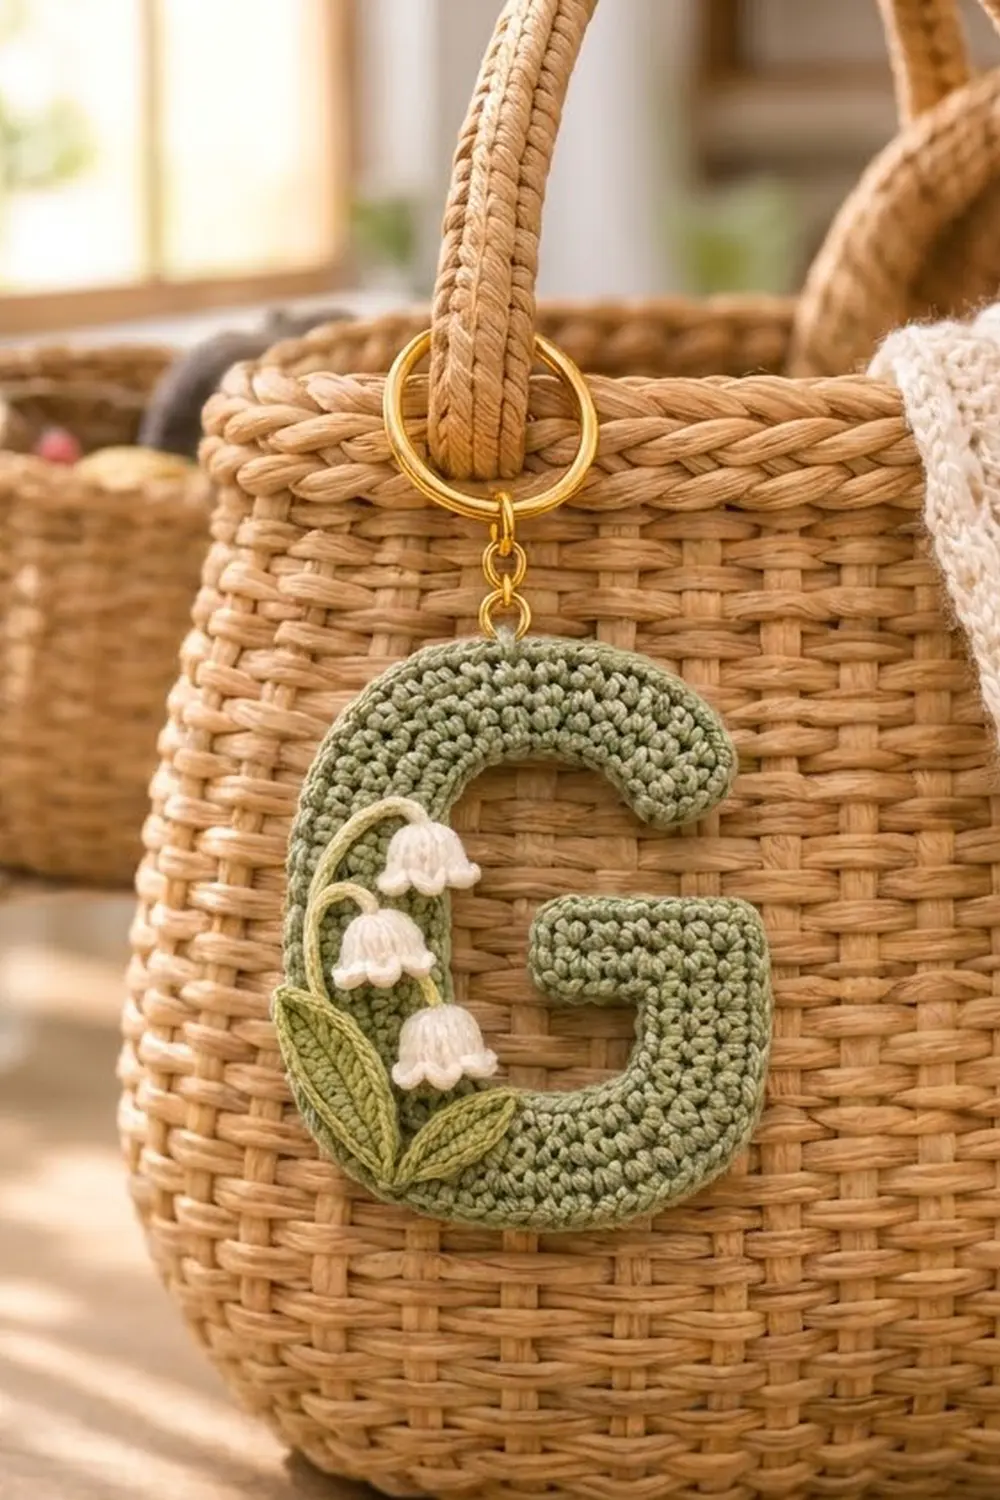
Final Notes
The measurement chain is:
- Gauge: 6 sts and 7 rows per inch.
- Letter body: 18 sts × 21 rows = 3 × 3 in (7.6 × 7.6 cm).
- Border: 130 sts, adding ⅛ in (0.3 cm) per side.
- Finished letter: 3¼ × 3¼ in (8.3 × 8.3 cm).
Check each stage, layer the lilies with care, and you will have a charming personalized keychain.
Happy crocheting!