

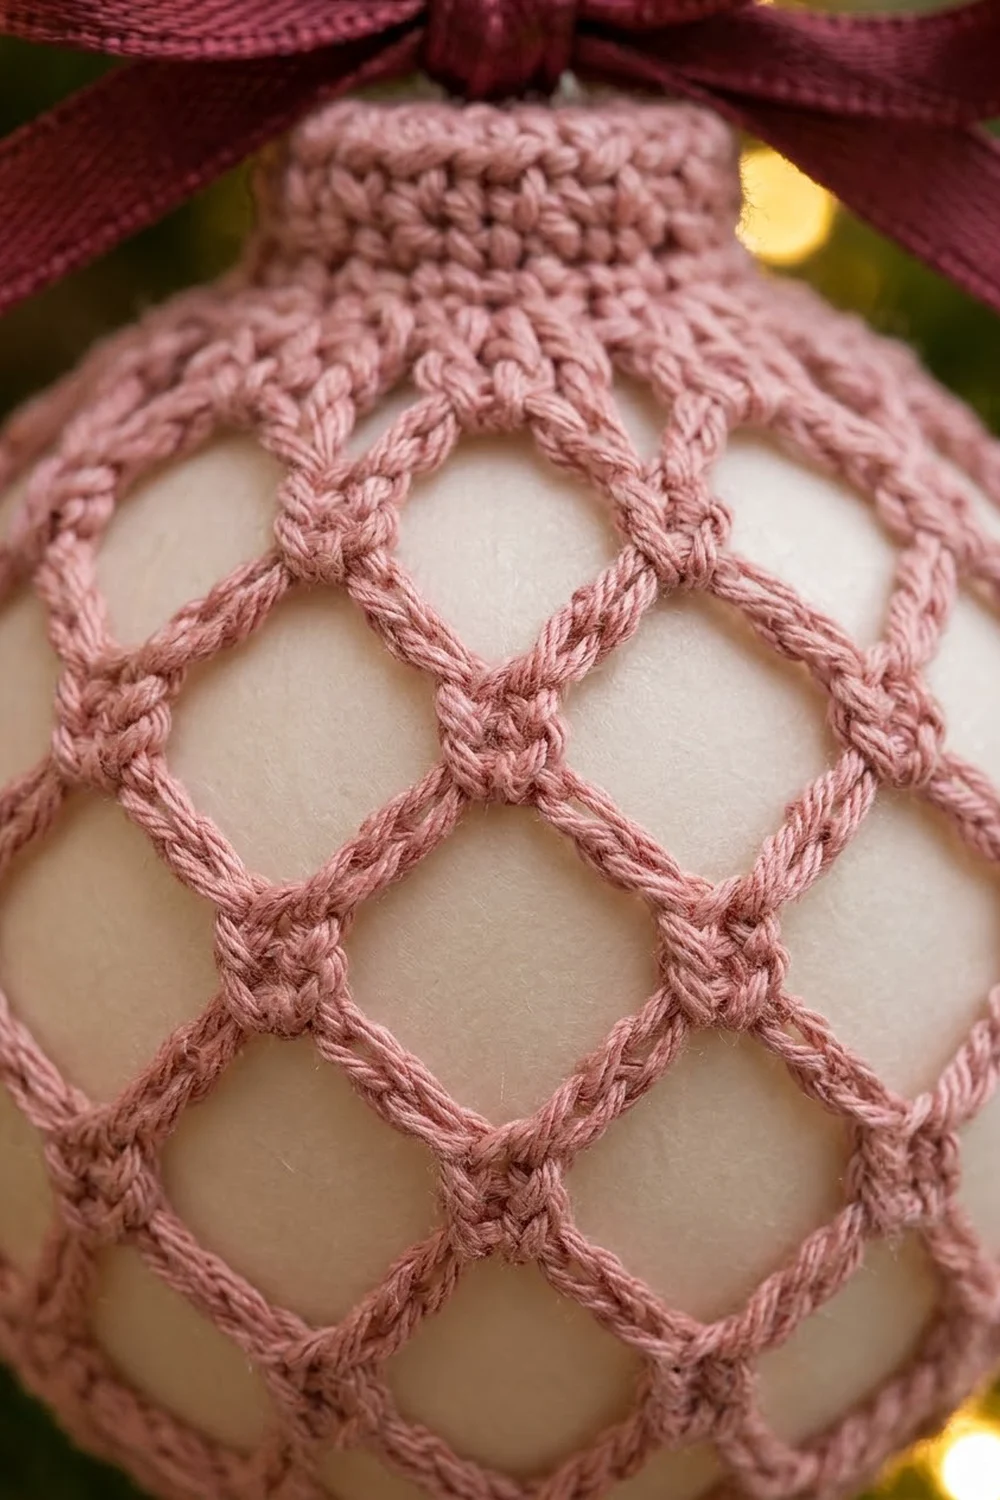
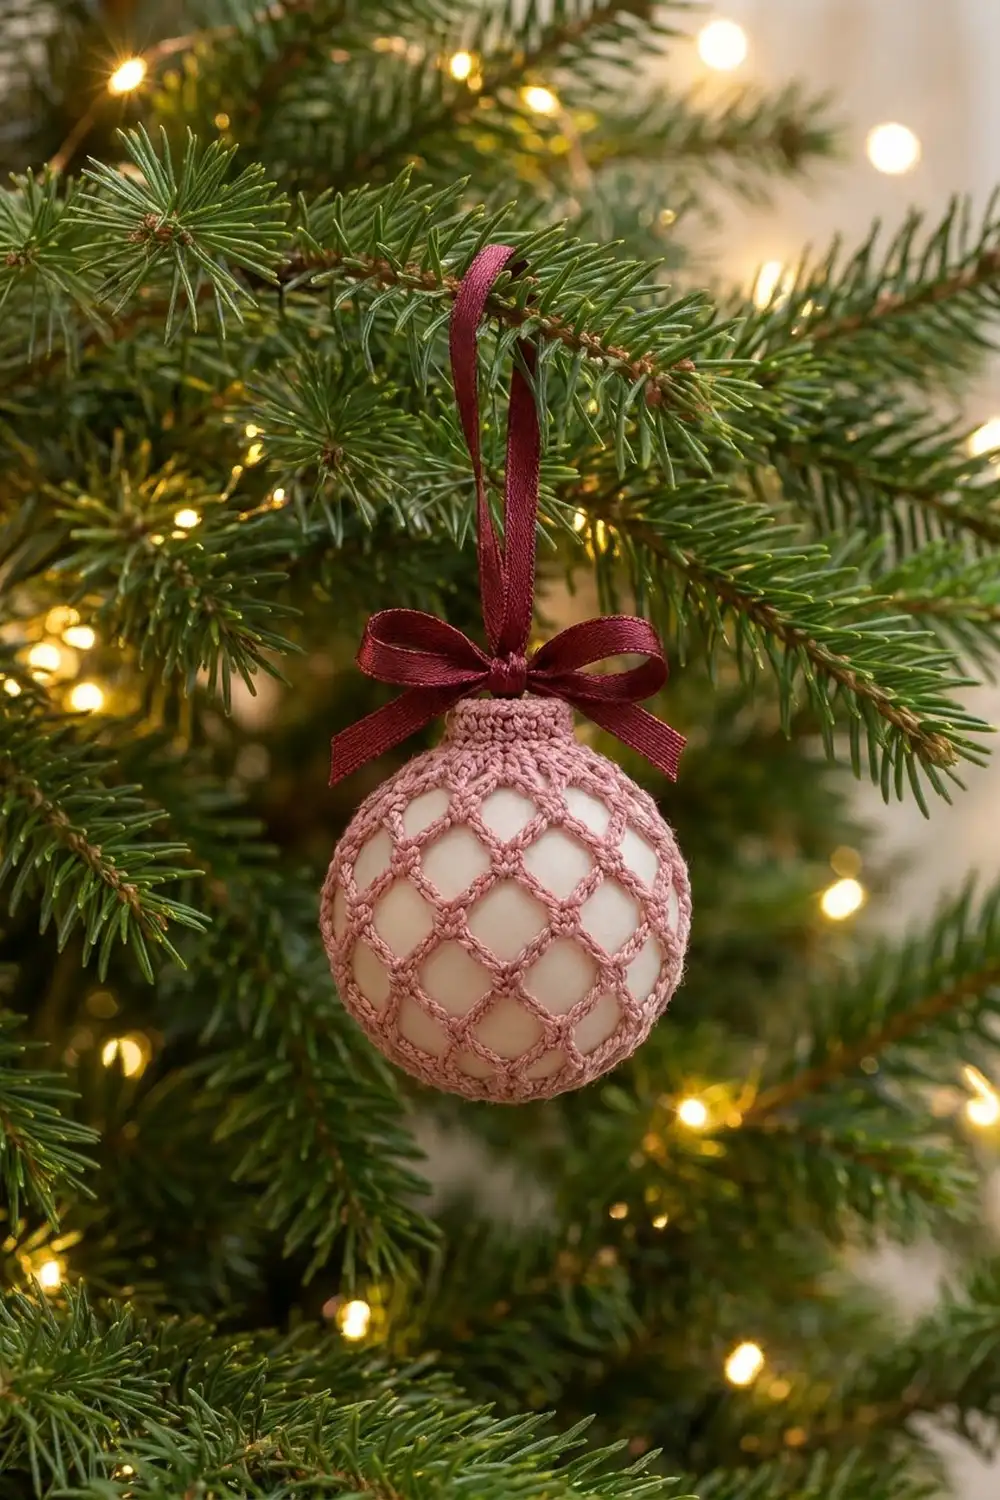
This ornament cover wraps a plain ivory bauble in an open diamond net of dusty rose cotton. A small solid collar sits at the top, and a fan of double crochet spreads out from it. Below that, long chain loops held by single crochet knots form a neat lattice over the whole ball. A burgundy satin hanging loop and bow finish it off.
The look is soft and vintage, like a Victorian net purse pulled over a glass ball. The ivory shows through every diamond, so the rose thread reads as a fine drawn line. It suits a romantic tree, a gift topper, or a bowl of ornaments on a table.
This pattern uses US crochet terms. The finished ornament is 3 in (7.6 cm) across, about 9.4 in (23.9 cm) around at its widest point, and about 3.5 in (8.9 cm) tall, not counting the ribbon.
You make one single piece, worked top down in joined rounds. In order, it has a solid single crochet collar, one double crochet fan round, nine chain-mesh rounds, and three closing rounds worked over the ball. One border round finishes the top edge of the collar, and the ribbon goes on last.
Finished Size and Construction
- Finished size: 3 in (7.6 cm) diameter, 3.5 in (8.9 cm) tall, 9.4 in (23.9 cm) circumference
- Skill level: Intermediate
- Terminology: US crochet terms
- Yarn weight: Size 3 mercerized cotton thread / fingering (Super Fine, 1)
- Hook: 2.25 mm (US B-1)
- Number of pieces: 1
- Layout: One seamless cover, worked top down in joined rounds over a 3 in (7.6 cm) ball
- Piece size: Collar is 3 in (7.6 cm) around and 0.5 in (1.3 cm) tall; the full cover fits a 3 in (7.6 cm) ball
- Size before border: Collar is 0.5 in (1.3 cm) tall
- Border depth: 1 round of sc, which adds about 0.125 in (0.3 cm) to the collar
Materials
Choose a smooth mercerized cotton thread in size 3 or fingering weight, about 125 m per 50 g (137 yd per 1.75 oz). Mercerized cotton keeps the lattice crisp and holds its shape once it is stretched over the ball. Avoid fuzzy, brushed, or very stretchy yarns, because they blur the diamonds and sag over time.
A dusty, slightly muted rose looks best against ivory. Bright pinks look harsher and lose the vintage feel.
Yarn:
– Dusty rose: 15 g, about 38 m (42 yd)
Other materials:
– One 3 in (7.6 cm) matte ivory shatterproof ornament ball, with the metal cap and wire hanger removed
– Burgundy satin ribbon, 5/8 in (1.6 cm) wide: 20 in (50.8 cm) total, cut into 8 in (20.3 cm) for the loop and 12 in (30.5 cm) for the bow
A shatterproof ball is safer to work over than glass, because you will be handling it for the last four rounds. A matte finish also grips the thread better than a glossy one.
Tools:
– 2.25 mm (US B-1) crochet hook
– Tapestry needle with a large eye
– Scissors
– Stitch marker
– Flexible tape measure
– Spray bottle with water
The yarn quantity includes a margin of about 30% for your gauge check and for weaving in ends.
Abbreviations (US Terms)
- ch – chain
- sl st – slip stitch
- sc – single crochet
- dc – double crochet
- sc2tog – single crochet 2 together
- sk – skip
- st(s) – stitch(es)
- rnd(s) – round(s)
- ch-X loop – the loop made by X chains in the previous round
Special stitch – sc2tog: Insert the hook in the next st, yarn over, and pull up a loop (2 loops on hook). Insert the hook in the following st, yarn over, and pull up a loop (3 loops on hook). Yarn over and draw through all 3 loops. This turns 2 stitches into 1.
Gauge and Checkpoints
Gauge: 8 sc and 8 sc rnds = 1 in (2.5 cm); 10 ch = 1 in (2.5 cm).
Make the collar (Rnds 1–4) first and measure it before you go any further. It works as your test piece, and it tells you whether the whole cover will fit the ball.
Checkpoints:
– After Rnd 1: The ring measures 3 in (7.6 cm) around, or 1.5 in (3.8 cm) laid flat.
– After Rnd 4: The collar is 0.5 in (1.3 cm) tall and still 3 in (7.6 cm) around.
– After Rnd 5: The lower edge of the fan relaxes to about 6 in (15.2 cm) around.
– After Rnd 10: Slip the cover onto the ball. The Rnd 10 knots should reach the widest part of the ball without straining.
– After Rnd 13: With the ball inside, the open end sits about 1 in (2.5 cm) above the bottom of the ball.
If your collar is too big, switch to a 2 mm hook, because a loose collar slides off the neck of the ball. If it is too small, switch to a 2.5 mm hook, because a tight collar pinches the top and pulls the diamonds out of line. If only the mesh is off, change the chain lengths by 1 instead of changing the hook (see Troubleshooting).
Pattern
Join every round with a sl st to the first st. The ch 1 at the start of a round does not count as a stitch. In Rnd 5, the ch 3 counts as the first dc. Place a marker in the first st of each round.
Collar
Foundation: Ch 24. Join with a sl st to the first ch to make a ring. Take care not to twist the chain.
Rnd 1: Ch 1, sc in each ch around, join. (24 sc)
Rnds 2–4: Ch 1, sc in each st around, join. (24 sc each rnd)
The collar is now a small solid tube, 3 in (7.6 cm) around and 0.5 in (1.3 cm) tall. It forms the neck of the ornament, and the ribbon will pass through it later.
Fan Round
Rnd 5 (conversion round): Ch 3 (counts as dc), dc in the same st, then 2 dc in each remaining st around. Join to the top of the ch-3. (24 sts worked 1-per-existing-st + 24 extra dc = 48 dc)
The doubled dc spread out like the shoulders of a bauble. They make the short fan of upright posts between the collar and the first diamonds.
Lattice Mesh
Each mesh round has 12 sc and 12 chain loops. Every sc is worked around the center of a loop from the round before, and this is what forms the diamonds. The loops get longer toward the middle of the ball and shorter again below it. The slip stitches at the start of each round move you to the center of the first loop.
Keep your chains even and fairly relaxed. Tight chains pull the diamonds into narrow slits, and very loose chains sag once the cover is on the ball.
Rnd 6: Ch 1, sc in the first dc, ch 7, sk 3 dc, sc in next dc; repeat from * 10 more times, ch 7, sk 3 dc, join to the first sc. (12 sc, 12 ch-7 loops)
Check: 12 repeats × 4 dc used (1 sc + 3 skipped) = 48 dc. ✓
Rnd 7: Sl st in each of the next 3 ch, ch 1, sc around the center of the same ch-7 loop, ch 8, sc in next ch-7 loop; repeat from * 10 more times, ch 8, join to the first sc. (12 sc, 12 ch-8 loops)
Rnd 8: Sl st in each of the next 4 ch, ch 1, sc in the same ch-8 loop, ch 9, sc in next ch-8 loop; repeat from * 10 more times, ch 9, join. (12 sc, 12 ch-9 loops)
Rnd 9: Sl st in each of the next 4 ch, ch 1, sc in the same ch-9 loop, ch 10, sc in next ch-9 loop; repeat from * 10 more times, ch 10, join. (12 sc, 12 ch-10 loops)
Rnd 10: Sl st in each of the next 5 ch, ch 1, sc in the same ch-10 loop, ch 11, sc in next ch-10 loop; repeat from * 10 more times, ch 11, join. (12 sc, 12 ch-11 loops)
Test-fit the cover now, as described in the checkpoints. Rnd 10 sits on the widest part of the ball.
Rnd 11: Sl st in each of the next 5 ch, ch 1, sc in the same ch-11 loop, ch 11, sc in next ch-11 loop; repeat from * 10 more times, ch 11, join. (12 sc, 12 ch-11 loops)
Rnd 12: Sl st in each of the next 5 ch, ch 1, sc in the same ch-11 loop, ch 10, sc in next ch-11 loop; repeat from * 10 more times, ch 10, join. (12 sc, 12 ch-10 loops)
Rnd 13: Sl st in each of the next 5 ch, ch 1, sc in the same ch-10 loop, ch 8, sc in next ch-10 loop; repeat from * 10 more times, ch 8, join. (12 sc, 12 ch-8 loops)
Insert the ball now. Remove the metal cap and hanger if you haven’t already. Ease the ball up through the open end, neck first, until the neck sits inside the collar. Spread the diamonds evenly so each column of knots runs straight down from its own section of the fan.
Rnd 14: Working over the ball, sl st in each of the next 4 ch, ch 1, sc in the same ch-8 loop, ch 6, sc in next ch-8 loop; repeat from * 10 more times, ch 6, join. (12 sc, 12 ch-6 loops)
Bottom Closure
Hold the ball with the base facing you so you can see each stitch. These rounds pull in quickly.
Rnd 15 (conversion round): Ch 1, 3 sc in each ch-6 loop around, join. (12 loops × 3 sc = 36 sc)
Rnd 16: Ch 1, sc2tog around, join. (18 sc)
Rnd 17: Ch 1, sc2tog around, join. (9 sc)
Fasten off, leaving a 6 in (15.2 cm) tail. Thread the tail through the front loop of all 9 sts and pull gently until the small hole at the base closes. Weave in the end.
Border: Collar Top Edge
The border is one round worked into the free loops of the foundation chain. It neatens the raw top edge so that it matches the bottom of the collar.
Border gauge: 8 sc = 1 in (2.5 cm), the same as the collar.
Border Rnd: Join the thread with a sl st in any free loop of the foundation ch. Ch 1, sc in the same loop and in each free loop around, join. (24 sc)
The collar has one continuous edge and no corners, so the count is simply 1 sc per foundation ch: 24 ch × 1 = 24 sc. Fasten off and weave in the end.
Why the math works: 24 sc at 8 sc per inch is 3 in (7.6 cm), exactly the collar’s circumference, so the border lies flat without ruffling or pulling in. Below the collar, 24 sts double to 48 dc, and 48 divides into 12 repeats of 4. That gives 12 loops in every mesh round. Rnd 15 turns those 12 loops into 36 sc, which halve to 18 and then to 9. Every round divides evenly, so no repeat ever comes up short.
Ribbon
- Cut 8 in (20.3 cm) of ribbon. Fold it lengthwise to narrow it, then use the tapestry needle to thread it under one sc of Rnd 4 and under the sc directly opposite (sts 1 and 13).
- Bring both ends up, overlap them, and knot them to make a hanging loop about 3 in (7.6 cm) long.
- Tie the 12 in (30.5 cm) piece into a bow around the base of the loop, right on top of the collar.
- Cut the ribbon ends at an angle so they don’t fray.
Final Blocking
- Check that the ball is centered, with its neck fully inside the collar.
- Mist the cover lightly with water until it is damp but not wet.
- Use your fingers to nudge each knot so the diamonds line up in straight diagonal rows and all 12 columns are evenly spaced.
- Roll the collar between your fingers so it stands up straight and round.
- Smooth the fan posts so they point straight down toward the first knots.
- Hang the ornament by its loop and let it dry completely, about 2 hours.
- Fluff the bow, and retie it if the loops have flattened.
Final Quality-Control Checklist
- The collar has 24 sc in every round, including the border.
- Rnd 5 has 48 dc.
- Every mesh round (Rnds 6–14) has 12 sc and 12 loops.
- The closing rounds have 36, 18, and 9 sc.
- The diamonds run in straight diagonals, with no twisted or doubled loops.
- The hole at the base is closed and the ball doesn’t show through it.
- The cover measures 3 in (7.6 cm) across and 9.4 in (23.9 cm) around.
- All ends are woven in and the ribbon is secure.
Troubleshooting
The collar is loose and slides off the neck. Remake it with a smaller hook, or work Rnds 2–4 through the back loop only for a firmer band.
The mesh is too tight to reach the widest part of the ball. Add 1 ch to each loop in Rnds 8–11.
The mesh is baggy and wrinkles near the bottom. Remove 1 ch from each loop in Rnds 11–13.
A round has 11 or 13 loops. You skipped a loop or worked into one twice. Count the loops before you join, and keep a marker in the first sc.
The diamonds spiral around the ball. Make sure each set of starting slip stitches ends at the true center of the loop. Use the counts given.
The fan ruffles. Your dc are too loose. Go down half a hook size for Rnd 5 only.
The bottom closure puckers. Pull the closing tail in gradually, and spread the 36 sc of Rnd 15 evenly across the loops.
Care
Spot clean with a damp cloth and cool water, then reshape and hang to dry. Store the ornament in a box with tissue paper so the lattice doesn’t get crushed.
Final Notes
Every measurement depends on the collar. At gauge, 24 sc make a 3 in (7.6 cm) collar. Doubling to 48 dc sets up 12 even repeats. Those 12 loops grow from 7 chains to 11 and shrink back to 6, covering a 3 in (7.6 cm) ball that is 9.4 in (23.9 cm) around. The closure then goes 36, 18, 9. Check the collar first and test-fit at Rnd 10, and the rest of the ornament will fall into place.
Happy crocheting!